How-To Geek
How to make a flowchart in powerpoint.
Creating a quick flowchart in PowerPoint is super easy.

Quick Links
Making a flowchart in powerpoint.
Microsoft PowerPoint provides built-in tools for creating and arranging different types of flowcharts. Here's how they work.
Since you’re going to be working with shapes, you might find it helpful to have PowerPoint show a grid you can use to size and line up objects.
To show the grid, check the box next to “Gridlines” in the “Show” section of the “View” tab.
Gridlines will now appear on your slides.
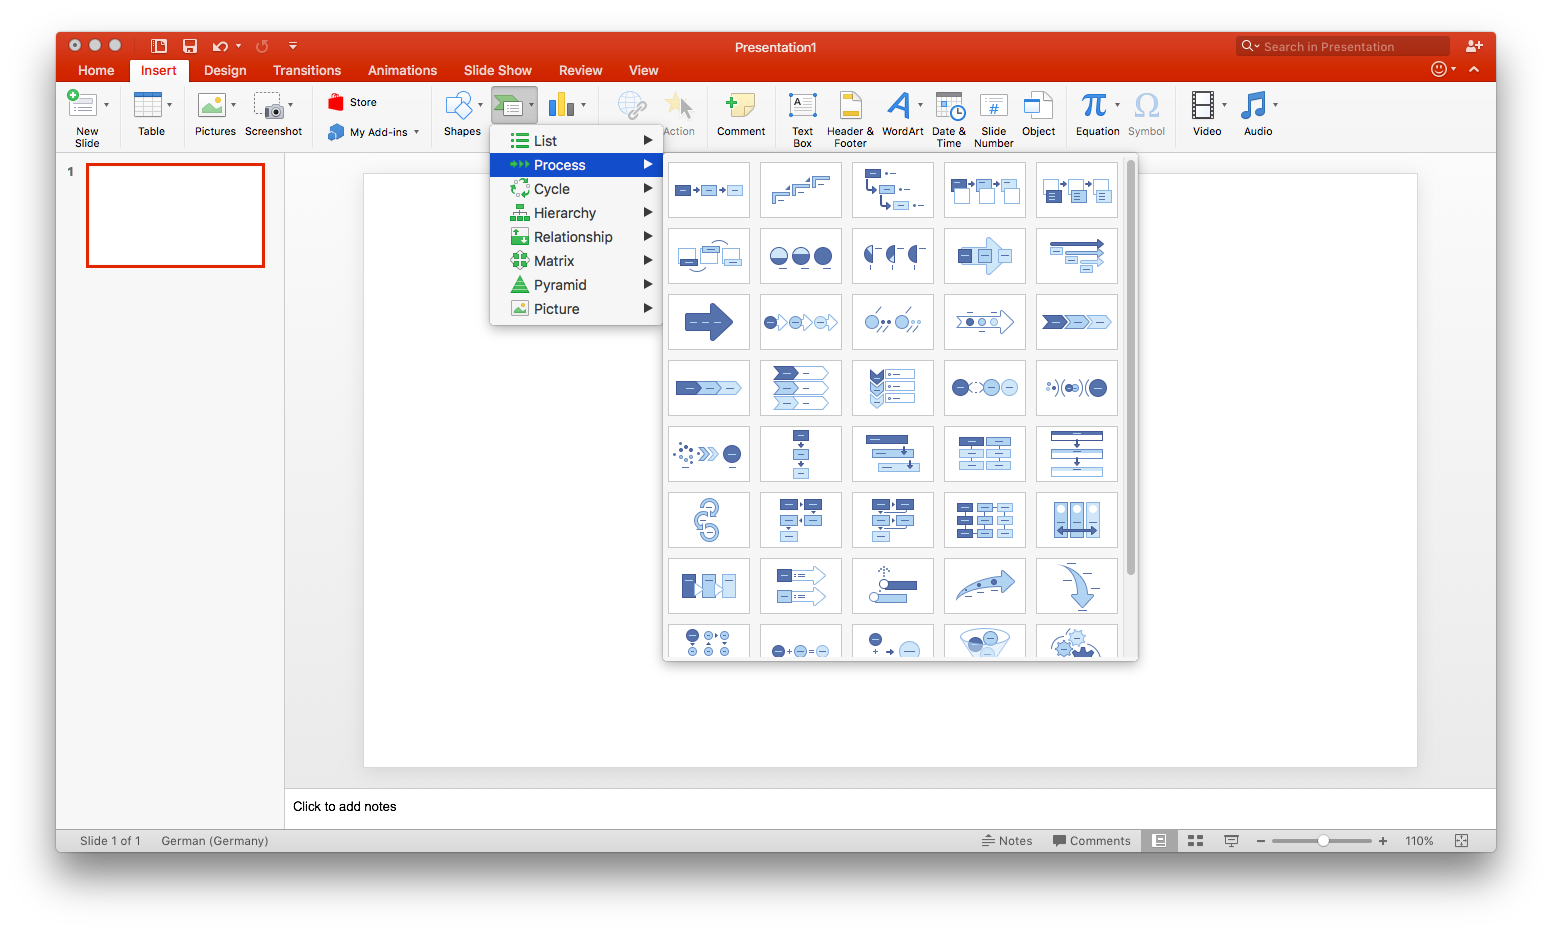
Next, select “Shapes” in the “Illustrations” section of the “Insert” tab.
This will bring down a menu with many different shapes to choose from. We will primarily be focusing on the shapes in the “Flowchart” section near the bottom and the connectors in the “Lines” group near the top.
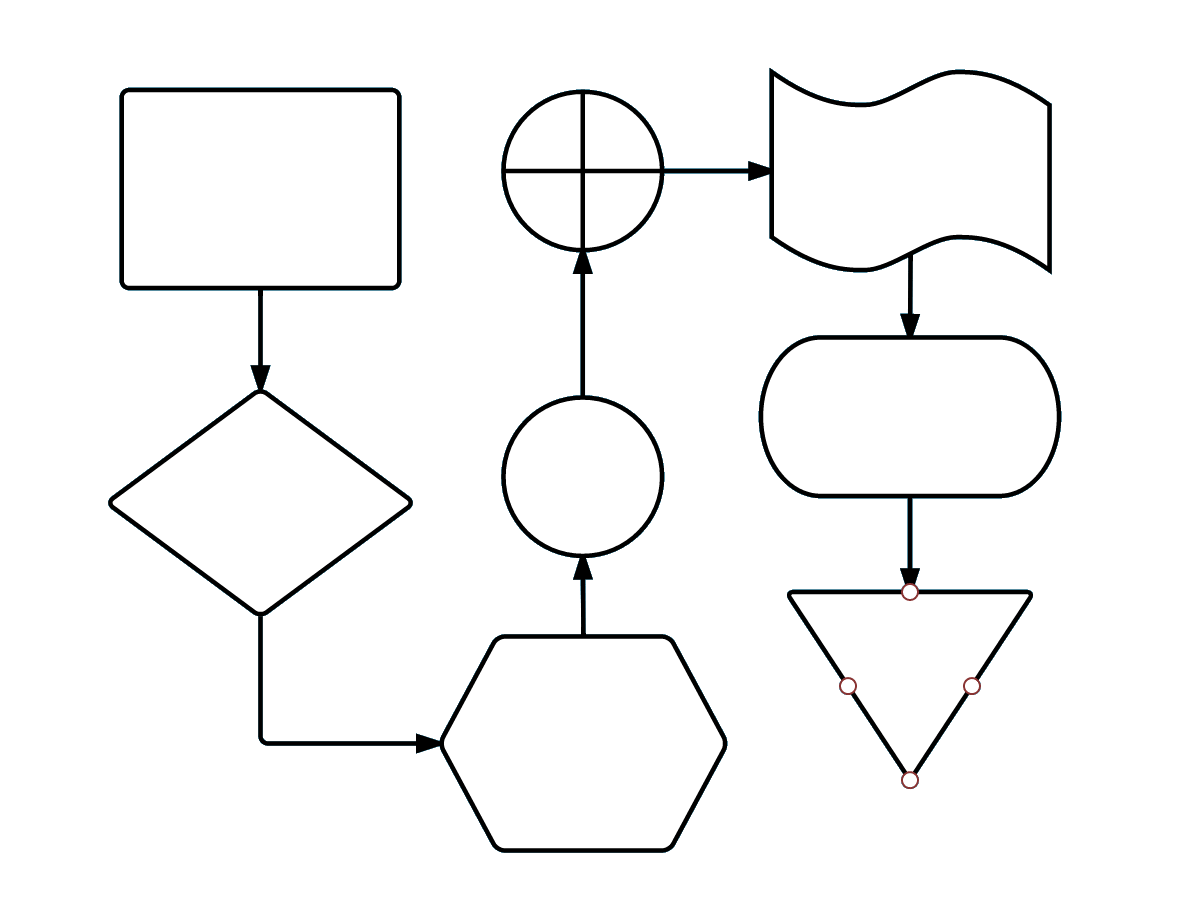
Before we continue, it’s important to understand the intended purpose of the shapes. You may want to consider reading this comprehensive list that details the meaning of flowchart shapes , but here’s a quick overview of the basics:
- Rectangle: This shape is used for process steps.
- Diamond: The diamond is used to show decision points.
- Oval: The oval is used as the terminator shape, indicating start and end points of a process.
Additionally, you can hover over the shape to see an information box stating the shape's purpose.
Let’s go ahead and insert our first shape. Back at the shapes menu, select the shape you’d like to insert in the flowchart. Since this is our first shape to insert in the flowchart, we’ll use the oval shape to indicate the starting point.
Once you select the shape, you’ll notice your mouse turns into a crosshair. To draw your shape, just click and drag.
Afterward, you’ll notice a new “Format” tab appears where you can format your shape, the outline, color, and more.
To insert text inside the shape, click the shape and start typing.
Let’s insert another shape and then connect the two shapes. We’ll insert a rectangle to indicate another part of the process. Repeat the above steps to insert the shape.
To connect the two shapes, head back to the shape menu, and select the connector you would like to use. We’ll use a simple line arrow for this example.
Once you select the arrow, click the center handle on the first shape and then, while still holding down your mouse button, drag to the center handle on the next shape.
Like the other shapes, you can also format the arrow with different line widths, colors, and so on.
As a tip, if you plan on using the same line format for the entirety of the flowchart, right-click the line after you’ve formatted it and select “Set as Default Line.” You may also do this for any shapes you insert, as well.
The beauty of using the connector arrows is that they become tied to the handles on the shapes. When you move the shapes around on your slide, the arrows adjust accordingly.
- Slidesgo School
- PowerPoint Tutorials
How to Create a Flowchart in PowerPoint

A flowchart is a graphic representation of a process in which each step appears as a symbol and these are connected with arrows. In this tutorial, you’re going to learn how to create flowcharts for your PowerPoint presentation .
Creating a Flowchart from Scratch
Inserting a preset diagram.
- Open your PowerPoint presentation and go to the slide where you want to insert the flowchart.
- This kind of diagram is composed of shapes. Please note that each type of shape means different things:
- A rectangle equals a process and is used for the main steps.
- A diamond equals a decision and is used in inflection points within the process.
- An oval equals a terminal point and indicates the beginning or the ending of a process.
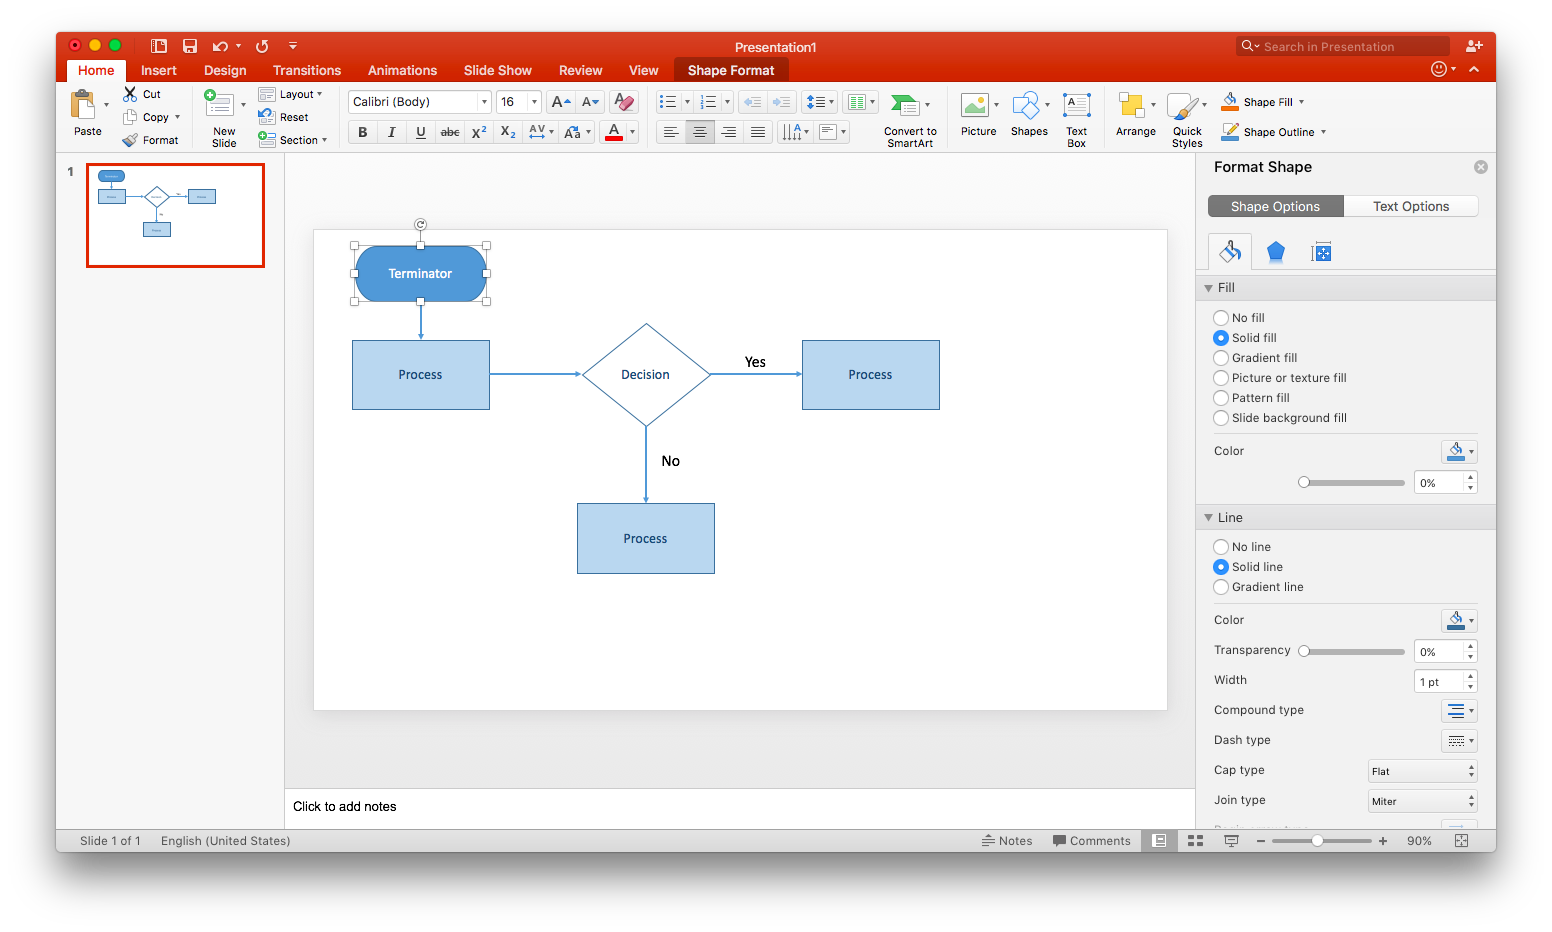
- To insert a shape, go to the Insert tab and click Shapes. If you want to modify the shape, select it and, on the Shape Format tab, click Edit Shape → Change Shape, or you may choose Edit Points to adjust the shape manually.
For this tutorial, we’re going to do the following:
- Create an oval shape.
- On the Shape Format tab, click Shape Fill to select the desired color for the fill.
- On the Shape Format tab, click Shape Outline to select the desired color for the border.
- Center the shape horizontally on the slide. To do so, use the guides or the Align options.
If you need more information, please refer to the “ How to Arrange and Align Elements in PowerPoint ” tutorial.

- To insert a text inside the shape, double-click the shape. Now you can type your text. Don’t forget to use a suitable font. If you’re using our templates, you’ll find the fonts used in the final slides.

- Insert as many shapes as you see fit. Try to align them properly using the guides and make sure the distance from the border is consistent.
- To connect two shapes, first insert an arrow. On the Insert tab, click Shapes and choose an arrow. If you hover over a shape, you’ll see various anchor points. You can use these as connection points for the arrows. Once the arrows have been inserted, you can edit their color by choosing one of the options in the Shape Styles box.

You can also insert shapes and/or arrows by clicking on the desired one from the box in the Drawing group, on the Home tab. If you do it this way, to change the color of an arrow, select it and choose one of the options in the Shape Styles box, on the Shape Format tab.

A flowchart must have a starting and an ending point, and all the elements must be connected. Here’s an example:

- Open your PowerPoint presentation and select the slide where you want to insert a flowchart.
- On the Insert tab, click SmartArt.
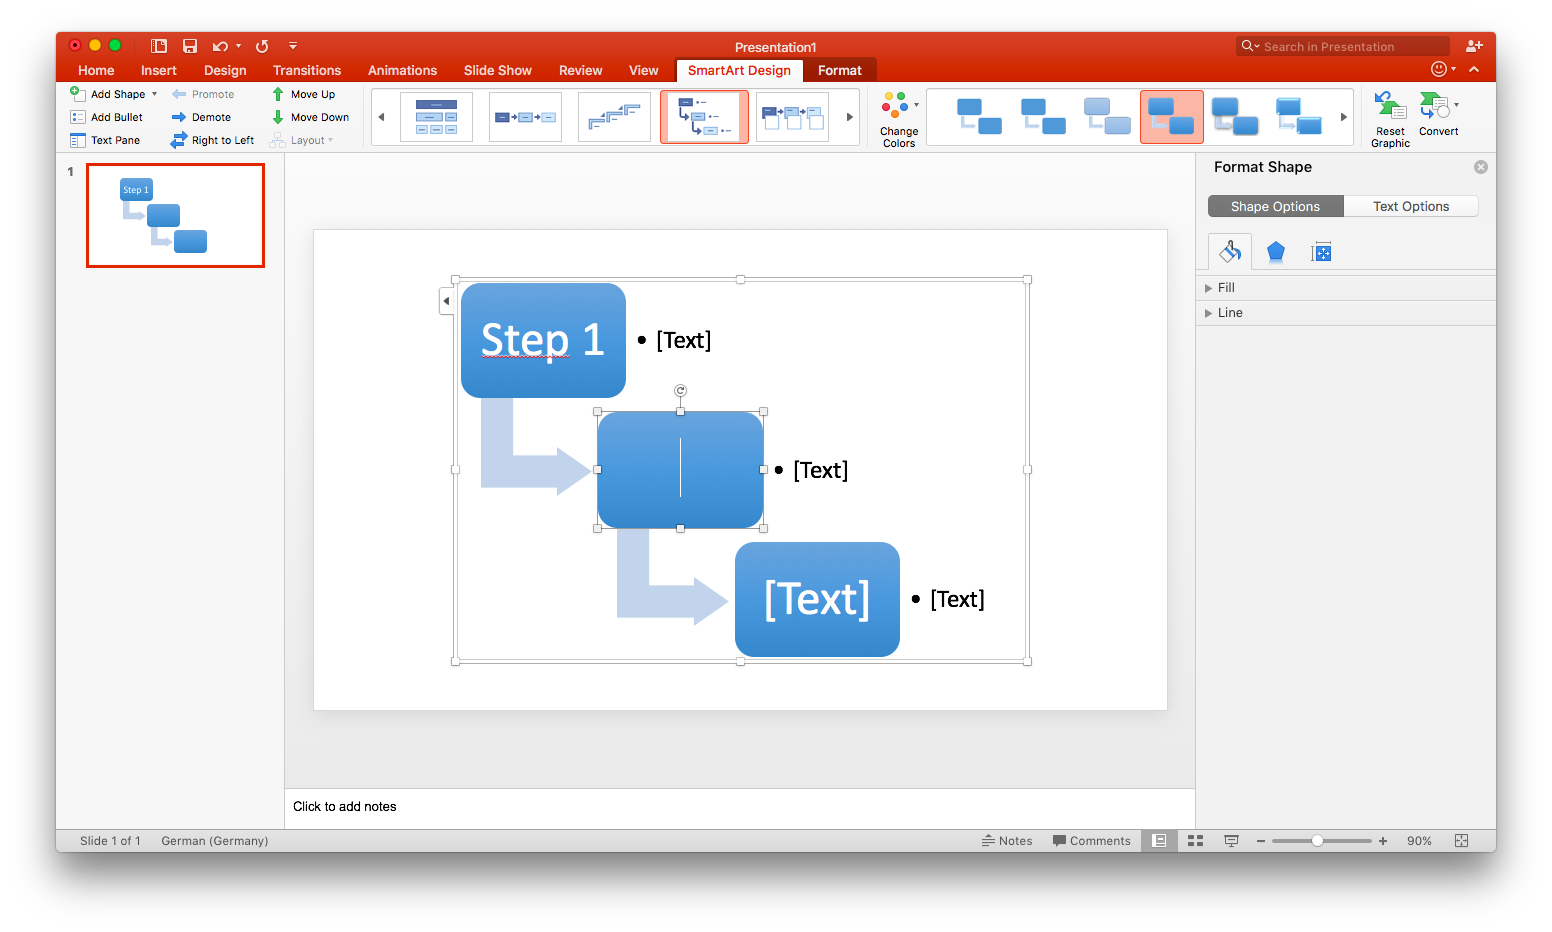
- Choose the diagram that best suits your needs. As an example, we’re going to insert the “Repeating Bending Process” diagram (on the “Process” list).

- Adjust the size of the diagram by dragging the anchor points. To keep the proportions, hold Shift while doing so.
- To change the size of an individual shape, double-click on it first.

- You can change the colors of the shapes and the lines. To do so, on the SmartArt Design tab, click Change Colors. Don’t forget to take into account the chosen palette for the presentation.

- To edit the text inside a shape, just click on it and type your own. Then, you can modify its size, color or font, among other things, by using the options found in the Font group, on the Home tab.

- You can even insert icons inside the shapes. If you’re using our templates, just copy an icon from the final slides and paste it. It’s best if you use icons that fit the topic of your presentation. To change the color of an icon, select it and, on the Shape Format tab, click Shape Fill.

If you need to add more elements to the diagram or the flowchart, just insert new shapes and/or arrows. Follow the instructions found in the “ Creating a Flowchart from Scratch ” section of this tutorial.
Do you find this article useful?
Related tutorials.

How to Use the Presenter View in Google Slides
Google Slides, like PowerPoint, has different presentation modes that can come in handy when you’re presenting and you want your slideshow to look smooth. Whether you’re looking for slides only, speaker notes or the Q&A feature, in this new Google Slides tutorial, you’ll learn about these and their respective settings. Ready? Then let’s explore the presenter view!

Top 10 tips and tricks for creating a business presentation!
Slidesgo is back with a new post! We want your presentations and oral expositions to never be the same again, but to go to the next level of presentations. Success comes from a combination of two main ingredients: a presentation template suitable for the topic and a correct development of the spoken part. For templates, just take a look at the Slidesgo website, where you are sure to find your ideal design. For tips and tricks on how to make a presentation, our blog contains a lot of information, for example, this post. We have focused these tips on business presentations, so that, no matter what type of company or...

How to present survey results in PowerPoint or Google Slides
A survey is a technique that is applied by conducting a questionnaire to a significant sample of a group of people. When we carry out the survey, we start from a hypothesis and it is this survey activity that will allow us to confirm the hypothesis or to see where the problem and solution of what we are investigating lies.We know: fieldwork is hard work. Many hours collecting data, analyzing and organizing it until we have our survey results.Well, we don't want to discourage you (at Slidesgo we stand for positivism) but this is only 50% of the survey work....

Best 10 tips for webinar presentations
During the last couple of years, the popularity of webinars has skyrocketed. Thousands of people have taken advantage of the shift to online learning and have prepared their own webinars where they have both taught and learned new skills while getting to know more people from their fields. Thanks to online resources like Google Meet and Slidesgo, now you can also prepare your own webinar. Here are 10 webinar presentation tips that will make your speech stand out!
How To Make A Flowchart In Powerpoint - Step by Step Guide
Introduction .
A wall of text will ruin your passionate PowerPoint presentation, especially when a simple picture is enough to describe the whole point. Thus, a well-executed flowchart can bring clarity to any presentation, whether you're making an important decision or explaining a complex process.
Making a flowchart is easier if you have a specialized flowchart maker , but even if you only have PowerPoint, it can be done as well! If you’re interested in how to create a neat flow chart using PowerPoint, scroll down to read on because this tutorial will teach you how to make a flowchart in PowerPoint in the most effective way.

What Is A Flowchart?
Flowcharts are graphical representations of a computer system, process, or algorithm. They are commonly found in various fields to research, document, plan, improve and convey complex processes in easy-to-understand diagrams.
Flowcharts use rectangles, oval shape, rhombus, and many other associated shapes to specify steps and link arrows to define flows & sequences. These can range from simple hand-drawn diagrams to detailed computer-drawn diagrams showing a variety of processes and paths.
Flowcharts are sometimes given more specialized names, such as Process Map, Functional Flowchart, Business Process Modeling and Notation (BPMN), Business Process Mapping, or Process Flow Diagram. They are closely related to several other common diagram types, such as Data Flow Diagrams, Unified Modeling Language, or Activity Diagram.

How Are Flowcharts Utilized In Various Fields?
Flowcharts have a wide range of applications outside of computer programming, here are a few to name:
In education:
- Plan curriculum and academic requirements.
- Make a lesson plan and give an oral presentation.
- Set up a group/individual project.
- Display a legal/civil process, such as voter registration.
- Plan and organize creative work, such as lyrics or poetry.
- The ability to build characters for your literature and movies.
- Show the flow of algorithms or logic puzzles.
- Recognize a scientific process.
- Draw a diagram of an anatomical process, like digestion.
- Create a plan for disease/disorder symptoms and treatment.
- Represent theories, such as Maslow's hierarchy of needs.
In marketing and sales:
- Create a flowchart for a survey.
- Create a sales procedure.
- Make a research strategy.
- Display registration flows.
- Disseminate messaging policies.
- Disseminate messaging policies.
In business:
- Understand the order & procurement processes.
- Represent employee's daily responsibilities or routine.
- Recognize the paths that customers follow on a website or in a store.
- Create a business/product realization plan.
- Establish a process in advance of an audit, including regulatory compliance.
- In preparation for a sale or consolidation by documenting a process.

In manufacturing:
- Describes a product's physical or chemical composition.
- Show the entire manufacturing process.
- Find and fix inefficiencies in the manufacturing and procurement processes.
In engineering:
- Describe operation flows
- Create and improve chemical & plant processes.
- Analyze a structure's life cycle.
- Create a reverse-engineering flowchart.
- Display the new structure/product design and prototyping stages.
How To Make A Flowchart In Powerpoint
With smartart graphics.
SmartArt is a great choice if you need a quick, simple diagram. A SmartArt graphic is similar to an image or clip art to which you can add additional features, but your choices are limited to one or two pre-selected forms.
Step 1: Select a template from the drop-down menu
In Microsoft PowerPoint , go to the slide where you want to place the flowchart. Click Insert, then click SmartArt to bring up a drop-down menu with different types of diagrams.
Then hover over "Flowchart" to see some of the flowchart's capabilities. Simply click on one of these diagrams to insert it.
Step 2: Add text and shapes
Select the full SmartArt graphic and click "Create Shape" to add the Shape. You can find this button in the upper left corner of the toolbar. You can move shapes around by clicking and dragging. The connecting arrows will automatically adjust.
Step 3: Customize it
When you select a SmartArt graphic, two tabs on the toolbar appear: "SmartArt Design" and "Format". You can change the style of the previous diagram, choose from many predefined color schemes, and add shapes by clicking on it.
On the other hand, the format tab allows for more precise adjustments like flowchart symbol color, text color, edit text, and unique font.
With The Powerpoint Shape Library
Using Powerpoint flowchart offers much greater freedom throughout the creative process. If you want a standard flowchart that has process and decision boxes, as well as flowchart-specific shapes, you'll have to use a shape library as SmartArt doesn't include any diagrams with these elements.
Step 1: Add the shapes
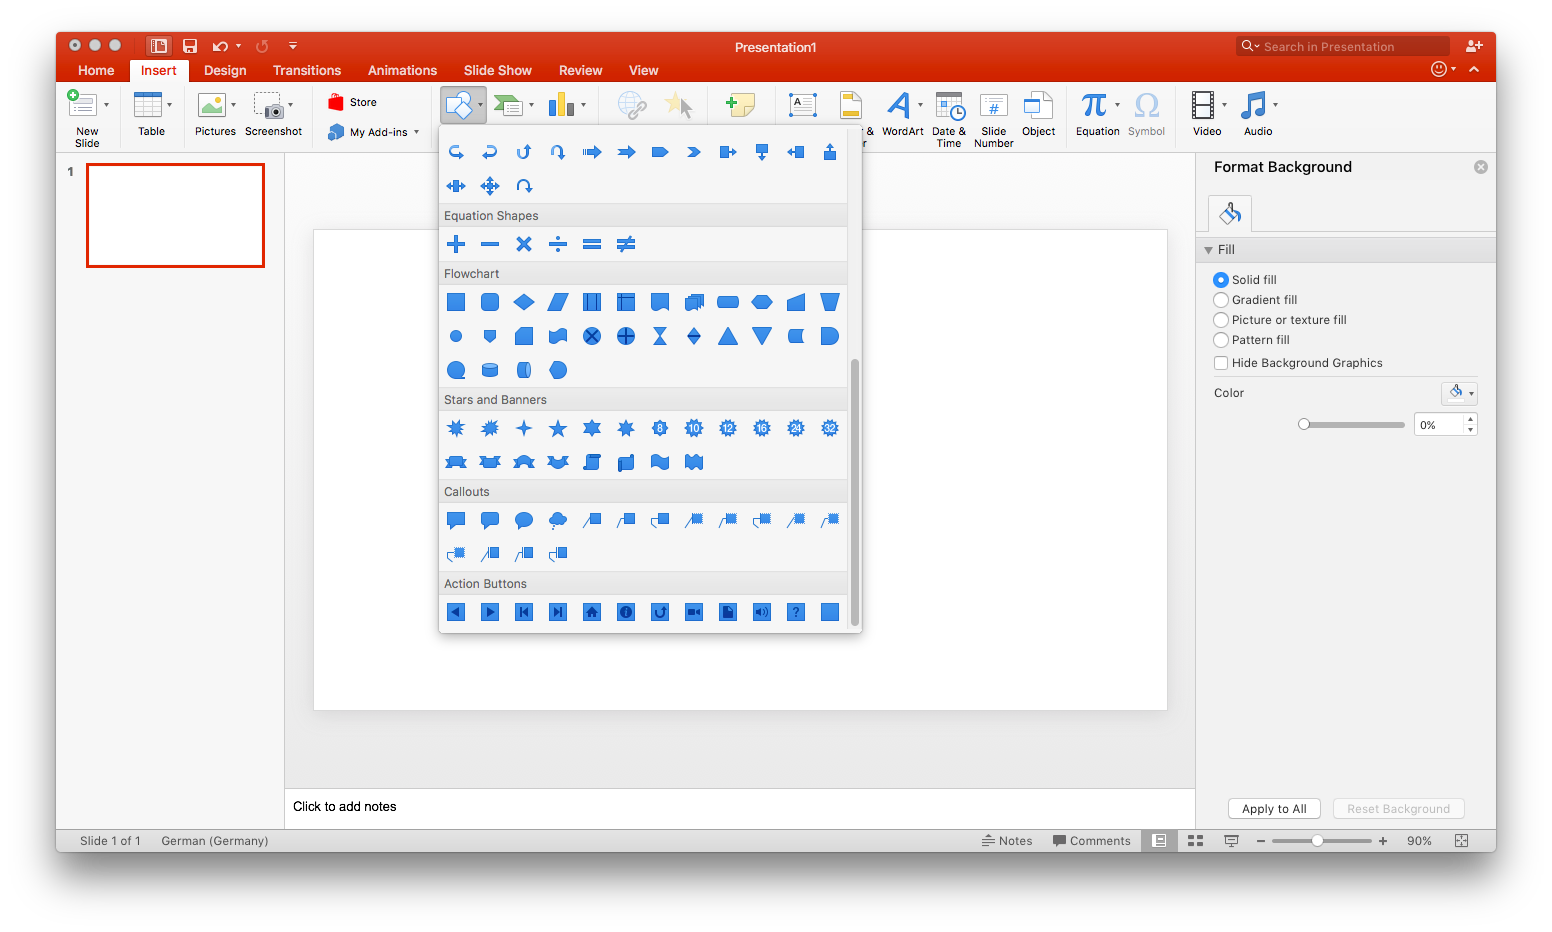
Select Insert, then click on Shapes. This brings up a drop-down menu of PowerPoint's shape libraries. Next, scroll down until you get to the flowchart area. There, you'll discover all the shapes in powerpoint you'll need to create a diagram, from decision boxes to manual input boxes.
Hover over any shape to see its function, and a small label will show each shape's characteristics for you to choose from.
After you select the shapes, use your mouse to outline the shape on the slide. Simply repeat this step from the beginning to add more forms.
Tip: Add a shape, and then copy and paste it as needed for shapes that will appear multiple times in your diagram, such as process boxes.
Step 2: Add connecting lines
Connecting arrows are an essential component of any flowchart; After all, it is these arrows that demonstrate the "flow" or relationship(s) of the diagram to other forms in your design. To add a line, go to Insert, then click on Shape, just like you did in the previous step. The arrows are available under the line section.
After you've decided on a line type, click and drag your mouse from one Shape to the next to create a connecting line.
Step 3: Label the lines and shapes
Simply select an existing shape and start typing to add text to it. You'll need to use text boxes to label any connectors. Select Insert, followed by Text Box, then drag the pointer to draw a content-box; tap to add text.
Step 4: Customize it
At this stage, any shapes and lines you've created have been styled using MS PowerPoint presets. Skip this step if you like how your flowchart looks.
The Format Shapes window, which double-clicks any shape or line you can access in your diagram, allows you to change nearly every feature of the forms in your diagram. You can then edit the shapes with shape fill, line strength, opacity, and more in your diagram.

Conclusion
Making a flowchart in PowerPoint with PowerPoint slide show and flowchart symbol set is basic and straightforward. You have to drag the current forms up and link them with lines. If you're still unsure where to begin, refer back to our guide for more information on how to make a flowchart in PowerPoint .
So, what are you waiting for? Begin creating your diagram using the steps above rapidly and effectively now!
Related Guides
Flowchart guides, brought to you by, zen flowchart.
Create PowerPoint Flowcharts: Tips and Tricks
A flowchart allows you to present complex processes clearly . Flowcharts’ greatest strength is the fact that they make processes easier to understand than wordy descriptions . PowerPoint flowcharts can be a big asset in presentations . By combining shapes, text, and arrows, a flowchart can contain everything from step-by-step instructions to the development of ideas.
The history of flowcharts
Flowcharts were created as far back as the 1920s , when two industrial engineers presented the term flow process chart to the American Society of Mechanical Engineers (ASME). In the 1930s, flowchart tools were used to visualize methods for working more effectively . Procter and Gamble began using flowcharts in the 1940s. During the same time, this type of diagram became the cornerstone of computer program design and grew in popularity.
With advancing modernization and technical innovations, the flowchart has become widely accepted. A hundred years after its initial creation, the flowchart is still a universally accepted to describe and explain processes.
What is a flowchart?
Simply put, a flowchart is a way to illustrate business processes . More specifically, flowcharts are a way to illustrate a variety of processes in detail . The key is that it provides an audience with a quick and easy overview of a process .
Flowcharts illustrate how different process steps are connected with each other, which information is required for which steps and how input is converted to output .
Flowcharts are found in a wide variety of PowerPoint business presentations . Thanks to their versatility, they’re a popular tool for visualizing complex structures and processes .
Advantages and disadvantages of flowcharts
There are numerous advantages in using flowcharts at work:
- Processes, process steps and collected data can be monitored and optimized more easily.
- Processes can be analyzed and improved.
- Current workflows, documents and resources can be mapped collectively.
But there are a few disadvantages :
- The flowchart may become confusing if the process is overly complex
- An audience may have difficulty seeing the entire process, as a flowchart primarily presents sub-processes.
- Since flowcharts have a linear structure, it can be complicated to display parallel sub-processes.
Symbols and functions
For various types of processes and sequences, different symbols are used in flowcharts. The continuous process is typically represented with arrows in a flowchart. Additionally, branches, yes-no decisions, loops, and more can be better depicted using other symbols.

Types of PowerPoint flowcharts
Flowcharts are used in a wide range of fields and industries and are a popular visualization tool for complex processes. We’ll introduce you to the most common types of flowcharts and how to use them.
1. The standard flowchart
Flowcharts illustrate the sequence of steps in a process . They visualize the movement of information, tasks, money, people or objects within a process or organization.

Feel free to use PowerPoint templates for a standard flowchart from PresentationLoad:

2. Pools and swim lanes
Swim lane flowcharts can be used to categorize different organizational units and process steps . For example, a swim lane can be used to visualize the employee or department responsible for a specific process . Several swim lanes create a pool diagram . Swim lanes can be vertical or horizontal.

3. Workflow diagram
A workflow diagram focuses on visualizing tasks and decisions . Each decision results in a sequence that determines the subsequent path along the flow lines in the diagram.

4. Process flow diagram
Process flow diagrams are used to plan and design an entire process . For example, the movement of a product through a company – from development to production to delivery – can be planned and tracked . Process flow diagrams are a valuable tool for quality assurance.

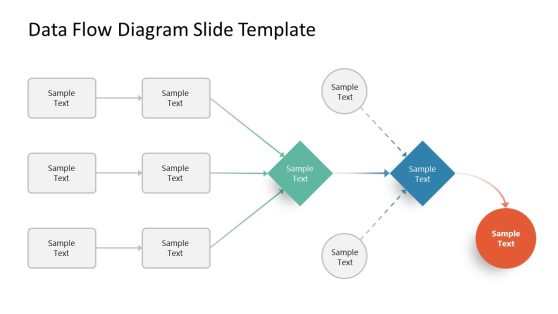
5 . Data flow diagram
A data flow diagram represents the flow of data within a process or system . Its focus is on the flow of information – where data comes from, where it goes and how it gets stored .

6. Specific and standardized flowcharts
Many areas of IT used standardized, specific forms of flowcharts . They include the BPMN diagram, the IDEF0 diagram, the EPC diagram, the SDL diagram and the Nassi-Shneiderman diagram.
Manual vs. Automatic: Creating Flowcharts in PowerPoint
There are various methods to create a flowchart in PowerPoint. You can create a flowchart manually or use the SmartArt function. If you have limited experience with flowcharts, you can expedite the process further by using our PowerPoint flowchart templates :

Tutorial 1/2: Manually Creating Flowcharts in PowerPoint
- Plan Your Flowchart in Advance
What exactly do you want to visualize? What purpose should the flowchart serve? Do you have all the necessary information? Clarifying these questions in advance will save you valuable time when creating your flowchart. Additionally, having a clear idea of the desired end result will be beneficial. Especially for more complex diagrams, it makes sense to sketch out your intentions and ideas beforehand to have a roadmap to follow during the final implementation.
2. Choose and Place Shapes for Your Flowchart To select shapes in PowerPoint, go to the “Insert” tab at the top of the screen and click on “Shapes.”

There, you can choose from various shapes for your flowchart. Practical options include squares, wide arrows, or circles. In the “Flowchart” subcategory, PowerPoint also provides some helpful shapes to expedite the creation of your custom flowchart.

If you need a shape multiple times, you can copy it with Ctrl+C and then paste it with Ctrl+V. Alternatively, you can use the shortcut Ctrl+D (Duplicate). To insert text boxes into the shapes, simply double-click on the corresponding shape or go to the “Insert” option and choose “Text Box” again. You can place a text box anywhere and adjust its size as needed.
3. Arrows and connecting lines for your flowchart Connect your shapes to illustrate which elements are related or follow each other . Insert arrows or lines for this purpose. Once again, go to “Insert” and click on “Shapes.” Here, you’ll find a selection of arrows, block arrows, and various connector lines. After inserting them, drag the arrows or lines to the appropriate positions using your mouse. When you get close to a shape, small anchor points will appear for better alignment.

Here are some additional tips and official Microsoft guides on creating flowcharts that you can find in this video .
Tutorial 2/2: Automatically Create Flowcharts Using PowerPoint SmartArt
1. To use “SmartArt,” click on the “Insert” tab, then go to “Illustrations,” and select “SmartArt.”

2. In the now-open SmartArt window, choose the appropriate template for your specific project. On the left side, you’ll find various diagram categories. In the “Process” section, you’ll see many of the most common flowchart options. Feel free to explore different SmartArt templates until you find one that suits your needs.

3. Customize Your SmartArt: After selecting a version of the SmartArt flowchart, you can customize it as needed. To do this, highlight the SmartArt you want to modify, and then click on the “ SmartArt Design” tab at the top of the PowerPoint window.

You can freely modify or customize the color scheme, format, and layout of your new SmartArt flowchart here to match your preferences.
4. To label the shapes in your SmartArt, simply double-click on the respective shape. Alternatively, you can insert a “ Text Box” from the “Text” category in the “Insert” tab. These text boxes can then be freely placed on your slide and resized or adjusted as needed to fit the available space.
To expand SmartArt by adding or deleting fields in the flowchart
- First, select the SmartArt graphic to which you want to add a field.
- Next, select an existing field that is closest to the position where you want to place your new field. Double-click on the field to open the “SmartArt Design” tab. Alternatively, you can find this tab in the toolbar above.
- In the “Create Graphic” section, open the “Add Shape” dropdown menu by clicking on the small arrow next to it.

Here, you will be presented with various options. You have the option to click “Add Shape After” to insert a new field on the same level behind the selected shape. You can also insert a new field before the selected one by choosing “Add Shape Before.” To delete a field, select it and then press the Delete key (usually labeled “Del” or “Delete”) on your keyboard.
Pro Tip: Animate Your SmartArt Flowchart
When creating your flowchart in PowerPoint using PowerPoint SmartArt , you can highlight individual fields by animating your diagram. Here’s how to do it:
- Start by selecting the SmartArt graphic you want to animate.
- In the “Animations” tab, open all the available animation effects in the “Animation” subcategory. You can open the dropdown menu by clicking on the small arrow located to the right of the animation effects.

3. Here, you can freely choose from a wide range of animation effects and add them by clicking. In the “Effect Options” (also next to the “Animation” subcategory), click on “ After Previous.”
Important: You can also adjust the timing/delay of each animation in the “Animations” tab. In the “Timing” subcategory, you have various options. The “After Previous” effect will work only if you have set at least a minimal delay.
Conclusion: Use flowcharts to clearly visualize your projects
Flowcharts are ideal for presenting larger processes in both a detailed and clear manner. Unlike extensive descriptions, the strength of flowcharts lies in making complex processes easily understandable, and they can be created effortlessly even by inexperienced PowerPoint users.
Are you looking for professionally designed flowchart templates that align with current trends? Then feel free to visit our shop , and don’t hesitate to contact us at [email protected] .
You might also be interested in these articles:
- Venn Diagrams
- Types of Charts
Share this post
- share
- save

Design Thinking: Problem Solving with a Difference

Why Corporate Mission Statements Are So Important

7 Tips & Learnings from the Apple Keynote
How to Create Flowcharts in PowerPoint
It's very easy if you follow these steps
Do you need to create a flowchart for your project? A flowchart is a diagram that shows the steps of a process or a decision in a logical order. It can help you visualize and communicate your ideas more effectively.
You might think that creating a flowchart requires specialized software like Visio , but you can actually use Microsoft PowerPoint to complete the task. While PowerPoint is better known for presentations , it allows you to insert and customize different types of shapes and connectors and create a professional-looking flowchart for your data.
There are two ways to make a flowchart in PowerPoint. You can use the built-in SmartArt feature or you can create your own using shapes and connectors. To create flowcharts in PowerPoint, follow the steps below.

How to Use SmartArt to Create a Flowchart in PowerPoint
The easiest way to create a flowchart in PowerPoint is to use the SmartArt feature. SmartArt is a collection of pre-designed graphics that you can insert and modify on your slides. It includes various categories of diagrams, such as process—the category that best describes a typical flowchart.
To use SmartArt to create a flowchart in PowerPoint, follow these steps.
- Open PowerPoint and select Insert > SmartArt .

- In the Choose a SmartArt Graphic window, select Process .
- Select a flowchart design in the middle. You’ll see a descriptive name and description (as well as possible design) on the right. SmartArt has a number of different types of flowcharts you can choose from, such as basic, linear, vertical, horizontal, funnel, and more.
- Once you’ve selected a flowchart, press OK to insert it into your presentation.

- After inserting the flowchart design, replace [Text] with the steps you want to include in your flowchart using the Type your text here box or by replacing them on the flowchart directly.

- To format and style your flowchart, you can use the options on the SmartArt Design and SmartArt Format tabs. For example, you can change the color, shape, size, outline, layout, and alignment of your flowchart. You can also add or delete shapes in the flowchart in the SmartArt Design tab.

Using SmartArt is a quick and easy way to create a flowchart in PowerPoint, but it does have some limitations. For instance, you can’t use custom shapes or connectors, and you’ll have less control over the spacing and positioning of your shapes.
How to Draw Your Own Flowchart in PowerPoint
If you want more flexibility in the design of your flowchart, you might want to draw your own flowchart using shapes and connectors.
It isn’t as quick a process as using the SmartArt method, as you’ll have to manually draw each shape and connector and adjust their size and position accordingly. You’ll also have to make sure that your shapes are aligned and spaced evenly.
You can create a flowchart in PowerPoint using the shapes and connectors made available in the Insert tab. To draw your own flowchart in PowerPoint, follow these steps.
- In PowerPoint, press Insert > Shapes .

- In the Shapes drop-down menu, select a shape from the Flowchart section near the bottom. You can hover over each shape to see its name and purpose. For example, a rectangle is typically used for process steps, a diamond is used for decisions, an oval is used for start and end points, etc.

- Once you’ve selected a shape, click and drag on your slide canvas to draw it. You can resize and move it as needed afterward. To insert text inside the shape, select the shape and begin typing.

- Repeat these steps to insert more shapes and create your flowchart.
- To connect the shapes together, go back to the Shapes menu and select a connector from the Lines group near the top. You can choose from different types of connectors, such as straight lines, curved lines, and more.

- Click on a connection point (a small circle) on one shape and then drag to another connection point on another shape. The connector will snap to the connection points and stay attached to them even if you move the shapes around.

- Repeat these steps to connect all of the shapes in your flowchart together to complete the process.

- To format and style your flowchart, you can use the Shape Format tab that appears when you select a shape or connector. For example, you can change the fill color, outline color, line width, line style, and 3D effects from this menu.

Creating Powerful Diagrams in PowerPoint
Thanks to the steps above, you can quickly create flowcharts in your PowerPoint presentation. They can be as simple or as advanced as you like—just make sure you leave enough room on your slide canvas to fit everything in.
Want to create flowcharts in other Office documents? You can create flowcharts in Excel or Word using similar tools to the PowerPoint method above. You can also use the Microsoft Visio app to create them or consider some Visio alternatives to get the job done instead.

Ben Stockton is a freelance technology writer based in the United Kingdom. In a past life, Ben was a college lecturer in the UK, training teens and adults. Since leaving the classroom, Ben has taken his teaching experience and applied it to writing tech how-to guides and tutorials, specialising in Linux, Windows, and Android. He has a degree in History and a postgraduate qualification in Computing. Read Ben's Full Bio
Read More Posts:

Leave a Reply
Your email address will not be published. Required fields are marked *
How to Make a Flowchart in PowerPoint
What do you want to do with flowcharts.
Nothing ruins a PowerPoint presentation like a wall of text—especially when a simple visual would suffice. Whether you’re mapping out a critical decision or describing a complex process, a well-made flowchart can add polish and clarity to any slideshow. Use this guide to learn how to make flowcharts in both PowerPoint and Lucidchart.
7 minute read
Want to create a flowchart of your own? Try Lucidchart. It's fast, easy, and totally free.
How to create a flowchart in Microsoft PowerPoint
For many students, teachers, and professionals, MS PowerPoint is the go-to presentation software—and with good reason. When it comes to creating flowcharts, however, PowerPoint is extremely limited; it simply wasn’t designed for that. Lucidchart allows you to create beautiful, complex diagrams easily and quickly. Skip to the next section to see for yourself.
There are two ways to build flowcharts using only PowerPoint: with SmartArt or with the shapes library. This tutorial will cover both methods, touching on some of the pros and cons of each approach.
Create a flowchart with SmartArt
SmartArt graphics are pre-made collections of shapes—very basic, rigid diagram templates, essentially. Using SmartArt to build charts and diagrams can be faster than starting from scratch, but you’ll sacrifice flexibility. SmartArt is a great option if you want a quick, simple diagram. It should, however, only be used for the most rudimentary diagrams. SmartArt graphics are clip art images—additional elements can be added, but your options are limited to one or two preselected shapes.
If you choose to use SmartArt to build your diagram, follow these steps:
1. Select a flowchart from the SmartArt drop-down menu
In MS PowerPoint, navigate to the slide where you want to add a flowchart. Click Insert > SmartArt to open a drop-down list with a variety of diagram types. Hover your mouse over “Process” to see the various flowchart options. To insert one of these diagrams, simply click it.
2. Add text and shapes to your flowchart
Text can be added to the shapes in your SmartArt graphic by clicking the center of the shape.
To add shapes, select the whole SmartArt graphic and click “Add Shape.” (This button is located in the toolbar’s upper left corner.) If you move shapes around—to do this, click and drag—the connecting arrows will automatically adjust.
3. Customize your flowchart
When you select your SmartArt graphic, two tabs appear on the toolbar: “SmartArt Design” and “Format.” By clicking on the former, you can change the diagram type, choose from a number of preset color schemes, and add shapes. The format tab, on the other hand, allows for more specific customizations, including individual shape color, text color, and font.
Create a flowchart with the PowerPoint shape library
Using the shape library to create a flowchart is substantially slower than using SmartArt because every box and arrow must be added individually. However, this method affords much more flexibility throughout the creation process. Additionally, if you’re looking for a traditional flowchart—one with process and decision boxes, and other flowchart-specific shapes—you’ll have to use the shape library, as SmartArt doesn’t offer any diagrams with these features.
1. Add the necessary shapes
Once you’ve selected a shape, click and drag your mouse to draw it on the slide. To add more shapes, simply repeat this step from the beginning. (Tip: For shapes that will occur multiple times in your flowchart—such as process boxes—add one and then copy and paste it as required.)
2. Add connecting lines
A key feature of any flowchart is connecting arrows—after all, it’s these arrows that illustrate the diagram’s “flow” or relationship(s) to the other shapes in your diagram. As with the previous step, to add lines, go to Insert > Shapes. The arrows can be found in the lines section.
After selecting a line type, click and drag your mouse from one shape to another to draw a connecting line.
3. Label your shapes and lines
To add text to an existing shape, simply select the shape and begin typing. If you want to label any connecting lines, you’ll have to use text boxes. Go to Insert > Text Box and then click and drag your mouse to draw the text box; type to add text.
4. Customize your flowchart
At this point, every shape and line you’ve drawn is styled according to MS PowerPoint’s presets. If you like the look of your flowchart as is, skip this step.
Nearly every aspect of the shapes in your diagram can be modified in the format shape pane, accessible by double-clicking any shape or line. You can then edit fill color, line weight, opacity, and many other elements of your diagram.
How to create a flowchart using Lucidchart
While it’s possible to make a flowchart using only PowerPoint (as outlined above), using Lucidchart is a more efficient and intuitive solution. And thanks to Lucidchart’s PowerPoint integration, you can bring your Lucidchart diagrams directly into your presentations!
1. Choose a template or start from scratch
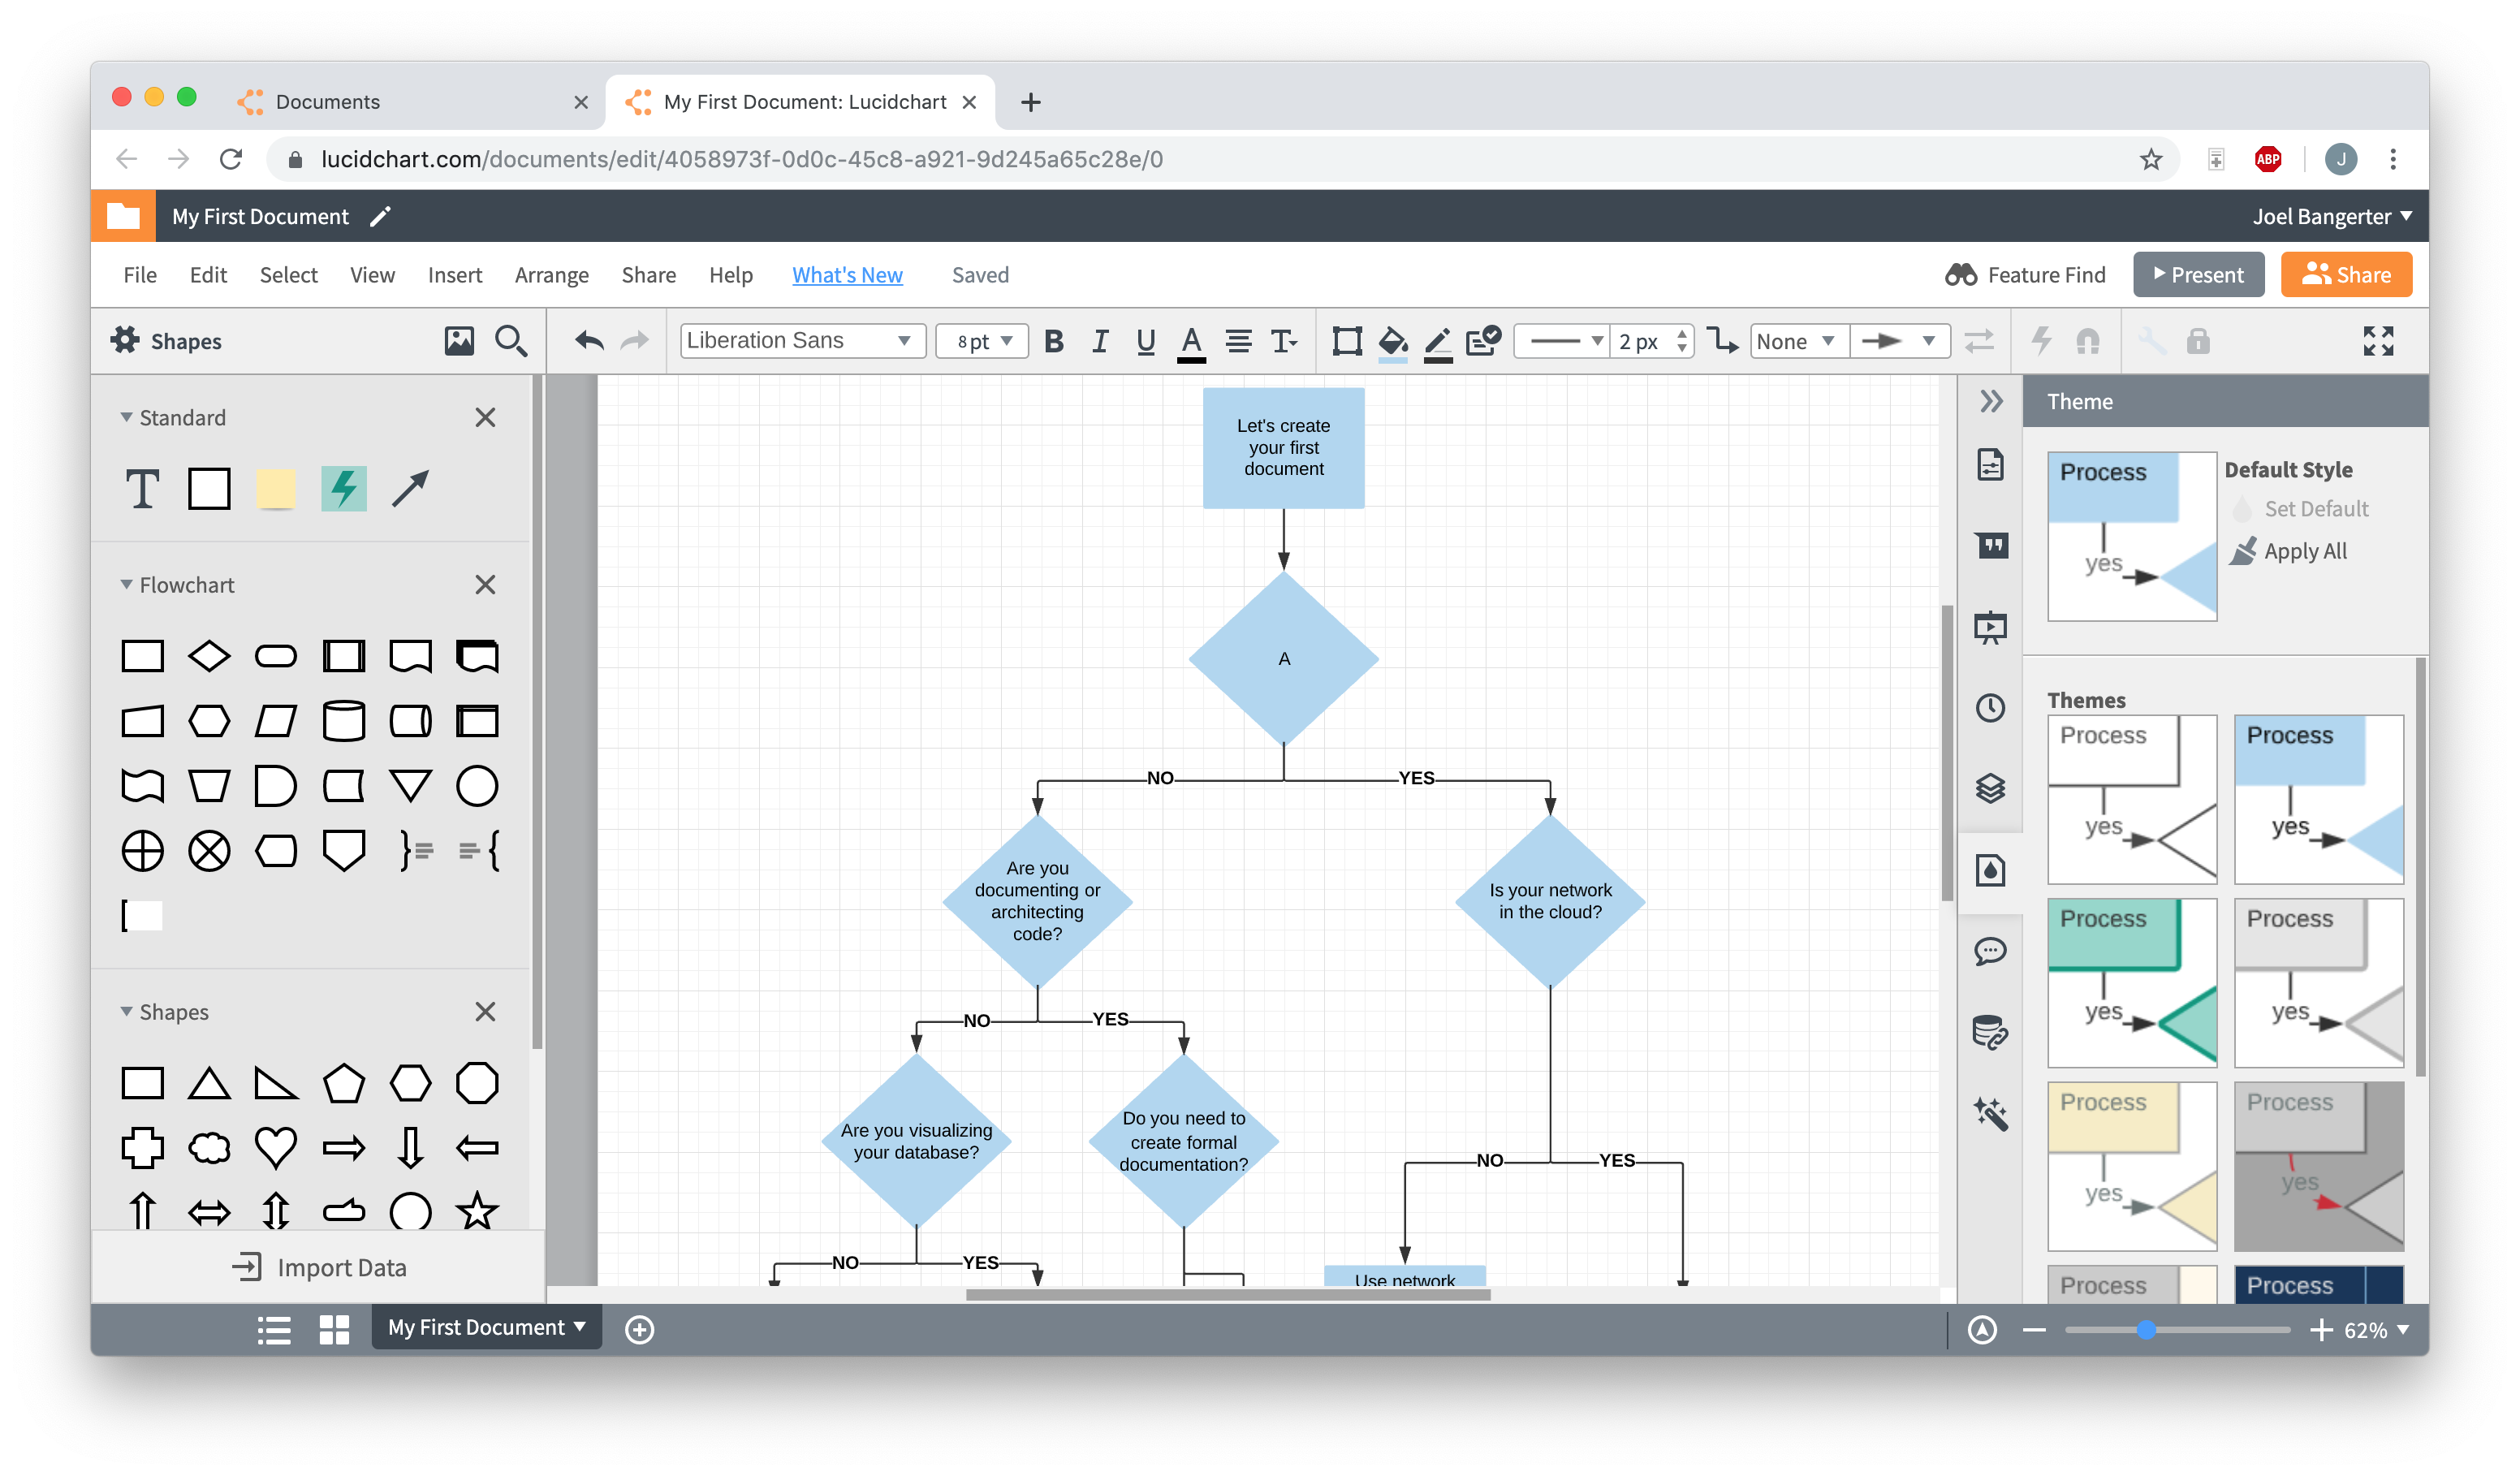
Lucidchart has dozens of pre-made flowcharts in its template library—to access them, click the down arrow next to “+Document” and select “Flowchart.” To read more about a template, simply click it once. To use a template, either double-click or select it and click “Create Document.”
Each template is completely customizable—move, add, or delete shapes and arrows until the diagram suits your needs.

If you’d rather build your diagram from scratch, open a blank document by clicking “+Document.” With Lucidchart’s intuitive interface, adding shapes, lines, and text is a cinch. By default, the flowchart shape library is pinned to the shape menu—drag and drop shapes onto your canvas to start your flowchart. To add connecting lines, click and drag your cursor between two shapes.
2. Add text
At this point, your diagram should look almost complete. But it’s missing one crucial element: text. What decision is being made at each decision box? Which line represents yes? No?
Adding text to arrows and other shapes in Lucidchart is incredibly easy—just double-click and start typing! To edit existing text, do the same.
Font, text size and color, and much more can be easily adjusted using the toolbar at the top of the editor.
3. Format and style your flowchart
If you started your flowchart from scratch, it’s probably looking pretty plain—now’s your chance to change that. If you started from a template, your diagram is styled according to that template’s presets. You can still change the style to your liking!
To set a coherent, diagram-wide formatting theme, click “Theme,” the droplet icon located on the right-hand side of the editor. This opens a pane with a variety of themes to choose from—click on one to apply it to your diagram.
You can also style shapes individually using the toolbar at the top of the editor. Whether you’re changing line weight and fill color, adding a gradient, or adjusting opacity, use this toolbar to customize nearly every aspect of your shapes.
Insert a Lucidchart diagram into PowerPoint
With the Lucidchart add-in for MS PowerPoint, add your flowchart to a PowerPoint slide in a matter of minutes—just follow the steps below:
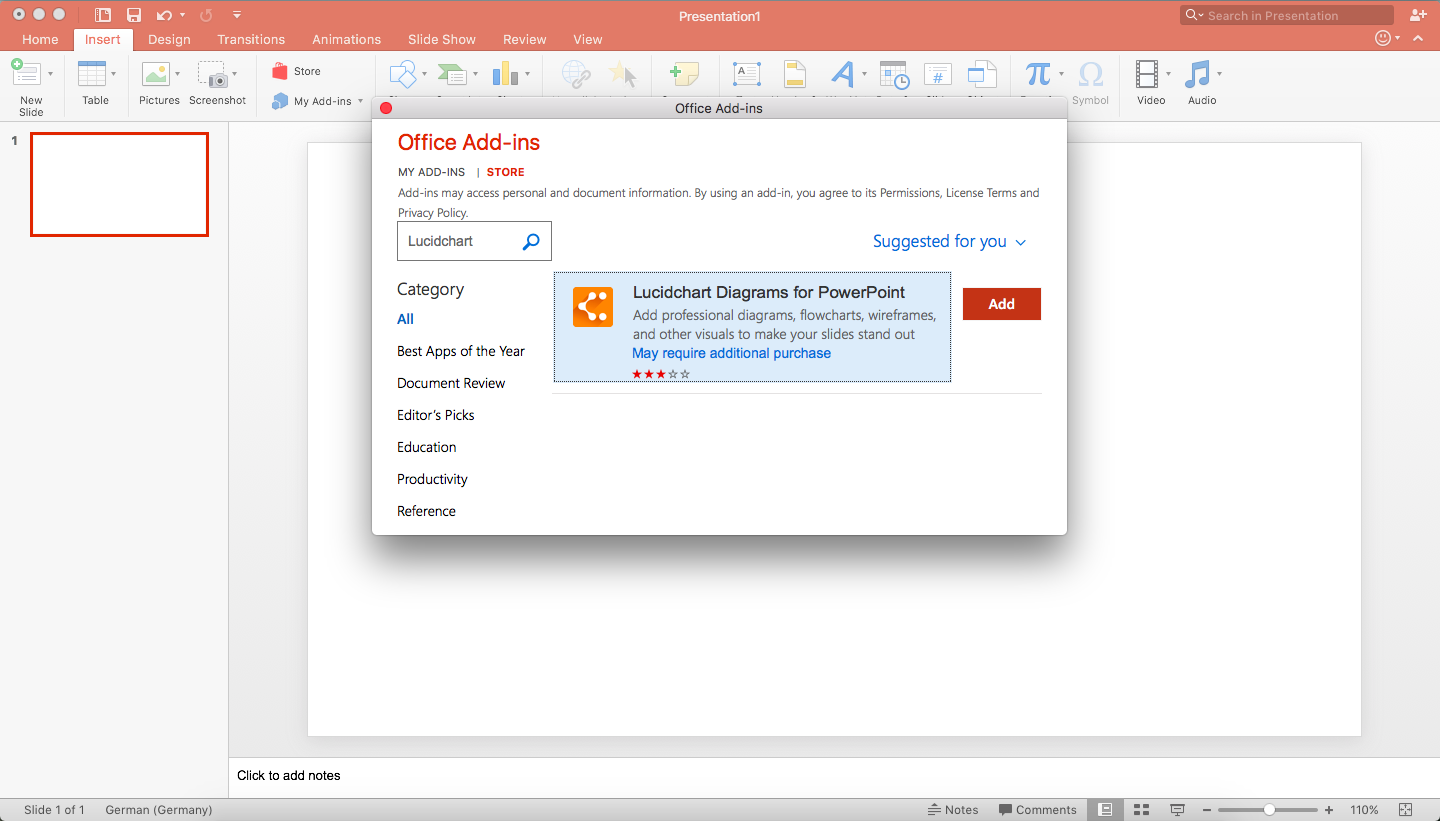
1. Install the Lucidchart add-in
Installing the add-in takes only a few clicks! Open PowerPoint and go to Insert > My Add-ins > Store. Type “Lucidchart” in the search bar and click “Add.”
If the Lucidchart add-in doesn’t open when you download it, don’t worry. Simply go to Insert > My Add-ins > Lucidchart. (You may be prompted to enter your Lucidchart login info—once logged in, you can view all of your Lucidchart documents.)
2. Select a diagram to add to your PowerPoint slide
With the Lucidchart add-in open, you can view all of your Lucidchart documents in PowerPoint. To insert a diagram, hover your mouse over the diagram you wish to add and click “Select.” This will add the diagram to the current slide.
If you edit the diagram after inserting it, simply click the refresh icon (located on the toolbar below the inserted diagram), and any changes will be applied.
For more info on how to use the Lucidchart add-in, watch our video tutorial.

Additional Resources
- How to Make a Flowchart in Excel
- What is a flowchart and how to create one
- Flowchart Symbols and Notation
- How to Make a Flowchart
- How to Make a Flowchart in Word
- What is a Flowchart
If you’re struggling to make a flowchart in any MS Office programs, Lucidchart can help! Just like with PowerPoint, you can import diagrams into MS Word and Excel with the Lucidchart add-in—it’s quick, easy, and free!
- PowerPoint Themes
- Latest PowerPoint Templates
- Best PowerPoint Templates
- Free PowerPoint Templates
- Simple PowerPoint Templates
- PowerPoint Backgrounds
- Project Charter
- Project Timeline
- Project Team
- Project Status
- Market Analysis
- Marketing Funnel
- Market Segmentation
- Target Customer
- Marketing Mix
- Digital Marketing Strategy
- Resource Planning
- Recruitment
- Employee Onboarding
- Company Profile
- Mission Vision
- Meet The Team
- Problem & Solution
- Business Model
- Business Case
- Business Strategy
- Business Review
- Leadership Team
- Balance Sheet
- Income Statement
- Cash Flow Statement
- Executive Summary
- 30 60 90 Day Plan
- SWOT Analysis
- Flow Charts
- Gantt Charts
- Text Tables
- Infographics
- Google Slides Templates
- Presentation Services
- Ask Us To Make Slides
- Data Visualization Services
- Business Presentation Tips
- PowerPoint Tutorials
- Google Slides Tutorials
- Presentation Resources
How To Make A Flow Chart in PowerPoint Presentation?
A flowchart is a fantastic way to clearly display any process or idea with steps so that your team understands it. This blog will guide you through the different ways to create a FlowChart in a PowerPoint presentation. We have also discussed some templates to make it easy for you to start.

Flowcharts play an important role in business communication, conveying complex processes, ideas, and decisions. They enable teams to visualize workflows, identify bottlenecks, and streamline operations. This helps everyone on the team align with the goals and makes the work efficient. Hence, it would help if you learned how to make a flow chart in PowerPoint.
Flowcharts visually represent the steps involved in a particular business process or workflow. It helps stakeholders understand the sequence of activities and identify potential bottlenecks or areas for improvement. Flowcharts can be easily shared and communicated across teams, making them an effective tool for collaboration and decision-making.
This article will show you how to create a flowchart in a PowerPoint presentation. Let’s get started.
What Is A Flowchart?

A Flowchart is a visual representation of a process or system that uses symbols and arrows to show a flow of information or the steps you need to complete a task.
It consists of rectangles, ovals, rhombuses, and many other shapes to indicate stages and link arrows to define the flow and sequence. These can represent several procedures and paths, ranging from straightforward hand-drawn diagrams to intricate computer-drawn graphics.
There are different ways to add a flowchart in PowerPoint to present your data logically and create a lasting impression on your audience.
How To Make A Flow Chart In PowerPoint?
You can easily create flowcharts on your own by using MS PowerPoint . It offers easy access to shapes and SmartArt, allowing you to create flowcharts. The first step would be to plan and outline your flowchart. Think about the purpose of your flowchart, how many steps you need to show in your flowchart, etc. When you are done planning your flowchart, you can open MS PowerPoint and create your own.
Follow the three methods below to learn how to create a flow chart in PowerPoint.
- Using SmartArt
- From Scratch using Shapes
- Use SlideUpLift’s Templates
How To Make A Flow Chart In Powerpoint Using SmartArt?
Creating a flowchart in PowerPoint from scratch ensures customization, clarity, alignment with the brand, and effective communication with the target audience. It makes modifications easy and gives your presentations a professional look.
SmartArt is a good option if you need to create a flowchart quickly. Similar to an image or clip art, a SmartArt graphic allows you to add extra features. However, it will enable you to add only one or two pre-selected shapes.
Follow the below steps to learn how to make a flowchart in PowerPoint using SmartArt :
- Open your PowerPoint presentation and go to the slide where you want to insert a flowchart.
- Go to “Insert”> “SmartArt” option > “Process” and select a flowchart from the box that matches your requirements.
- Once you have picked one flowchart, click “OK” to insert the flowchart into your presentation slide.
- You can add the content to your flowchart by directly typing down the text or using the “Text Pane” option.
- Adjust the size of your flowchart using the anchor points or select any specific shape to edit.
- To change the color, go to “SmartArt Design” on the toolbar > “Change Colors” and select the flowchart’s desired color scheme.
- Review if you have added all the necessary details and save your presentation.
PRO TIP: You can add powerpoint shapes , modify the diagram type, and select from various pre-set color schemes. The “Format” tab enables more exact alterations like text color, flowchart symbol color, edit and format text , and unique font.
How to Create a Flowchart in PowerPoint From Scratch?
Another way to create a flow chart in PowerPoint is to use shapes and arrows from the shape library. It is a preferred option when you need to make a flowchart from scratch with your theme and creativity.
This approach offers more freedom during the FlowChart creation process, as SmartArt doesn’t include any diagrams with these elements. You’ll need to use the shape library for a standard flowchart with process and decision boxes and other flowchart-specific forms.
Follow the below-mentioned steps to learn how to create flow chart in PowerPoint from scratch:
- Go to the “Insert” tab > click on the “Shapes” option. A dropdown menu will appear with all the different shapes you can use for your flowchart.
- Select a shape that matches your requirements, double-click on it, and drag it onto your slide.
- Type in your content. Keep adding more such shapes and add your content to create a flowchart.
- Arrange the shapes in the order of your content requirements to show a flow of steps. You can also drag the shapes around by simply clicking on it.
- To finish the flowchart, add connecting arrows or lines to show an association between the two steps. Go to “Insert” > “Shapes” to add lines and arrows. After choosing a line type, draw a connecting line by clicking and dragging your mouse from one shape to another. You can also make curved arrows to make your flowcharts more creative.
- Review all the things and save your slide.
PRO TIP: To organize your shapes, click on the “Arrange” tab > go to the “Align” option from the dropdown menu and select either “Distribute Horizontally” or “Distribute Vertically.” It will ensure that your shapes are spaced at equal distances from each other.
Suggested Reading: How to create a flowchart in Google Slides?
How To Make A Flow Chart In PowerPoint Using SlideUpLift’s Templates?
Selecting each box and arrow separately using the shape library takes too much time, especially if you must make bigger flowcharts. The same is true with SmartArts. You can prefer the above two methods, but allocating time to create flowcharts for busy professionals is challenging. That’s why we have developed various templates for you to use, helping you to create flowcharts in minutes.
Follow the below steps to learn how to create a flowchart in PowerPoint using SlideUpLift’s Templates:
- Visit Slideuplifts Flowchart Templates library.
- Choose a template that aligns with your requirements. We offer flowcharts for various purposes and with different designs, including animated templates.
- Download your desired templates in PPT format or Google Slides format.
- Open the file and customize the content according to your requirements. You can change the text and colors of elements and even add background Images if you want. Edit and personalize the slide to match your brand identity.
- Review the changes and save the file.
Best FlowChart PowerPoint Templates
Now, you have understood how to make a flow chart in PowerPoint. These templates are invaluable resources that significantly ease the process of creating flowcharts, saving time and effort while ensuring professional and consistent results. Rather than starting from scratch, you can leverage pre-made PowerPoint templates to map out processes, ideas, or workflows in a structured way.
The professional design of these templates ensures consistency and a polished look throughout your flowchart. These customizable premade templates enable you to seamlessly meet your specific needs by incorporating your content, branding, and style.
1. Business Process Flowchart : This template depicts step-by-step processes and workflows. It includes various shapes and icons to help you illustrate each stage efficiently.

2. Decision Tree Flowchart : Ideal for making decisions and showing different outcomes, this template simplifies complex choices with a clear and visually engaging design.

3. Timeline Flowchart : For project planning and milestones, this template offers a timeline-style flowchart that helps users visualize the sequence of events and deadlines.

4. Swimlane Flowchart : When you need to depict responsibilities within a process, the swimlane template from SlideUpLift is perfect for showing who is accountable for each step.

We discussed the three methods on how to make a flow chart in PowerPoint. Crafting outstanding presentations with intricate flowcharts can be daunting. You will now be able to create better flowcharts to enhance your team’s productivity. To ensure the utmost professionalism, engaging the services of online presentation design experts like SlideUpLift is prudent. Our specialized presentation design services elevate the visual impact of your presentations substantially.
How to make a Flow Chart in PowerPoint presentation?
To create a flowchart in PowerPoint, you can create by using SmartArt:
- Navigate to the slide where you want to add a flowchart.
- Click “Insert” > “SmartArt” > “Process” > Click on the flowchart you wish to edit.
How do I ensure my flow chart in PowerPoint is visually appealing and easy to follow?
Use consistent colors, shapes, and alignment, and keep text concise. Ensure a logical flow from left to right or top to bottom. Additionally, you can also use FlowChart PowerPoint presentation templates to enhance your FlowChart presentation tenfold.
Are flow charts in PowerPoint only for business presentations?
No, flowcharts are not just restricted to business; they can be used in various aspects of education, engineering, administration, etc., as they assist with clear process visualization.
What are some of the best practices for presenting a flowchart in a PowerPoint slide?
Present one step at a time, use animations to reveal elements, and explain each part clearly to your audience. In addition, you can highlight key points and transitions. You can easily represent your data logically using SlideUpLift’s Flowchart PowerPoint templates .
Table Of Content
Related presentations.

FlowChart Templates Collection

Animated Procurement Flow Chart PowerPoint Template

Mindmap Flowchart Options PowerPoint Template
Related blogs.

10 Bad PowerPoint Slides Examples to Avoid

10 Best Animated PowerPoint Templates

10 Best Business PowerPoint Templates for Presentations

10 Best Business Presentation Topics to Captivate Your Audience
Tags and categories, privacy overview.
Necessary cookies are absolutely essential for the website to function properly. This category only includes cookies that ensures basic functionalities and security features of the website. These cookies do not store any personal information
Any cookies that may not be particularly necessary for the website to function and is used specifically to collect user personal data via ads, other embedded contents are termed as non-necessary cookies. It is mandatory to procure user consent prior to running these cookies on your website.
Flow Charts
Powerpoint FlowChart Templates make it easy to visually illustrate process flow. Use these amazing slide layouts can save you a lot of time while creating compelling flow charts in your presentations. You can add your own text and edit each shape or re-position them to meet your requirements. These PowerPoint Flow Chart Templates provide a basic diagram which can be customized to represent an algorithm, process or workflow. These pre-designed ready to edit layouts are an excellent tool for managers in any vertical.

Project Kick Off
What do you think of this template.

Vaccine Strategic Roadmap

Agile Product Roadmap

Talent Management Model

Yes No Flowchart

Safe Agile Framework

Pay Per Click
You dont have access, please change your membership plan., great you're all signed up..., verify your account.
PowerSlides.com will email you template files that you've chosen to dowload.
Please make sure you've provided a valid email address! Sometimes, our emails can end up in your Promotions/Spam folder.
Simply, verify your account by clicking on the link in your email.
Home PowerPoint Templates Flow Chart
67+ Flow Chart Templates for PowerPoint & Google Slides
Download 100% editable flowchart templates for PowerPoint & Google Slides presentations. Present a process or set of steps to an audience using PowerPoint flowchart templates that are very easy to edit and customize.
Featured Templates

Metro Style Flow Chart Template for PowerPoint
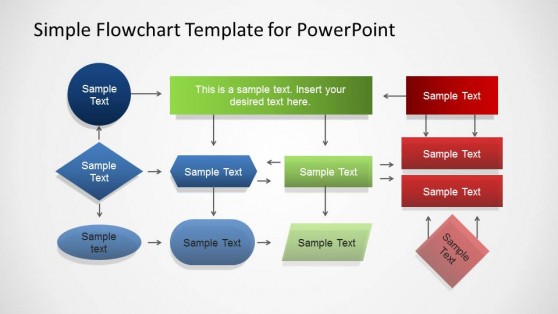
Simple Flowchart Template for PowerPoint
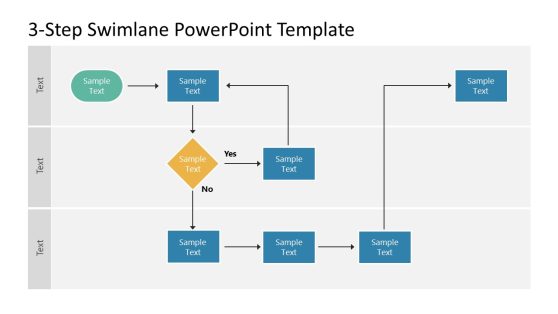
3-Step Swimlane PowerPoint Template
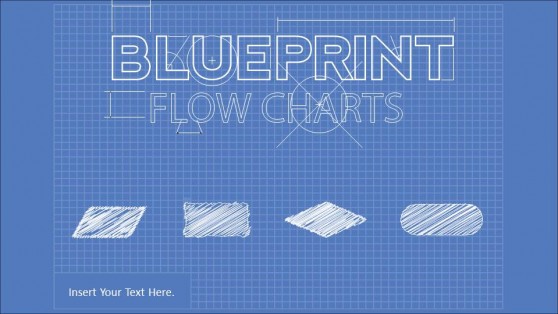
Blueprint Flowchart PowerPoint Diagram
Latest templates.
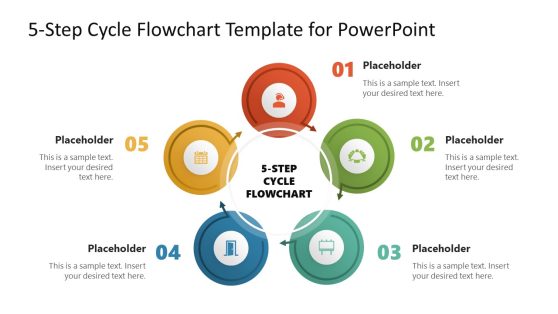
5-Step Cycle Flowchart Template for PowerPoint
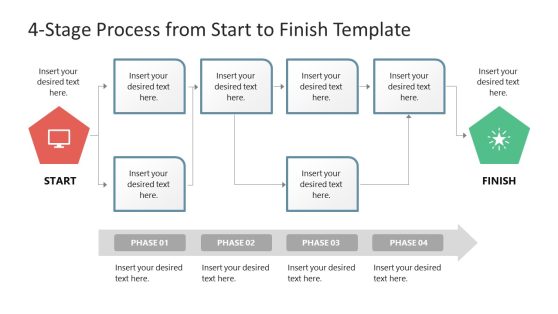
4-Stage Process From Start to Finish PowerPoint Template
Data Flow Diagram PowerPoint Template
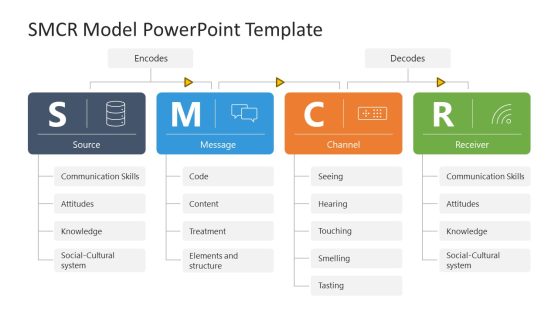
SMCR Model PowerPoint Template
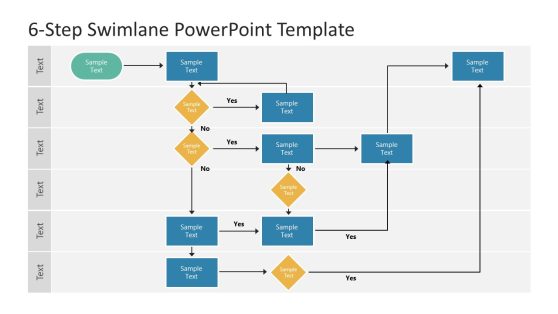
6-Step Swimlane PowerPoint Template
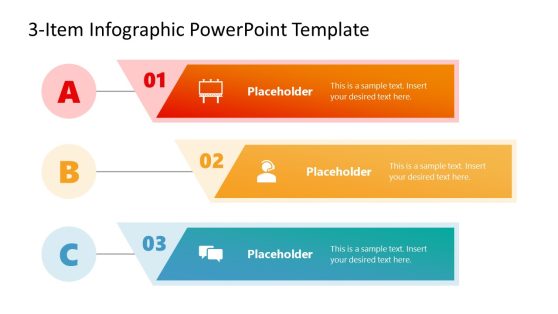
3-Item ABC Infographic PowerPoint Template
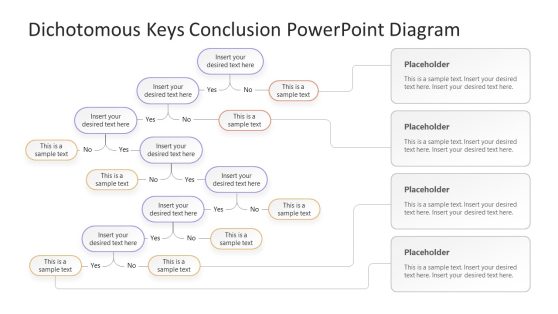
Dichotomous Keys Conclusion PowerPoint Diagram
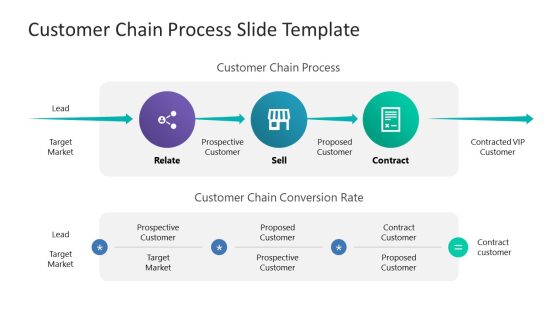
Customer Chain Process PowerPoint Template
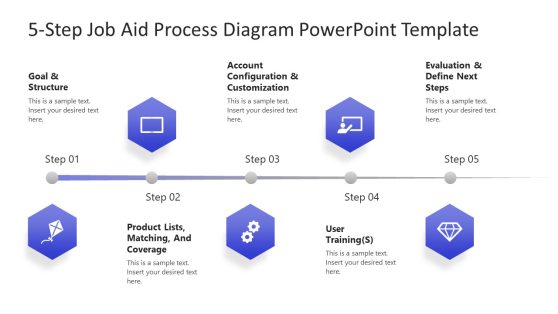
5-Step Job Aid Process Diagram PowerPoint Template

Tree Infographics PowerPoint Template

Soccer Tournament Bracket Template for PowerPoint

Distribution Channels PowerPoint Template
Flowchart symbols are supposed to join with arrows representing the process flow path. With flowchart PPT templates , you can build simplistic and multiple flowcharts by moving shapes from the template to your performance.
They are such excellent tools for making your creativity even more attractive. Here, you can easily find any themed flowchart shapes, flowchart templates , and already-designed flowchart diagrams that fit with your Microsoft PowerPoint versions.
A flow char t is a figurative illustration of a process you can create using common tools like PowerPoint. In a flow chart template , each process is represented by various shapes and figures holding a brief description.
A flowchart allows a clear and simplified visualization of a specific process or arrangement. It is easy to use, edit, and maintain over time. SlideModel flowchart templates cover numerous geometrical shapes that show several actions, decisions, steps, and connections in a process.
The purpose of using a Flowchart is to divide a big set of processes into smaller sub-processes and be able to see the whole picture or drill down into detail. In the higher-level process, one box in a flowchart can represent a complex subprocess that the presenter can drill down in another slide with a new flowchart diagram. Using a flowchart presentation template, you will quickly display the logical flow and sense of the relationship between divided steps of a single process to your targeted audience . They aim to make your project look clear and engaging enough. F low Chart templates lead you to the Data and Documents Flow within your Organization.
You can go through the symbols and shapes of your requirements. Having a diagrammatic approach to something makes it easier to understand and visualize. Professional flowchart templates make your diagrams look polished without requiring design skills.
Also check our step-by-step guide on How to Make a Flowchart .
What is a Flowchart?
A flowchart is a figurative approach to document a process or set of steps. The chart enables the user to represent actions, decisions , precedence , order, parallelism and of course the connections between them.
What is a Flow Chart PowerPoint Template?
A Flowchart PowerPoint template is a template that provides all the elements for creating flowcharts, using PowerPoint Shapes and PowerPoint connectors. The template provides the building blocks, the user can arrange them and connect them to create the diagram they need. Ranging from basic flowchart diagram to a complex process, using the simple blocks provided by the template, the user can achieve any flow.
How can a Flow Chart Template be used in Presentations?
The best approach to presenting flowcharts is using a hierarchical presentation and the use of hyperlinks to connect the slides. In the first slide, the presenter should describe the high level flow chart. This chart should only contain the macro process, and use one “process” box to describe sub processes (sub processes can also be big). Then the presenter will create one slide per sub process. In this way the presenter can navigate into low level detail and high level detail.
Download Unlimited Content
Our annual unlimited plan let you download unlimited content from slidemodel. save hours of manual work and use awesome slide designs in your next presentation..

Add a flow chart to a slide in PowerPoint
You can insert a flow chart into your PowerPoint presentation by using a SmartArt graphic.
On the Insert tab, click SmartArt .

In the Choose a SmartArt Graphic dialog box, on the left, select the Process category.
Single-click a flow chart in the middle pane to see its name and description in the right pane of the dialog box.
Select the flow chart you want, and then click OK .
After the flow chart is added to your slide, replace the [Text] placeholders with the steps in your flow chart.

You can also change the color or style of the SmartArt graphic. While it is selected on your slide, click the SmartArt Design tab on the ribbon, and then click Change Colors or open the SmartArt Styles gallery to see options you can choose from.

For more details about working with SmartArt graphics, see Create a SmartArt graphic .
On the Insert tab of the ribbon, click SmartArt , and then point at Process .

In the menu of categories that appears, point at Process and then select a layout.

From the drop-down menu, in the Process section, select a process flow chart such as Accent Process or Basic Bending Process .

After the flow chart is added to the slide, a text editor appears at the left edge of the chart. Type your chart text in the editor. As you type, the text appears in the graphic:

Tip: To quickly change the colors of the shapes in your flow chart, click Change Colors on the SmartArt tab of the ribbon.
Create a SmartArt graphic

Need more help?
Want more options.
Explore subscription benefits, browse training courses, learn how to secure your device, and more.

Microsoft 365 subscription benefits

Microsoft 365 training

Microsoft security

Accessibility center
Communities help you ask and answer questions, give feedback, and hear from experts with rich knowledge.

Ask the Microsoft Community

Microsoft Tech Community

Windows Insiders
Microsoft 365 Insiders
Was this information helpful?
Thank you for your feedback.
Flow Charts
Discover our collection of 54 Flow Chart templates , perfect for showcasing processes and workflows in your PowerPoint and Google Slides presentations. Enhance communication, collaboration, and understanding.
Flow Charts are powerful visual tools that help in organizing, understanding, and communicating complex processes and workflows in a simplified manner. They are versatile and widely applicable across various industries such as project management, software development, business analysis, and more. Flow Charts make it easy for presenters to break down complicated concepts into easily digestible chunks.
Using Flow Charts in your PowerPoint and Google Slides presentations can help your audience quickly grasp the sequence of events, decision points, and outcomes in a process. They facilitate better communication by providing a clear and structured representation of the relationships between steps.
In addition to their practical use, Flow Charts can add an aesthetic appeal to your presentation slides, making them more engaging and visually appealing. Whether you’re explaining a new procedure, illustrating a problem-solving strategy, or showcasing a project plan, our Flow Chart templates will be invaluable tools for any professional presentation.

Flowchart Board Game for PowerPoint and Google Slides
Google Slides , PPTX

Horizontal Relationships for PowerPoint and Google Slides

Infographic Funnel with 4 Stages for PowerPoint

Infographic Funnel w/ 3 Stages for PowerPoint

Process Circle PowerPoint Diagram

Process Workflow PowerPoint Diagram

5-Step Hexagons Puzzle Diagram for PowerPoint

4-Step Hexagons Puzzle Diagram for PowerPoint

3-Step Hexagons Puzzle Diagram for PowerPoint

Consumer Decision Journey for PowerPoint

PowerPoint Purchase Funnel

Vertical Funnel Diagram for PowerPoint
Search templates by categories, search templates by colors.
Love our templates? Show your support with a coffee!
Thank you for fueling our creativity.
Charts & Diagrams
Text & Tables
Graphics & Metaphors
Timelines & Planning
Best-Ofs & Tips
Terms and Conditions
Privacy Statement
Cookie Policy
Digital Millennium Copyright Act (DMCA) Policy
© Copyright 2024 Ofeex | PRESENTATIONGO® is a registered trademark | All rights reserved.

To provide the best experiences, we and our partners use technologies like cookies to store and/or access device information. Consenting to these technologies will allow us and our partners to process personal data such as browsing behavior or unique IDs on this site and show (non-) personalized ads. Not consenting or withdrawing consent, may adversely affect certain features and functions.
Click below to consent to the above or make granular choices. Your choices will be applied to this site only. You can change your settings at any time, including withdrawing your consent, by using the toggles on the Cookie Policy, or by clicking on the manage consent button at the bottom of the screen.
Thank you for downloading this template!
Remember, you can use it for free but you have to attribute PresentationGO . For example, you can use the following text:
If you really like our free templates and want to thank/help us, you can:
Thank you for your support
How to Insert Flow Chart in PowerPoint

PowerPoint is a powerful tool for creating presentations, and it is commonly used to create flow charts. Flow charts are important for representing processes in a visual format, which makes them easier to understand. In this article, we will be discussing the process of inserting a flow chart in PowerPoint. We will cover the basics of flow charts, the benefits of using them, the steps to creating a flow chart, how to choose the right flow chart template, customizing your flow chart, adding text and labels, inserting images and icons, connecting and linking shapes, animating your flow chart, sharing and exporting your presentation, troubleshooting common issues, and best practices for using flow charts in business presentations.
Table of Contents
Understanding the Basics of Flow Charts
A flow chart is a graphical representation of a process or system that uses symbols to represent the steps of the process. Flow charts typically begin with a start symbol that initiates the process and end with a stop symbol that marks the end of the process. The symbols in between represent the various steps that the process follows. Each symbol is connected by lines that show the flow of the process. Flow charts can be used in a variety of fields, including engineering, business, and education.
One of the benefits of using flow charts is that they can help identify inefficiencies or bottlenecks in a process. By visually mapping out each step, it becomes easier to see where delays or errors may be occurring. This can lead to improvements in the process and ultimately save time and resources. Additionally, flow charts can be used to train new employees on a process or system, as they provide a clear and concise overview of the steps involved. Overall, flow charts are a valuable tool for improving processes and increasing efficiency in a variety of industries.
The Benefits of Incorporating Flow Charts in PowerPoint Presentations
Using flow charts in your PowerPoint presentations has several benefits. Firstly, it makes your presentation more engaging and easier to understand for your audience. Secondly, it helps you organize your ideas and present them in a logical flow. Lastly, it is a valuable tool for analyzing processes and identifying areas for improvement.
Another benefit of using flow charts in PowerPoint presentations is that it can save time. Instead of explaining a complex process or system verbally, you can use a flow chart to visually represent it. This can help you convey information more efficiently and effectively, allowing you to cover more material in less time.
Additionally, flow charts can be customized to fit your specific needs. You can choose the colors, shapes, and symbols that best represent your ideas and make your presentation more visually appealing. This can help you create a more memorable and impactful presentation that resonates with your audience long after it’s over.
Step-by-Step Guide to Creating a Flow Chart in PowerPoint
Creating a flow chart in PowerPoint involves the following steps:
- Open PowerPoint
- Go to the Insert tab and click on the SmartArt button
- Select the Process category and choose a flow chart template
- Enter your text in the text boxes provided
- Customize your flow chart by changing the shapes, colors, and styles
- Add text and labels to your flow chart
- Insert images and icons to enhance your flow chart
- Connect shapes in your flow chart using lines or arrows
- Animate your flow chart to increase engagement
- Save and share your presentation
When creating a flow chart in PowerPoint, it is important to keep in mind the purpose of the chart. Is it meant to explain a process, show a timeline, or illustrate a decision-making tree? Understanding the purpose will help you choose the appropriate template and design elements.
Another important aspect to consider is the audience. Who will be viewing the flow chart? Will they be familiar with the terminology and symbols used in the chart? It may be necessary to provide a legend or key to ensure that the audience can understand the information presented.
How to Choose the Right Flow Chart Template for Your Presentation
Choosing the right flow chart template is important for creating a professional-looking presentation. PowerPoint comes with several built-in templates, but you can also download additional templates from the internet. When choosing a template, consider the purpose of your presentation, the audience, and the style you want to convey.
One important factor to consider when choosing a flow chart template is the level of detail you want to include. Some templates are more detailed and complex, while others are simpler and more streamlined. If you are presenting to a technical audience, a more detailed template may be appropriate. However, if you are presenting to a general audience, a simpler template may be easier to understand.
Another factor to consider is the color scheme and design of the template. You want to choose a template that complements your content and enhances the overall look of your presentation. Avoid templates that are too busy or distracting, as they can take away from the message you are trying to convey.
Customizing Your Flow Chart: Colors, Shapes, and Styles
Customizing your flow chart can make it more visually appealing and help convey your message more effectively. You can change the colors, shapes, and styles of the symbols to match your brand, preferences, or the theme of your presentation. PowerPoint provides several customization options, including shape fill, outline, effects, and layout options.
One important aspect to consider when customizing your flow chart is the use of color. Color can be used to highlight important information, create contrast, and make your flow chart more engaging. However, it is important to use colors that are consistent with your brand or theme, and avoid using too many colors that can be overwhelming or confusing.
In addition to colors, you can also customize the shapes and styles of your flow chart symbols. This can help you create a unique and professional-looking flow chart that stands out from the rest. You can choose from a variety of shapes, such as rectangles, circles, diamonds, and arrows, and apply different styles, such as gradients, shadows, and reflections, to enhance the visual appeal of your flow chart.
Tips and Tricks for Creating Professional-Looking Flow Charts in PowerPoint
To create professional-looking flow charts in PowerPoint, follow these tips and tricks:
- Keep it simple and don’t overcrowd your flow chart with too much information
- Use consistent colors, fonts, and styles throughout your presentation
- Align your symbols and text to create a clean and organized layout
- Use descriptive labels and text to explain your process clearly
- Test your flow chart before presenting it to identify any errors or issues
Another important tip for creating professional-looking flow charts in PowerPoint is to use appropriate symbols and shapes. Choose symbols that are easy to understand and represent the process accurately. You can also customize the shapes to match your company’s branding or style.
Additionally, consider using animation to enhance your flow chart presentation. Animating the flow chart can help to draw attention to important points and make the presentation more engaging. However, be careful not to overdo it with too many animations, as this can be distracting and take away from the message you are trying to convey.
Adding Text and Labels to Your Flow Chart
Adding text and labels to your flow chart is important for clarifying the different steps in your process. Use short and concise descriptions that are easy to understand. Place your labels near the corresponding shapes and use arrows or lines to connect them to create a clear flow.
Another important aspect of adding text and labels to your flow chart is to ensure consistency in the formatting. Use the same font, size, and color for all labels and text to create a professional and cohesive look. Additionally, consider using different shapes or colors for different types of steps in your process to make it easier to follow.
It’s also a good idea to review and revise your text and labels after creating your flow chart. Make sure that each label accurately describes the corresponding step and that the flow of the chart makes sense. You may also want to have someone else review your chart to ensure that it is easy to understand and follow.
Inserting Images and Icons to Enhance Your Flow Chart
Inserting images and icons can make your flow chart more interesting and engaging, especially if you are presenting complex topics. Use relevant images and icons that match your theme or brand and place them near the corresponding shapes. Be careful not to clutter your flow chart with too many images that distract from the main message.
How to Connect and Link Shapes in Your Flow Chart
Connecting the shapes in your flow chart makes it easier to understand the flow of the process. You can connect the shapes using lines or arrows to show the direction of the flow. There is no specific “Link shapes” option in PowerPoint, but you can manually connect the shapes using lines or arrows to indicate the flow of the process.
Animating Your Flow Chart: Simple Techniques for Increasing Engagement
Animating your flow chart can make your presentation more engaging and interactive. Use simple animation techniques like entrances or exits to reveal the symbols as you present. Use a consistent animation style throughout your presentation to avoid distracting your audience.
Sharing and Exporting Your PowerPoint Presentation with Embedded Flow Charts
Sharing and exporting your PowerPoint presentation is important to ensure your audience can access and view it. To share your presentation with embedded flow charts, save it as a PowerPoint presentation or export it as a PDF. You can also share it through cloud storage services like OneDrive or Dropbox.
Troubleshooting Common Issues when Inserting a Flow Chart in PowerPoint
Some common issues when inserting flow charts in PowerPoint include incorrect labeling, inconsistent text formatting, unwanted automatic resizing, and difficulty connecting shapes. To troubleshoot these issues, double-check your labeling and formatting, use the “Lock aspect ratio” option for images and shapes to control resizing, and manually connect your shapes using lines or arrows if you’re having trouble.
Best Practices for Using Flow Charts in Business Presentations
When using flow charts in business presentations, follow these best practices:
- Use flow charts to present complex processes or systems
- Keep your flow chart simple and easy to understand
- Use relevant imagery and icons
- Include descriptive labels and text
- Practice your presentation to ensure a smooth flow
Examples of Great Flow Charts: Inspiration from Top Brands and Thought Leaders
Looking for inspiration for your flow charts? Take a look at some great examples from top brands and thought leaders. Some examples include the customer journey map from Airbnb, the sales process flow chart from Hubspot, and the content marketing strategy flow chart from Moz. These examples can help you create a professional-looking flow chart that effectively conveys your message.
Overall, including a flow chart in your PowerPoint presentation is a valuable tool for conveying complex processes in a clear and organized way. Follow these steps, tips, and tricks to create a professional-looking flow chart that engages and impresses your audience!
By humans, for humans - Best rated articles:
Excel report templates: build better reports faster, top 9 power bi dashboard examples, excel waterfall charts: how to create one that doesn't suck, beyond ai - discover our handpicked bi resources.
Explore Zebra BI's expert-selected resources combining technology and insight for practical, in-depth BI strategies.

We’ve been experimenting with AI-generated content, and sometimes it gets carried away. Give us a feedback and help us learn and improve! 🤍
Note: This is an experimental AI-generated article. Your help is welcome. Share your feedback with us and help us improve.

Powerpoint Templates
Icon Bundle
Kpi Dashboard
Professional
Business Plans
Swot Analysis
Gantt Chart
Business Proposal
Marketing Plan
Project Management
Business Case
Business Model
Cyber Security
Business PPT
Digital Marketing
Digital Transformation
Human Resources
Product Management
Artificial Intelligence
Company Profile
Acknowledgement PPT
PPT Presentation
Reports Brochures
One Page Pitch
Interview PPT
All Categories

Flowchart PowerPoint Templates
- You're currently reading page 1
Stages // require(['jquery'], function ($) { $(document).ready(function () { //removes paginator if items are less than selected items per page var paginator = $("#limiter :selected").text(); var itemsPerPage = parseInt(paginator); var itemsCount = $(".products.list.items.product-items.sli_container").children().length; if (itemsCount ? ’Stages’ here means the number of divisions or graphic elements in the slide. For example, if you want a 4 piece puzzle slide, you can search for the word ‘puzzles’ and then select 4 ‘Stages’ here. We have categorized all our content according to the number of ‘Stages’ to make it easier for you to refine the results.
Category reset // require(['jquery'], function ($) { $(document).ready(function () { //removes paginator if items are less than selected items per page var paginator = $("#limiter :selected").text(); var itemsperpage = parseint(paginator); var itemscount = $(".products.list.items.product-items.sli_container").children().length; if (itemscount.
- 3D Man (2767)
- Anatomy (593)
- Animated (15)
- Block Chain (82)
- Branding (181)

IMAGES
VIDEO
COMMENTS
You can insert a flow chart into your PowerPoint presentation by using a SmartArt graphic. On the Insert tab, click SmartArt. In the Choose a SmartArt Graphic dialog box, on the left, select the Process category. Single-click a flow chart in the middle pane to see its name and description in the right pane of the dialog box.
Back at the shapes menu, select the shape you'd like to insert in the flowchart. Since this is our first shape to insert in the flowchart, we'll use the oval shape to indicate the starting point. Once you select the shape, you'll notice your mouse turns into a crosshair. To draw your shape, just click and drag.
Option A: Create a flowchart using the PowerPoint SmartArt tool. This is the easiest way to create a flowchart in PowerPoint. The SmartArt tool allows you to insert a pre-made flowchart into your slides and customize it. -Step #1: Go to the Insert tab and pick the SmartArt option. This will open the SmartArt Graphic pop-up window.
To build a SmartArt chart, start off by going to the Insert tab on Excel's ribbon. Click on the SmartArt button to get started. Start creating your own flow chart on PPT by going to Insert > SmartArt. Now, you'll see a variety of styles to choose from for creating SmartArt.
Open your PowerPoint presentation and select the slide where you want to insert a flowchart. On the Insert tab, click SmartArt. Choose the diagram that best suits your needs. As an example, we're going to insert the "Repeating Bending Process" diagram (on the "Process" list). Inserting a diagram.
You might want to know how to create flowchart in PowerPoint for your business, because you want to communicate a process through a diagram. A flowchart help...
Step 1: Select a template from the drop-down menu. In Microsoft PowerPoint, go to the slide where you want to place the flowchart. Click Insert, then click SmartArt to bring up a drop-down menu with different types of diagrams. Then hover over "Flowchart" to see some of the flowchart's capabilities. Simply click on one of these diagrams to ...
A flowchart allows you to present complex processes clearly.Flowcharts' greatest strength is the fact that they make processes easier to understand than wordy descriptions.PowerPoint flowcharts can be a big asset in presentations.By combining shapes, text, and arrows, a flowchart can contain everything from step-by-step instructions to the development of ideas.
To use SmartArt to create a flowchart in PowerPoint, follow these steps. Open PowerPoint and select Insert > SmartArt. In the Choose a SmartArt Graphic window, select Process . Select a flowchart design in the middle. You'll see a descriptive name and description (as well as possible design) on the right.
1. Select a flowchart from the SmartArt drop-down menu. In MS PowerPoint, navigate to the slide where you want to add a flowchart. Click Insert > SmartArt to open a drop-down list with a variety of diagram types. Hover your mouse over "Process" to see the various flowchart options.
Step 2: Pick a Flowchart Design and Template. Depending upon your needs, you can pick different flow chart templates across various platforms. For example, to create a PowerPoint flowchart for a presentation, you can pick a template from our suggested PowerPoint templates mentioned in the section below.
Open your PowerPoint presentation and go to the slide where you want to insert a flowchart. Go to "Insert"> "SmartArt" option > "Process" and select a flowchart from the box that matches your requirements. Once you have picked one flowchart, click "OK" to insert the flowchart into your presentation slide.
Powerpoint FlowChart Templates make it easy to visually illustrate process flow. Use these amazing slide layouts can save you a lot of time while creating compelling flow charts in your presentations. You can add your own text and edit each shape or re-position them to meet your requirements. These PowerPoint Flow Chart Templates provide a basic diagram which can be customized to represent an ...
A Flowchart PowerPoint template is a template that provides all the elements for creating flowcharts, using PowerPoint Shapes and PowerPoint connectors. The template provides the building blocks, the user can arrange them and connect them to create the diagram they need. Ranging from basic flowchart diagram to a complex process, using the ...
You can insert a flow chart into your PowerPoint presentation by using a SmartArt graphic. On the Insert tab, click SmartArt. In the Choose a SmartArt Graphic dialog box, on the left, select the Process category. Single-click a flow chart in the middle pane to see its name and description in the right pane of the dialog box.
Flow Charts. Discover our collection of 54 Flow Chart templates, perfect for showcasing processes and workflows in your PowerPoint and Google Slides presentations. Enhance communication, collaboration, and understanding. Flow Charts are powerful visual tools that help in organizing, understanding, and communicating complex processes and ...
To create a new flow chart in PowerPoint, start by opening a new slide in your presentation and selecting the Insert tab. From there, select the SmartArt option and choose the type of flow chart you want to create. This will open a new window where you can customize the flow chart to fit your specific needs. Once you have selected the type of ...
Choose the Right Type of Diagram Begin by selecting the diagram type that best represents the data or process you want to illustrate. Common types include flowcharts, organizational charts, Venn ...
Creating a flow chart in PowerPoint involves the following steps: Open PowerPoint. Go to the Insert tab and click on the SmartArt button. Select the Process category and choose a flow chart template. Enter your text in the text boxes provided. Customize your flow chart by changing the shapes, colors, and styles.
Basic waterfall model for software development flat powerpoint design. Slide 1 of 5. Approval process flowchart. Slide 1 of 6. Five Stages Of Procurement Process Flow Chart. Slide 1 of 5. Flow chart for business process flat powerpoint design. Slide 1 of 2. Flow of funds through financial intermediaries and markets.