Home Blog Presentation Ideas 23 PowerPoint Presentation Tips for Creating Engaging and Interactive Presentations

23 PowerPoint Presentation Tips for Creating Engaging and Interactive Presentations

PowerPoint presentations are not usually known for being engaging or interactive. That’s often because most people treat their slides as if they are notes to read off and not a tool to help empower their message.
Your presentation slides are there to help bring to life the story you are telling. They are there to provide visuals and empower your speech.
So how do you go about avoiding a presentation “snoozefest” and instead ensure you have an engaging and interactive presentation? By making sure that you use your slides to help YOU tell your story, instead of using them as note cards to read off of.
The key thing to remember is that your presentation is there to compliment your speech, not be its focus.
In this article, we will review several presentation tips and tricks on how to become a storytelling powerhouse by building a powerful and engaging PowerPoint presentation.
Start with writing your speech outline, not with putting together slides
Use more images and less text, use high-quality images, keep the focus on you and your presentation, not the powerpoint, your presentation should be legible from anywhere in the room, use a consistent presentation design, one topic per slide, avoid information overwhelm by using the “rule of three”.
- Display one bullet at a time
Avoid unnecessary animations
- Only add content that supports your main points
Do not use PowerPoint as a teleprompter
- Never Give Out Copies of the Presentation
Re-focus the attention on you by fading into blackness
Change the tone of your voice when presenting, host an expert discussion panel, ask questions, embed videos, use live polling to get instant feedback and engage the audience.
- He kept his slides uncluttered and always strived for simplicity
- He was known to use large font size, the bigger, the better.
- He found made the complex sound simple.
He was known to practice, practice, and keep on practicing.
Summary – how to make your presentation engaging & interactive, fundamental rules to build powerful & engaging presentation slides.
Before we go into tips and tricks on how to add flair to your presentations and create effective presentations, it’s essential to get the fundamentals of your presentation right.
Your PowerPoint presentation is there to compliment your message, and the story you are telling. Before you can even put together slides, you need to identify the goal of your speech, and the key takeaways you want your audience to remember.
YOU and your speech are the focus of this presentation, not the slides – use your PowerPoint to complement your story.
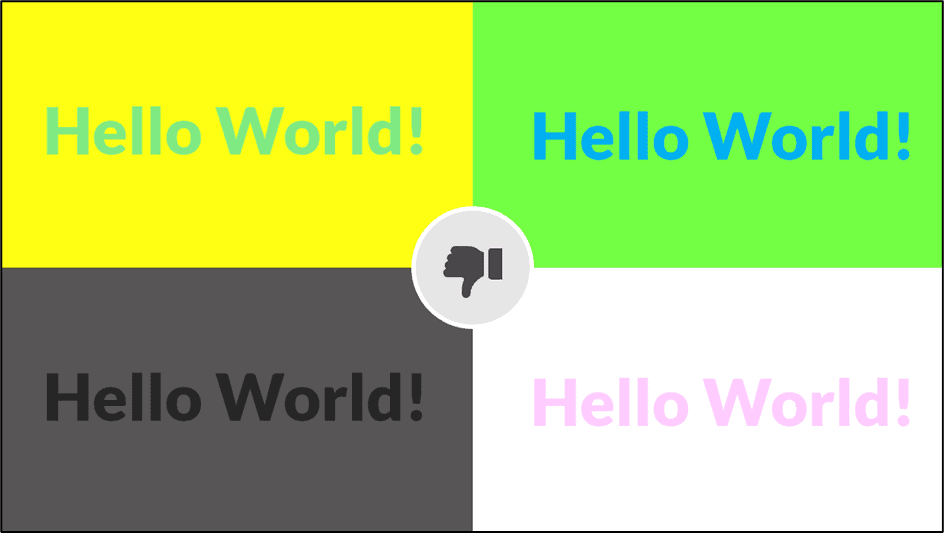
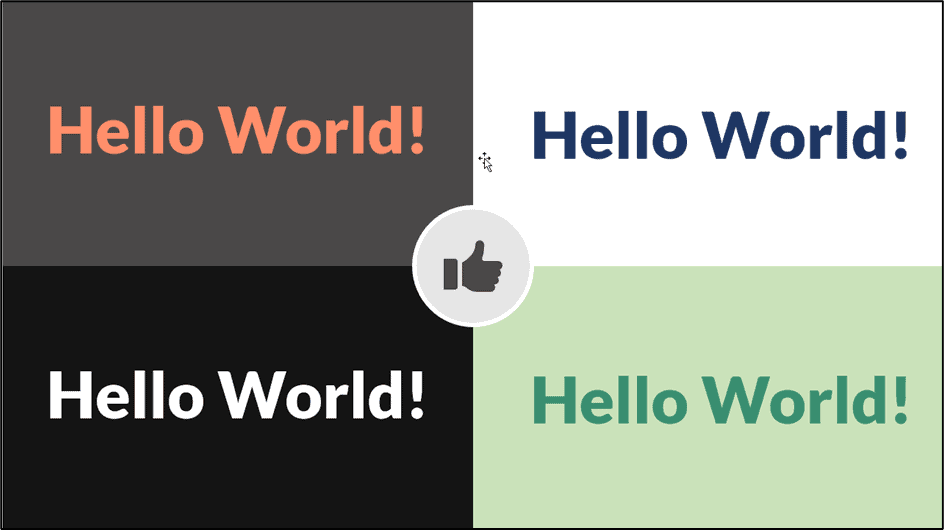
Keep in mind that your slides are there to add to your speech, not distract from it. Using too much text in your slides can be distracting and confusing to your audience. Instead, use a relevant picture with minimal text, “A picture is worth a thousand words.”

This slide is not unusual, but is not a visual aid, it is more like an “eye chart”.
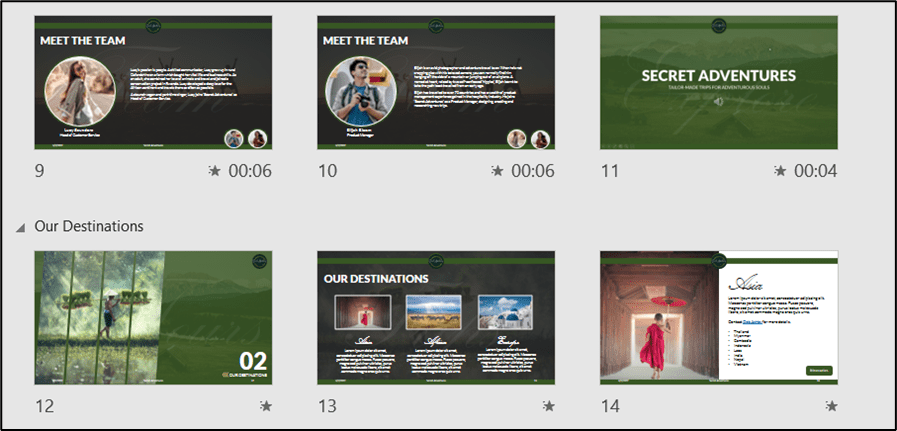
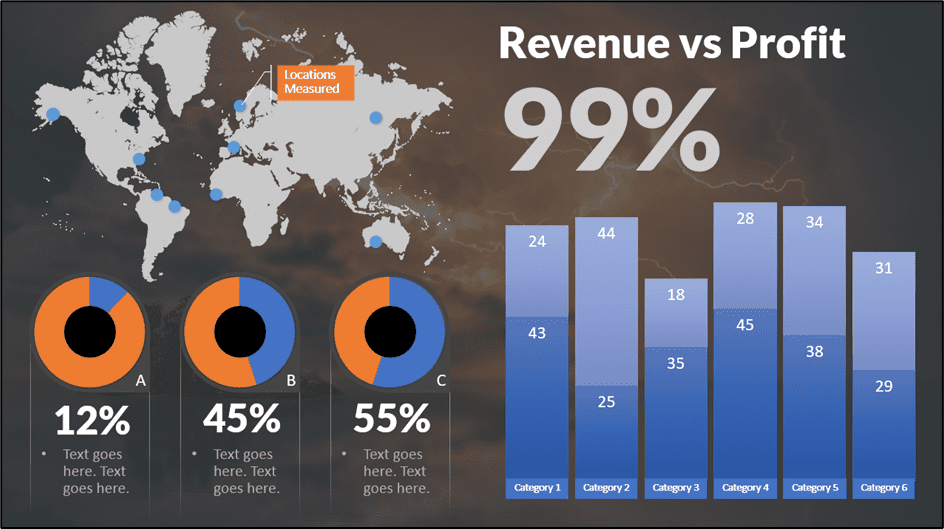
Aim for something simpler, easy to remember and concise, like the slides below.
Keep in mind your audience when designing your presentation, their background and aesthetics sense. You will want to avoid the default clip art and cheesy graphics on your slides.

While presenting make sure to control the presentation and the room by walking around, drawing attention to you and what you are saying. You should occasionally stand still when referencing a slide, but never turn your back to your audience to read your slide.
You and your speech are the presentations; the slides are just there to aid you.
Most season presenters don’t use anything less than twenty-eight point font size, and even Steve Jobs was known to use nothing smaller than forty-point text fonts.
If you can’t comfortably fit all the text on your slide using 28 font size than you’re trying to say and cram too much into the slide, remember tip #1.4 – Use relevant images instead and accompany it with bullets.
Best Practice PowerPoint Presentation Tips
The job of your presentation is to help convey information as efficiently and clearly as possible. By keeping the theme and design consistent, you’re allowing the information and pictures to stand out.
However, by varying the design from slide to slide, you will be causing confusion and distraction from the focus, which is you and the information to be conveyed on the slide.

Technology can also help us in creating a consistent presentation design just by picking a topic and selecting a sample template style. This is possible thanks to the SlideModel’s AI slideshow maker .
Each slide should try to represent one topic or talking point. The goal is to keep the attention focused on your speech, and by using one slide per talking point, you make it easy for you to prepare, as well as easy for your audience to follow along with your speech.
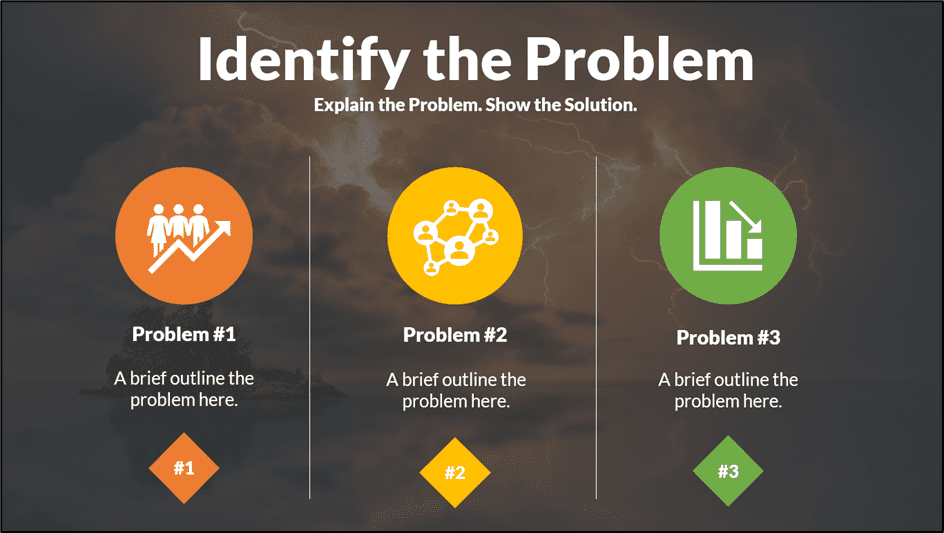
Sometimes when creating our presentation, we can often get in our heads and try to over-explain. A simple way to avoid this is to follow the “ Rule of Three ,” a concept coined by the ancient Greek philosopher Aristotle.
The idea is to stick to only 3 main ideas that will help deliver your point. Each of the ideas can be further broken into 3 parts to explain further. The best modern example of this “Rule of Three” can be derived from the great Apple presentations given by Steve Jobs – they were always structured around the “Rule of Three.”

Display one sentence at a time
If you are planning to include text in your slides, try to avoid bullet lists, and use one slide per sentence. Be short and concise. This best practice focuses on the idea that simple messages are easy to retain in memory. Also, each slide can follow your storytelling path, introducing the audience to each concept while you speak, instead of listing everything beforehand.
Presentation Blunders To Avoid
In reality, there is no need for animations or transitions in your slides.
It’s great to know how to turn your text into fires or how to create a transition with sparkle effects, but the reality is the focus should be on the message. Using basic or no transitions lets the content of your presentation stand out, rather than the graphics.
If you plan to use animations, make sure to use modern and professional animations that helps the audience follow the story you are telling, for example when explaining time series or changing events over time.
Only add engaging content that supports your main points
You might have a great chart, picture or even phrase you want to add, but when creating every slide, it’s crucial to ask yourself the following question.
“Does this slide help support my main point?”
If the answer is no, then remove it. Remember, less is more.
A common crutch for rookie presenters is to use slides as their teleprompter.
First of all, you shouldn’t have that much text on your slides. If you have to read off something, prepare some index cards that fit in your hand but at all costs do not turn your back on your audience and read off of your PowerPoint. The moment you do that, you make the presentation the focus, and lose the audience as the presenter.
Avoid Giving Out Copies of the Presentation
At least not before you deliver a killer presentation; providing copies of your presentation gives your audience a possible distraction where they can flip through the copy and ignore what you are saying.
It’s also easy for them to take your slides out of context without understanding the meaning behind each slide. It’s OK to give a copy of the presentation, but generally it is better to give the copies AFTER you have delivered your speech. If you decide to share a copy of your presentation, the best way to do it is by generating a QR code for it and placing it at the end of your presentation. Those who want a copy can simply scan and download it onto their phones.

Tips To Making Your Presentation More Engaging
The point of your presentation is to help deliver a message.
When expanding on a particularly important topic that requires a lengthy explanation it’s best to fade the slide into black. This removes any distraction from the screen and re-focuses it on you, the present speaker. Some presentation devices have a built-in black screen button, but if they don’t, you can always prepare for this by adding a black side to your presentation at the right moment.
“It’s not what you say, it’s how you say it.”
Part of making your presentation engaging is to use all the tools at your disposal to get your point across. Changing the inflection and tone of your voice as you present helps make the content and the points more memorable and engaging.
One easy and powerful way to make your presentation interactive is experts to discuss a particular topic during your presentation. This helps create a more engaging presentation and gives you the ability to facilitate and lead a discussion around your topic.
It’s best to prepare some questions for your panel but to also field questions from the audience in a question and answer format.
How To Make Your Presentation More Interactive
What happens if I ask you to think about a pink elephant? You probably briefly think about a pink elephant, right?
Asking questions when presenting helps engage the audience, and arouse interest and curiosity. It also has the added benefit of making people pay closer attention, in case they get called on.
So don’t be afraid to ask questions, even if rhetorical; asking a question engages a different part of our brain. It causes us to reflect rather than merely take in the information one way. So ask many of them.
Asking questions can also be an excellent way to build suspense for the next slide.

(Steve Jobs was known to ask questions during his presentations, in this slide he built suspense by asking the audience “Is there space for a device between a cell phone and a laptop?” before revealing the iPad) Source: MacWorld SF 2018
Remember the point of your presentation is to get a message across and although you are the presenter, it is completely fine to use video in your PowerPoint to enhance your presentation. A relevant video can give you some breathing time to prepare the next slides while equally informing the audience on a particular point.
CAUTION: Be sure to test the video beforehand, and that your audience can hear it in the room.
A trending engagement tool among presenters is to use a live polling tool to allow the audience to participate and collect immediate feedback.
Using a live polling tool is a fun and interactive way to engage your audience in real-time and allow them to participate in part of your presentation.

Google Slides has a built-in Q&A feature that allows presenters to make the slide deck more interactive by providing answers to the audience’s questions. By using the Q&A feature in Google Slides, presenters can start a live Q&A session and people can ask questions directly from their devices including mobile and smartphones.
Key Takeaways from one of the best presenters, Steve Jobs
He kept his slides uncluttered and always strove for simplicity.
In this slide, you can easily see he is talking about the battery life, and it uses a simple image and a few words. Learning from Jobs, you can also make a great presentation too. Focus on the core benefit of your product and incorporate great visuals.

Source: Macworld 2008
SlideModel.com can help to reproduce high-impact slides like these, keeping your audience engagement.

He was known to use large font sizes, the bigger, the better
A big font makes it hard to miss the message on the slide, and allows the audience to focus on the presenter while clearing the understanding what the point of the slide is.
He found made the complex sound simple
When explaining a list of features, he used a simple image and lines or simple tables to provide visual cues to his talking points.

(This particular slide is referencing the iMac features)
What made Steve Jobs the master of presentation, was the ritual of practicing with his team, and this is simple yet often overlooked by many presenters. It’s easy to get caught in the trap of thinking you don’t need to practice because you know the material so well.
While all these tips will help you create a truly powerful presentation , it can only achieve if applied correctly.
It’s important to remember when trying to deliver an amazing experience, you should be thoroughly prepared. This way, you can elevate your content presentation, convey your message effectively and captivate your audience.
This includes having your research cited, your presentation rehearsed. Don’t just rehearse your slides, also take time to practice your delivery, and your tone. The more you rehearse, the more relaxed you will be when delivering. The more confident you will feel.
While we can’t help you with the practice of your next presentation, we can help you by making sure you look good, and that you have a great design and cohesiveness.

You focus on the message and content; we’ll focus on making you look good.
Have a tip you would like to include? Be sure to mention it in the comments!

Like this article? Please share
Audience, Engaging, Feedback, Interactive, Poll, Rule of Three, Steve Jobs Filed under Presentation Ideas
Related Articles

Filed under Presentation Ideas • November 29th, 2023
The Power of Audience Engagement: Strategies and Examples
As presenters, captivating the interest of our viewers is the most important thing. Join us to learn all that’s required to boost audience engagement.

Filed under Business • April 30th, 2020
A Manager’s Guide to Interpersonal Communication
People are promoted to management positions for a variety of reasons. For many, they rise to the top because of their knowledge, technical skills, and decision-making capabilities. As a manager, your effectiveness also strongly depends on your ability to communicate well with your team members and other stakeholders. Here is a quick guide on Interpersonal Communication for Managers.

Filed under Business • June 27th, 2019
Using 360 Degree Feedback in Your Organization
Many organizations use 360 degree feedback to provide assessment for employees via multiple sources to analyze the knowledge, skill and behavior of employees. It is also known as multi-rater feedback, multi-source feedback, 360 Degree Review and multi-source assessment, since it is used frequently for assessing the performance of an employee and to determine his/her future […]
2 Responses to “23 PowerPoint Presentation Tips for Creating Engaging and Interactive Presentations”
Very great advices!
Greetings ! A compact composed communication for the host to have an impact -VOICE
Thank You ?
Leave a Reply
Microsoft PowerPoint can now help you practice presentations almost anywhere — no humans required
Now you can improve your presenting skills on the go.
By Mitchell Clark
Share this story
If you buy something from a Verge link, Vox Media may earn a commission. See our ethics statement.
:format(webp)/cdn.vox-cdn.com/uploads/chorus_asset/file/22378572/Screen_Shot_2021_03_17_at_2.54.00_PM.png "powerpoint presentation practice")
Microsoft’s Presenter Coach, which helps you practice presentations, has been available on the web version of PowerPoint for a while now, but it’s finally coming to the desktop and mobile versions of the app. According to Microsoft , the feature will now be available on Mac, Windows, iOS, Android, and, of course, the web.
PowerPoint Presenter Coach listens to you while you practice a presentation out loud — it analyzes what you’re saying, and can warn you if you’re talking too fast or slow, using filler words like “um” or “ahh,” or just reading the words off the slide (a personal pet peeve of mine). Trying it out on both PowerPoint for Windows and iOS, it worked shockingly well, doing pretty much everything Microsoft says it should. At the end it gives you a little report, telling you what you need to practice.
Along with the expanded availability, there are also some new ways that the feature can try to make your presentation better: it can look at body language (how close you are to the camera, if you’re making eye contact or putting things in front of your face), and warn you if you’re repeating words or saying them wrong. And yes, it still tells you not to swear in your presentation.
:format(webp)/cdn.vox-cdn.com/uploads/chorus_asset/file/22378650/Screen_Shot_2021_03_17_at_3.42.03_PM.png "powerpoint presentation practice")
When I tried it, the feature didn’t show up in the Mac version of the app, but I was able to use it on iOS. Microsoft said the Presenter feature would be rolled out to all Mac users by the end of the month.
Microsoft also said that the processing for the feature is done on its servers, but is not stored. It is worth keeping in mind that this means you won’t be able to use the feature without an internet connection.
Update March 18th, 12:00PM ET : Added information from Microsoft regarding the Mac version and where the data is analyzed.
Sonos is teasing its ‘most requested product ever’ on Tuesday
The ai assistants are getting better fast, the five-year journey to make an adventure game out of ink and paper, the msi claw is an embarrassment, sugar’s big twist was more than a gimmick.
More from Tech
:format(webp)/cdn.vox-cdn.com/uploads/chorus_asset/file/24365737/Wyze_Cam_OG_Telephoto_8.jpg "powerpoint presentation practice")
Wyze cameras let some owners see into a stranger’s home — again
:format(webp)/cdn.vox-cdn.com/uploads/chorus_asset/file/24049860/226292_Apple_Watch_SE_PHO_akrales_0047.jpg "powerpoint presentation practice")
Here are the best Apple Watch deals right now
OpenAI can’t register ‘GPT’ as a trademark — yet
:format(webp)/cdn.vox-cdn.com/uploads/chorus_asset/file/25184511/111323_PlayStation_Portal_ADiBenedetto_0013.jpg "powerpoint presentation practice")
Sony’s portable PlayStation Portal is back in stock
Critical PowerPoint Shortcuts – Claim Your FREE Training Module and Get Your Time Back!
How to Make a PowerPoint Presentation (Step-by-Step)
- PowerPoint Tutorials
- Presentation Design
- January 22, 2024
In this beginner’s guide, you will learn step-by-step how to make a PowerPoint presentation from scratch.
While PowerPoint is designed to be intuitive and accessible, it can be overwhelming if you’ve never gotten any training on it before. As you progress through this guide, you’ll will learn how to move from blank slides to PowerPoint slides that look like these.

Table of Contents
Additionally, as you create your presentation, you’ll also learn tricks for working more efficiently in PowerPoint, including how to:
- Change the slide order
- Reset your layout
- Change the slide dimensions
- Use PowerPoint Designer
- Format text
- Format objects
- Play a presentation (slide show)
With this knowledge under your belt, you’ll be ready to start creating PowerPoint presentations. Moreover, you’ll have taken your skills from beginner to proficient in no time at all. I will also include links to more advanced PowerPoint topics.
Ready to start learning how to make a PowerPoint presentation?
Take your PPT skills to the next level
Start with a blank presentation.
Note: Before you open PowerPoint and start creating your presentation, make sure you’ve collected your thoughts. If you’re going to make your slides compelling, you need to spend some time brainstorming.
For help with this, see our article with tips for nailing your business presentation here .
The first thing you’ll need to do is to open PowerPoint. When you do, you are shown the Start Menu , with the Home tab open.
This is where you can choose either a blank theme (1) or a pre-built theme (2). You can also choose to open an existing presentation (3).
For now, go ahead and click on the Blank Presentation (1) thumbnail.

Doing so launches a brand new and blank presentation for you to work with. Before you start adding content to your presentation, let’s first familiarize ourselves with the PowerPoint interface.
The PowerPoint interface

Here is how the program is laid out:
- The Application Header
- The Ribbon (including the Ribbon tabs)
- The Quick Access Toolbar (either above or below the Ribbon)
- The Slides Pane (slide thumbnails)
The Slide Area
The notes pane.
- The Status Bar (including the View Buttons)
Each one of these areas has options for viewing certain parts of the PowerPoint environment and formatting your presentation.
Below are the important things to know about certain elements of the PowerPoint interface.
The PowerPoint Ribbon

The Ribbon is contextual. That means that it will adapt to what you’re doing in the program.
For example, the Font, Paragraph and Drawing options are greyed out until you select something that has text in it, as in the example below (A).

Furthermore, if you start manipulating certain objects, the Ribbon will display additional tabs, as seen above (B), with more commands and features to help you work with those objects. The following objects have their own additional tabs in the Ribbon which are hidden until you select them:
- Online Pictures
- Screenshots
- Screen Recording
The Slides Pane

This is where you can preview and rearrange all the slides in your presentation.
Right-clicking on a slide in the pane gives you additional options on the slide level that you won’t find on the Ribbon, such as Duplicate Slide , Delete Slide , and Hide Slide .

In addition, you can add sections to your presentation by right-clicking anywhere in this Pane and selecting Add Section . Sections are extremely helpful in large presentations, as they allow you to organize your slides into chunks that you can then rearrange, print or display differently from other slides.

The Slide Area (A) is where you will build out your slides. Anything within the bounds of this area will be visible when you present or print your presentation.
Anything outside of this area (B) will be hidden from view. This means that you can place things here, such as instructions for each slide, without worrying about them being shown to your audience.

The Notes Pane is the space beneath the Slide Area where you can type in the speaker notes for each slide. It’s designed as a fast way to add and edit your slides’ talking points.
To expand your knowledge and learn more about adding, printing, and exporting your PowerPoint speaker notes, read our guide here .
Your speaker notes are visible when you print your slides using the Notes Pages option and when you use the Presenter View . To expand your knowledge and learn the ins and outs of using the Presenter View , read our guide here .

You can resize the Notes Pane by clicking on its edge and dragging it up or down (A). You can also minimize or reopen it by clicking on the Notes button in the Status Bar (B).
Note: Not all text formatting displays in the Notes Pane, even though it will show up when printing your speaker notes. To learn more about printing PowerPoint with notes, read our guide here .
Now that you have a basic grasp of the PowerPoint interface at your disposal, it’s time to make your presentation.
Adding Content to Your PowerPoint Presentation
Notice that in the Slide Area , there are two rectangles with dotted outlines. These are called Placeholders and they’re set on the template in the Slide Master View .
To expand your knowledge and learn how to create a PowerPoint template of your own (which is no small task), read our guide here .

As the prompt text suggests, you can click into each placeholder and start typing text. These types of placeholder prompts are customizable too. That means that if you are using a company template, it might say something different, but the functionality is the same.

Note: For the purposes of this example, I will create a presentation based on the content in the Starbucks 2018 Global Social Impact Report, which is available to the public on their website.
If you type in more text than there is room for, PowerPoint will automatically reduce its font size. You can stop this behavior by clicking on the Autofit Options icon to the left of the placeholder and selecting Stop Fitting Text to this Placeholder .
Next, you can make formatting adjustments to your text by selecting the commands in the Font area and the Paragraph area of the Home tab of the Ribbon.

The Reset Command: If you make any changes to your title and decide you want to go back to how it was originally, you can use the Reset button up in the Home tab .

Insert More Slides into Your Presentation
Now that you have your title slide filled in, it’s time to add more slides. To do that, simply go up to the Home tab and click on New Slide . This inserts a new slide in your presentation right after the one you were on.

You can alternatively hit Ctrl+M on your keyboard to insert a new blank slide in PowerPoint. To learn more about this shortcut, see my guide on using Ctrl+M in PowerPoint .
Instead of clicking the New Slide command, you can also open the New Slide dropdown to see all the slide layouts in your PowerPoint template. Depending on who created your template, your layouts in this dropdown can be radically different.

If you insert a layout and later want to change it to a different layout, you can use the Layout dropdown instead of the New Slide dropdown.
After inserting a few different slide layouts, your presentation might look like the following picture. Don’t worry that it looks blank, next we will start adding content to your presentation.

If you want to follow along exactly with me, your five slides should be as follows:
- Title Slide
- Title and Content
- Section Header
- Two Content
- Picture with Caption
Adding Content to Your Slides
Now let’s go into each slide and start adding our content. You’ll notice some new types of placeholders.

On slide 2 we have a Content Placeholder , which allows you to add any kind of content. That includes:
- A SmartArt graphic,
- A 3D object,
- A picture from the web,
- Or an icon.
To insert text, simply type it in or hit Ctrl+C to Copy and Ctrl+V to Paste from elsewhere. To insert any of the other objects, click on the appropriate icon and follow the steps to insert it.
For my example, I’ll simply type in some text as you can see in the picture below.

Slides 3 and 4 only have text placeholders, so I’ll go ahead and add in my text into each one.

On slide 5 we have a Picture Placeholder . That means that the only elements that can go into it are:
- A picture from the web

To insert a picture into the picture placeholder, simply:
- Click on the Picture icon
- Find a picture on your computer and select it
- Click on Insert
Alternatively, if you already have a picture open somewhere else, you can select the placeholder and paste in (shortcut: Ctrl+V ) the picture. You can also drag the picture in from a file explorer window.

If you do not like the background of the picture you inserted onto your slide, you can remove the background here in PowerPoint. To see how to do this, read my guide here .
Placeholders aren’t the only way to add content to your slides. At any point, you can use the Insert tab to add elements to your slides.
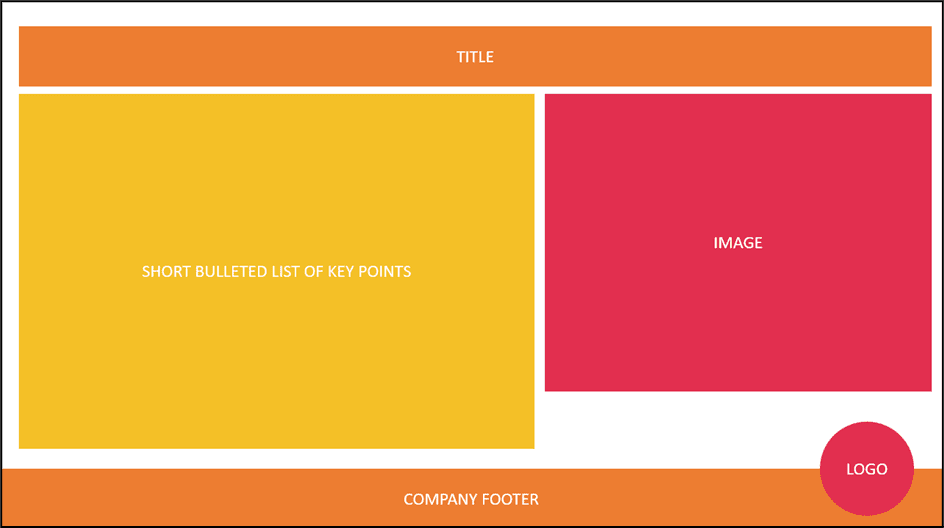
You can use either the Title Only or the Blank slide layout to create slides for content that’s different. For example, a three-layout content slide, or a single picture divider slide, as shown below.

In the first example above, I’ve inserted 6 text boxes, 3 icons, and 3 circles to create this layout. In the second example, I’ve inserted a full-sized picture and then 2 shapes and 2 text boxes.
The Reset Command: Because these slides are built with shapes and text boxes (and not placeholders), hitting the Reset button up in the Home tab won’t do anything.
That is a good thing if you don’t want your layouts to adjust. However, it does mean that it falls on you to make sure everything is aligned and positioned correctly.
For more on how to add and manipulate the different objects in PowerPoint, check out our step-by-step articles here:
- Using graphics in PowerPoint
- Inserting icons onto slides
- Adding pictures to your PowerPoint
- How to embed a video in PowerPoint
- How to add music to your presentation
Using Designer to generate more layouts ideas
If you have Office 365, your version of PowerPoint comes with a new feature called Designer (or Design Ideas). This is a feature that generates slide layout ideas for you. The coolest thing about this feature is that it uses the content you already have.
To use Designer , simply navigate to the Design tab in your Ribbon, and click on Design Ideas .

NOTE: If the PowerPoint Designer is not working for you (it is grey out), see my troubleshooting guide for Designer .
Change the Overall Design (optional)
When you make a PowerPoint presentation, you’ll want to think about the overall design. Now that you have some content in your presentation, you can use the Design tab to change the look and feel of your slides.
For additional help thinking through the design of your presentation, read my guide here .
A. Picking your PowerPoint slide size
If you have PowerPoint 2013 or later, when you create a blank document in PowerPoint, you automatically start with a widescreen layout with a 16:9 ratio. These dimensions are suitable for most presentations as they match the screens of most computers and projectors.
However, you do have the option to change the dimensions.
For example, your presentation might not be presented, but instead converted into a PDF or printed and distributed. In that case, you can easily switch to the standard dimensions with a 4:3 ratio by selecting from the dropdown (A).
You can also choose a custom slide size or change the slide orientation from landscape to portrait in the Custom Slide Size dialog box (B).

To learn all about the different PowerPoint slide sizes, and some of the issues you will face when changing the slide size of a non-blank presentation, read my guide here .
B. Selecting a PowerPoint theme
The next thing you can do is change the theme of your presentation to a pre-built one. For a detailed explanation of what a PowerPoint theme is, and how to best use it, read my article here .
In the beginning of this tutorial, we started with a blank presentation, which uses the default Office theme as you can see in the picture below.

That gives you the most flexibility because it has a blank background and quite simple layouts that work for most presentations. However, it also means that it’s your responsibility to enhance the design.
If you’re comfortable with this, you can stay with the default theme or create your own custom theme ( read my guide here ). But if you would rather not have to think about design, then you can choose a pre-designed theme.
Microsoft provides 46 other pre-built themes, which include slide layouts, color variants and palettes, and fonts. Each one varies quite significantly, so make sure you look through them carefully.
To select a different theme, go to the Design tab in the Ribbon, and click on the dropdown arrow in the Themes section .

For this tutorial, let’s select the Frame theme and then choose the third Variant in the theme. Doing so changes the layout, colors, and fonts of your presentation.

Note: The theme dropdown area is also where you can import or save custom themes. To see my favorite places to find professional PowerPoint templates and themes (and recommendations for why I like them), read my guide here .
C. How to change a slide background in PowerPoint
The next thing to decide is how you want your background to look for the entire presentation. In the Variants area, you can see four background options.

For this example, we want our presentation to have a dark background, so let’s select Style 3. When you do so, you’ll notice that:
- The background color automatically changes across all slides
- The color of the text on most of the slides automatically changes to white so that it’s visible on the dark background
- The colors of the objects on slides #6 and #7 also adjust, in a way we may not want (we’ll likely have to make some manual adjustments to these slides)

Note: If you want to change the slide background for just that one slide, don’t left-click the style. Instead, right-click it and select Apply to Selected Slides .
After you change the background for your entire presentation, you can easily adjust the background for an individual slide.

Inside the Format Background pane, you can see you have the following options:
- Gradient fill
- Picture or texture fill
- Pattern fill
- Hide background
You can explore these options to find the PowerPoint background that best fits your presentation.
D. How to change your color palette in PowerPoint
Another thing you may want to adjust in your presentation, is the color scheme. In the picture below you can see the Theme Colors we are currently using for this presentation.

Each PowerPoint theme comes with its own color palette. By default, the Office theme includes the Office color palette. This affects the colors you are presented with when you format any element within your presentation (text, shapes, SmartArt, etc.).

The good news is that the colors here are easy to change. To switch color palettes, simply:
- Go to the Design tab in the Ribbon
- In the Variants area, click on the dropdown arrow and select Colors
- Select the color palette (or theme colors) you want
You can choose among the pre-built color palettes from Office, or you can customize them to create your own.
As you build your presentation, make sure you use the colors from your theme to format objects. That way, changing the color palette adjusts all the colors in your presentation automatically.
E. How to change your fonts in PowerPoint
Just as we changed the color palette, you can do the same for the fonts.

Each PowerPoint theme comes with its own font combination. By default, the Office theme includes the Office font pairing. This affects the fonts that are automatically assigned to all text in your presentation.

The good news is that the font pairings are easy to change. To switch your Theme Fonts, simply:
- Go to the Design tab in the Ribbon
- Click on the dropdown arrow in the Variants area
- Select Fonts
- Select the font pairing you want
You can choose among the pre-built fonts from Office, or you can customize them to create your own.
If you are working with PowerPoint presentations on both Mac and PC computers, make sure you choose a safe PowerPoint font. To see a list of the safest PowerPoint fonts, read our guide here .
If you receive a PowerPoint presentation and the wrong fonts were used, you can use the Replace Fonts dialog box to change the fonts across your entire presentation. For details, read our guide here .
Adding Animations & Transitions (optional)
The final step to make a PowerPoint presentation compelling, is to consider using animations and transitions. These are by no means necessary to a good presentation, but they may be helpful in your situation.
A. Adding PowerPoint animations
PowerPoint has an incredibly robust animations engine designed to power your creativity. That being said, it’s also easy to get started with basic animations.
Animations are movements that you can apply to individual objects on your slide.

To add a PowerPoint animation to an element of your slide, simply:
- Select the element
- Go to the Animations tab in the Ribbon
- Click on the dropdown arrow to view your options
- Select the animation you want
You can add animations to multiple objects at one time by selecting them all first and then applying the animation.
B. How to preview a PowerPoint animation

There are three ways to preview a PowerPoint animation:
- Click on the Preview button in the Animations tab
- Click on the little star next to the slide
- Play the slide in Slide Show Mode
To learn other ways to run your slide show, see our guide on presenting a PowerPoint slide show with shortcuts .
To adjust the settings of your animations, explore the options in the Effect Options , Advanced Animation and the Timing areas of the Animation tab .

Note: To see how to make objects appear and disappear in your slides by clicking a button, read our guide here .
C. How to manage your animations in PowerPoint

The best way to manage lots of animations on your slide is with the Animation Pane . To open it, simply:
- Navigate to the Animations tab
- Select the Animation Pane
Inside the Animation Pane, you’ll see all of the different animations that have been applied to objects on your slide, with their numbers marked as pictured above.
Note: To see examples of PowerPoint animations that can use in PowerPoint, see our list of PowerPoint animation tutorials here .
D. How to add transitions to your PowerPoint presentation
PowerPoint has an incredibly robust transition engine so that you can dictate how your slides change from one to the other. It is also extremely easy to add transitions to your slides.
In PowerPoint, transitions are the movements (or effects) you see as you move between two slides.

To add a transition to a PowerPoint slide, simply:
- Select the slide
- Go to the Transitions tab in the Ribbon
- In the Transitions to This Slide area, click on the dropdown arrow to view your options
- Select the transition you want
To adjust the settings of the transition, explore the options in the Timing area of the Transitions tab.
You can also add the same transition to multiple slides. To do that, select them in the Slides Pane and apply the transition.
E. How to preview a transition in PowerPoint

There are three ways to preview your PowerPoint transitions (just like your animations):
- Click on the Preview button in the Transitions tab
- Click on the little star beneath the slide number in the thumbnail view
Note: In 2016, PowerPoint added a cool new transition, called Morph. It operates a bit differently from other transitions. For a detailed tutorial on how to use the cool Morph transition, see our step-by-step article here .
Save Your PowerPoint Presentation
After you’ve built your presentation and made all the adjustments to your slides, you’ll want to save your presentation. YOu can do this several different ways.

To save a PowerPoint presentation using your Ribbon, simply:
- Navigate to the File tab
- Select Save As on the left
- Choose where you want to save your presentation
- Name your presentation and/or adjust your file type settings
- Click Save
You can alternatively use the Ctrl+S keyboard shortcut to save your presentation. I recommend using this shortcut frequently as you build your presentation to make sure you don’t lose any of your work.

This is the standard way to save a presentation. However, there may be a situation where you want to save your presentation as a different file type.
To learn how to save your presentation as a PDF, see our guide on converting PowerPoint to a PDF .
How to save your PowerPoint presentation as a template
Once you’ve created a presentation that you like, you may want to turn it into a template. The easiest – but not technically correct – way, is to simply create a copy of your current presentation and then change the content.
But be careful! A PowerPoint template is a special type of document and it has its own parameters and behaviors.
If you’re interested in learning about how to create your own PowerPoint template from scratch, see our guide on how to create a PowerPoint template .
Printing Your PowerPoint Presentation
After finishing your PowerPoint presentation, you may want to print it out on paper. Printing your slides is relatively easy.

To open the Print dialog box, you can either:
- Hit Ctrl+P on your keyboard
- Or go to the Ribbon and click on File and then Print

Inside the Print dialog box, you can choose from the various printing settings:
- Printer: Select a printer to use (or print to PDF or OneNote)
- Slides: Choose which slides you want to print
- Layout: Determine how many slides you want per page (this is where you can print the notes, outline, and handouts)
- Collated or uncollated (learn what collated printing means here )
- Color: Choose to print in color, grayscale or black & white
There are many more options for printing your PowerPoint presentations. Here are links to more in-depth articles:
- How to print multiple slides per page
- How to print your speaker notes in PowerPoint
- How to save PowerPoint as a picture presentation
So that’s how to create a PowerPoint presentation if you are brand new to it. We’ve also included a ton of links to helpful resources to boost your PowerPoint skills further.
When you are creating your presentation, it is critical to first focus on the content (what you are trying to say) before getting lost inserting and playing with elements. The clearer you are on what you want to present, the easier it will be to build it out in PowerPoint.
If you enjoyed this article, you can learn more about our PowerPoint training courses and other presentation resources by visiting us here .
🔒 Unlock the PowerPoint Shortcuts Trusted by Industry Leaders KKR, American Express, HSBC, and More!
Join over 114,880 professionals from diverse fields including consulting, investment banking, advertising, marketing, sales, and business development who have supercharged their PowerPoint game with our proven methods.
✅ Customize compelling presentations effortlessly.
✅ Master time-saving techniques for faster deck creation.
✅ Boost your career prospects with top-notch PowerPoint skills.
Get FREE access to the Critical PowerPoint Shortcuts module of our premium training course by entering your name and email below.
DISCLAIMER: PC Users Only!
We respect your privacy and will keep your info safe and confidential.
About The Author

Popular Tutorials
- How to Strikethrough Text (l̶i̶k̶e̶ ̶t̶h̶i̶s̶) in Word, Excel & PowerPoint
- How to Make Animated Fireworks in PowerPoint (Step-by-Step)
- Strikethrough Shortcut (l̶i̶k̶e̶ ̶t̶h̶i̶s̶) for Word, Excel & PowerPoint
- How to Create a Flash Card Memory Game in PowerPoint (Like Jeopardy)
- Keyboard Shortcuts Not Working: Solved
PowerPoint Tutorial Categories
- Strategies & Opinions
- Shortcuts & Hacks
- Pictures, Icons, Videos, Etc.
- New Features
- Miscellaneous
- Charts & Data Viz
We help busy professionals save hours and gain peace of mind, with corporate workshops, self-paced courses and tutorials for PowerPoint and Word.
Work With Us
- Corporate Training
- Presentation & Template Design
- Courses & Downloads
- PowerPoint Articles
- Word Articles
- Productivity Resources
Find a Tutorial
- Free Training
- For Businesses
We help busy office workers save hours and gain peace of mind, with tips, training and tutorials for Microsoft PowerPoint and Word.
Master Critical PowerPoint Shortcuts – Secure Your FREE Training Module and Save Valuable Time!
⌛ Master time-saving expert techniques.
🔥 Create powerful presentations.
🚀 Propel your career to new heights.
We value your privacy – we keep your info safe.
Discover PowerPoint Hacks Loved by Industry Giants - KKR, AmEx, HSBC!
Over 114,880 professionals in finance, marketing and sales have revolutionized their PPT skills with our proven methods.
Gain FREE access to a full module of our premium PowerPoint training program – Get started today!
We hate spam too and promise to keep your information safe.
You are currently viewing a placeholder content from Facebook . To access the actual content, click the button below. Please note that doing so will share data with third-party providers.
How-To Geek
8 tips to make the best powerpoint presentations.
Want to make your PowerPoint presentations really shine? Here's how to impress and engage your audience.
Quick Links
Table of contents, start with a goal, less is more, consider your typeface, make bullet points count, limit the use of transitions, skip text where possible, think in color, take a look from the top down, bonus: start with templates.
Slideshows are an intuitive way to share complex ideas with an audience, although they're dull and frustrating when poorly executed. Here are some tips to make your Microsoft PowerPoint presentations sing while avoiding common pitfalls.
It all starts with identifying what we're trying to achieve with the presentation. Is it informative, a showcase of data in an easy-to-understand medium? Or is it more of a pitch, something meant to persuade and convince an audience and lead them to a particular outcome?
It's here where the majority of these presentations go wrong with the inability to identify the talking points that best support our goal. Always start with a goal in mind: to entertain, to inform, or to share data in a way that's easy to understand. Use facts, figures, and images to support your conclusion while keeping structure in mind (Where are we now and where are we going?).
I've found that it's helpful to start with the ending. Once I know how to end a presentation, I know how best to get to that point. I start by identifying the takeaway---that one nugget that I want to implant before thanking everyone for their time---and I work in reverse to figure out how best to get there.
Your mileage, of course, may vary. But it's always going to be a good idea to put in the time in the beginning stages so that you aren't reworking large portions of the presentation later. And that starts with a defined goal.
A slideshow isn't supposed to include everything. It's an introduction to a topic, one that we can elaborate on with speech. Anything unnecessary is a distraction. It makes the presentation less visually appealing and less interesting, and it makes you look bad as a presenter.
This goes for text as well as images. There's nothing worse, in fact, than a series of slides where the presenter just reads them as they appear. Your audience is capable of reading, and chances are they'll be done with the slide, and browsing Reddit, long before you finish. Avoid putting the literal text on the screen, and your audience will thank you.
Related: How to Burn Your PowerPoint to DVD
Right off the bat, we're just going to come out and say that Papyrus and Comic Sans should be banned from all PowerPoint presentations, permanently. Beyond that, it's worth considering the typeface you're using and what it's saying about you, the presenter, and the presentation itself.
Consider choosing readability over aesthetics, and avoid fancy fonts that could prove to be more of a distraction than anything else. A good presentation needs two fonts: a serif and sans-serif. Use one for the headlines and one for body text, lists, and the like. Keep it simple. Veranda, Helvetica, Arial, and even Times New Roman are safe choices. Stick with the classics and it's hard to botch this one too badly.
There reaches a point where bullet points become less of a visual aid and more of a visual examination.
Bullet points should support the speaker, not overwhelm his audience. The best slides have little or no text at all, in fact. As a presenter, it's our job to talk through complex issues, but that doesn't mean that we need to highlight every talking point.
Instead, think about how you can break up large lists into three or four bullet points. Carefully consider whether you need to use more bullet points, or if you can combine multiple topics into a single point instead. And if you can't, remember that there's no one limiting the number of slides you can have in a presentation. It's always possible to break a list of 12 points down into three pages of four points each.
Animation, when used correctly, is a good idea. It breaks up slow-moving parts of a presentation and adds action to elements that require it. But it should be used judiciously.
Adding a transition that wipes left to right between every slide or that animates each bullet point in a list, for example, starts to grow taxing on those forced to endure the presentation. Viewers get bored quickly, and animations that are meant to highlight specific elements quickly become taxing.
That's not to say that you can't use animations and transitions, just that you need to pick your spots. Aim for no more than a handful of these transitions for each presentation. And use them in spots where they'll add to the demonstration, not detract from it.
Sometimes images tell a better story than text can. And as a presenter, your goal is to describe points in detail without making users do a lot of reading. In these cases, a well-designed visual, like a chart, might better convey the information you're trying to share.
The right image adds visual appeal and serves to break up longer, text-heavy sections of the presentation---but only if you're using the right images. A single high-quality image can make all the difference between a success and a dud when you're driving a specific point home.
When considering text, don't think solely in terms of bullet points and paragraphs. Tables, for example, are often unnecessary. Ask yourself whether you could present the same data in a bar or line chart instead.
Color is interesting. It evokes certain feelings and adds visual appeal to your presentation as a whole. Studies show that color also improves interest, comprehension, and retention. It should be a careful consideration, not an afterthought.
You don't have to be a graphic designer to use color well in a presentation. What I do is look for palettes I like, and then find ways to use them in the presentation. There are a number of tools for this, like Adobe Color , Coolors , and ColorHunt , just to name a few. After finding a palette you enjoy, consider how it works with the presentation you're about to give. Pastels, for example, evoke feelings of freedom and light, so they probably aren't the best choice when you're presenting quarterly earnings that missed the mark.
It's also worth mentioning that you don't need to use every color in the palette. Often, you can get by with just two or three, though you should really think through how they all work together and how readable they'll be when layered. A simple rule of thumb here is that contrast is your friend. Dark colors work well on light backgrounds, and light colors work best on dark backgrounds.
Spend some time in the Slide Sorter before you finish your presentation. By clicking the four squares at the bottom left of the presentation, you can take a look at multiple slides at once and consider how each works together. Alternatively, you can click "View" on the ribbon and select "Slide Sorter."
Are you presenting too much text at once? Move an image in. Could a series of slides benefit from a chart or summary before you move on to another point?
It's here that we have the opportunity to view the presentation from beyond the single-slide viewpoint and think in terms of how each slide fits, or if it fits at all. From this view, you can rearrange slides, add additional ones, or delete them entirely if you find that they don't advance the presentation.
The difference between a good presentation and a bad one is really all about preparation and execution. Those that respect the process and plan carefully---not only the presentation as a whole, but each slide within it---are the ones who will succeed.
This brings me to my last (half) point: When in doubt, just buy a template and use it. You can find these all over the web, though Creative Market and GraphicRiver are probably the two most popular marketplaces for this kind of thing. Not all of us are blessed with the skills needed to design and deliver an effective presentation. And while a pre-made PowerPoint template isn't going to make you a better presenter, it will ease the anxiety of creating a visually appealing slide deck.
Simon Sez IT
Online software training and video tutorials for Microsoft, Adobe & more
- Get Started
- Access 2021 Beginners
- Access 2021 Advanced
- Access 2019
- Access 2019 Advanced
- Access 2016
- Copilot Essentials in Microsoft Office
- Microsoft Excel 365 Advanced
- Microsoft Excel 365 Intermediate
- Excel 365 for Beginners
- The Accountants Excel Toolkit
- Data Analytics in Excel
- Microsoft 365
- PowerPoint 365 for Beginners
- Microsoft Word 365
- OneNote Desktop and Windows 10
- OneNote 2016
- Outlook 2021
- Outlook 2019
- Outlook 2016
- Outlook 2013
- Outlook 2010
- Introduction to Power Automate
- Power BI Essentials
- Power BI Training
- Power BI Intermediate
- PowerPoint 2021
- PowerPoint 2019
- PowerPoint 2016
- PowerPoint 2013
- Project 2021 Advanced
- Project 2021 Beginners
- Project for the Web
- Project 2019
- Project 2019 Advanced
- Microsoft Publisher 365
- Publisher 2013
- SharePoint Online: The Essential Guide (2023)
- SharePoint Online (2021)
- SharePoint Foundation 2013
- SharePoint Server 2013
- SharePoint Foundation 2010
- Microsoft Teams (2023 Update)
- Macros and VBA for Beginners
- VBA for Excel
- VBA Intermediate Training
- Microsoft Visio 2019
- Microsoft Visio 2010
- Windows 11 Advanced
- Windows 11 (2023 Update)
- Windows 10 (2020 Update)
- Word 2019 Advanced
- Dreamweaver CC
- Dreamweaver CS6
- Dreamweaver CS5
- Dreamweaver CS4
- Adobe Illustrator CC for Beginners
- Adobe InDesign CC for Beginners
- InDesign CS6
- InDesign CS5
- Adobe Photoshop CC Advanced
- Adobe Photoshop CC Intermediate
- Adobe Photoshop CC for Beginners
- Photoshop CS6
- Photoshop CS5
- Photoshop Elements 2022
- Photoshop Elements 2019
- Photoshop Elements 2018
- Photoshop Elements 15
- Photoshop Elements 14
- QuickBooks Online 2024
- QuickBooks Desktop 2024
- QuickBooks Desktop 2023
- QuickBooks Desktop Pro 2022
- QuickBooks Pro 2021
- AngularJS Crash Course
- Bootstrap Framework
- HTML/CSS Crash Course
- HTML5 Essentials
- Java for Beginners
- JavaScript for Beginners
- jQuery Crash Course
- MySQL for Beginners
- PHP for Beginners
- Advanced PHP Programming
- Matplotlib, Seaborn, and Plotly Python Libraries for Beginners
- Python Object-Oriented Programming
- Pandas for Beginners
- Introduction to Python
- SQL for Beginners
- SQL Server Integration Services for Beginners
- XML Crash Course
- Alteryx Advanced
- Introduction to Alteryx
- Introduction to Data Visualization and Business Intelligence Principles
- Analytical Methods for Effective Data Analysis
- Introduction to Analytics and Artificial Intelligence
- Financial Risk Management
- Financial Forecasting and Modeling
- Qlik Sense Advanced
- R Programming
- Tableau Desktop Advanced
- Tableau Desktop
- Advanced Agile Scrum
- Agile Scrum Training
- Using Generative AI for Images and Videos
- Generative AI and Cybersecurity
- Introduction to ChatGPT
- Artificial Intelligence Intermediate
- Introduction to Asana for Project Management
- Asana for Employees and Managers
- Introduction to Asana
- Effective Communication Tactics for the Modern Workplace
- Introduction to Confluence
- Introduction to Pipedrive
- HubSpot CRM for Beginners
- Introduction to Google Chrome
- Introduction to Google Calendar
- Introduction to Google Drive
- Gmail for Beginners and Pros
- Google Sheets for Beginners
- Getting Started in Jira
- Getting Started in Monday.com
- Cybersecurity Essentials: Stay Safe and Secure Online
- Cybersecurity Awareness Essentials
- Introduction to Wrike for Project Management
- Excel Efficiency and Data Management
- Excel Advanced Features and Customization
- Mastering PivotTables
- Microsoft Suite Productivity

Powerpoint Presentation Tips and Best Practices
(Note: S uitable for users of PowerPoint 2016, 2019, 2021, and PowerPoint for Microsoft 365 . )
Understand the dos and don’ts of effective PowerPoint design that adheres to best practice guidelines.
PowerPoint Presentation Tips and Design Explained
PowerPoint is a presentation application that helps us communicate our thoughts and ideas to an audience. It’s designed to assist the presenter, not to be a replacement for the presenter. However, simply ‘slapping’ together a few slides and adding some text and a couple of images doesn’t quite cut it in 2022.
PowerPoint has evolved in leaps and bounds over the last few years. No longer are we stuck with creating long, linear slide decks full of bulleted lists and text, inflicting ‘Death by PowerPoint’ on our audience.
Modern slide design tells a story. It allows the viewer to choose their own path through the presentation. We use animation sparingly and effectively. We think about color, font, and accessibility. We choose images over text and consider our audience before we begin our design.
The latest versions of PowerPoint (365, 2016, 2019, 2021) contain many new features to help us build a truly awesome PowerPoint presentation. However, the ‘rules’ with regard to effective design remain the same as ever. By knowing and employing a few basic best practice principles, we can create an attractive, modern presentation that communicates our message effectively.
1. What is the Goal?
2. know your audience, 3. create an outline, 4. decide on visuals.
- 5. Text. Less is More
6. Use Readable Fonts
7. be mindful of color, 8. design for wide screen, 9. be consistent with style.
- 10. Animation. Less is More
11. Consider Templates
12. end with action points.
Related reads:
How to Wrap Text in PowerPoint
How to Add a Watermark in PowerPoint
How to Add a Hyperlink to a PowerPoint
Best Practice Guidelines
Best Practice Guidelines give us a framework from which to work within. Much like a blueprint, we can follow these rules to ensure we are designing our slide deck in the best way for our audience.
Before we begin, it’s important to establish the goal of the presentation, as this will affect how we design our slides. What are we hoping to achieve? Is this a Sales pitch to a potential client? Are we trying to sell a product or service? Is this an internal presentation for our team? Work out what the goal is prior to creating slides.
For example, if this is a sales pitch to a potential client, it’s important to get to the relevant points quickly. Identify early where you see problems and then offer solutions. This helps get ‘buy-in’, and the client understands how we can benefit their organization. If we present data in charts, ensure the charts are simple to read and communicate key metrics important to that client.
It’s also worth thinking about how to end the presentation. Do we want our audience to take action on something? Do we want to encourage them to follow us on social media? Or maybe we need them to go to a website and register for a newsletter. Maybe we want them to think about certain key points and provide feedback at a later time. Remember to include clear calls to action.

Establishing who we are presenting to is vital. Different audiences will require different slide designs. For example, if we are presenting to a board of CEOs and stakeholders, we need to ensure the presentation is professional, business-like, focused on key metrics, and establishes our brand. Whereas, if we are putting together a presentation for our local tennis club, we can afford to be more relaxed with the design.
Our audience determines how we design a presentation. It affects the types of images we use, which fonts and colors we use, and the messaging we work into the slides.
The environment also plays a key role. Will they be in a meeting room viewing the presentation on a projector? Will they be sitting next to you at your desk? Will they be receiving an email copy of the presentation? Will the presentation be on large screens at an event? For example, if we present in a large auditorium, we must ensure that even the people at the back can see everything. We need to consider font size, font style, contrast, and the types of images we use.
NOTE : Many times, organizations will have their own PowerPoint template to use for all company presentations. Templates ensure that every presentation is consistent, uses branded colors, and contains items like the company logo. We should always ensure that we are working within our organization’s branding guidelines when designing.
Try and establish these three key factors:
- Who will be watching?
- What’s important to them?
- What’s the environment?

An outline is similar to a storyboard. We can plan out our slides ahead of time to establish flow, presentation length, and timings.
An outline can be something as simple as drawing out slides in a notepad and jotting down the key points to cover, or we can use PowerPoint to create a ‘wireframe’. A wireframe is simply a plan of how each slide will look and what content is to be included.
Establishing what needs to be included from the start means that we are less likely to forget to include important information, and we can plan our slide deck more effectively.
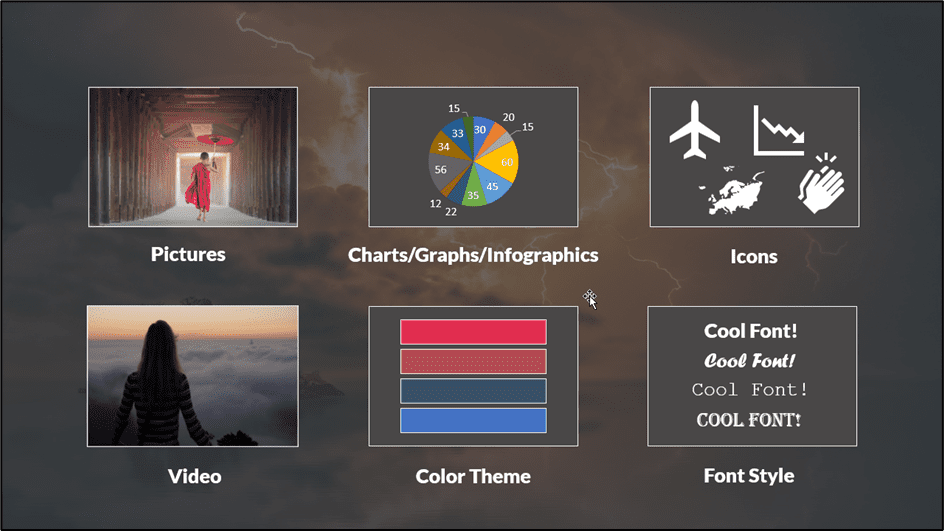
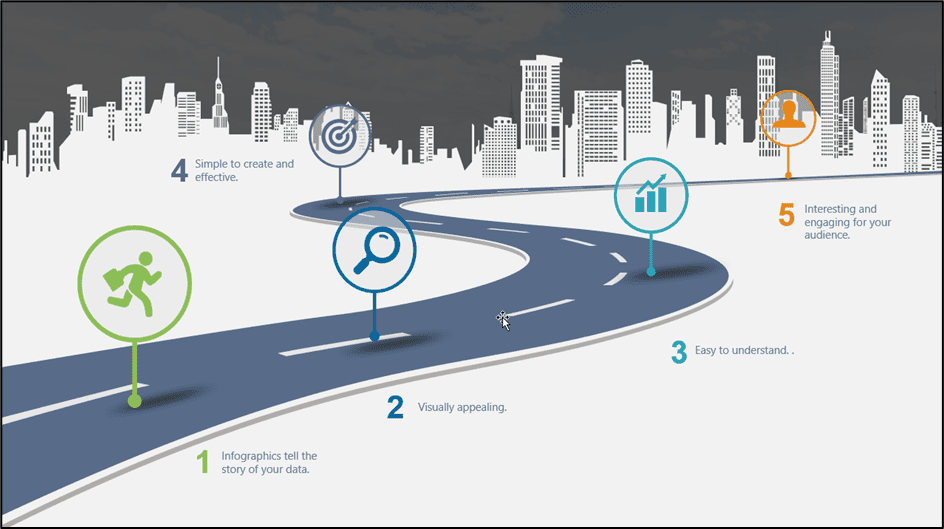
Visual elements are a huge part of PowerPoint. The phrase ‘a picture speaks 1000 words’ is true, with most people remembering infographics, charts, and other images over bulleted lists of text. It’s important to think about the types of visuals to include in the presentation ahead of time. Do we want to use photos? What about charts? Are we going to use icons? What about video?
We can use multiple types of visual elements in our presentations, and we need to think about what will convey our message best. Also, think about the tone of the presentation and match any visual elements to that.
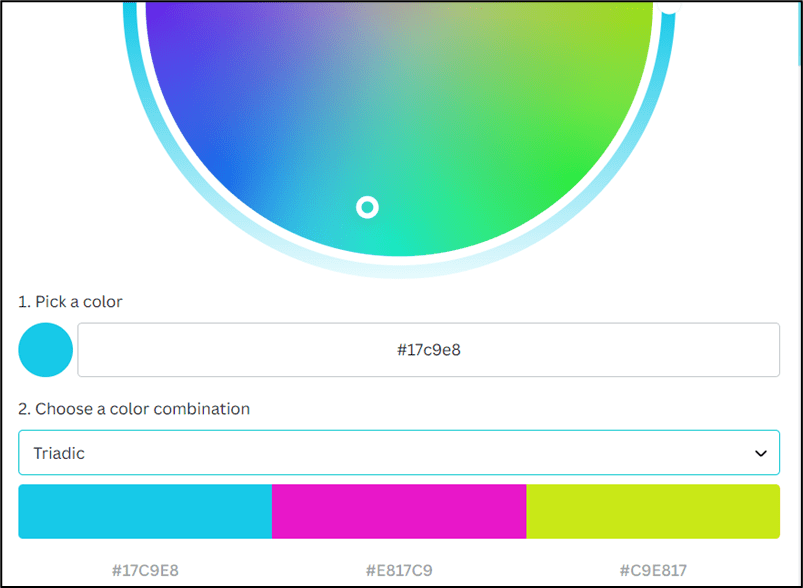
Color and font style are also very important. If company-branded colors do not restrict us, we need to think about the color palette of our presentation and ensure we use a selection of colors that complement one another.
If you struggle with color, the Canva Color Wheel is a great free tool for finding complementary colors based on a starting color.
5. Text. Less is More.
When it comes to text, less is definitely more. One mistake many presenters make is adding everything they want to say to the slide. Too much text renders the presenter redundant. PowerPoint is designed to be a presentation aid, not the entire presentation.
An audience should be focused on the presenter. Powerpoint can list some brief, key talking points, but the presenter should speak most of the information. If we have a ‘wall of words’ on a slide, it’s very difficult for the human brain to read and listen at the same time.
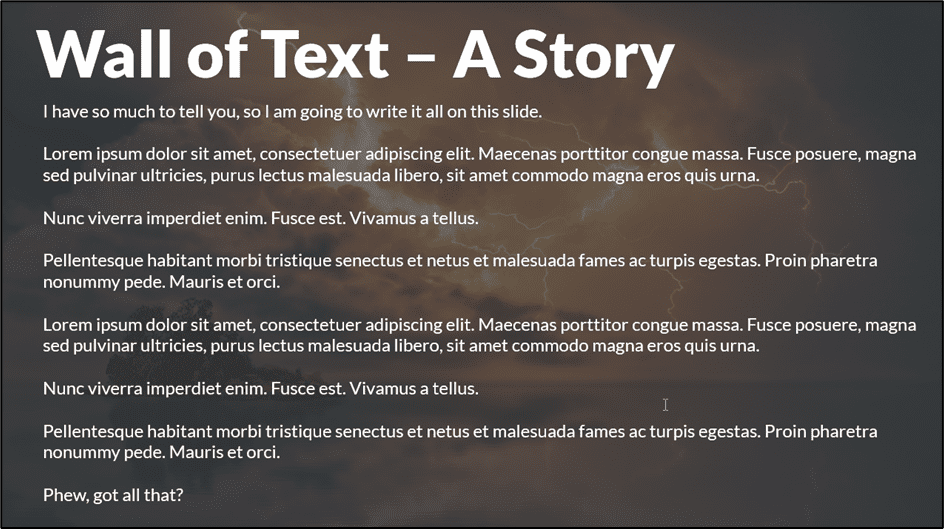
A good guide to stick to is ‘The Rule of 5/5/5’. No more than 5 words per line, no more than 5 lines per slide, and no more than 5 text-heavy slides in a row. Keep text to a minimum and break up text-based slides with images, charts, and other visuals.
Font selection is incredibly important, and not all fonts are created equally.
Over the years, I’ve seen many presentations ruined by crazy font choices. For business presentations, it’s best to stick to well-established, easy-to-read fonts: Arial, Tahoma, Calibri, Verdana, and Times New Roman are some of the most popular.
With that said, using the same font throughout the entire presentation can make our slide deck look a little stale and boring. Don’t be scared to use more than one font style, although try and stick to three or less. If we are going to use more than one font in the presentation, we should ensure that the fonts are from the same font family to keep things looking consistent and tied together.
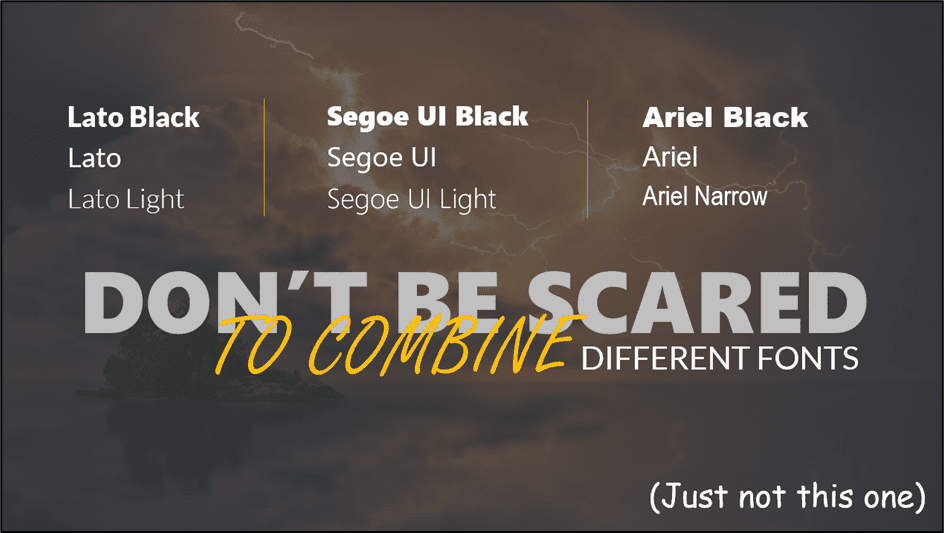
For example, we might use Lato font for the majority of the text in the presentation, Lato Black for the headings, and Lato Light for text boxes and sub-headings.
Stick to fonts that are easy to read even when the font size is relatively small.
A great website for finding complimentary font pairings is Fontjoy .
Suggested reads:
How to Change PowerPoint Slides to Portrait
How to Change Slide Size in PowerPoint
How to Save PowerPoint as Video
Color can make or break a presentation. Choose the wrong colors, and at best, the presentation will look unprofessional and, at worst, will give people a headache.
We need to think about our color choices carefully. Choose high-contrast colors like white text on a dark background or dark text on a light background.
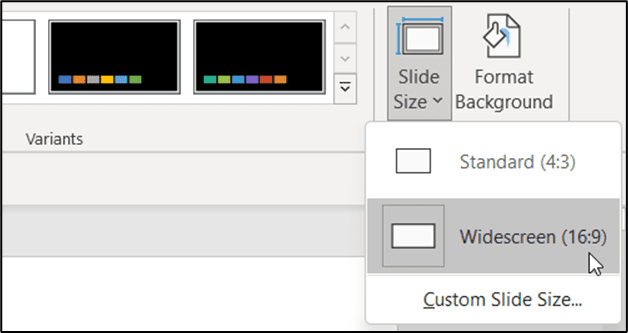
In PowerPoint 2021, we can choose between two slide sizes: Standard (4:3) and Widescreen (16:9).
Always design for widescreen! If we create a slide deck using the standard size and someone with a widescreen opens the presentation, PowerPoint needs to scale the presentation up, which can lead to problems, distortion, and misaligned objects. It’s much easier for PowerPoint to scale a presentation down.
- Click on the Design tab.
- From the Customize group, click Slide Size .
- Choose Widescreen from the menu.
It’s important that all slides in a deck look like they are part of that presentation. They should have a consistent look and feel. One of the best ways of tying slides together is to use color.
Choose a color palette of complementary colors and use them consistently throughout the presentation. Sticking to just a few colors prevents the presentation from looking like a rainbow.
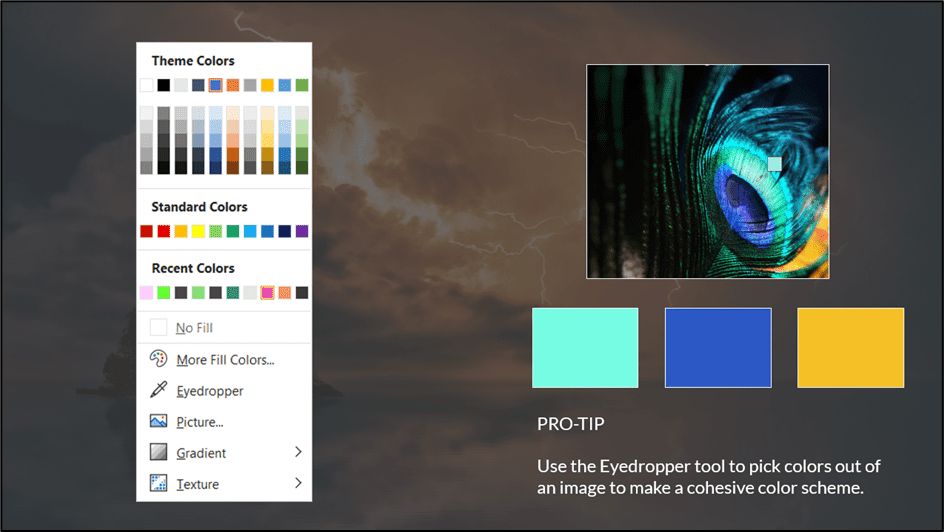
In PowerPoint 2021, we have a great utility called ‘Eyedropper’, which helps us copy colors from one object to the next, ensuring that we are picking the exact same color every single time. If we have an image on our slide, we could use the eyedropper tool to pick a specific color from the image and then use that color to fill another shape or icon.
We could even use the colors in an image to help build our own color palette.
10. Animation. Less is More.
Much like text, when it comes to animation, less is more.
How many presentations have you seen where the author has been a bit too enthusiastic with their animation effects? Text boxes fly in from the top, bullet points spin in from the left, and images pulsing in different colors. It’s enough to make anyone go crazy.
Animation when used correctly can really elevate a presentation and emphasize important points. Animation can also make our presentation look slick and modern. The key point here is ‘when used correctly’. The animation should enhance and not distract.
The rule here is to try and stick to less than three different animation effects in the presentation. Subtle animation tends to work better than something more dynamic and ‘in your face’.
For example, if we have a list of bullet points and we want to speak about the first one before the next one is visible to the audience, we might add a ‘fade in’ animation to the bullets. The second bullet point will subtly fade in and won’t give anyone in the audience a seizure.
Templates give us a head start when creating a PowerPoint presentation. Instead of staring at a blank presentation, not knowing where to start, we could choose a template from PowerPoint’s template gallery and have a lot of the hard work done for us.
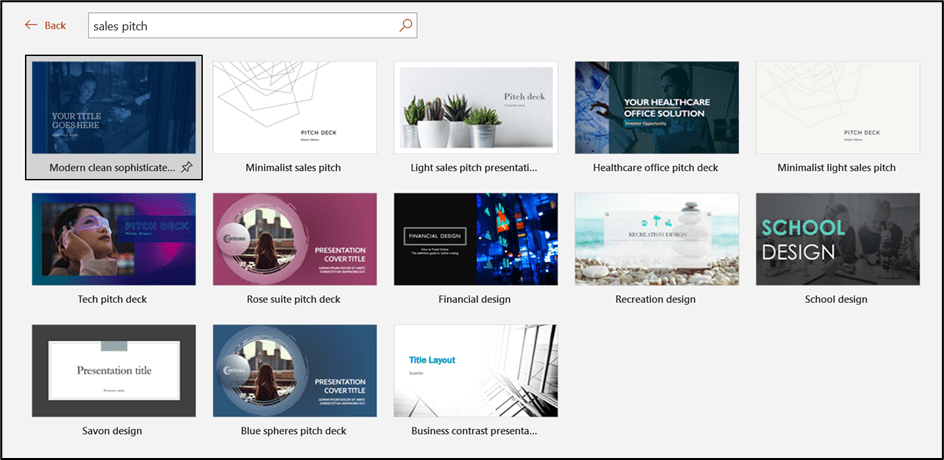
PowerPoint 2021 has hundreds of in-built templates available to use for free. All templates are divided into categories, and if we are looking for something specific, we can use the search bar.
- Click on the File tab.
- Click on New .
- In the templates section, type the search term into the search bar.
PowerPoint templates include pre-made slides, images, shapes, sample text, colors, fonts, and effects. Every element of the template can be customized to use your own colors and images.
If we can’t find a template that suits our needs, there are many websites that offer free and paid PowerPoint templates for download.
For free templates, check out Slides Carnival
For beautiful, high-quality paid templates, check out Envato Elements.
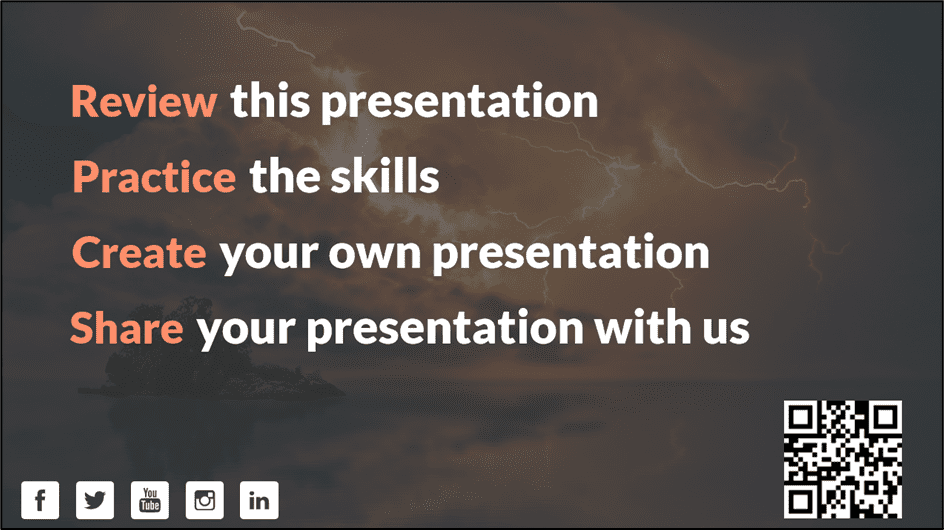
We always want to make sure we end our presentations on a high. Leave the audience with action points or a task to complete.
For example, we might want our audience to provide feedback or get their opinion on the topic discussed. Or maybe we need them to complete a survey. Maybe we want to get them to follow us on social media, or we want them to complete an exercise. Whatever the action points, provide all the details at the end.
Sometimes, it’s worth mentioning at the beginning of the presentation that there will be some calls to action at the end. This can prevent people from zoning out or not paying attention if they know they will be required to do something at the end.
If we want to direct the audience to a specific website, we can utilize the QR Code add-in for PowerPoint 2021 so they can scan it with their phone.
How to Make a Flowchart in PowerPoint
How to Link Excel to PowerPoint
How to Add Slide Numbers in PowerPoint
Please visit our free resources center for more high-quality PowerPoint and Microsoft Suite application guides.
Ready to dive deep into PowerPoint? Click here for basic to advanced PowerPoint courses with in-depth training modules.
Simon Sez IT has been teaching PowerPoint and other business software for over ten years. You can access 160+ IT training courses for a low monthly fee.

Deborah Ashby

Deborah Ashby is a TAP Accredited IT Trainer, specializing in the design, delivery, and facilitation of Microsoft courses both online and in the classroom.She has over 11 years of IT Training Experience and 24 years in the IT Industry. To date, she's trained over 10,000 people in the UK and overseas at companies such as HMRC, the Metropolitan Police, Parliament, SKY, Microsoft, Kew Gardens, Norton Rose Fulbright LLP.She's a qualified MOS Master for 2010, 2013, and 2016 editions of Microsoft Office and is COLF and TAP Accredited and a member of The British Learning Institute.
Similar Posts
How to Create Charts and Graphs Using Excel 2010
XLOOKUP Google Sheets – 4 Best Alternatives!
How to Use Critical Paths in Microsoft Project 2016
How to Add a Watermark in PowerPoint? 2 Different Ways
The Most Used Access Shortcuts – Download
How to use the OFFSET function in Excel
- Privacy Policy

ADVANCE YOUR CAREER
Gain instant access to 200+ courses. Earn a CERTIFICATE each time you complete a course.
PowerPoint Presentation Best Practices: Tips & Resources
- Slide Content
- The Presentation: Public Speaking
- Tips & Resources
Watch your timing, both while speaking and going through your slides. You don't want to go too fast, but make sure you don't go over your allotted time, either. (This is where practice comes in!) You might want to leave a few minutes at the end for questions.
Sort Your Slides
Try breaking your slides into smaller chunks or segments, and make sure they flow. But don’t use too many slides, either; find a nice middle ground. If you look at all of them in the slide sorter, do they seem to flow logically without your speech backing them up?
The "B" Key
During your presentation (on either PowerPoint or Keynote) you can press the "B" key on the keyboard, and the screen will go blank. This is useful if you need to go off topic for a minute, or you want people to focus on you while you say something extremely important. Press "B" again and your presentation will reappear.
- Keep it simple, but not simplistic
- Have a theme and be consistent
- Be smart with colors
- Choose fonts wisely
- Use high-quality graphics, not clip art
- Try using video or audio
- Minimize distractions in your slides
- Pace yourself
- Break up your slides into small chunks
- Check your spelling and grammar
- Don’t use stale built-in templates
- Don’t throw off your audience with fancy fonts
- Don’t use distracting animations and transitions
- Don’t use clip art
- Don’t put an entire paragraph in your slide
- Don’t go too fast
- Don't read from cue cards word-for-word
- Don’t stress—act relaxed and natural, and your audience will be more receptive
- "Design Tips" - Garr Reynolds Tips and slide examples from a communication expert.
- "10 PowerPoint Tips to Make Your Slides More Effective" - iSpring Top 10 tips, written by Ferry Pereboom, the co-founder of a design agency.
- Presentation Zen: "What is good presentation design?" - Garr Reynolds Tips and slide examples from a communication expert.
- "Top 10 Tips to Make Your PowerPoint Suck Way Less" - Your PowerPoint Sucks Top 10 tips, other articles, examples, and resources.
- "Speak up: Preparing an Engaging Presentation" - Amherst College Tips on presenting a public speech from Amherst College's Writing Center.
- “Basic tasks for creating a PowerPoint presentation” - Microsoft A guide for getting started with PowerPoint, with tips for creating an effective presentation at the bottom.
- "Delivery Tips" - Garr Reynolds Public speaking tips from a communication expert.
- "Preparation Tips" - Garr Reynolds Preparation tips for presenting from a communication expert.
- Canva Slide builder with professional and artistic templates.
- SlideModel Professional slide and theme templates.
- PresentationGO Free templates, slides, graphics, diagrams, tables, etc.
- << Previous: The Presentation: Public Speaking
- Last Updated: Dec 8, 2023 12:36 PM
- URL: https://libguides.hccfl.edu/powerpoint
© 2024 | All rights reserved
20 Great Examples of PowerPoint Presentation Design [+ Templates]
Published: January 17, 2024
When it comes to PowerPoint presentation design, there's no shortage of avenues you can take.

While all that choice — colors, formats, visuals, fonts — can feel liberating, it‘s important that you’re careful in your selection as not all design combinations add up to success.
![→ Free Download: 10 PowerPoint Presentation Templates [Access Now]](https://no-cache.hubspot.com/cta/default/53/2d0b5298-2daa-4812-b2d4-fa65cd354a8e.png "powerpoint presentation practice")
In this blog post, I’m sharing some of my favorite PowerPoint tips and templates to help you nail your next presentation.
Table of Contents
What makes a good PowerPoint presentation?
Powerpoint design ideas, best powerpoint presentation slides, good examples of powerpoint presentation design.
In my opinion, a great PowerPoint presentation gets the point across succinctly while using a design that doesn't detract from it.
Here are some of the elements I like to keep in mind when I’m building my own.
1. Minimal Animations and Transitions
Believe it or not, animations and transitions can take away from your PowerPoint presentation. Why? Well, they distract from the content you worked so hard on.
A good PowerPoint presentation keeps the focus on your argument by keeping animations and transitions to a minimum. I suggest using them tastefully and sparingly to emphasize a point or bring attention to a certain part of an image.
2. Cohesive Color Palette
I like to refresh my memory on color theory when creating a new PowerPoint presentation.
A cohesive color palette uses complementary and analogous colors to draw the audience’s attention and help emphasize certain aspects at the right time.

10 Free PowerPoint Templates
Download ten free PowerPoint templates for a better presentation.
- Creative templates.
- Data-driven templates.
- Professional templates.
You're all set!
Click this link to access this resource at any time.
Tell us a little about yourself below to gain access today:
It‘s impossible for me to tell you the specific design ideas you should go after in your next PowerPoint, because, well, I don’t know what the goal of your presentation is.
Luckily, new versions of PowerPoint actually suggest ideas for you based on the content you're presenting. This can help you keep up with the latest trends in presentation design .
PowerPoint is filled with interesting boilerplate designs you can start with. To find these suggestions, open PowerPoint and click the “Design” tab in your top navigation bar. Then, on the far right side, you'll see the following choices:

This simplistic presentation example employs several different colors and font weights, but instead of coming off as disconnected, the varied colors work with one another to create contrast and call out specific concepts.
What I like: The big, bold numbers help set the reader's expectations, as they clearly signify how far along the viewer is in the list of tips.
10. “Pixar's 22 Rules to Phenomenal Storytelling,” Gavin McMahon
This presentation by Gavin McMahon features color in all the right places. While each of the background images boasts a bright, spotlight-like design, all the characters are intentionally blacked out.
What I like: This helps keep the focus on the tips, while still incorporating visuals. Not to mention, it's still easy for me to identify each character without the details. (I found you on slide eight, Nemo.)
11. “Facebook Engagement and Activity Report,” We Are Social
Here's another great example of data visualization in the wild.
What I like: Rather than displaying numbers and statistics straight up, this presentation calls upon interesting, colorful graphs, and charts to present the information in a way that just makes sense.
12. “The GaryVee Content Model,” Gary Vaynerchuk
This wouldn‘t be a true Gary Vaynerchuk presentation if it wasn’t a little loud, am I right?
What I like: Aside from the fact that I love the eye-catching, bright yellow background, Vaynerchuk does a great job of incorporating screenshots on each slide to create a visual tutorial that coincides with the tips. He also does a great job including a visual table of contents that shows your progress as you go .
13. “20 Tweetable Quotes to Inspire Marketing & Design Creative Genius,” IMPACT Branding & Design
We‘ve all seen our fair share of quote-chronicling presentations but that isn’t to say they were all done well. Often the background images are poor quality, the text is too small, or there isn't enough contrast.
Well, this professional presentation from IMPACT Branding & Design suffers from none of said challenges.
What I like: The colorful filters over each background image create just enough contrast for the quotes to stand out.
14. “The Great State of Design,” Stacy Kvernmo
This presentation offers up a lot of information in a way that doesn't feel overwhelming.
What I like: The contrasting colors create visual interest and “pop,” and the comic images (slides 6 through 12) are used to make the information seem less buttoned-up and overwhelming.
15. “Clickbait: A Guide To Writing Un-Ignorable Headlines,” Ethos3
Not going to lie, it was the title that convinced me to click through to this presentation but the awesome design kept me there once I arrived.
What I like: This simple design adheres to a consistent color pattern and leverages bullet points and varied fonts to break up the text nicely.
16. “Digital Transformation in 50 Soundbites,” Julie Dodd
This design highlights a great alternative to the “text-over-image” display we've grown used to seeing.
What I like: By leveraging a split-screen approach to each presentation slide, Julie Dodd was able to serve up a clean, legible quote without sacrificing the power of a strong visual.
17. “Fix Your Really Bad PowerPoint,” Slide Comet
When you‘re creating a PowerPoint about how everyone’s PowerPoints stink, yours had better be terrific. The one above, based on the ebook by Seth Godin, keeps it simple without boring its audience.
What I like: Its clever combinations of fonts, together with consistent color across each slide, ensure you're neither overwhelmed nor unengaged.
18. “How Google Works,” Eric Schmidt
Simple, clever doodles tell the story of Google in a fun and creative way. This presentation reads almost like a storybook, making it easy to move from one slide to the next.
What I like: This uncluttered approach provides viewers with an easy-to-understand explanation of a complicated topic.
19. “What Really Differentiates the Best Content Marketers From The Rest,” Ross Simmonds
Let‘s be honest: These graphics are hard not to love. I especially appreciate the author’s cartoonified self-portrait that closes out the presentation. Well played, Ross Simmonds.
What I like: Rather than employing the same old stock photos, this unique design serves as a refreshing way to present information that's both valuable and fun.
20. “Be A Great Product Leader,” Adam Nash
This presentation by Adam Nash immediately draws attention by putting the company's logo first — a great move if your company is well known.
What I like: He uses popular images, such as ones of Megatron and Pinocchio, to drive his points home. In the same way, you can take advantage of popular images and media to keep your audience engaged.
PowerPoint Presentation Examples for the Best Slide Presentation
Mastering a PowerPoint presentation begins with the design itself.
Get inspired by my ideas above to create a presentation that engages your audience, builds upon your point, and helps you generate leads for your brand.
Editor's note: This post was originally published in March 2013 and has been updated for comprehensiveness. This article was written by a human, but our team uses AI in our editorial process. Check out our full disclosure to learn more about how we use AI.
![Blog - Beautiful PowerPoint Presentation Template [List-Based]](https://no-cache.hubspot.com/cta/default/53/013286c0-2cc2-45f8-a6db-c71dad0835b8.png "powerpoint presentation practice")
Don't forget to share this post!
Related articles.
![How to Create the Best PowerPoint Presentations [Examples & Templates]](https://blog.hubspot.com/hubfs/powerpoint.webp "powerpoint presentation practice")
How to Create the Best PowerPoint Presentations [Examples & Templates]
![17 PowerPoint Presentation Tips From Pro Presenters [+ Templates]](https://blog.hubspot.com/hubfs/powerpoint-design-tricks_7.webp "powerpoint presentation practice")
17 PowerPoint Presentation Tips From Pro Presenters [+ Templates]
![How to Write an Ecommerce Business Plan [Examples & Template]](https://blog.hubspot.com/hubfs/ecommerce%20business%20plan.png "powerpoint presentation practice")
How to Write an Ecommerce Business Plan [Examples & Template]
![How to Create an Infographic in Under an Hour — the 2024 Guide [+ Free Templates]](https://blog.hubspot.com/hubfs/Make-infographic-hero%20%28598%20%C3%97%20398%20px%29.jpg "powerpoint presentation practice")
How to Create an Infographic in Under an Hour — the 2024 Guide [+ Free Templates]

Get Buyers to Do What You Want: The Power of Temptation Bundling in Sales

How to Create an Engaging 5-Minute Presentation
![How to Start a Presentation [+ Examples]](https://blog.hubspot.com/hubfs/how-to-start-presenting.webp "powerpoint presentation practice")
How to Start a Presentation [+ Examples]

120 Presentation Topic Ideas Help You Hook Your Audience

The Presenter's Guide to Nailing Your Next PowerPoint
![How to Create a Stunning Presentation Cover Page [+ Examples]](https://blog.hubspot.com/hubfs/presentation-cover-page_3.webp "powerpoint presentation practice")
How to Create a Stunning Presentation Cover Page [+ Examples]
Marketing software that helps you drive revenue, save time and resources, and measure and optimize your investments — all on one easy-to-use platform
- Best Mac Apps
- Unknown Caller
Best practices for making awesome PowerPoint slides
Whether you’re presenting a slideshow to your executives, clients, or peers, you want to convey your message clearly and successfully. Unfortunately, many mistakes can be made when creating PowerPoint presentations .
Choose the fonts wisely
Select pleasing colors.
- Don’t overuse animations and effects
Use a standard presentation rule
From hard-to-read fonts to colors that hurt the eyes of your audience, here are some best practices to keep in mind for your next PowerPoint slideshow.
Using a fancy, dramatic, or even whimsical font can be tempting. But you must consider the readability of the font. You want your audience to easily see your headings and bullet points. Consider the two basic font styles: serif and sans serif.
- Apple’s Vision Pro to get bespoke Microsoft 365 apps at launch
- PowerPoint will use ChatGPT to create entire slideshows for you
- Use Office? Your PC could be at risk due to this Microsoft change
Serif fonts are more decorative, have a classic appearance, and are frequently used in print publications. Each letter has a stroke that extends from a point in the letter. Popular serif styles include Times New Roman, Garamond, Georgia, and Baskerville.
Sans serif fonts are more precise, have a clean appearance, and are frequently used in digital publications. Each letter is clear-cut without wings or curves at its points. Popular sans serif styles include Arial, Verdana, Tahoma, and Calibri.
Because of the extended strokes, serif fonts can appear a bit blurry on a screen. This makes a sans serif font the favored choice. The bottom line is that you should remain consistent and use the same type, serif or sans serif, for all fonts in the slideshow.
The colors you use in your PowerPoint presentation can be just as important as the content. You want to use those that enhance the appearance of the slideshow, not distract or give your audience a headache.
As Robert Lane explains in his article about combining colors in PowerPoint , mixing red and blue or red and green can cause eye strain. Plus, red and green mixtures are difficult to see for those with color blindness.
The article mentions that warm colors like reds, oranges, and yellows are eye-catching, whereas cool colors like blues, greens, and purples draw less attention. Additionally, lighter colors are more noticeable than dark.
One of the easiest ways to choose the colors for your presentation is to use a built-in theme. Select the Design tab and you’ll see a collection of Themes in the ribbon.
Once you select a theme, you can then use the Variants section to choose a different color scheme. Each scheme includes eight complementing colors. You can also pick the font style you want to use in the Variants drop-down menu.
Tip : You can also check out the Design Ideas if you need help with the layouts for your slides.
Don’t overuse animations and effects
Animations can be attention-grabbing additions to a slideshow. But if you overuse or misuse them, they can be detrimental to your presentation and actually turn off viewers. The best thing to do is consider your audience and slideshow’s purpose.
For instance, if you are presenting the slideshow to a classroom of 8-year-old students, animations can grab and hold their attention more than simple images or words. However, if you’re presenting to your company’s executive team or board of directors, animations can come across as unprofessional.
If you really want to include animations, make them subtle or purposeful. As an example, you may want to expand on each bullet point in your list. You can create an animation to display the bullet points one by one and only when you click.
To do this, select the first bullet point, go to the Animations tab, and choose the Appear effect. Then, in the Timing section of the ribbon, choose On click in the Start drop-down list. Do the same for each bullet point in your list.
This creates a simple animation that benefits your presentation. It doesn’t distract but instead keeps your audience focused on your current talking point.
What is the 10/20/30 rule of PowerPoint? What is the five-by-five rule? What about the 5/5/5 and seven-by-seven rules? Rules, rules, rules. These are different standards that many recommend using when it comes to creating PowerPoint presentations.
- The 10/20/30 rule : Have no more than 10 slides, a presentation no longer than 20 minutes, and a font size no smaller than 30 points.
- The five-by-five rule : Have no more than five words per line and five lines per slide.
- The 5/5/5 rule : Have no more than five words per line, five lines per slide, and five text-heavy slides in a row.
- The seven-by-seven rule : Have no more than seven words per line and seven lines per slide.
What each of these rules basically means is: Keep it simple.
The first rule, 10/20/30, is a good rule to follow for your overall presentation. While it may not always be possible, the more succinct a presentation, the more successful it will be.
The last three rules are helpful ones to follow when you’re adding text to your slides. As you know, presentations are visual. Using too much text means your audience is reading more than watching.
Hopefully, these best practices will help you create a memorable and effective slideshow. For other ways to enhance your presentation, look at how to add audio to the slides or how to include music in PowerPoint .
Editors' Recommendations
- Best Microsoft Office deals: Get Word, PowerPoint, and Excel for free
- This PowerPoint ploy could help hackers empty your bank account
- Microsoft might put ChatGPT into Outlook, Word, and PowerPoint
- The best PowerPoint templates
- Microsoft is phasing out the default Office font. Here’s what could replace it

Many of the apps from the Microsoft 365 suite now run natively on Apple's new M1-powered MacBooks. Outlook, Word, Excel, PowerPoint, and OneNote are now all able to take full advantage of Apple's custom ARM-based silicon.
These new Microsoft 365 apps for Apple M1 Macs are all universal apps, which means that they will also run on traditional Macs with Intel processors. This also means that the Office apps on Apple's M1 Macs -- like the new MacBook Air, 13-inch MacBook Pro, and Mac mini -- should all feel snappier and faster than when they were previously running under emulation with Rosetta 2.
This holiday season, Microsoft will release a dual-screen smartphone known as the Surface Duo. As a dual-screen device, you can stack your favorite apps side by side, span apps across the screen for a better view of your work, and generally do more while on the go.
That demands software and hardware work hand-in-hand, however, so the new Office app for iOS and Android is paving the way forward. It'll make your phone a bit more useful for work -- in Office apps, at least. One hub for all things Office You can already use the dedicated Word, Excel, and PowerPoint apps on your phone. With the new Office app, however, Microsoft is creating a one-stop hub for all things related to work. Word, Excel, and PowerPoint are all part of the Office app. Yet it's lightweight, coming in at less than 100MB.
Public speaking, including the delivery of PowerPoint presentations, can be a trial. There's the need to pace yourself, as well as to avoid reading your slides word for word. Microsoft gets that.
Leaning on the power of artificial intelligence, the company is now launching a public preview of its PowerPoint Presenter Coach, a tool which can help critique your PowerPoint presentation.

- Get started with computers
- Learn Microsoft Office
- Apply for a job
- Improve my work skills
- Design nice-looking docs
- Getting Started
- Smartphones & Tablets
- Typing Tutorial
- Online Learning
- Basic Internet Skills
- Online Safety
- Social Media
- Zoom Basics
- Google Docs
- Google Sheets
- Career Planning
- Resume Writing
- Cover Letters
- Job Search and Networking
- Business Communication
- Entrepreneurship 101
- Careers without College
- Job Hunt for Today
- 3D Printing
- Freelancing 101
- Personal Finance
- Sharing Economy
- Decision-Making
- Graphic Design
- Photography
- Image Editing
- Learning WordPress
- Language Learning
- Critical Thinking
- For Educators
- Translations
- Staff Picks
- English expand_more expand_less
PowerPoint Tips - Simple Rules for Better PowerPoint Presentations
Powerpoint tips -, simple rules for better powerpoint presentations, powerpoint tips simple rules for better powerpoint presentations.

PowerPoint Tips: Simple Rules for Better PowerPoint Presentations
Lesson 17: simple rules for better powerpoint presentations.
/en/powerpoint-tips/embed-excel-charts-in-a-slide/content/
Simple rules for better PowerPoint presentations
Have you ever given a PowerPoint presentation and noticed that something about it just seemed a little … off? If you’re unfamiliar with basic PowerPoint design principles, it can be difficult to create a slide show that presents your information in the best light.
Poorly designed presentations can leave an audience feeling confused, bored, and even irritated. Review these tips to make your next presentation more engaging.
Don't read your presentation straight from the slides
If your audience can both read and hear, it’s a waste of time for you to simply read your slides aloud. Your audience will zone out and stop listening to what you’re saying, which means they won’t hear any extra information you include.
Instead of typing out your entire presentation, include only main ideas, keywords, and talking points in your slide show text. Engage your audience by sharing the details out loud.
Follow the 5/5/5 rule
To keep your audience from feeling overwhelmed, you should keep the text on each slide short and to the point. Some experts suggest using the 5/5/5 rule : no more than five words per line of text, five lines of text per slide, or five text-heavy slides in a row.

Don't forget your audience
Who will be watching your presentation? The same goofy effects and funny clip art that would entertain a classroom full of middle-school students might make you look unprofessional in front of business colleagues and clients.
Humor can lighten up a presentation, but if you use it inappropriately your audience might think you don’t know what you’re doing. Know your audience, and tailor your presentation to their tastes and expectations.
Choose readable colors and fonts
Your text should be easy to read and pleasant to look at. Large, simple fonts and theme colors are always your best bet. The best fonts and colors can vary depending on your presentation setting. Presenting in a large room? Make your text larger than usual so people in the back can read it. Presenting with the lights on? Dark text on a light background is your best bet for visibility.

Don't overload your presentation with animations
As anyone who’s sat through a presentation while every letter of every paragraph zoomed across the screen can tell you, being inundated with complicated animations and exciting slide transitions can become irritating.
Before including effects like this in your presentation, ask yourself: Would this moment in the presentation be equally strong without an added effect? Does it unnecessarily delay information? If the answer to either question is yes—or even maybe—leave out the effect.
Use animations sparingly to enhance your presentation
Don’t take the last tip to mean you should avoid animations and other effects entirely. When used sparingly, subtle effects and animations can add to your presentation. For example, having bullet points appear as you address them rather than before can help keep your audience’s attention.
Keep these tips in mind the next time you create a presentation—your audience will thank you. For more detailed information on creating a PowerPoint presentation, visit our Office tutorials .
/en/powerpoint-tips/three-tips-for-beautiful-powerpoint-presentations/content/
- Create a presentation Article
- Save Article
- Design Article
- Share and collaborate Article
- Give a presentation Article
- Set up your mobile apps Article
- Learn more Article

Create a presentation
Create a presentation in PowerPoint

Create presentations from scratch or start with a professionally designed, fully customizable template from Microsoft Create .
Tip: If you have Microsoft Copilot it can help you create a presentation, add slides or images, and more. To learn more see Create a new presentation with Copilot in PowerPoint.
Open PowerPoint.
In the left pane, select New .
Select an option:
To create a presentation from scratch, select Blank Presentation .
To use a prepared design, select one of the templates.
To see tips for using PowerPoint, select Take a Tour , and then select Create , .

Add a slide
In the thumbnails on the left pane, select the slide you want your new slide to follow.
In the Home tab, in the Slides section, select New Slide .
In the Slides section, select Layout , and then select the layout you want from the menu.

Add and format text
Place the cursor inside a text box, and then type something.
Select the text, and then select one or more options from the Font section of the Home tab, such as Font , Increase Font Size , Decrease Font Size , Bold , Italic , Underline , etc.
To create bulleted or numbered lists, select the text, and then select Bullets or Numbering .

Add a picture, shape, and more
Go to the Insert tab.
To add a picture:
In the Images section, select Pictures .
In the Insert Picture From menu, select the source you want.
Browse for the picture you want, select it, and then select Insert .
To add illustrations:
In the Illustrations section, select Shapes , Icons , 3D Models , SmartArt , or Chart .
In the dialog box that opens when you click one of the illustration types, select the item you want and follow the prompts to insert it.

Need more help?
Want more options.
Explore subscription benefits, browse training courses, learn how to secure your device, and more.

Microsoft 365 subscription benefits

Microsoft 365 training

Microsoft security

Accessibility center
Communities help you ask and answer questions, give feedback, and hear from experts with rich knowledge.

Ask the Microsoft Community

Microsoft Tech Community

Windows Insiders
Microsoft 365 Insiders
Find solutions to common problems or get help from a support agent.

Online support
Was this information helpful?
Thank you for your feedback.
Subject Explorer
School Subjects
Math & Science
Business & Technology
Electives & Health
Board & Administration
Teaching & Learning
Audio/Video Lectures
Books & Documents
Classifieds
Jobs & Resources
Discussions
Language & Literature
Practice Projects for PowerPoint

Powerpoint Project 5
In this practice project for Powerpoint, students will create a powerpoint presentation following the example given. Students will be required to have slides enter with custom animation and differing …

Powerpoint Project 4
In this practice project for Powerpoint, students will creat a basic powerpoint where slides advance automatically. …

Powerpoint Project 3
In this practice project for Powerpoint, students will create a basic powerpoint based on the example given. Students will need to create and insert a chart and have different parts of the slide …

Powerpoint Project 2
In this practice project for Powerpoint, students will follow basic instructions to create a powerpoint where slides and text appear with different animations. …

Powerpoint Project 1
In this practice project for Powerpoint, students will create a basic powerpoint based on the example given. Students will need to write titles, insert pictures and use different animations for key …
Resource Type:
Pass it on:
Leave a Reply

PowerPoint Practice 1

Prefer to watch and learn? Check out this video tutorial:
Complete the following Practice Activity and submit your completed project.
We will use PowerPoint to create a presentation that welcomes new students to Paradise Valley Community College. As a Peer Leader, you have been asked to present at New Student Orientation, where new students are introduced to college life at PVCC. We will build upon this presentation over the next 4 practice assignments. Key skills in this practice include creating a new presentation, entering text, presentation views, presentation themes, speaker notes, adding and formatting pictures, printing a presentation, and Header and Footer options.
- Start PowerPoint, notice how it opens in Backstage View. Under Theme s , select the Facet theme. If the Facet theme is not visible, use the search to locate it. Select the second color variant , and the select Create. If PowerPoint does not open in Backstage View, select the file button to show Backstage View, and then select blank presentation. Then, on the Design tab, select the theme as indicated above.
- Select File, Save As, Browse, and then navigate to your PowerPoint folder on your flash drive or other location where you save your files. Name the presentation as Yourlastname_Yourfirstname_PowerPoint_Practice_1.

- Notice that the layout of slide 1 is Title and Content. This is a common layout for the Title Slide . All text, graphics, videos, or anything that is on a slide must be in a placeholder . In the Click to add title placeholder, type Welcome Pumas! In the subtitle placeholder type Fall New Student Orientation.
- On the Design tab, in the Themes group, ensure under Variants, Blue colors are selected.
- Although we only have our title slide added, most presentations have several slides. When creating your presentation, keep in mind the attention span of your audience, and the allotted amount of time. For this presentation, we have been allotted 10 minutes, and will create 5 slides.
- Outline View
- Slide Sorter
- Notes Pages
- Reading View
- On the Home tab, in the Slides group, select the arrow next to New Slide and selected Title and Content. In the Click to add title placeholder type Student Life.
- With slide 2 still active, on the Home Tab, in the Slides Group, select the arrow next to Layout and select Two Content. Notice how the layout of slide 2 changed.
- Get involved with Student Life and Leadership!
- Connect with fellow students
- Discover empowerment
- Make a difference
- Format the text as a bulleted list, with the default bullet. Change the font size of the text to 28.
- In the second placeholder, use the placeholder shortcut to insert an online picture. In the Insert Pictures dialog box, use the Bing image search to search for a picture of students. Choose any picture of college students, and insert it into the placeholder.
- With slide 2 displayed, in the Status Bar , click Notes. Notice that the Notes Pane displays below the Slide Pane. In the Notes pane type: We sponsor numerous campus events and opportunities for you to participate in our dynamic learning environment. Through Student Life, students engage in educational relationships that inspire positive social change, contributing to a richer and more fulfilling college experience. Not only that, students build leadership and professional skills that carry on through life.
- Cross Country
- Track and Field
- Resize the text to 28 pt and use the default bullet.
- With slide 3 still active, on the Insert tab in the Illustration group, select the arrow next to Shapes, under Stars and Banners add the Explosion 1 shape to the right of the bulleted list. Click and drag the shape onto the slide.
- Inside the shape type Find us on Social Media @Puma Athletics
- Use the Sizing handle to turn the Explosion shape slightly to the left, and move it so that it is in line with the text. Use the guides to align the image.
- With the Explosion graphic still selected, on the Drawing Tools Format tab, in the Shape Styles group, select the Colored Fill-Blue, Accent 2 shape style.
- On the Home tab, in the Slides Group, select New Slide and choose Picture with Caption Layout. In the picture placeholder, click to add a picture. Browse to your data files, and insert the image PowerPoint_Practice_1. On the Picture Tools Format tab, in the Size group select the arrow under Crop and select Fit .
- Select the placeholder below the image and enter the following title: It is great to be a Puma! In the placeholder below that, type: Welcome to PVCC! Change the font size of the second text placeholder to 36.
- With slide 4 still active, ensure the Notes Pane displays. In the notes section, add the following speaker notes : Explain the Puma Commitment and the support available to students.
- On the Home tab, in the Slides Group, select New Slide and choose Blank Layout. Ensure slide 5 is active
- On the Insert tab, in the Text Group, select the arrow under WordArt , and select Word Art in the second row, second column Gradient Fill Green Accent 1 Reflection. Type the text: Any Questions?
- Change the font size of the WordArt to 72.
- Display slide 1. On the Insert tab, in the Text Group, select Header & Footer to display the Header and Footer Dialog Box. Notice there are two tabs: Slide and Notes and Handouts. On the Notes and Handouts tab, check the box next to Data and Time. Ensure the check box next to Page Number is also selected. Click Apply to All.
- Select the File tab to display backstage view. Select Print to view the Print Options . Although PowerPoint slides are meant for presentations, there is the option to print slides for the presenter and participants. Click Full Page Slides to then choose Notes Pages . Scroll through the slides and notice that slides 2 and 4 are displaying the Notes.
- Select Notes Pages, and choose 6 slides Horizontal. Notice how the data and page number displays on the slide in Print Preview .
- Save your presentation, and take note of where it is located. There should be a total of 5 slides in your slide deck. Compare your presentation to the image below, and make any modifications if needed. Close out of PowerPoint and submit your entire presentation per your instructor’s instructions.

Media Attributions
- Practice It Icon © Jessica Parsons is licensed under a CC BY (Attribution) license
A set of unified design elements that provides a coordinated look for your presentation by applying colors, fonts and effects
A variation on the presentation theme style or color
The process of communicating a topic to an audience, typically a demonstration, introduction, lecture, or speech meant to inform, persuade, inspire, motivate, or to build good will or to present a new idea or product
The arrangement of elements in a PowerPoint slide such as title and subtitle, lists, pictures, shapes, charts, tables and media
A slide layout this is commonly used as the first slide in a presentation and contains and introduction to the presentation
A box on a slide with a dotted border that holds the title, body text, or other content such as charts, tables and media
The primary editing view in PowerPoint where you write and design your presentations
A PowerPoint view that displays the presentation outline to the left of the slide pane
Displays a miniature version of each slide
A printout that contains the slide image on the top half of the page and notes that you have entered on the notes pane in the lower half of the page
A view in PowerPoint that displays a presentation in a manner similar to a side show but in which the taskbar, title bar, and status bar remain available in the presentation window
Occupies the full computer screen exactly the way your presentation will look on a big screen when your audience sees it
Located at the bottom of the PowerPoint window and shows messages and information about the view, such as the slide number and the current theme template used
Allows you to apply preset colors and effects to quickly change the appearance of your shape
A command that removes unwanted or unnecessary areas of a picture
A function of the crop command that allows you to resize the picture so that the entire picture displays inside the picture area, while maintain the original aspect ratio
Helps presenters recall important points, such as key messages or stats, as they give a presentation
A gallery of text styles with which you can create decorative effects, such as shadowed or mirrored
Although presentations are not typically printed, this will allow efficient options for when printing is necessary
A backstage view feature that displays on the screen what a hard (printed) copy would looks like
Computer Usage and Applications Copyright © by Abigail Rusu & Maricopa Millions is licensed under a Creative Commons Attribution 4.0 International License , except where otherwise noted.
Share This Book
IMAGES
VIDEO
COMMENTS
To activate the Presenter Coach, click "Start Rehearsing" in the bottom-right corner of your window. Optionally, enable "Show real-time feedback" if you want the coach to give you tips while you're still presenting. Now, begin your presentation like you normally would. If you enabled the real-time feedback option, you'll see some tips appear in ...
Rehearse your presentation. Select Slide Show > Rehearse Timings. Select the Next arrow to go to the next slide. Or click the mouse or press the Right Arrow key. The number to the right of the Pause icon is the time for the current slide. The time to the right of that is the time for the whole presentation. Select the Pause icon if you want to ...
On the Slide Show tab, select Rehearse with Coach. (If you've turned off the Simplified Ribbon, you don't have a Slide Show tab; instead use the View tab to start Speaker Coach.) The presentation opens in a full-screen view, similar to Slide Show. Select Get Started at the lower right when you are ready to begin rehearsing.
Microsoft PowerPoint is a presentation design software that is part of Microsoft 365. This software allows you to design presentations by combining text, images, graphics, video, and animation on slides in a simple and intuitive way. Over time, PowerPoint has evolved and improved its accessibility to users.
Here's another one of our top PPT tips: tap into Envato Elements' unlimited stock photo library. People are more likely to take you seriously if your presentation is visually appealing. Users view attractive design as more usable. Similarly, they'll view a more attractive PowerPoint as more effective. 11.
Get your main point into the presentation as early as possible (this avoids any risk of audience fatigue or attention span waning), then substantiate your point with facts, figures etc and then reiterate your point at the end in a 'Summary'. 2. Practice Makes Perfect. Also, don't forget to practice your presentation.
Tips for creating an effective presentation. Tip. Details. Choose a font style that your audience can read from a distance. Choosing a simple font style, such as Arial or Calibri, helps to get your message across. Avoid very thin or decorative fonts that might impair readability, especially at small sizes. Choose a font size that your audience ...
Best Practice PowerPoint Presentation Tips. Use A Consistent Presentation Design. One Topic Per Slide. Avoid information overwhelm by using the "Rule of Three". Display one bullet at a time. Presentation Blunders To Avoid. Avoid unnecessary animations. Only add content that supports your main points.
Get a FREE Intro to PowerPoint 2019 course here: ️ https://theskillstream.com/powerpoint-2019-intro-courseIn this Microsoft PowerPoint tutorial, we look at...
Download to follow along and complete the exercises ️ https://www.simonsezit.com/powerpoint-2021-exercise-files/In this PowerPoint 2021/365 beginner tutor...
Microsoft's Presenter Coach, which helps you practice presentations, has been available on the web version of PowerPoint for a while now, but it's finally coming to the desktop and mobile ...
To do that, simply go up to the Home tab and click on New Slide. This inserts a new slide in your presentation right after the one you were on. You can alternatively hit Ctrl+M on your keyboard to insert a new blank slide in PowerPoint. To learn more about this shortcut, see my guide on using Ctrl+M in PowerPoint.
A good presentation needs two fonts: a serif and sans-serif. Use one for the headlines and one for body text, lists, and the like. Keep it simple. Veranda, Helvetica, Arial, and even Times New Roman are safe choices. Stick with the classics and it's hard to botch this one too badly.
3. Create an Outline. An outline is similar to a storyboard. We can plan out our slides ahead of time to establish flow, presentation length, and timings. An outline can be something as simple as drawing out slides in a notepad and jotting down the key points to cover, or we can use PowerPoint to create a 'wireframe'.
PowerPoint Presentation Best Practices: Tips & Resources. A guide to layout, design, best practices, and tips for creating a great PowerPoint presentation for your class. ... your slides. You don't want to go too fast, but make sure you don't go over your allotted time, either. (This is where practice comes in!) You might want to leave a few ...
Step 1 - Know your audience and Step 2 - Know your purpose • 6 minutes. Step 3 - Structure the body of your presentation • 7 minutes. Step 4 - Plan how you will start your presentation • 3 minutes. Step 5 - Plan how you will end your presentation • 2 minutes. Step 6 - Prepare your visual aids • 3 minutes.
Select the text. Under Drawing Tools, choose Format. Do one of the following: To change the color of your text, choose Text Fill, and then choose a color. To change the outline color of your text, choose Text Outline, and then choose a color. To apply a shadow, reflection, glow, bevel, 3-D rotation, a transform, choose Text Effects, and then ...
6. "Blitzscaling: Book Trailer," Reid Hoffman. If you're going to go the minimalistic route, I'd take note of this PowerPoint presentation example from Reid Hoffman. This clean design adheres to a simple, consistent color scheme with clean graphics peppered throughout to make the slides more visually interesting.
Choose the fonts wisely. Select pleasing colors. Don't overuse animations and effects. Use a standard presentation rule. From hard-to-read fonts to colors that hurt the eyes of your audience ...
Follow the 5/5/5 rule. To keep your audience from feeling overwhelmed, you should keep the text on each slide short and to the point. Some experts suggest using the 5/5/5 rule: no more than five words per line of text, five lines of text per slide, or five text-heavy slides in a row.
Create a presentation. Open PowerPoint. In the left pane, select New. Select an option: To create a presentation from scratch, select Blank Presentation. To use a prepared design, select one of the templates. To see tips for using PowerPoint, select Take a Tour, and then select Create, . Add a slide.
Powerpoint Project 1. Kendall Myers December 22, 2017. In this practice project for Powerpoint, students will create a basic powerpoint based on the example given. Students will need to write titles, insert pictures and use different animations for key …. Resource Type:
On the Home tab, in the Slides Group, select New Slide and choose Picture with Caption Layout. In the picture placeholder, click to add a picture. Browse to your data files, and insert the image PowerPoint_Practice_1. On the Picture Tools Format tab, in the Size group select the arrow under Crop and select Fit.
Practice and rehearse your presentation or create index cards with speaking notes to make your presentation more engaging. Don't use a new design, transition, animation, etc., on each slide—you'll clutter up your design. Choose one single design, color scheme, font pairing, transition style, animation effect, etc., and use it throughout ...