
- Onsite training
3,000,000+ delegates
15,000+ clients
1,000+ locations
- KnowledgePass
- Log a ticket
01344203999 Available 24/7

What is PowerPoint: A Comprehensive Guide for Beginners
What is PowerPoint? This blog provides the essence of PowerPoint, a versatile presentation software by Microsoft. Discover its features, uses, and the art of crafting compelling slideshows. Whether you're a student, professional, or simply curious, explore the power of PowerPoint and learn how to create impactful presentations effortlessly.

Exclusive 40% OFF
Training Outcomes Within Your Budget!
We ensure quality, budget-alignment, and timely delivery by our expert instructors.
Share this Resource
- Microsoft Dynamics 365 Fundamentals (ERP) MB920
- Microsoft Access Training
- Microsoft Dynamics 365 Fundamentals (CRM) MB910
- Microsoft Word Course
- Microsoft Dynamics 365 Marketing MB220

According to Glassdoor , a PowerPoint designer's average salary in the UK is about £37,811 annually. In this blog, you will learn What is PowerPoint, its key features, its benefits, and how to use it, as well as learn some tips for creating effective presentations.
Table of contents
1) What is PowerPoint?
2) Understanding the PowerPoint Interface
3) Key Features of PowerPoint
4) How to use PowerPoint to create a presentation?
5) Benefits of PowerPoint
6) Tips for Creating Effective PowerPoint Presentations
7) Conclusion
What is PowerPoint?
PowerPoint is a versatile and popular presentation software developed by Microsoft (MS). It is a part of the Microsoft Office Suite and offers various features and tools to create visually appealing and engaging presentations. MS PowerPoint allows users to combine text, graphics, multimedia elements, and animations to convey information effectively .
Evolution of PowerPoint

Understanding the PowerPoint Interface
The PowerPoint interface provides a user-friendly environment for creating and editing presentations. Familiarising yourself with its essential components will help you navigate the software efficiently. Here's a breakdown of the MS PowerPoint interface:
1) Ribbon : The Ribbon is located at the top of the MS PowerPoint window and consists of multiple tabs, such as Home, Insert, Design, Transitions, and more.
2) Slides pane : The Slides pane is on the left side of the PowerPoint window. It displays thumbnail images of your presentation slides, allowing you to navigate and rearrange them easily. You can add, delete, duplicate, or hide slides from this pane.
3) Notes pane : The Notes pane is located below the Slides pane. It provides space for adding speaker notes or additional information related to each slide.
4) Slide area : The Slide area occupies the central part of the PowerPoint window. It displays the selected slide, where you can add and arrange content such as text, images, charts, and multimedia elements .
5) Task panes : Task panes are additional panels on the PowerPoint window's right side. They offer various functionalities such as formatting options, slide layouts, animations, etc. Task panes can be opened or closed based on your specific needs.
Understanding the MS PowerPoint interface will help you navigate the software effectively and make the most of its features. Whether you are creating slides, adding content, or applying formatting, having a good grasp of the interface ensures a smooth and productive experience .
Key Features of PowerPoint
When it comes to creating captivating and professional presentations, MS PowerPoint stands out as versatile and feature-rich software. Its array of tools and functionalities enables users to bring their imagination and ideas to life. Moreover, it also helps engage their audience effectively .

1) Slide Templates : PowerPoint provides a collection of pre-designed templates that make it easy to create visually appealing slides.
2) Slide Master : The Slide Master feature allows users to define the overall layout, font styles, and colour scheme for the entire presentation .
3) Animations and transitions : PowerPoint offers various animation effects and slide transitions to add visual interest and captivate the audience .
4) Multimedia integration : Users can embed images, videos, and audio files directly into their presentations, enhancing the overall impact .
5) Collaboration tools : MS PowerPoint allows multiple users to work on a presentation simultaneously, making it ideal for team projects and remote collaboration .
6) Presenter View : The Presenter View feature gives presenters access to speaker notes, a timer, and a preview of upcoming slides, enabling a seamless presentation experience .
These features collectively contribute to PowerPoint's versatility and make it a powerful tool for developing engaging and impactful presentations.
How to use PowerPoint to create a presentation?
Creating a presentation in PowerPoint is a straightforward process. Whether it's simple animations or explainer videos learning H ow to use PowerPoint is an extremely valuable skill. Here's a step-by-step guide on how to create a presentation:
1) Launch PowerPoint and choose a template or start with a blank slide.
2) Add slides by clicking "New Slide" or using the shortcut key (Ctrl + M).
3) Customise slide content by entering text and inserting visuals.
4) Rearrange slides for a logical flow by dragging them in the slide navigation pane.
5) Apply slide transitions for visual effects in the "Transitions" tab.
6) Add animations to objects in the "Animations" tab.
7) Preview your presentation by clicking "Slide Show".
8) Save your presentation and choose a format (.pptx or .pdf).
9) Share your presentation via email, cloud storage, or collaboration tools.
By following these steps, you can create a well-structured and visually appealing presentation in Microsoft PowerPoint. Remember to keep your content concise, use engaging visuals, and practice your presentation skills to deliver an impactful presentation .
Benefits of PowerPoint

1) Visual appeal : Microsoft PowerPoint allows you to create visually appealing presentations with its wide range of design tools and features. You can use templates, themes, and customisable layouts to make your slides visually engaging and professional .
2) Easy to use : PowerPoint has a user-friendly interface, making it accessible to users of all levels. The intuitive tools and straightforward navigation make it easy to create, edit, and deliver presentations efficiently .
3) Flexibility : PowerPoint provides flexibility in terms of content creation. You can include various types of content, such as text, images, charts, graphs, videos, and audio files, to enhance your message and engage your audience effectively.
4) Organisation and structure : PowerPoint offers features to help you organise and structure your content. You can create multiple slides, use slide masters for consistent formatting, and arrange the sequence of slides to create a logical flow .
5) Presenter tools : PowerPoint includes built-in presenter tools that aid in delivering presentations smoothly. You can use presenter view to see your notes and upcoming slides while your audience sees only the presentation. Additionally, features like slide transitions and animations add visual interest and help you control the flow of information .
6) Collaboration and sharing : PowerPoint allows for easy collaboration and sharing of presentations. Several users can simultaneously work on the same presentation, making it convenient for team projects. You can also share your presentations via email, cloud storage, or online platforms, ensuring easy access for viewers .
7) Integration with other tools : PowerPoint can seamlessly integrate with other Microsoft Office applications, such as Word and Excel. You can import data and charts from Excel or copy and paste content between different Office applications, saving time and effort .
8) Presenter-audience interaction : PowerPoint provides features that facilitate interaction between the presenter and the audience. You can include interactive elements like hyperlinks, buttons, and quizzes to engage your audience and make your presentations more dynamic.
9) Portable and accessible : PowerPoint presentations can be saved in various formats, such as .pptx or .pdf, making them easily accessible on different devices. This portability allows you to deliver presentations on laptops, tablets, or even projectors without compatibility issues .
10) Time and effort savings : PowerPoint simplifies the process of creating presentations, saving you time and effort. The pre-designed templates, slide layouts, and formatting options enable you to create professional-looking presentations efficiently .
Unleash your creativity to deliver captivating presentations that leave a lasting impact with our Microsoft PowerPoint Masterclass – Sign up now!
Tips for Creating Effective PowerPoint Presentations

1) Simplicity is key : Keep your slides clean and uncluttered. Use concise bullet points and simple visuals to convey your message effectively .
2) Visuals matter : Incorporate relevant, high-quality visuals such as images, charts, and diagrams to enhance understanding and engagement .
3) Limit text : Avoid overwhelming your audience with excessive text on slides. Use brief phrases or keywords to communicate key points .
4) Choose legible fonts : Opt for clear and readable fonts that are easy to read, even from a distance. Maintain consistency in font styles throughout your presentation .
5) Consistent design : Maintain a consistent design theme, including colours, fonts, and layout, to create a visually appealing and professional presentation.
6) Emphasise important points : Use visual hierarchy techniques, such as font size, colour, and formatting, to draw attention to essential information .
7) Use transitions and animations sparingly : Incorporate slide transitions and animations thoughtfully, focusing on enhancing content and transitions without distracting the audience .
8) S lide notes for guidance : Utilise the slide notes feature to include additional details, explanations, or reminders for a well-prepared and confident presentation.
9) Practice and time yourself : Rehearse your presentation to ensure smooth delivery and stay within the allocated time. Practice helps you refine your content and delivery.
10) Engage the audience : Encourage audience participation through interactive elements, questions, or discussions to foster engagement and make your presentation more memorable.
By implementing these tips, you can create effective MS PowerPoint presentations that capture attention, communicate information clearly, and engage your audience effectively.
Conclusion
We hope this blog has helped you understand What is PowerPoint and how it can help you. It offers powerful features with a user-friendly interface for creating visually appealing presentations. With its tools for organising information, incorporating text and visuals, and delivering impactful content, PowerPoint is a valuable tool for beginners to communicate their ideas effectively .
Master the art of effective communication and productivity and unlock your potential with our comprehensive Microsoft Office Training – Sign up now!
Frequently Asked Questions
Upcoming office applications resources batches & dates.
Thu 16th May 2024
Thu 6th Jun 2024
Thu 4th Jul 2024
Thu 8th Aug 2024
Thu 5th Sep 2024
Thu 10th Oct 2024
Thu 7th Nov 2024
Thu 5th Dec 2024
Get A Quote
WHO WILL BE FUNDING THE COURSE?
My employer
By submitting your details you agree to be contacted in order to respond to your enquiry
- Business Analysis
- Lean Six Sigma Certification
Share this course
Our biggest spring sale.

We cannot process your enquiry without contacting you, please tick to confirm your consent to us for contacting you about your enquiry.
By submitting your details you agree to be contacted in order to respond to your enquiry.
We may not have the course you’re looking for. If you enquire or give us a call on 01344203999 and speak to our training experts, we may still be able to help with your training requirements.
Or select from our popular topics
- ITIL® Certification
- Scrum Certification
- Change Management Certification
- Business Analysis Courses
- Microsoft Azure Certification
- Microsoft Excel Courses
- Microsoft Project
- Explore more courses
Press esc to close
Fill out your contact details below and our training experts will be in touch.
Fill out your contact details below
Thank you for your enquiry!
One of our training experts will be in touch shortly to go over your training requirements.
Back to Course Information
Fill out your contact details below so we can get in touch with you regarding your training requirements.
* WHO WILL BE FUNDING THE COURSE?
Preferred Contact Method
No preference
Back to course information
Fill out your training details below
Fill out your training details below so we have a better idea of what your training requirements are.
HOW MANY DELEGATES NEED TRAINING?
HOW DO YOU WANT THE COURSE DELIVERED?
Online Instructor-led
Online Self-paced
WHEN WOULD YOU LIKE TO TAKE THIS COURSE?
Next 2 - 4 months
WHAT IS YOUR REASON FOR ENQUIRING?
Looking for some information
Looking for a discount
I want to book but have questions
One of our training experts will be in touch shortly to go overy your training requirements.
Your privacy & cookies!
Like many websites we use cookies. We care about your data and experience, so to give you the best possible experience using our site, we store a very limited amount of your data. Continuing to use this site or clicking “Accept & close” means that you agree to our use of cookies. Learn more about our privacy policy and cookie policy cookie policy .
We use cookies that are essential for our site to work. Please visit our cookie policy for more information. To accept all cookies click 'Accept & close'.
- Help Center
- Google Docs Editors
- Privacy Policy
- Terms of Service
- Submit feedback
- Get started with Google Slides
- Create a presentation
How to use Google Slides
Want advanced Google Workspace features for your business?
Try Google Workspace today!
Google Slides is an online presentation app that lets you create and format presentations and work with other people.
Step 1: Create a presentation
To create a new presentation:
- Open the Slides home screen at Google Slides .
You can also create new presentations from the URL https://slides.google.com/create .
Step 2: Edit and format a presentation
You can add, edit, or format text, images, or videos in a presentation.
- Insert and arrange text, shapes, and lines
- Add, delete & organize slides
- Add animations to a slide
Step 3: Share & work with others
You can share files and folders with people and choose whether they can view, edit, or comment on them.
Related articles
Learn more about Tool finder for Docs, Sheets & Slides
Need more help?
Try these next steps:.
Using Google products, like Google Docs, at work or school? Try powerful tips, tutorials, and templates. Learn to work on Office files without installing Office, create dynamic project plans and team calendars, auto-organize your inbox, and more.
- PRO Courses Guides New Tech Help Pro Expert Videos About wikiHow Pro Upgrade Sign In
- EDIT Edit this Article
- EXPLORE Tech Help Pro About Us Random Article Quizzes Request a New Article Community Dashboard This Or That Game Popular Categories Arts and Entertainment Artwork Books Movies Computers and Electronics Computers Phone Skills Technology Hacks Health Men's Health Mental Health Women's Health Relationships Dating Love Relationship Issues Hobbies and Crafts Crafts Drawing Games Education & Communication Communication Skills Personal Development Studying Personal Care and Style Fashion Hair Care Personal Hygiene Youth Personal Care School Stuff Dating All Categories Arts and Entertainment Finance and Business Home and Garden Relationship Quizzes Cars & Other Vehicles Food and Entertaining Personal Care and Style Sports and Fitness Computers and Electronics Health Pets and Animals Travel Education & Communication Hobbies and Crafts Philosophy and Religion Work World Family Life Holidays and Traditions Relationships Youth
- Browse Articles
- Learn Something New
- Quizzes Hot
- This Or That Game
- Train Your Brain
- Explore More
- Support wikiHow
- About wikiHow
- Log in / Sign up
- Computers and Electronics
- Website Application Instructions
- Google Applications
How to Create a Presentation Using Google Slides
Last Updated: November 30, 2023
wikiHow is a “wiki,” similar to Wikipedia, which means that many of our articles are co-written by multiple authors. To create this article, 17 people, some anonymous, worked to edit and improve it over time. This article has been viewed 237,077 times. Learn more...
This tutorial will show you how to make a PowerPoint-like presentation using Google Slides. Presentations can be used for school, business, and so much more.

- You can also just type in https://slides.google.com , log in if you haven't already, and will be taken to the Slides page.
- If you don't have a Google account, learn to create one now!

- For more options, hover over the arrow on the right edge of the Google Slides option, where a smaller drop-down menu will appear. From here you can select to create a presentation from a template or a blank slide.

- Be sure to add a title and subtitle by clicking where you are prompted to add text.

- You can also change a pre-existing slide's layout by clicking the layout option on the upper editing bar.

- As you add animations to each element by clicking the blue "+ Select an object to animate", they will begin to pile up. Click on each one to edit it.
- Change the transition from slide to slide by clicking the default "Slide: No transition" at the top of the sidebar. You can choose whether to apply to all slides or just one.
- Preview your animations by clicking Play at the bottom of the sidebar.
- Remove an animation by clicking the small x on its rectangle, and drag each animation up or down to change the order.

Community Q&A
wikiHow Video: How to Create a Presentation Using Google Slides
- If you have a pop-up blocker, make sure to disable it so Slides can work properly. Thanks Helpful 0 Not Helpful 0
- Hover over each tool to see its keyboard shortcut and function. Thanks Helpful 0 Not Helpful 0
- Remember, these are the basic functions- Google Slides contains many more tools that you can work with as you explore the creator. Thanks Helpful 0 Not Helpful 0
You Might Also Like

About This Article
To create a new Google Slides presentation, open a web browser and go to Slides.Google.com. If you want to start from a template, you can choose one from the template gallery. Otherwise, click "Blank" to create a new blank presentation. Your blank presentation starts with a single simple slide with space to enter a title and subtitle. You can personalize this slide, as well as other slides you add, by editing the placeholder text, as well as choosing a slide theme from the panel to the right. To insert another slide, click the "Insert" menu and select "New Slide," or press "Control M" for a quick keyboard shortcut. You'll also find other things you can add to your slide on the Insert menu, including the option to add an image, a text box for typing, videos, shapes, charts, and other features. After adding a new slide, click the "Layout" menu to choose a slide layout—you can give each slide its own layout or reuse the same layout as much as necessary. Edit the placeholder text, and then insert objects from the Insert menu. To move an object, click the arrow in the toolbar, hover the mouse cursor around the object's border line until it turns to a 4-point arrow, and then click and drag it. Each slide you add will have a thumbnail in the left panel—click a slide's thumbnail to open that slide for editing. To see your presentation as a viewer would, click your first slide in the left panel, and then click "Present" at the top corner. Click the Escape key to go back to editing. Google Slides also has some built-in effects you can access from the "Transition" menu—here you can animate a slide's transition into the next slide, as well as animate individual objects. To apply an effect, background, theme, layout, or any other setting to more than one slide at once, select the slides in the left panel by holding down the Control key as you click each thumbnail. Your presentation will automatically save to your Google Drive as you work—type a name for the presentation in the top-left corner so you can easily find the file when you need it. Did this summary help you? Yes No
- Send fan mail to authors
Is this article up to date?

Featured Articles

Trending Articles

Watch Articles

- Terms of Use
- Privacy Policy
- Do Not Sell or Share My Info
- Not Selling Info
Keep up with the latest tech with wikiHow's free Tech Help Newsletter
- Meta Quest 4
- Google Pixel 9
- Google Pixel 8a
- Apple Vision Pro 2
- Nintendo Switch 2
- Samsung Galaxy Ring
- Yellowstone Season 6
- Recall an Email in Outlook
- Stranger Things Season 5
How to use Google Slides
If you want to create a presentation for your company or a slideshow for your classroom, Google Slides is a solid option. The application is similar to Microsoft PowerPoint but is completely free and web-based for easy access.
Get started in Google Slides
Use views in google slides, add and format slides in a presentation, include speaker notes, insert and format text on a slide, insert and format images on a slide, insert other objects on a slide, view and present a slideshow.
Here, we’ll walk you through the basics of using Google Slides as a beginner. From adding slides to inserting text and images to presenting your slideshow, here’s how to use Google Slides.
What You Need
Web browser
Google account
To create a presentation, visit Google Slides and sign in with your Google account. You can then use a template for a quick start or create a blank slideshow.
Step 1: On the main Google Slides page, you’ll see a few templates across the top. To see them all, select Template gallery . If you see a template you want to use, select it.
Otherwise, pick the Blank option to create a slideshow from scratch.
Step 2: When the slideshow opens, head to the top-left corner and give it a name.
The default for a template is the template name, and for a blank slideshow, it’s “Untitled Presentation.” Simply replace that text with your own and press Enter or Return to save it.
- How to change margins in Google Docs
- How to draw on Google Docs to add doodles, sketches, and more
- How to do hanging indent on Google Docs
Step 3: As you create your presentation, Google Slides saves it automatically. At the top of the slideshow screen, you’ll see that it is saved to your Google Drive and when you made the last edit.
Step 4: You can return to the main Google Slides screen anytime by selecting the Google Slides logo on the top left, beside the name.
As you create your presentation, you can use different views depending on how you want to work.
Step 1: The main view, as shown below, puts your slide front and center without distractions.
Step 2: To open thumbnails of your slides on the left, select View > Show filmstrip . You can then use the Filmstrip to move to different slides in your presentation and take action on a slide with a right-click.
To close the Filmstrip, return to View > Show filmstrip to deselect the option.
Step 3: To see a full screen of slide thumbnails, go to View > Grid view to select the option. This gives you a larger picture of how your slides are set up and actions you can take using a right-click.
To close this view, go to View > Grid view to deselect the option.
To build a presentation, you’ll add slides. Each slide can contain text, images, videos, shapes, and other elements. To make structuring your slides a bit easier, you can use a pre-made layout. But you also have the option to use a blank slide to place items where you like.
Step 1: To add a slide, do one of the following:
- Go to the Insert tab and choose New slide near the bottom.
- Go to the Slide tab and choose New slide at the top.
- In the Filmstrip or Grid view, right-click a slide and pick New slide .
Step 2: By default, the new slide is placed after your selected slide and uses the same layout. You can change the layout for the new slide if you prefer.
Step 3: To change the layout, select the slide and do one of the following:
- Go to the Slide tab, move to Apply layout , and choose a layout in the pop-out menu.
- In the Filmstrip or Grid view, right-click a slide, move to Apply layout , and choose a layout in the pop-out menu.
When you present a slideshow that you plan to talk through, you can add notes to your slides that only you can see. This is similar to using physical index cards during a speech.
Step 1: To display the notes section on a slide, either drag up using the Three dots at the very bottom of the slide or select View > Show speaker notes .
Step 2: This expands the section below the slide. Place your cursor inside the Notes section and enter your text.
Step 3: To change the font style, size, color, or formatting, select the text in your note and use the Font buttons in the toolbar.
Step 4: To close the speaker notes area, either drag down until the notes section is out of sight or go to View > Show speaker notes to deselect the option.
You can add text to your slides using the pre-made text boxes that are included with the layout you select. Alternatively, you can add text boxes and move them where you want.
Step 1: To add text to an included text box, simply click inside the box and type. The text is automatically formatted per the text box type. For instance, if you enter text in a title box, it’s formatted in a larger font.
Step 2: To insert a text box of your own, either select Insert > Text box in the menu or choose the Text box button in the toolbar.
Step 3: Click a spot on your slide to add the text box, and then enter your text inside.
Step 4: You can move a text box by dragging it and resize one by dragging in or out from a corner or edge.
Step 5: To change the font style, size, color, or format for the text inside the box, select the text and then use the font options in the toolbar.
Slideshows are visual presentations, so along with text, you’ll likely want to include pictures or photos.
Step 1: Go to Insert and move to Image or select the arrow next to the Image button in the toolbar.
Step 2: Choose the location for your image. You can pick a picture from your computer, a web search, Google Drive, Google Photos, a URL, or your device camera.
Step 3: Once you locate and insert the image, drag to move it where you like. You can also drag a corner or edge to resize it.
Step 4: For additional formatting options such as rotation, position, shadow, reflection, and other adjustments, open the Format options sidebar.
You can do this by selecting the image and choosing Format options in the toolbar or by right-clicking the image and choosing Format options .
Along with text and images, you can include other types of visuals in your presentation. You can add videos, audio files, tables, charts, diagrams, word art, and lines.
Step 1: To see all of your options and add an element, go to the Insert tab and choose what you would like to add.
Step 2: Some items like shapes, charts, and lines display a pop-out menu for you to pick the type or style. Other elements like video and audio display a pop-up window for you to pick the location or enter a URL.
Step 3: Once you insert an object on your slide, drag to move it to the spot you want. You can also right-click the item to view additional actions like formatting, alignment, or arrangement with other slide elements.
You can view your presentation at any point in the creation process and can present it the same way to your audience.
Plus, you can take advantage of the Presenter view, which gives you controls and displays your notes. Or, simply watch the slideshow as your audience will.
Step 1: On the top right, select the arrow next to Slideshow and pick Presenter view or Start from beginning .
Step 2: In Presenter view, you’ll see your slideshow on one side of your display or second monitor, with a smaller control window floating on top.
Use the control window to move through the slides, pause the slideshow, and see your speaker notes.
Step 3: In regular slideshow view, you’ll see the presentation in full-screen mode, as mentioned.
Use the Floating toolbar on the bottom left to advance through the slides or pause the slideshow.
Step 4: In either of the above views, select the Three dots on the right side of the floating toolbar to do things like enter or exit full-screen mode, view your speaker notes, automatically play the presentation, or exit the show.
There you have it! These are the basics for how to use Google Slides if you’re new to the application. For more, look at how to use Google Sheets .
Editors' Recommendations
- How to change theme colors in Google Slides
- How to delete a file from Google Drive on desktop and mobile
- 5 web browsers you should use instead of Google Chrome or Edge
- How to delete Google Chrome on Windows and Mac
- How to create folders and move files in Google Drive
- How-To Guides

Whether for personal preference or as a requirement for the APA or MLA writing style, we’ll show you how to double-space in Google Docs.
The nice part about this format in Google Docs is that you can apply it to the entire document or only selected blocks of text. Plus, you can double-space in Google Docs on the web and in the mobile app.
Google Drive is a common cloud storage choice for work and education projects, especially if you are collaborating with other people or are part of a broader workflow process. However, sometimes you need to download a file to your device for more direct work or to more easily move it somewhere else.
Google Slides is a great way to add style and flare to your everyday workplace presentations. It’s also a great tool for the classroom, that’s easy to adapt for students of all ages. Packed with graphics, animation tools, and other immersive features, Google Sheets even lets you upload your own audio and video to your slideshows.
- Create a presentation Article
- Save Article
- Design Article
- Share and collaborate Article
- Give a presentation Article
- Set up your mobile apps Article
- Learn more Article

Create a presentation
Create a presentation in PowerPoint

Create presentations from scratch or start with a professionally designed, fully customizable template from Microsoft Create .
Tip: If you have Microsoft Copilot it can help you create a presentation, add slides or images, and more. To learn more see Create a new presentation with Copilot in PowerPoint.
Open PowerPoint.
In the left pane, select New .
Select an option:
To create a presentation from scratch, select Blank Presentation .
To use a prepared design, select one of the templates.
To see tips for using PowerPoint, select Take a Tour , and then select Create , .

Add a slide
In the thumbnails on the left pane, select the slide you want your new slide to follow.
In the Home tab, in the Slides section, select New Slide .
In the Slides section, select Layout , and then select the layout you want from the menu.

Add and format text
Place the cursor inside a text box, and then type something.
Select the text, and then select one or more options from the Font section of the Home tab, such as Font , Increase Font Size , Decrease Font Size , Bold , Italic , Underline , etc.
To create bulleted or numbered lists, select the text, and then select Bullets or Numbering .

Add a picture, shape, and more
Go to the Insert tab.
To add a picture:
In the Images section, select Pictures .
In the Insert Picture From menu, select the source you want.
Browse for the picture you want, select it, and then select Insert .
To add illustrations:
In the Illustrations section, select Shapes , Icons , 3D Models , SmartArt , or Chart .
In the dialog box that opens when you click one of the illustration types, select the item you want and follow the prompts to insert it.

Need more help?
Want more options.
Explore subscription benefits, browse training courses, learn how to secure your device, and more.

Microsoft 365 subscription benefits

Microsoft 365 training

Microsoft security

Accessibility center
Communities help you ask and answer questions, give feedback, and hear from experts with rich knowledge.

Ask the Microsoft Community

Microsoft Tech Community

Windows Insiders
Microsoft 365 Insiders
Find solutions to common problems or get help from a support agent.

Online support
Was this information helpful?
Thank you for your feedback.
We use essential cookies to make Venngage work. By clicking “Accept All Cookies”, you agree to the storing of cookies on your device to enhance site navigation, analyze site usage, and assist in our marketing efforts.
Manage Cookies
Cookies and similar technologies collect certain information about how you’re using our website. Some of them are essential, and without them you wouldn’t be able to use Venngage. But others are optional, and you get to choose whether we use them or not.
Strictly Necessary Cookies
These cookies are always on, as they’re essential for making Venngage work, and making it safe. Without these cookies, services you’ve asked for can’t be provided.
Show cookie providers
- Google Login
Functionality Cookies
These cookies help us provide enhanced functionality and personalisation, and remember your settings. They may be set by us or by third party providers.
Performance Cookies
These cookies help us analyze how many people are using Venngage, where they come from and how they're using it. If you opt out of these cookies, we can’t get feedback to make Venngage better for you and all our users.
- Google Analytics
Targeting Cookies
These cookies are set by our advertising partners to track your activity and show you relevant Venngage ads on other sites as you browse the internet.
- Google Tag Manager
- Infographics
- Daily Infographics
- Template Lists
- Graphic Design
- Graphs and Charts
- Data Visualization
- Human Resources
- Beginner Guides
Blog Beginner Guides How To Make a Good Presentation [A Complete Guide]
How To Make a Good Presentation [A Complete Guide]
Written by: Krystle Wong Jul 20, 2023

A top-notch presentation possesses the power to drive action. From winning stakeholders over and conveying a powerful message to securing funding — your secret weapon lies within the realm of creating an effective presentation .
Being an excellent presenter isn’t confined to the boardroom. Whether you’re delivering a presentation at work, pursuing an academic career, involved in a non-profit organization or even a student, nailing the presentation game is a game-changer.
In this article, I’ll cover the top qualities of compelling presentations and walk you through a step-by-step guide on how to give a good presentation. Here’s a little tip to kick things off: for a headstart, check out Venngage’s collection of free presentation templates . They are fully customizable, and the best part is you don’t need professional design skills to make them shine!
These valuable presentation tips cater to individuals from diverse professional backgrounds, encompassing business professionals, sales and marketing teams, educators, trainers, students, researchers, non-profit organizations, public speakers and presenters.
No matter your field or role, these tips for presenting will equip you with the skills to deliver effective presentations that leave a lasting impression on any audience.
Click to jump ahead:
What are the 10 qualities of a good presentation?
Step-by-step guide on how to prepare an effective presentation, 9 effective techniques to deliver a memorable presentation, faqs on making a good presentation, how to create a presentation with venngage in 5 steps.
When it comes to giving an engaging presentation that leaves a lasting impression, it’s not just about the content — it’s also about how you deliver it. Wondering what makes a good presentation? Well, the best presentations I’ve seen consistently exhibit these 10 qualities:
1. Clear structure
No one likes to get lost in a maze of information. Organize your thoughts into a logical flow, complete with an introduction, main points and a solid conclusion. A structured presentation helps your audience follow along effortlessly, leaving them with a sense of satisfaction at the end.
Regardless of your presentation style , a quality presentation starts with a clear roadmap. Browse through Venngage’s template library and select a presentation template that aligns with your content and presentation goals. Here’s a good presentation example template with a logical layout that includes sections for the introduction, main points, supporting information and a conclusion:

2. Engaging opening
Hook your audience right from the start with an attention-grabbing statement, a fascinating question or maybe even a captivating anecdote. Set the stage for a killer presentation!
The opening moments of your presentation hold immense power – check out these 15 ways to start a presentation to set the stage and captivate your audience.
3. Relevant content
Make sure your content aligns with their interests and needs. Your audience is there for a reason, and that’s to get valuable insights. Avoid fluff and get straight to the point, your audience will be genuinely excited.
4. Effective visual aids
Picture this: a slide with walls of text and tiny charts, yawn! Visual aids should be just that—aiding your presentation. Opt for clear and visually appealing slides, engaging images and informative charts that add value and help reinforce your message.
With Venngage, visualizing data takes no effort at all. You can import data from CSV or Google Sheets seamlessly and create stunning charts, graphs and icon stories effortlessly to showcase your data in a captivating and impactful way.

5. Clear and concise communication
Keep your language simple, and avoid jargon or complicated terms. Communicate your ideas clearly, so your audience can easily grasp and retain the information being conveyed. This can prevent confusion and enhance the overall effectiveness of the message.
6. Engaging delivery
Spice up your presentation with a sprinkle of enthusiasm! Maintain eye contact, use expressive gestures and vary your tone of voice to keep your audience glued to the edge of their seats. A touch of charisma goes a long way!
7. Interaction and audience engagement
Turn your presentation into an interactive experience — encourage questions, foster discussions and maybe even throw in a fun activity. Engaged audiences are more likely to remember and embrace your message.
Transform your slides into an interactive presentation with Venngage’s dynamic features like pop-ups, clickable icons and animated elements. Engage your audience with interactive content that lets them explore and interact with your presentation for a truly immersive experience.

8. Effective storytelling
Who doesn’t love a good story? Weaving relevant anecdotes, case studies or even a personal story into your presentation can captivate your audience and create a lasting impact. Stories build connections and make your message memorable.
A great presentation background is also essential as it sets the tone, creates visual interest and reinforces your message. Enhance the overall aesthetics of your presentation with these 15 presentation background examples and captivate your audience’s attention.
9. Well-timed pacing
Pace your presentation thoughtfully with well-designed presentation slides, neither rushing through nor dragging it out. Respect your audience’s time and ensure you cover all the essential points without losing their interest.
10. Strong conclusion
Last impressions linger! Summarize your main points and leave your audience with a clear takeaway. End your presentation with a bang , a call to action or an inspiring thought that resonates long after the conclusion.
In-person presentations aside, acing a virtual presentation is of paramount importance in today’s digital world. Check out this guide to learn how you can adapt your in-person presentations into virtual presentations .

Preparing an effective presentation starts with laying a strong foundation that goes beyond just creating slides and notes. One of the quickest and best ways to make a presentation would be with the help of a good presentation software .
Otherwise, let me walk you to how to prepare for a presentation step by step and unlock the secrets of crafting a professional presentation that sets you apart.
1. Understand the audience and their needs
Before you dive into preparing your masterpiece, take a moment to get to know your target audience. Tailor your presentation to meet their needs and expectations , and you’ll have them hooked from the start!
2. Conduct thorough research on the topic
Time to hit the books (or the internet)! Don’t skimp on the research with your presentation materials — dive deep into the subject matter and gather valuable insights . The more you know, the more confident you’ll feel in delivering your presentation.
3. Organize the content with a clear structure
No one wants to stumble through a chaotic mess of information. Outline your presentation with a clear and logical flow. Start with a captivating introduction, follow up with main points that build on each other and wrap it up with a powerful conclusion that leaves a lasting impression.
Delivering an effective business presentation hinges on captivating your audience, and Venngage’s professionally designed business presentation templates are tailor-made for this purpose. With thoughtfully structured layouts, these templates enhance your message’s clarity and coherence, ensuring a memorable and engaging experience for your audience members.
Don’t want to build your presentation layout from scratch? pick from these 5 foolproof presentation layout ideas that won’t go wrong.

4. Develop visually appealing and supportive visual aids
Spice up your presentation with eye-catching visuals! Create slides that complement your message, not overshadow it. Remember, a picture is worth a thousand words, but that doesn’t mean you need to overload your slides with text.
Well-chosen designs create a cohesive and professional look, capturing your audience’s attention and enhancing the overall effectiveness of your message. Here’s a list of carefully curated PowerPoint presentation templates and great background graphics that will significantly influence the visual appeal and engagement of your presentation.
5. Practice, practice and practice
Practice makes perfect — rehearse your presentation and arrive early to your presentation to help overcome stage fright. Familiarity with your material will boost your presentation skills and help you handle curveballs with ease.
6. Seek feedback and make necessary adjustments
Don’t be afraid to ask for help and seek feedback from friends and colleagues. Constructive criticism can help you identify blind spots and fine-tune your presentation to perfection.
With Venngage’s real-time collaboration feature , receiving feedback and editing your presentation is a seamless process. Group members can access and work on the presentation simultaneously and edit content side by side in real-time. Changes will be reflected immediately to the entire team, promoting seamless teamwork.

7. Prepare for potential technical or logistical issues
Prepare for the unexpected by checking your equipment, internet connection and any other potential hiccups. If you’re worried that you’ll miss out on any important points, you could always have note cards prepared. Remember to remain focused and rehearse potential answers to anticipated questions.
8. Fine-tune and polish your presentation
As the big day approaches, give your presentation one last shine. Review your talking points, practice how to present a presentation and make any final tweaks. Deep breaths — you’re on the brink of delivering a successful presentation!
In competitive environments, persuasive presentations set individuals and organizations apart. To brush up on your presentation skills, read these guides on how to make a persuasive presentation and tips to presenting effectively .

Whether you’re an experienced presenter or a novice, the right techniques will let your presentation skills soar to new heights!
From public speaking hacks to interactive elements and storytelling prowess, these 9 effective presentation techniques will empower you to leave a lasting impression on your audience and make your presentations unforgettable.
1. Confidence and positive body language
Positive body language instantly captivates your audience, making them believe in your message as much as you do. Strengthen your stage presence and own that stage like it’s your second home! Stand tall, shoulders back and exude confidence.
2. Eye contact with the audience
Break down that invisible barrier and connect with your audience through their eyes. Maintaining eye contact when giving a presentation builds trust and shows that you’re present and engaged with them.
3. Effective use of hand gestures and movement
A little movement goes a long way! Emphasize key points with purposeful gestures and don’t be afraid to walk around the stage. Your energy will be contagious!
4. Utilize storytelling techniques
Weave the magic of storytelling into your presentation. Share relatable anecdotes, inspiring success stories or even personal experiences that tug at the heartstrings of your audience. Adjust your pitch, pace and volume to match the emotions and intensity of the story. Varying your speaking voice adds depth and enhances your stage presence.

5. Incorporate multimedia elements
Spice up your presentation with a dash of visual pizzazz! Use slides, images and video clips to add depth and clarity to your message. Just remember, less is more—don’t overwhelm them with information overload.
Turn your presentations into an interactive party! Involve your audience with questions, polls or group activities. When they actively participate, they become invested in your presentation’s success. Bring your design to life with animated elements. Venngage allows you to apply animations to icons, images and text to create dynamic and engaging visual content.
6. Utilize humor strategically
Laughter is the best medicine—and a fantastic presentation enhancer! A well-placed joke or lighthearted moment can break the ice and create a warm atmosphere , making your audience more receptive to your message.
7. Practice active listening and respond to feedback
Be attentive to your audience’s reactions and feedback. If they have questions or concerns, address them with genuine interest and respect. Your responsiveness builds rapport and shows that you genuinely care about their experience.

8. Apply the 10-20-30 rule
Apply the 10-20-30 presentation rule and keep it short, sweet and impactful! Stick to ten slides, deliver your presentation within 20 minutes and use a 30-point font to ensure clarity and focus. Less is more, and your audience will thank you for it!
9. Implement the 5-5-5 rule
Simplicity is key. Limit each slide to five bullet points, with only five words per bullet point and allow each slide to remain visible for about five seconds. This rule keeps your presentation concise and prevents information overload.
Simple presentations are more engaging because they are easier to follow. Summarize your presentations and keep them simple with Venngage’s gallery of simple presentation templates and ensure that your message is delivered effectively across your audience.

1. How to start a presentation?
To kick off your presentation effectively, begin with an attention-grabbing statement or a powerful quote. Introduce yourself, establish credibility and clearly state the purpose and relevance of your presentation.
2. How to end a presentation?
For a strong conclusion, summarize your talking points and key takeaways. End with a compelling call to action or a thought-provoking question and remember to thank your audience and invite any final questions or interactions.
3. How to make a presentation interactive?
To make your presentation interactive, encourage questions and discussion throughout your talk. Utilize multimedia elements like videos or images and consider including polls, quizzes or group activities to actively involve your audience.
In need of inspiration for your next presentation? I’ve got your back! Pick from these 120+ presentation ideas, topics and examples to get started.
Creating a stunning presentation with Venngage is a breeze with our user-friendly drag-and-drop editor and professionally designed templates for all your communication needs.
Here’s how to make a presentation in just 5 simple steps with the help of Venngage:
Step 1: Sign up for Venngage for free using your email, Gmail or Facebook account or simply log in to access your account.
Step 2: Pick a design from our selection of free presentation templates (they’re all created by our expert in-house designers).
Step 3: Make the template your own by customizing it to fit your content and branding. With Venngage’s intuitive drag-and-drop editor, you can easily modify text, change colors and adjust the layout to create a unique and eye-catching design.
Step 4: Elevate your presentation by incorporating captivating visuals. You can upload your images or choose from Venngage’s vast library of high-quality photos, icons and illustrations.
Step 5: Upgrade to a premium or business account to export your presentation in PDF and print it for in-person presentations or share it digitally for free!
By following these five simple steps, you’ll have a professionally designed and visually engaging presentation ready in no time. With Venngage’s user-friendly platform, your presentation is sure to make a lasting impression. So, let your creativity flow and get ready to shine in your next presentation!
Discover popular designs

Brochure maker

White paper online

Newsletter creator

Flyer maker

Timeline maker

Letterhead maker

Mind map maker

Ebook maker
.css-1qrtm5m{display:block;margin-bottom:8px;text-transform:uppercase;font-size:14px;line-height:1.5714285714285714;-webkit-letter-spacing:-0.35px;-moz-letter-spacing:-0.35px;-ms-letter-spacing:-0.35px;letter-spacing:-0.35px;font-weight:300;color:#606F7B;}@media (min-width:600px){.css-1qrtm5m{font-size:16px;line-height:1.625;-webkit-letter-spacing:-0.5px;-moz-letter-spacing:-0.5px;-ms-letter-spacing:-0.5px;letter-spacing:-0.5px;}} Best Practices The #1 rule for improving your presentation slides
by Tom Rielly • May 12, 2020

When giving presentations, either on a video conference call or in person, your slides, videos and graphics (or lack of them) can be an important element in helping you tell your story or express your idea. This is the first of a series of blog posts that will give you tips and tricks on how to perfect your visual presentations.
Your job as a presenter is to build your idea -- step-by-step -- in the minds of your audience members. One tool to do that is presentation graphics, such as slides and videos.
Why graphics for your presentation?
A common mistake is using slides or videos as a crutch, even if they don’t actually add anything to your presentation. Not all presentations need graphics. Lots of presentations work wonderfully with just one person standing on a stage telling a story, as demonstrated by many TED Talks.
You should only use slides if they serve a purpose: conveying scientific information, art, and things that are hard to explain without pictures. Once you have decided on using slides, you will have a number of decisions to make. We’ll help you with the basics of making a presentation that is, above all, clear and easy to understand. The most important thing to remember here is: less is more.
Less is so much more
You want to aim for the fewest number of slides, the fewest number of photos, the fewest words per slide, the least cluttered slides and the most white space on your slides. This is the most violated slide rule, but it is the secret to success. Take a look at these examples.

As you can see in the above example, you don’t need fancy backgrounds or extra words to convey a simple concept. If you take “Everything you need to know about Turtles”, and delete “everything you need to know about” leaving just “turtles”, the slide has become much easier for your audience to read, and tells the story with economy.

The above example demonstrates that a single image that fills the entire screen is far more powerful than a slide cluttered with images. A slide with too many images may be detrimental to your presentation. The audience will spend more mental energy trying to sort through the clutter than listening to your presentation. If you need multiple images, then put each one on its own slide. Make each image high-resolution and have it fill the entire screen. If the photos are not the same dimensions as the screen, put them on a black background. Don’t use other colors, especially white.

Your slides will be much more effective if you use the fewest words, characters, and pictures needed to tell your story. Long paragraphs make the audience strain to read them, which means they are not paying attention to you. Your audience may even get stressed if you move on to your next slide before they’ve finished reading your paragraph. The best way to make sure the attention stays on you is to limit word count to no more than 10 words per slide. As presentation expert Nancy Duarte says “any slide with more than 10 words is a document.” If you really do need a longer explanation of something, handouts or follow-up emails are the way to go.
Following a “less is more” approach is one of the simplest things you can do to improve your presentation visuals and the impact of your presentation overall. Make sure your visuals add to your presentation rather than distract from it and get your message across.
Ready to learn more about how to make your presentation even better? Get TED Masterclass and develop your ideas into TED-style talks.
© 2024 TED Conferences, LLC. All rights reserved. Please note that the TED Talks Usage policy does not apply to this content and is not subject to our creative commons license.
17 PowerPoint Presentation Tips From Pro Presenters [+ Templates]
Published: April 26, 2024
PowerPoint presentations can be professional, attractive, and really help your audience remember your message.

If you don’t have much experience, that’s okay — I’m going to arm you with PowerPoint design tips from pro presenters, the steps you need to build an engaging deck, and templates to help you nail great slide design.
![→ Free Download: 10 PowerPoint Presentation Templates [Access Now]](https://no-cache.hubspot.com/cta/default/53/2d0b5298-2daa-4812-b2d4-fa65cd354a8e.png "uses of slide presentation")
Download Now
Buckle up for a variety of step-by-step explanations as well as tips and tricks to help you start mastering this program. There are additional resources woven in, and you’ll find expert perspectives from other HubSpotters along the way.
Table of Contents
How to Make a PowerPoint Presentation
Powerpoint presentation tips.
Microsoft PowerPoint is like a test of basic professional skills, and each PowerPoint is basically a presentation made of multiple slides.
Successful PowerPoints depend on three main factors: your command of PowerPoint's design tools, your attention to presentation processes, and being consistent with your style.
Keep those in mind as we jump into PowerPoint's capabilities.
Getting Started
1. open powerpoint and click ‘new.’.
A page with templates will usually open automatically, but if not, go to the top left pane of your screen and click New . If you’ve already created a presentation, select Open and then double-click the icon to open the existing file.

10 Free PowerPoint Templates
Download ten free PowerPoint templates for a better presentation.
- Creative templates.
- Data-driven templates.
- Professional templates.
You're all set!
Click this link to access this resource at any time.
Creating PowerPoint Slides
3. insert a slide..
Insert a new slide by clicking on the Home tab and then the New Slide button. Consider what content you want to put on the slide, including heading, text, and imagery.

- Finally, PowerPoint Live is a new tool that enables you to do more seamless presentations during video calls and may be a better overall match for doing presentations remotely. Check out this video:
11. Try Using GIFs.

12 Free Customizable Resume Templates
Fill out this form to access your free professionally-designed templates, available on:
- Microsoft Word
- Google Docs
- Microsoft PowerPoint
- Google Slides
15. Embed multimedia.
PowerPoint allows you to either link to video/audio files externally or to embed the media directly in your presentation. For PCs, two great reasons for embedding are:
- Embedding allows you to play media directly in your presentation. It will look much more professional than switching between windows.
- Embedding also means that the file stays within the PowerPoint presentation, so it should play normally without extra work (except on a Mac).
If you use PowerPoint for Mac it gets a bit complicated, but it can be done:
- Always bring the video and/or audio file with you in the same folder as the PowerPoint presentation.
- Only insert video or audio files once the presentation and the containing folder have been saved on a portable drive in their permanent folder.
- If the presentation will be played on a Windows computer, then Mac users need to make sure their multimedia files are in WMV format.
- Consider using the same operating system for designing and presenting, no matter what.
16. Bring your own hardware.
Between operating systems, PowerPoint is still a bit jumpy. Even between differing PPT versions, things can change. The easiest fix? Just bring along your own laptop when you're presenting.
The next easiest fix is to upload your PowerPoint presentation into Google Slides as a backup option — just make sure there is a good internet connection and a browser available where you plan to present.
Google Slides is a cloud-based presentation software that will show up the same way on all operating systems.
To import your PowerPoint presentation into Google Slides:
- Navigate to slides.google.com . Make sure you’re signed in to a Google account (preferably your own).
- Under Start a new presentation , click the empty box with a plus sign. This will open up a blank presentation.
- Go to File , then Import slides .
- A dialog box will come up. Tap Upload.
- Click Select a file from your device .
- Select your presentation and click Open .
- Select the slides you’d like to import. If you want to import all of them, click All in the upper right-hand corner of the dialog box.
- Click Import slides.
When I tested this out, Google Slides imported everything perfectly, including a shape whose points I had manipulated. This is a good backup option to have if you’ll be presenting across different operating systems.
17. Use Presenter View.
In most presentation situations, there will be both a presenter’s screen and the main projected display for your presentation.
PowerPoint has a great tool called Presenter View, which can be found in the Slide Show tab of PowerPoint. Included in the Presenter View is an area for notes, a timer/clock, and a presentation display.
For many presenters, this tool can help unify their spoken presentation and their visual aid. You never want to make the PowerPoint seem like a stack of notes that you’re reading off of.
Use the Presenter View option to help create a more natural presentation.
Pro Tip: At the start of the presentation, you should also hit CTRL + H to make the cursor disappear. Hitting the “A” key will bring it back if you need it.
Your Next Great PowerPoint Presentation Starts Here
Now that you have these style, design, and presentation tips under your belt, you should feel confident to create your PowerPoint presentation.
But if you can explore other resources to make sure your content hits the mark. After all, you need a strong presentation to land your point and make an impression.
With several templates to choose from — both in PowerPoint and available for free download — you can swiftly be on your way to creating presentations that wow your audiences.
Editor's note: This post was originally published in September 2013 and has been updated for comprehensiveness.
![Blog - Beautiful PowerPoint Presentation Template [List-Based]](https://no-cache.hubspot.com/cta/default/53/013286c0-2cc2-45f8-a6db-c71dad0835b8.png "uses of slide presentation")
Don't forget to share this post!
Related articles.
![How to Write an Ecommerce Business Plan [Examples & Template]](https://blog.hubspot.com/hubfs/ecommerce%20business%20plan.png "uses of slide presentation")
How to Write an Ecommerce Business Plan [Examples & Template]
![How to Create an Infographic in Under an Hour — the 2024 Guide [+ Free Templates]](https://blog.hubspot.com/hubfs/Make-infographic-hero%20%28598%20%C3%97%20398%20px%29.jpg "uses of slide presentation")
How to Create an Infographic in Under an Hour — the 2024 Guide [+ Free Templates]
![20 Great Examples of PowerPoint Presentation Design [+ Templates]](https://blog.hubspot.com/hubfs/powerpoint-presentation-examples.webp "uses of slide presentation")
20 Great Examples of PowerPoint Presentation Design [+ Templates]

Get Buyers to Do What You Want: The Power of Temptation Bundling in Sales

How to Create an Engaging 5-Minute Presentation
![How to Start a Presentation [+ Examples]](https://blog.hubspot.com/hubfs/how-to-start-presenting.webp "uses of slide presentation")
How to Start a Presentation [+ Examples]

120 Presentation Topic Ideas Help You Hook Your Audience
![How to Create the Best PowerPoint Presentations [Examples & Templates]](https://blog.hubspot.com/hubfs/Powerpoint%20presentation.jpg "uses of slide presentation")
How to Create the Best PowerPoint Presentations [Examples & Templates]

The Presenter's Guide to Nailing Your Next PowerPoint
![How to Create a Stunning Presentation Cover Page [+ Examples]](https://blog.hubspot.com/hubfs/presentation-cover-page_3.webp "uses of slide presentation")
How to Create a Stunning Presentation Cover Page [+ Examples]
Marketing software that helps you drive revenue, save time and resources, and measure and optimize your investments — all on one easy-to-use platform
- SUGGESTED TOPICS
- The Magazine
- Newsletters
- Managing Yourself
- Managing Teams
- Work-life Balance
- The Big Idea
- Data & Visuals
- Reading Lists
- Case Selections
- HBR Learning
- Topic Feeds
- Account Settings
- Email Preferences
What It Takes to Give a Great Presentation
- Carmine Gallo

Five tips to set yourself apart.
Never underestimate the power of great communication. It can help you land the job of your dreams, attract investors to back your idea, or elevate your stature within your organization. But while there are plenty of good speakers in the world, you can set yourself apart out by being the person who can deliver something great over and over. Here are a few tips for business professionals who want to move from being good speakers to great ones: be concise (the fewer words, the better); never use bullet points (photos and images paired together are more memorable); don’t underestimate the power of your voice (raise and lower it for emphasis); give your audience something extra (unexpected moments will grab their attention); rehearse (the best speakers are the best because they practice — a lot).
I was sitting across the table from a Silicon Valley CEO who had pioneered a technology that touches many of our lives — the flash memory that stores data on smartphones, digital cameras, and computers. He was a frequent guest on CNBC and had been delivering business presentations for at least 20 years before we met. And yet, the CEO wanted to sharpen his public speaking skills.
- Carmine Gallo is a Harvard University instructor, keynote speaker, and author of 10 books translated into 40 languages. Gallo is the author of The Bezos Blueprint: Communication Secrets of the World’s Greatest Salesman (St. Martin’s Press).
Partner Center
Critical PowerPoint Shortcuts – Claim Your FREE Training Module and Get Your Time Back!
How to Make a PowerPoint Presentation (Step-by-Step)
- PowerPoint Tutorials
- Presentation Design
- January 22, 2024
In this beginner’s guide, you will learn step-by-step how to make a PowerPoint presentation from scratch.
While PowerPoint is designed to be intuitive and accessible, it can be overwhelming if you’ve never gotten any training on it before. As you progress through this guide, you’ll will learn how to move from blank slides to PowerPoint slides that look like these.

Table of Contents
Additionally, as you create your presentation, you’ll also learn tricks for working more efficiently in PowerPoint, including how to:
- Change the slide order
- Reset your layout
- Change the slide dimensions
- Use PowerPoint Designer
- Format text
- Format objects
- Play a presentation (slide show)
With this knowledge under your belt, you’ll be ready to start creating PowerPoint presentations. Moreover, you’ll have taken your skills from beginner to proficient in no time at all. I will also include links to more advanced PowerPoint topics.
Ready to start learning how to make a PowerPoint presentation?
Take your PPT skills to the next level
Start with a blank presentation.
Note: Before you open PowerPoint and start creating your presentation, make sure you’ve collected your thoughts. If you’re going to make your slides compelling, you need to spend some time brainstorming.
For help with this, see our article with tips for nailing your business presentation here .
The first thing you’ll need to do is to open PowerPoint. When you do, you are shown the Start Menu , with the Home tab open.
This is where you can choose either a blank theme (1) or a pre-built theme (2). You can also choose to open an existing presentation (3).
For now, go ahead and click on the Blank Presentation (1) thumbnail.

Doing so launches a brand new and blank presentation for you to work with. Before you start adding content to your presentation, let’s first familiarize ourselves with the PowerPoint interface.
The PowerPoint interface

Here is how the program is laid out:
- The Application Header
- The Ribbon (including the Ribbon tabs)
- The Quick Access Toolbar (either above or below the Ribbon)
- The Slides Pane (slide thumbnails)
The Slide Area
The notes pane.
- The Status Bar (including the View Buttons)
Each one of these areas has options for viewing certain parts of the PowerPoint environment and formatting your presentation.
Below are the important things to know about certain elements of the PowerPoint interface.
The PowerPoint Ribbon

The Ribbon is contextual. That means that it will adapt to what you’re doing in the program.
For example, the Font, Paragraph and Drawing options are greyed out until you select something that has text in it, as in the example below (A).

Furthermore, if you start manipulating certain objects, the Ribbon will display additional tabs, as seen above (B), with more commands and features to help you work with those objects. The following objects have their own additional tabs in the Ribbon which are hidden until you select them:
- Online Pictures
- Screenshots
- Screen Recording
The Slides Pane

This is where you can preview and rearrange all the slides in your presentation.
Right-clicking on a slide in the pane gives you additional options on the slide level that you won’t find on the Ribbon, such as Duplicate Slide , Delete Slide , and Hide Slide .

In addition, you can add sections to your presentation by right-clicking anywhere in this Pane and selecting Add Section . Sections are extremely helpful in large presentations, as they allow you to organize your slides into chunks that you can then rearrange, print or display differently from other slides.

The Slide Area (A) is where you will build out your slides. Anything within the bounds of this area will be visible when you present or print your presentation.
Anything outside of this area (B) will be hidden from view. This means that you can place things here, such as instructions for each slide, without worrying about them being shown to your audience.

The Notes Pane is the space beneath the Slide Area where you can type in the speaker notes for each slide. It’s designed as a fast way to add and edit your slides’ talking points.
To expand your knowledge and learn more about adding, printing, and exporting your PowerPoint speaker notes, read our guide here .
Your speaker notes are visible when you print your slides using the Notes Pages option and when you use the Presenter View . To expand your knowledge and learn the ins and outs of using the Presenter View , read our guide here .

You can resize the Notes Pane by clicking on its edge and dragging it up or down (A). You can also minimize or reopen it by clicking on the Notes button in the Status Bar (B).
Note: Not all text formatting displays in the Notes Pane, even though it will show up when printing your speaker notes. To learn more about printing PowerPoint with notes, read our guide here .
Now that you have a basic grasp of the PowerPoint interface at your disposal, it’s time to make your presentation.
Adding Content to Your PowerPoint Presentation
Notice that in the Slide Area , there are two rectangles with dotted outlines. These are called Placeholders and they’re set on the template in the Slide Master View .
To expand your knowledge and learn how to create a PowerPoint template of your own (which is no small task), read our guide here .

As the prompt text suggests, you can click into each placeholder and start typing text. These types of placeholder prompts are customizable too. That means that if you are using a company template, it might say something different, but the functionality is the same.

Note: For the purposes of this example, I will create a presentation based on the content in the Starbucks 2018 Global Social Impact Report, which is available to the public on their website.
If you type in more text than there is room for, PowerPoint will automatically reduce its font size. You can stop this behavior by clicking on the Autofit Options icon to the left of the placeholder and selecting Stop Fitting Text to this Placeholder .
Next, you can make formatting adjustments to your text by selecting the commands in the Font area and the Paragraph area of the Home tab of the Ribbon.

The Reset Command: If you make any changes to your title and decide you want to go back to how it was originally, you can use the Reset button up in the Home tab .

Insert More Slides into Your Presentation
Now that you have your title slide filled in, it’s time to add more slides. To do that, simply go up to the Home tab and click on New Slide . This inserts a new slide in your presentation right after the one you were on.

You can alternatively hit Ctrl+M on your keyboard to insert a new blank slide in PowerPoint. To learn more about this shortcut, see my guide on using Ctrl+M in PowerPoint .
Instead of clicking the New Slide command, you can also open the New Slide dropdown to see all the slide layouts in your PowerPoint template. Depending on who created your template, your layouts in this dropdown can be radically different.

If you insert a layout and later want to change it to a different layout, you can use the Layout dropdown instead of the New Slide dropdown.
After inserting a few different slide layouts, your presentation might look like the following picture. Don’t worry that it looks blank, next we will start adding content to your presentation.

If you want to follow along exactly with me, your five slides should be as follows:
- Title Slide
- Title and Content
- Section Header
- Two Content
- Picture with Caption
Adding Content to Your Slides
Now let’s go into each slide and start adding our content. You’ll notice some new types of placeholders.

On slide 2 we have a Content Placeholder , which allows you to add any kind of content. That includes:
- A SmartArt graphic,
- A 3D object,
- A picture from the web,
- Or an icon.
To insert text, simply type it in or hit Ctrl+C to Copy and Ctrl+V to Paste from elsewhere. To insert any of the other objects, click on the appropriate icon and follow the steps to insert it.
For my example, I’ll simply type in some text as you can see in the picture below.

Slides 3 and 4 only have text placeholders, so I’ll go ahead and add in my text into each one.

On slide 5 we have a Picture Placeholder . That means that the only elements that can go into it are:
- A picture from the web

To insert a picture into the picture placeholder, simply:
- Click on the Picture icon
- Find a picture on your computer and select it
- Click on Insert
Alternatively, if you already have a picture open somewhere else, you can select the placeholder and paste in (shortcut: Ctrl+V ) the picture. You can also drag the picture in from a file explorer window.

If you do not like the background of the picture you inserted onto your slide, you can remove the background here in PowerPoint. To see how to do this, read my guide here .
Placeholders aren’t the only way to add content to your slides. At any point, you can use the Insert tab to add elements to your slides.
You can use either the Title Only or the Blank slide layout to create slides for content that’s different. For example, a three-layout content slide, or a single picture divider slide, as shown below.

In the first example above, I’ve inserted 6 text boxes, 3 icons, and 3 circles to create this layout. In the second example, I’ve inserted a full-sized picture and then 2 shapes and 2 text boxes.
The Reset Command: Because these slides are built with shapes and text boxes (and not placeholders), hitting the Reset button up in the Home tab won’t do anything.
That is a good thing if you don’t want your layouts to adjust. However, it does mean that it falls on you to make sure everything is aligned and positioned correctly.
For more on how to add and manipulate the different objects in PowerPoint, check out our step-by-step articles here:
- Using graphics in PowerPoint
- Inserting icons onto slides
- Adding pictures to your PowerPoint
- How to embed a video in PowerPoint
- How to add music to your presentation
Using Designer to generate more layouts ideas
If you have Office 365, your version of PowerPoint comes with a new feature called Designer (or Design Ideas). This is a feature that generates slide layout ideas for you. The coolest thing about this feature is that it uses the content you already have.
To use Designer , simply navigate to the Design tab in your Ribbon, and click on Design Ideas .

NOTE: If the PowerPoint Designer is not working for you (it is grey out), see my troubleshooting guide for Designer .
Change the Overall Design (optional)
When you make a PowerPoint presentation, you’ll want to think about the overall design. Now that you have some content in your presentation, you can use the Design tab to change the look and feel of your slides.
For additional help thinking through the design of your presentation, read my guide here .
A. Picking your PowerPoint slide size
If you have PowerPoint 2013 or later, when you create a blank document in PowerPoint, you automatically start with a widescreen layout with a 16:9 ratio. These dimensions are suitable for most presentations as they match the screens of most computers and projectors.
However, you do have the option to change the dimensions.
For example, your presentation might not be presented, but instead converted into a PDF or printed and distributed. In that case, you can easily switch to the standard dimensions with a 4:3 ratio by selecting from the dropdown (A).
You can also choose a custom slide size or change the slide orientation from landscape to portrait in the Custom Slide Size dialog box (B).

To learn all about the different PowerPoint slide sizes, and some of the issues you will face when changing the slide size of a non-blank presentation, read my guide here .
B. Selecting a PowerPoint theme
The next thing you can do is change the theme of your presentation to a pre-built one. For a detailed explanation of what a PowerPoint theme is, and how to best use it, read my article here .
In the beginning of this tutorial, we started with a blank presentation, which uses the default Office theme as you can see in the picture below.

That gives you the most flexibility because it has a blank background and quite simple layouts that work for most presentations. However, it also means that it’s your responsibility to enhance the design.
If you’re comfortable with this, you can stay with the default theme or create your own custom theme ( read my guide here ). But if you would rather not have to think about design, then you can choose a pre-designed theme.
Microsoft provides 46 other pre-built themes, which include slide layouts, color variants and palettes, and fonts. Each one varies quite significantly, so make sure you look through them carefully.
To select a different theme, go to the Design tab in the Ribbon, and click on the dropdown arrow in the Themes section .

For this tutorial, let’s select the Frame theme and then choose the third Variant in the theme. Doing so changes the layout, colors, and fonts of your presentation.

Note: The theme dropdown area is also where you can import or save custom themes. To see my favorite places to find professional PowerPoint templates and themes (and recommendations for why I like them), read my guide here .
C. How to change a slide background in PowerPoint
The next thing to decide is how you want your background to look for the entire presentation. In the Variants area, you can see four background options.

For this example, we want our presentation to have a dark background, so let’s select Style 3. When you do so, you’ll notice that:
- The background color automatically changes across all slides
- The color of the text on most of the slides automatically changes to white so that it’s visible on the dark background
- The colors of the objects on slides #6 and #7 also adjust, in a way we may not want (we’ll likely have to make some manual adjustments to these slides)

Note: If you want to change the slide background for just that one slide, don’t left-click the style. Instead, right-click it and select Apply to Selected Slides .
After you change the background for your entire presentation, you can easily adjust the background for an individual slide.

Inside the Format Background pane, you can see you have the following options:
- Gradient fill
- Picture or texture fill
- Pattern fill
- Hide background
You can explore these options to find the PowerPoint background that best fits your presentation.
D. How to change your color palette in PowerPoint
Another thing you may want to adjust in your presentation, is the color scheme. In the picture below you can see the Theme Colors we are currently using for this presentation.

Each PowerPoint theme comes with its own color palette. By default, the Office theme includes the Office color palette. This affects the colors you are presented with when you format any element within your presentation (text, shapes, SmartArt, etc.).

The good news is that the colors here are easy to change. To switch color palettes, simply:
- Go to the Design tab in the Ribbon
- In the Variants area, click on the dropdown arrow and select Colors
- Select the color palette (or theme colors) you want
You can choose among the pre-built color palettes from Office, or you can customize them to create your own.
As you build your presentation, make sure you use the colors from your theme to format objects. That way, changing the color palette adjusts all the colors in your presentation automatically.
E. How to change your fonts in PowerPoint
Just as we changed the color palette, you can do the same for the fonts.

Each PowerPoint theme comes with its own font combination. By default, the Office theme includes the Office font pairing. This affects the fonts that are automatically assigned to all text in your presentation.

The good news is that the font pairings are easy to change. To switch your Theme Fonts, simply:
- Go to the Design tab in the Ribbon
- Click on the dropdown arrow in the Variants area
- Select Fonts
- Select the font pairing you want
You can choose among the pre-built fonts from Office, or you can customize them to create your own.
If you are working with PowerPoint presentations on both Mac and PC computers, make sure you choose a safe PowerPoint font. To see a list of the safest PowerPoint fonts, read our guide here .
If you receive a PowerPoint presentation and the wrong fonts were used, you can use the Replace Fonts dialog box to change the fonts across your entire presentation. For details, read our guide here .
Adding Animations & Transitions (optional)
The final step to make a PowerPoint presentation compelling, is to consider using animations and transitions. These are by no means necessary to a good presentation, but they may be helpful in your situation.
A. Adding PowerPoint animations
PowerPoint has an incredibly robust animations engine designed to power your creativity. That being said, it’s also easy to get started with basic animations.
Animations are movements that you can apply to individual objects on your slide.

To add a PowerPoint animation to an element of your slide, simply:
- Select the element
- Go to the Animations tab in the Ribbon
- Click on the dropdown arrow to view your options
- Select the animation you want
You can add animations to multiple objects at one time by selecting them all first and then applying the animation.
B. How to preview a PowerPoint animation

There are three ways to preview a PowerPoint animation:
- Click on the Preview button in the Animations tab
- Click on the little star next to the slide
- Play the slide in Slide Show Mode
To learn other ways to run your slide show, see our guide on presenting a PowerPoint slide show with shortcuts .
To adjust the settings of your animations, explore the options in the Effect Options , Advanced Animation and the Timing areas of the Animation tab .

Note: To see how to make objects appear and disappear in your slides by clicking a button, read our guide here .
C. How to manage your animations in PowerPoint

The best way to manage lots of animations on your slide is with the Animation Pane . To open it, simply:
- Navigate to the Animations tab
- Select the Animation Pane
Inside the Animation Pane, you’ll see all of the different animations that have been applied to objects on your slide, with their numbers marked as pictured above.
Note: To see examples of PowerPoint animations that can use in PowerPoint, see our list of PowerPoint animation tutorials here .
D. How to add transitions to your PowerPoint presentation
PowerPoint has an incredibly robust transition engine so that you can dictate how your slides change from one to the other. It is also extremely easy to add transitions to your slides.
In PowerPoint, transitions are the movements (or effects) you see as you move between two slides.

To add a transition to a PowerPoint slide, simply:
- Select the slide
- Go to the Transitions tab in the Ribbon
- In the Transitions to This Slide area, click on the dropdown arrow to view your options
- Select the transition you want
To adjust the settings of the transition, explore the options in the Timing area of the Transitions tab.
You can also add the same transition to multiple slides. To do that, select them in the Slides Pane and apply the transition.
E. How to preview a transition in PowerPoint

There are three ways to preview your PowerPoint transitions (just like your animations):
- Click on the Preview button in the Transitions tab
- Click on the little star beneath the slide number in the thumbnail view
Note: In 2016, PowerPoint added a cool new transition, called Morph. It operates a bit differently from other transitions. For a detailed tutorial on how to use the cool Morph transition, see our step-by-step article here .
Save Your PowerPoint Presentation
After you’ve built your presentation and made all the adjustments to your slides, you’ll want to save your presentation. YOu can do this several different ways.

To save a PowerPoint presentation using your Ribbon, simply:
- Navigate to the File tab
- Select Save As on the left
- Choose where you want to save your presentation
- Name your presentation and/or adjust your file type settings
- Click Save
You can alternatively use the Ctrl+S keyboard shortcut to save your presentation. I recommend using this shortcut frequently as you build your presentation to make sure you don’t lose any of your work.

This is the standard way to save a presentation. However, there may be a situation where you want to save your presentation as a different file type.
To learn how to save your presentation as a PDF, see our guide on converting PowerPoint to a PDF .
How to save your PowerPoint presentation as a template
Once you’ve created a presentation that you like, you may want to turn it into a template. The easiest – but not technically correct – way, is to simply create a copy of your current presentation and then change the content.
But be careful! A PowerPoint template is a special type of document and it has its own parameters and behaviors.
If you’re interested in learning about how to create your own PowerPoint template from scratch, see our guide on how to create a PowerPoint template .
Printing Your PowerPoint Presentation
After finishing your PowerPoint presentation, you may want to print it out on paper. Printing your slides is relatively easy.

To open the Print dialog box, you can either:
- Hit Ctrl+P on your keyboard
- Or go to the Ribbon and click on File and then Print

Inside the Print dialog box, you can choose from the various printing settings:
- Printer: Select a printer to use (or print to PDF or OneNote)
- Slides: Choose which slides you want to print
- Layout: Determine how many slides you want per page (this is where you can print the notes, outline, and handouts)
- Collated or uncollated (learn what collated printing means here )
- Color: Choose to print in color, grayscale or black & white
There are many more options for printing your PowerPoint presentations. Here are links to more in-depth articles:
- How to print multiple slides per page
- How to print your speaker notes in PowerPoint
- How to save PowerPoint as a picture presentation
So that’s how to create a PowerPoint presentation if you are brand new to it. We’ve also included a ton of links to helpful resources to boost your PowerPoint skills further.
When you are creating your presentation, it is critical to first focus on the content (what you are trying to say) before getting lost inserting and playing with elements. The clearer you are on what you want to present, the easier it will be to build it out in PowerPoint.
If you enjoyed this article, you can learn more about our PowerPoint training courses and other presentation resources by visiting us here .
🔒 Unlock the PowerPoint Shortcuts Trusted by Industry Leaders KKR, American Express, HSBC, and More!
Join over 114,880 professionals from diverse fields including consulting, investment banking, advertising, marketing, sales, and business development who have supercharged their PowerPoint game with our proven methods.
✅ Customize compelling presentations effortlessly.
✅ Master time-saving techniques for faster deck creation.
✅ Boost your career prospects with top-notch PowerPoint skills.
Get FREE access to the Critical PowerPoint Shortcuts module of our premium training course by entering your name and email below.
DISCLAIMER: PC Users Only!
We respect your privacy and will keep your info safe and confidential.
About The Author

Popular Tutorials
- How to Strikethrough Text (l̶i̶k̶e̶ ̶t̶h̶i̶s̶) in Word, Excel & PowerPoint
- How to Make Animated Fireworks in PowerPoint (Step-by-Step)
- Strikethrough Shortcut (l̶i̶k̶e̶ ̶t̶h̶i̶s̶) for Word, Excel & PowerPoint
- How to Create a Flash Card Memory Game in PowerPoint (Like Jeopardy)
- Keyboard Shortcuts Not Working: Solved
PowerPoint Tutorial Categories
- Strategies & Opinions
- Shortcuts & Hacks
- Pictures, Icons, Videos, Etc.
- New Features
- Miscellaneous
- Charts & Data Viz
We help busy professionals save hours and gain peace of mind, with corporate workshops, self-paced courses and tutorials for PowerPoint and Word.
Work With Us
- Corporate Training
- Presentation & Template Design
- Courses & Downloads
- PowerPoint Articles
- Word Articles
- Productivity Resources
Find a Tutorial
- Free Training
- For Businesses
We help busy office workers save hours and gain peace of mind, with tips, training and tutorials for Microsoft PowerPoint and Word.
Master Critical PowerPoint Shortcuts – Secure Your FREE Training Module and Save Valuable Time!
⌛ Master time-saving expert techniques.
🔥 Create powerful presentations.
🚀 Propel your career to new heights.
We value your privacy – we keep your info safe.
Discover PowerPoint Hacks Loved by Industry Giants - KKR, AmEx, HSBC!
Over 114,880 professionals in finance, marketing and sales have revolutionized their PPT skills with our proven methods.
Gain FREE access to a full module of our premium PowerPoint training program – Get started today!
We hate spam too and promise to keep your information safe.
You are currently viewing a placeholder content from Facebook . To access the actual content, click the button below. Please note that doing so will share data with third-party providers.
11 Advantages of Using Microsoft PowerPoint Presentations!
By: Author Shrot Katewa

If you suddenly find yourself in a position where you have to present information to other people, you might wonder what software is the best to use to deliver a professional presentation. There are different options to choose from and you just don’t know what to use.
The biggest advantage of using PowerPoint is that PPT files are the most commonly used and widely accepted file formats. PowerPoint is easy to use, cost-effective and boasts a huge online community for support. You also get access to thousands of templates to make your presentation look good.
But, there are several other advantages of using Microsoft PowerPoint for your presentations too. In this article, I’ll some of the most effective benefits of using Microsoft PowerPoint for presentation design!
Note – If you are on the fence but interested in getting PowerPoint, check out this limited-time deal to get Office 365 1-year subscription for the lowest price on Amazon!
1. Most Widely Accepted File Format
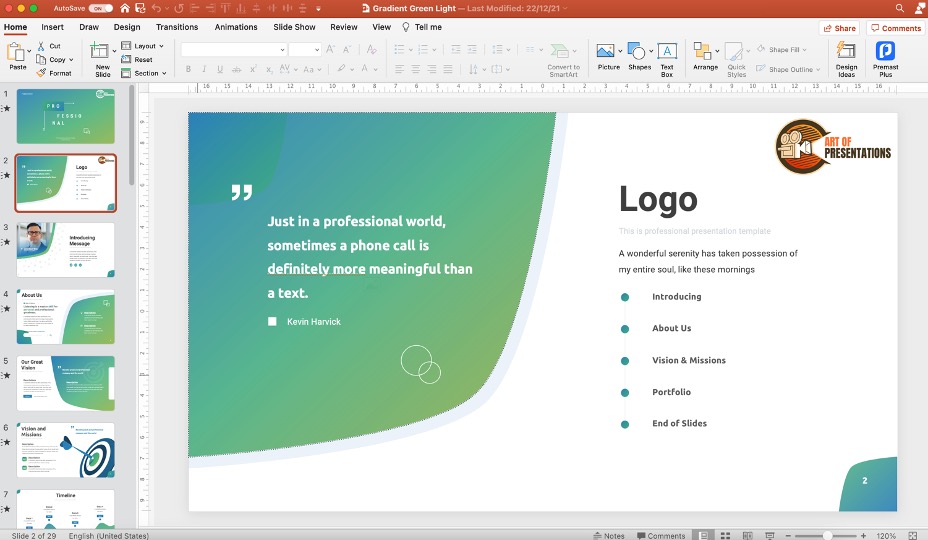
Microsoft PowerPoint is a widely accepted file format where slides are used to convey information. It is a standard component of the Microsoft Office Suite and is compatible with Google Slides, Keynote, and other open-source presentation software.
According to some research results regarding the popularity and use of presentation software, it is estimated that PowerPoint is currently installed on more than a billion computers worldwide ! It is believed that there might be about 30 million PowerPoint presentations created every day.
The advantage of using such a popular and widely used software program is that it is most probably a familiar program for the person you share a presentation with.
2. Wide Variety of File Export Options
A great advantage offered by PowerPoint is that you can export the whole presentation, or parts of it, in a variety of formats. PowerPoint presentations can also be made available on many different devices, and you can always control what content you want to display.
As you don’t have to send a presentation necessarily in .ppt or .pptx format, the receiver doesn’t require PowerPoint or PowerPoint Viewer to open the presentation.
You can export in PDF format and your layout and design will not be altered. The presentation’s slides can also be saved and exported in .png or .jpg format.
If needed, a presentation can also be exported to a video and saved in Mp4 format. If gifs form part of your presentation, they can be saved and exported as Animated GIFs .
You always have the print option to export your presentation or parts of the presentation to Word. When you’ve exported it to Word the content can be edited before printing it.
Whichever way of exporting you decide on, you can export the presentation either as a whole or only some of the slides. And it can be sent as an attachment with an email or you can use the Cloud to facilitate the saving and exporting processes of the presentation.
3. Provides huge Flexibility in Design & Creativity
PowerPoint provides huge flexibility in design and creativity. You can, for instance, use its visual hierarchy features when you create your slides. With this feature, you assure that the right elements and content catch the eye.
Other features include the merging of shapes, the creation of layers, and the creative use of color. You also get an eyedropper tool in PowerPoint that allows you to use any color from your screen in your presentation!
With the Design Ideas feature , you can create the content of a slide and PowerPoint will offer you a variety of design choices to make it better.
The design features PowerPoint offers can in many aspects be compared to advanced design software solutions like Adobe InDesign. You don’t need separate software to design your slides – PowerPoint provides you with built-in features.
4. Allows you to Use Creative Templates
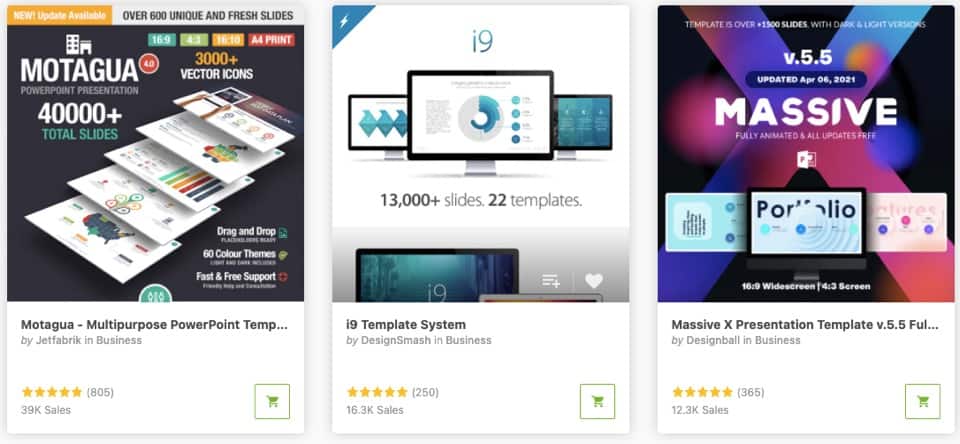
The designs of your presentations are what catch the eye and help you to convey your message to your audience. PowerPoint’s creative templates spare you the time of designing your own templates.
However, if you are a good designer yourself, PowerPoint allows you to create your own templates if you want to.
Note – Check out some of the most popular PowerPoint templates on the internet!
When using PowerPoint’s creative templates feature, it automatically generates design ideas to choose from. You get virtually unlimited options because this feature matches the content you are creating to professionally designed layouts in the background.
This template creation feature is a great advantage for users without any design background. It lets you design presentations that look professional even if you don’t have a design background.
5. Functionality to Use Both Online and Offline
PowerPoint offers you the option to work either online or offline. When you’re using PowerPoint online you can create and share basic presentations directly in your browser.
But it must be remembered that web-based PowerPoint doesn’t have all the features that you’ll have access to with desktop PowerPoint. For “normal” presentations the online web version is good enough and you can present your slide show from anywhere where you have internet access.
To utilize all the features of PowerPoint you have to install the software on your desktop device.
PowerPoint offers you the freedom to work online or offline whichever mode suits you the best for a specific presentation. Many PowerPoint users work with both modes – depending on what they are creating and for what purpose.
6. Allows easy Collaboration and Sharing with other Team Members
PowerPoint is an ideal tool to share and collaborate with team members when you are creating a presentation as a team. You have various options.
You can independently create a presentation and then send it to team members for comments or editing. Or you can work simultaneously on the same presentation with others via web-based PowerPoint or by saving your desktop-created presentation in the Cloud.
7. Option to Add a vast Variety of Multimedia
PowerPoint provides you with tools to make any presentation more interesting by using multi-media. When using PowerPoint you can in the same presentation have
- text with the option to install additional fonts ,
- videos and video snippets,
- background music,
- a narrator’s voice explaining the visual material on the screen,
- graphics to illustrate tendencies,
- tables to compare information, and more.
And you don’t need separate tools to create interesting presentations – everything is built-in into PowerPoint. You can either just add the various types of files to the presentation or you can add the formats as such into the presentation.
8. Suitable for Beginners and Advanced Users alike
The versatility of PowerPoint ensures that on the one hand, presentation creators with advanced design skills are not disappointed with the design tools and possibilities offered by PowerPoint and on the other hand, beginners and people without any designing background can create professional-looking presentations.
This is one of the most important advantages of PowerPoint – anyone can use it successfully.
9. Cost is relatively Inexpensive
PowerPoint is normally part of the Microsoft Office package and is included in the Microsoft Office one-off price or subscription. But if you are not a Microsoft Office user, you can purchase PowerPoint from the Microsoft Store at a reasonable price of about $160.
Note – Check out this limited-time deal to get Office 365 1-year subscription for as little as about $60 on Amazon!
Once you’ve purchased PowerPoint you can use it without extra charges to create presentations and to present them for non-commercial purposes. However, there are licensing and relatively small annual fees involved if you use the PowerPoint presentations commercially.
10. Suitable for Teaching
A PowerPoint presentation in the class is an effective way to reinforce content that has to be retained.
With features like the possibility to record your voice to accompany the PowerPoint slides, it is also easy to convert the presentations that have been used in the class into videos to post online. The students can then review the work done in the class at home. T
his method works effectively for academic lessons and training sessions.
PowerPoint presentations online can also sometimes be the only way to teach and train students. During the Covid pandemic, for instance, classes are sometimes not possible and online sessions are the only way to keep on teaching.
A large percentage of these online sessions have started as PowerPoint presentations.
11. Huge Online Community and Microsoft Support for Troubleshooting Issues
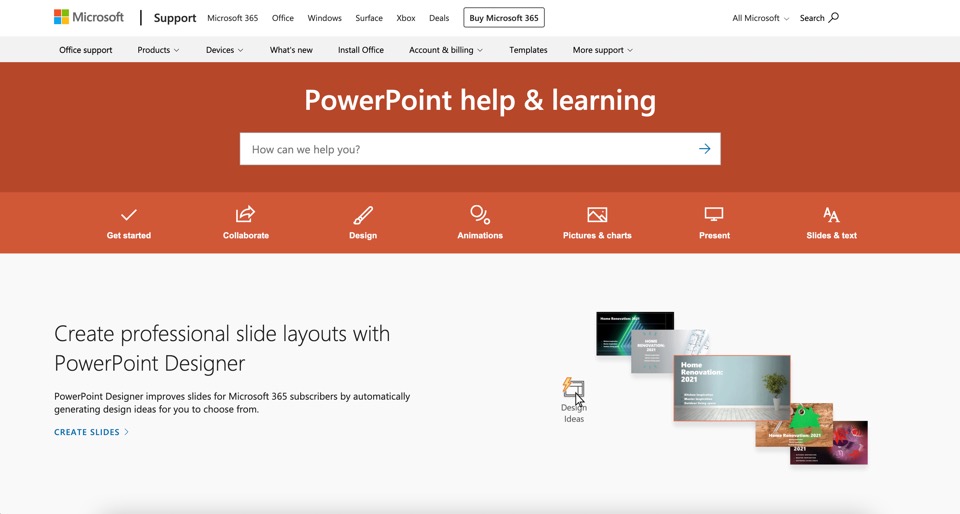
Microsoft offers 24/7 support for PowerPoint users and there are literally hundreds of articles online available on how to troubleshoot issues. The huge online community of PowerPoint users is also actively involved on websites like Quora to help fellow users to get solutions for their issues.
Credit to benzoix (on Freepik) for the featured image of this article (further edited)
Presentation
- Written By Gregg Rosenzweig
- Updated: November 8, 2023
We’re here to help you choose the most appropriate content types to fulfill your content strategy. In this series, we’re breaking down the most popular content types to their most basic fundamentals — simple definitions, clarity on formats, and plenty of examples — so you can start with a solid foundation.
What is a Presentation?
A communication device that relays a topic to an audience in the form of a slide show, demonstration, lecture, or speech, where words and pictures complement each other.
Why should you think of presentations as content?
The beauty of content creation is that almost anything can become a compelling piece of content . Just depends on the creativity used to convert it and the story that brings it to life.

The long and short of it
Although the length of a presentation in terms of time can depend on the overall approach (Are you talking a lot? Are you referring to the screen in detail or not?), consider the number of informational content slides when tallying the overall presentation length. For instance, don’t include title slides in your tally when conveying length to a content creator.
A general guide to presentation length:
- Short Form (5 content slides)
- Standard Form (10 content slides)
- Long Form (20+ content slides)
Popular use cases for presentations…
Let’s consider TED Talks for a minute: one of the best examples (bar none) of how words, pictures, and a narrative can make people care about something they otherwise might not.
These “talks” pre-date podcasts and blend a compelling use of language and imagery in presentation format to spread ideas in unique ways.
TED Talks have been viewed a billion-plus times worldwide (and counting) and are worth considering when it comes to how you might use video-presentation content to connect with your customers in creative, cool, new ways.
Business types:
Any company that has a pitch deck, executive summary , sales presentation, or any kind of internal document that can be repurposed into external-facing content pieces — without pain.
Presentation Examples – Short Form
Presentation Examples – Standard Form

Presentation Examples – Long Form

Understanding Content Quality in Examples
Our team has rated content type examples in three degrees of quality ( Good, Better, Best ) to help you better gauge resources needed for your content plan. In general, the degrees of content quality correspond to our three content levels ( General, Qualified, Expert ) based on the criteria below. Please consider there are multiple variables that could determine the cost, completion time, or content level for any content piece with a perceived degree of quality.
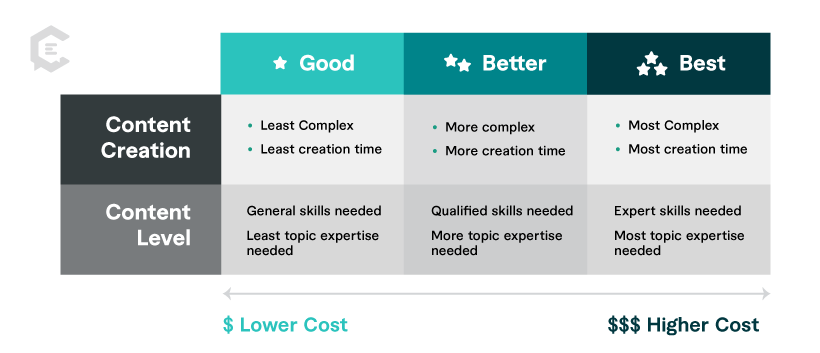
Impress your clients, co-workers, and leadership team with exceptional content for your next presentation, product demonstration, and more. If you need help getting your message across in a succinct, attention-grabbing, and persuasive way, talk to one of our content specialists today.
Stay in the know.
We will keep you up-to-date with all the content marketing news and resources. You will be a content expert in no time. Sign up for our free newsletter.
Elevate Your Content Game
Transform your marketing with a consistent stream of high-quality content for your brand.

You May Also Like...

Mastering the Content Audit: ClearVoice Marketing’s Comprehensive Process Revealed

Measuring What Matters in Your Collaborative Content Approach

Amplifying Your Content Strategy: Harnessing User Feedback for Effective Content Audits
- Content Production
- Build Your SEO
- Amplify Your Content
- For Agencies
Why ClearVoice
- Talent Network
- How It Works
- Freelance For Us
- Statement on AI
- Talk to a Specialist
Get Insights In Your Inbox
- Privacy Policy
- Terms of Service
- Intellectual Property Claims
- Data Collection Preferences
How-To Geek
6 ways to create more interactive powerpoint presentations.
Engage your audience with cool, actionable features.
Quick Links
- Add a QR code
- Embed Microsoft Forms (Education or Business Only)
- Embed a Live Web Page
- Add Links and Menus
- Add Clickable Images to Give More Info
- Add a Countdown Timer
We've all been to a presentation where the speaker bores you to death with a mundane PowerPoint presentation. Actually, the speaker could have kept you much more engaged by adding some interactive features to their slideshow. Let's look into some of these options.
1. Add a QR code
Adding a QR code can be particularly useful if you want to direct your audience to an online form, website, or video.
Some websites have in-built ways to create a QR code. For example, on Microsoft Forms , when you click "Collect Responses," you'll see the QR code option via the icon highlighted in the screenshot below. You can either right-click the QR code to copy and paste it into your presentation, or click "Download" to add it to your device gallery to insert the QR code as a picture.
In fact, you can easily add a QR code to take your viewer to any website. On Microsoft Edge, right-click anywhere on a web page where there isn't already a link, and left-click "Create QR Code For This Page."
You can also create QR codes in other browsers, such as Chrome.
You can then copy or download the QR code to use wherever you like in your presentation.
2. Embed Microsoft Forms (Education or Business Only)
If you plan to send your PPT presentation to others—for example, if you're a trainer sending step-by-step instruction presentation, a teacher sending an independent learning task to your students, or a campaigner for your local councilor sending a persuasive PPT to constituents—you might want to embed a quiz, questionnaire, pole, or feedback survey in your presentation.
In PowerPoint, open the "Insert" tab on the ribbon, and in the Forms group, click "Forms". If you cannot see this option, you can add new buttons to the ribbon .
As at April 2024, this feature is only available for those using their work or school account. We're using a Microsoft 365 Personal account in the screenshot below, which is why the Forms icon is grayed out.
Then, a sidebar will appear on the right-hand side of your screen, where you can either choose a form you have already created or opt to craft a new form.
Now, you can share your PPT presentation with others , who can click the fields and submit their responses when they view the presentation.
3. Embed a Live Web Page
You could always screenshot a web page and paste that into your PPT, but that's not a very interactive addition to your presentation. Instead, you can embed a live web page into your PPT so that people with access to your presentation can interact actively with its contents.
To do this, we will need to add an add-in to our PPT account .
Add-ins are not always reliable or secure. Before installing an add-in to your Microsoft account, check that the author is a reputable company, and type the add-in's name into a search engine to read reviews and other users' experiences.
To embed a web page, add the Web Viewer add-in ( this is an add-in created by Microsoft ).
Go to the relevant slide and open the Web Viewer add-in. Then, copy and paste the secure URL into the field box, and remove https:// from the start of the address. In our example, we will add a selector wheel to our slide. Click "Preview" to see a sample of the web page's appearance in your presentation.
This is how ours will look.
When you or someone with access to your presentation views the slideshow, this web page will be live and interactive.
4. Add Links and Menus
As well as moving from one slide to the next through a keyboard action or mouse click, you can create links within your presentation to direct the audience to specific locations.
To create a link, right-click the outline of the clickable object, and click "Link."
In the Insert Hyperlink dialog box, click "Place In This Document," choose the landing destination, and click "OK."
What's more, to make it clear that an object is clickable, you can use action buttons. Open the "Insert" tab on the ribbon, click "Shape," and then choose an appropriate action button. Usefully, PPT will automatically prompt you to add a link to these shapes.
You might also want a menu that displays on every slide. Once you have created the menu, add the links using the method outlined above. Then, select all the items, press Ctrl+C (copy), and then use Ctrl+V to paste them in your other slides.
5. Add Clickable Images to Give More Info
Through PowerPoint's animations, you can give your viewer the power to choose what they see and when they see it. This works nicely whether you're planning to send your presentation to others to run through independently or whether you're presenting in front of a group and want your audience to decide which action they want to take.
Start by creating the objects that will be clickable (trigger) and the items that will appear (pop-up).
Then, select all the pop-ups together. When you click "Animations" on the ribbon and choose an appropriate animation for the effect you want to achieve, this will be applied to all objects you have selected.
The next step is to rename the triggers in your presentation. To do this, open the "Home" tab, and in the Editing group, click "Select", and then "Selection Pane."
With the Selection Pane open, select each trigger on your slide individually, and rename them in the Selection Pane, so that they can be easily linked to in the next step.
Finally, go back to the first pop-up. Open the "Animations" tab, and in the Advanced Animation group, click the "Trigger" drop-down arrow. Then, you can set the item to appear when a trigger is clicked in your presentation.
If you want your item to disappear when the trigger is clicked again, select the pop-up, click "Add Animation" in the Advanced Animation group, choose an Exit animation, and follow the same step to link that animation to the trigger button.
6. Add a Countdown Timer
A great way to get your audience to engage with your PPT presentation is to keep them on edge by adding a countdown timer. Whether you're leading a presentation and want to let your audience stop to discuss a topic, or running an online quiz with time-limit questions, having a countdown timer means your audience will keep their eye on your slide throughout.
To do this, you need to animate text boxes or shapes containing your countdown numbers. Choose and format a shape and type the highest number that your countdown clock will need. In our case, we're creating a 10-second timer.
Now, with your shape selected, open the "Animations" tab on the ribbon and click the animation drop-down arrow. Then, in the Exit menu, click "Disappear."
Open the Animation Pane, and click the drop-down arrow next to the animation you've just added. From there, choose "Timing."
Make sure "On Click" is selected in the Start menu, and change the Delay option to "1 second," before clicking "OK."
Then, with this shape still selected, press Ctrl+C (copy), and then Ctrl+V (paste). In the second box, type 9 . With the Animation Pane still open and this second shape selected, click the drop-down arrow and choose "Timing" again. Change the Start option to "After Previous," and make sure the Delay option is 1 second. Then, click "OK."
We can now use this second shape as our template, as when we copy and paste it again, the animations will also duplicate. With this second shape selected, press Ctrl+C and Ctrl+V, type 8 into the box, and continue to do the same until you get to 0 .
Next, remove the animations from the "0" box, as you don't want this to disappear. To do this, click the shape, and in the Animation Pane drop-down, click "Remove."
You now need to layer them in order. Right-click the box containing number 1, and click "Bring To Front." You will now see that box on the top. Do the same with the other numbers in ascending order.
Finally, you need to align the objects together. Click anywhere on your slide and press Ctrl+A. Then, in the Home tab on the ribbon, click "Arrange." First click "Align Center," and then bring the menu up again, so that you can click "Align Middle."
Press Ctrl+A again to select your timer, and you can then move your timer or copy and paste it elsewhere.
Press F5 to see the presentation in action, and when you get to the slide containing the timer, click anywhere on the slide to see your countdown timer in action!
Now that your PPT presentation is more interactive, make sure you've avoided these eight common presentational mistakes before you present your slides.
Home Blog Design The Power of Mind Map Note Taking for Presenters
The Power of Mind Map Note Taking for Presenters

Some people find it challenging to attend a meeting and effectively retrieve information from its outcome. Several tools have been studied over the years to condense data, especially complex concepts , into actionable notes, and today we will approach one visual tool of particular interest for us presenters.
Mind map note-taking is a transformative approach to the typical mind map. This method leverages visual diagrams to represent tasks, words, concepts, or items linked around a central concept. By utilizing mind map notes, presenters can enhance their recall and generate deeper insights into their topics.
Table of Contents
Understanding Mind Map Note Taking
How mind map note taking enhances presentation skills, customizing mind map notes for effective presentations, how to use mind map notes for presentation development, case study: mind map note taking in corporate strategy development, case study: academic research presentation and mind map note taking, case study: application of mind map notes to health care system improvement, recommended mind map note taking templates for powerpoint & google slides, final words.
Mind mapping is a technique where information is visually mapped out in a way that resembles a tree structure. This method is distinct because it encourages non-linear thinking and organization of ideas. The central node represents the main topic, and related sub-topics radiate from it in branches, forming a connected nodal structure that is both intuitive and analytically effective.

On the other hand, we call mind map note-taking the application of mind maps for distilling information into a structured visual form as it is being received or reviewed. Some key aspects include:
- Real-time creation: Unlike general mind maps, which might be created over time and adjusted, mind map notes are often created in real-time during a lecture or meeting.
- Emphasis on keywords: Although this can be considered key for the marketing industry, several other niches can apply this format and capture keywords with their interrelations rather than lengthy sentences. With the proper node structure, recalling information this way is far easier.
- Adaptability: As new information is presented, the concept map templates can grow organically, with new branches or connections added on the fly.
Mind maps are particularly useful for presenters because they condense complex information into a clear, visual format. This not only aids in the internalization of knowledge but also in visual communication and connecting with the audience . Here’s how presenters can use mind maps to boost their presentation skills :
Organization of Ideas
Presenters can expand outward to secondary and tertiary ideas starting with a central idea. This helps structure the presentation logically and ensures no critical point is missed.

Memory Recall
The visual nature of mind maps helps recall information more effectively than traditional notes. The spatial organization and use of colors and images make recall cues more robust and intuitive.
Creativity and Engagement
Creating a mind map can be a dynamic process that stimulates creative thinking . In teamwork settings, this creative process can translate into interactive presentations in which the attendees help to build a collective mind map of the ideas introduced in the meeting.

Flexibility in Editing
Mind maps can be easily adjusted as new ideas emerge or changes are required. This flexibility is crucial during the iterative process of developing a presentation.
Although we can work with pre-made templates, customization is always a must as we ensure the presentation fits our unique needs and style. Here are some tips for tailoring mind maps to fit your presentation:
- Choose Your Tools: Whether digital or on paper, choose the medium that you are most comfortable with. Digital tools often offer functionalities like drag-and-drop editing and easy sharing, and can be presented by sharing the presentation on a screen, through tablets, or in pairs working with a computer. On the other hand, the mind map template we use can be printed as a layout to proceed with mind mapping note taking.
- Use Colors and Icons: Use colors to group related ideas or denote different topics. PowerPoint Icons or vector images can also be added to create visual associations without altering the presentation’s aesthetic values.
- Incorporate Keywords: Instead of full sentences, use keywords to keep the mind map clear and easy to skim.
- Link to Sources and Data: For digital mind maps, link parts of your map to sources, data, or even slides of your presentation for quick reference.
Once you have created a mind map , it can be a foundational tool for developing your presentation. Here’s how you can move from the mind map to the final presentation:
Outline Extraction
Use the structure of your mind map to outline your presentation. Each branch can represent a different section or part of your presentation. From then, you can link the bibliographical information to back up your research in a presentation handout or spare document.
Slide Development
Convert each node or branch into a slide. This ensures that your presentation flows logically and covers all necessary points. As we’ve mentioned in our article on the 10-20-30 rule of presentations , one idea per slide ensures the audience remains focused on the topic in discussion.
Walk through your mind map multiple times. This will help solidify your understanding and presentation flow, making you more comfortable and reducing the need for notes. You can take cues from our guide on the Feynman’s Technique for how to simplify the concepts you have to elaborate from your mind map notes. Additionally, rehearsing the mind map notes contributes to memorizing a presentation.
Feedback Incorporation
After rehearsing, you might find areas that need refining. Use your mind map to incorporate feedback and make adjustments quickly. You can share your mind map notes with a fellow worker to review the final details of the presentation, which makes the process smoother than going slide by slide in your presentation deck .
For our first case study, a multinational corporation is hosting a strategy meeting within the marketing team to overhaul its global marketing strategy. The team has to handle several reports gathered from different departments to tailor the strategy by segment. Therefore, some team members proposed to work with mind map note taking to streamline this process and enhance the learning experience.
The marketing team started a digital mind map PowerPoint template with a central node labeled “Global Marketing Strategy 2024”. From this central node, branches were created for key regions: North America, Europe, Asia, and South America. Each regional brand is further divided into local market trends, consumer behavior, and competitors.

As we can see, each branch from the central node is identified with a unique color. This helps to easily identify to which region does the data belong. By applying an in-company collaborative approach, the team were able to populate sheets with real-time data from the different regions, and add links to the corresponding spreadsheets (which are also colored by region to avoid mix-ups).
The final presentation done to senior management was highly praised for its clarity and depth, directly attributed to the structured preparation done with the mind map note taking technique.
In our second case study, a doctoral candidate in environmental science used mind mapping to organize the research data for her dissertation on climate change impacts on coastal ecosystems.
The core node of her mind map was labeled “Impact of Climate Change on Coastal Ecosystems”. From that node, branches were laid out with new nodes labeled “Current Research”, “Methodology”, “Data Analysis”, “Case Studies”, and “Future Research Directions”. Under each one of those nodes, sub-nodes allowed her to organize the vast amounts of data and research papers effectively.

By integrating graphs, statistical data, and research citations directly into the digital mind map, the researcher can simplify data management. Additionally, she used a color coding system in red-yellow-green format to label:
- Red: Not started
- Yellow: In-progress
- Green: Completed
Thanks to the mind map notes, the researcher was able to structure her oral presentation, anticipating the potential questions that the dissertation committee may ask.
In this final case study, we analyze the scenario in which a hospital administration team uses mind map notes to address the inefficiencies in patient flow and resource allocation within their facility. Initial research showed that some residents were using mind maps to instruct their interns on typical procedures; therefore, the method was used on a larger scale to analyze this problem.
After gathering the required resources, insights, and testimonials from employees and patients, the team constructed a mind map with a core node labeled “Hospital Efficiency.” The branches listed are Patient Admission, Treatment Protocols, Staff Allocation, and Discharge Procedures. Surrounding each sub-node, new branches were created to expose each situation and bottleneck and attach documents with proposed solutions.

From the information retrieved from this mind map, the team was able to craft a new strategy presentation to deliver the revised protocols. Out of the implemented solutions, a 20% improvement in patient throughput was seen in less than 3 months, with a significant increase in staff satisfaction rates.
We gathered our selection of professional mind map note taking templates that guarantee high-efficiency in creative journeys. You can also check our Free Mind Map Template for PowerPoint . Download and customize them now.
1. Animated Mind Map Note Taking PPT Template

Create digital mind maps for note taking with captivating animated effects by implementing this PPT template. You can customize the color scheme, font used, icons, and more. Check it out!
Use This Template
2. Hand-Drawn Concept Map for Note Taking Template

If you are looking for a mind map note taking method that resembles hand drawn diagrams, then this is your template. Print it or work under digital format. It’s entirely customizable in minutes.
3. 5-Steps Note Taking Map PowerPoint & Google Slides Template

The mind mapping method of note taking requires a highly visual layout to comprehend ideas with ease. Thanks to this 5-steps diagram for note taking presenters can discuss processes with precision.
4. Post-It Styled Concept Map for Note Taking PPT Template

For sticky notes fans out there, this playful layout is ideal for diagraming your ideas or explaining concepts by implementing mind map note-taking techniques. Work with the suggested layout or rearrange it to fit your presentation needs. Download now.
5. Mind Map Note Taking Google Slides Template

Not all nodes in mind maps have to bear rectangular shapes. This slide deck presents alternatives to the typical mind map notes templates. Check them out and work with the one that best fits your desired aesthetic.
6. Labeled Mind Map PowerPoint Template for Note Taking

This is one of the templates used in our case studies. Presenters can customize all aspects of these labeled cards, reduce them to simple nodes, or present detailed information per point.
7. Circular Concept Map Diagram with 4 Items & 12 Sub-Items Template

We conclude this list with a circular wheel diagram for expressing concept maps in a creative format. Work with the pre-established sub-nodes or alter their count. This template is fully editable in light and dark color schemes.
Mind map note taking is a versatile tool to understand processes. Presenters can implement them in constructing new ideas, learning processes, or to drive more efficiency in terms of developing and delivering presentations. Although you can work with hand-made mind map notes, we highly advise working with a mind map template to speed up the creative process.

Like this article? Please share
Mind Maps, Presentation Ideas Filed under Design , Presentation Ideas
Related Articles

Filed under Design • April 23rd, 2024
How to Create the Perfect Handouts for a Presentation
Learn how to create effective handouts for presentations and the recommended structure for handouts with this guide.

Filed under Presentation Ideas • February 15th, 2024
How to Create a 5 Minutes Presentation
Master the art of short-format speeches like the 5 minutes presentation with this article. Insights on content structure, audience engagement and more.

Filed under PowerPoint Tutorials • February 7th, 2024
How to Make a Venn Diagram in PowerPoint
Discover how easy is to make a Venn Diagram in PowerPoint with three different methods: SmartArt, PowerPoint shapes, and Venn Diagram PowerPoint Templates.
Leave a Reply

5 Better Alternatives To Google Slides
I f you're looking to create a compelling presentation to showcase a new idea or persuade others, Google Slides may be the first option that comes to mind. But with few built-in templates, basic themes, and a limited graphics collection, you'll likely have a hard time making your presentation stand out against others.
If you want to make your presentation truly stand out, there are several alternatives to Google Slides that offer extra perks and features to give your presentations an edge. While Google focuses on integrating Slides with its other work-based apps like Sheets and Docs, other presentation apps focus more on design elements, transitions, and themes to help you convey your brand or personal image throughout your presentation.
We've tested these Google Slide alternatives to give you an idea of other available options to deliver impactful presentations. If you're looking for a way to make boring information more fun and engaging, here are the best presentation apps to replace Google Slides.
Read more: Major Graphics Card Brands Ranked Worst To Best
Microsoft PowerPoint
There's a reason so many businesses around the globe use Microsoft PowerPoint. Building its reputation as the go-to option for delivering high-quality presentations, the software generated $100 million in annual sales only three years after its initial release in 1990.
Microsoft PowerPoint may be Google Slides' largest competitor, but there are plenty of unique features that can add an extra flourish to your slides. PowerPoint excels in its impressive library of custom animations and slide transitions, which are fairly limited in Google Slides. Another unique feature is its AI-powered Designer tool. This provides professional design schemes that mirror the words used in your slides. For instance, if your title slide is named "Basketball Team 2024," Designer will automatically suggest pictures and slide layouts associated with basketball.
As PowerPoint has been in development longer than Google Slides, it naturally offers more nuanced features if you're looking for something specific. For example, you can save individual slides as an image file (using .png or .jpeg formats) or as a separate presentation file. There's also a large library of free PowerPoint templates designed to speed up your workflow. Moreover, PowerPoint integrates seamlessly with Microsoft Teams with its PowerPoint Live function, allowing you to easily share your presentation with your co-workers.
Prezi offers an innovative approach to showing presentations with its unique canvas feature. Unlike traditional presentation software, Prezi lets you zoom and pan around a flexible canvas. The canvas may feel distant to something of a presentation program, but there is still some linear order provided thanks to the Timeline view.
Finding ways to visualize data is one of the biggest challenges when dealing with presentation software. Prezi resolves this struggle with the help of its Story Blocks: a series of infographics available in multiple designs to visually represent data. You can easily edit infographics and even add animations to individual shapes. This can help add a story to your presentation and help you emphasize key points.
To further enhance your presentation visually, Prezi offers several topic path settings, which let you change how Prezi transitions from one topic to another. These options include subtopics, which are super helpful for breaking large chunks of information down. If you're looking for a unique, modern approach to presenting information, Prezi is a top pick.
If you're looking to create a professional presentation to convince potential clients about your business idea, Slidebean is a popular choice among professionals with plenty of customization options. One of the issues with Google Slides is its fairly limited template library, which is filled mostly with basic designs. Slidebean offers a better alternative with a broad selection of innovative templates split into categories for convenience.
The app's user interface is easy to navigate so that you can create slides in less time. Each slide has a dedicated Design and Outline tab. You can use the Outline tab to quickly edit the information on each slide without being distracted by all the visual elements. Another productivity-enhancing feature is the ability to generate a presentation theme from your website. Simply enter your URL, and Slidebean will automatically apply the theming to your presentation.
Slidebean is another presentation app to take advantage of AI. Using the Auto-Design feature, you can generate recommended slide layouts based on your existing content. It also features AI text suggestions designed to suit different industries. Overall, Slidebean offers a quicker, more efficient method for creating stunning presentations compared to Google Slides.
Canva is a well-known app among graphic designers, but it's also capable of making stunning presentations. The app also has mobile editions, so you can easily create and edit presentations on your Android phone , iOS device, or tablet. As long as you have an internet connection, you can modify your designs wherever you are.
To get started, head to Canva's online presentation maker . Canva offers a vast range of templates categorized by topic, which easily surpasses the simple templates in Google Slides . While some of the templates are only available to Canva Pro members, there is an ample amount of free templates to help you get started. You'll also find a large selection of stock photos, shapes, and illustrations to create beautiful customized slides.
Because Canva is built for graphic designers, you can access several features to give your presentation consistent theming. These include color palettes, font sets, and even a brand kit that allows you to add your company's fonts (available to Pro members only). One time-saving feature is Canva's Uploads tab, which lets you access recently uploaded media files. This offers a convenient way to copy content between different presentations.
Visme is a powerful visual design tool able to create videos, infographics, and presentations. One of the perks of using Visme is the company's free educational content, which offers advice on how to create impactful content to boost your brand. After signing up, the company also asks whether you're using Visme for your business, education purposes, or personal use to offer personalized tips.
In terms of charts and graphs, Visme offers some of the most impressive features we've seen from a presentation app, so you can effortlessly convey important statistics. From the Data tab, you can access dozens of graph styles to visually represent your data. Then, simply double-click a chart inside your presentation to edit the values instantly in a simple table format.
Another area that Visme excels in is collaboration. You can either generate a link to publish your presentation on the web or share your presentation privately with others. For each team member, you can choose who can view, edit, and comment slides for a seamless workflow. There's also a Slack integration that lets you receive messages whenever changes are made to your presentation. Visme is free for all users, with limited features available in its premium plans.
Read the original article on SlashGear .

- Slidesgo School
Smartick, now available on Slidesgo

In the few years since its launch, Slidesgo has become one of the most popular sources of Google Slides and PowerPoint templates for creative presentations. Educators from all levels have experienced the ease of creating visually striking presentations using Slidesgo’s templates.
However, great-looking templates are not the only things on our platform. In partnership with the learning platform Smartick, Slidesgo is now able to offer full presentations on topics as complex as math.
The next era of hassle-free presentation making is here, and we're ready to tell you all about it.
What is Smartick?
Where can i find smartick presentations, how to use smartick with slidesgo, the fun way to learn math.
Smartick is an online method that specializes in teaching math to children. For almost 15 years, Smartick has developed an intuitive, logic-based program that has helped kids around the world improve their math skills with 15 minute-a-day lessons.
This method has proven to be a huge success since 83% of children using Smartick have improved their math grades and 94% have improved their logic, problem-solving, and calculus skills.
These results encouraged Slidesgo to partner with Smartick to turn their innovative program into ready-to-use presentations for math teachers.
.png "uses of slide presentation")
Smartick presentations have a dedicated section on the Slidesgo website .
In this section you’ll find presentations focused on topics such as division of fractions, integer numbers, and more.
This content mixes the effective design Slidesgo is known for with the expertise in math-teaching that Smartick has built over the years.
.png "uses of slide presentation")
The Slidesgo presentations in partnership with Smartick are part of your Premium plan. All these presentations come in both Google Slides and PowerPoint formats and are available in various languages.
The best part is that these presentations are ready to be used in the classroom, with dynamic explanations of each topic and fun exercises to keep your class engaged.
Are you ready to make math-teaching an easy and fun experience?
.png "uses of slide presentation")
Slidesgo’s partnership with Smartick is an effort to provide a 360° solution to teachers around the world. By partnering with education experts, Slidesgo can now offer ready-to-use content that meets both design and teaching standards . This way, educators can focus on engaging with their classes in a successful way while leaving the presentation-making process to us.
Slidesgo believes that joining forces with experts in different fields will allow us to continue innovating and offering more valuable content to our subscribers. If we can make math fun and easy, we're hopeful of the direction this path will lead us.
If you’re interested in learning other ways Slidesgo is helping you wow your audience with great presentations, make sure to check our News page.
Do you find this article useful?
Related tutorials.

Start with a mic drop, end with a high five: Make lessons easily cool with AI icebreaker generator and exit ticket
So, here’s the tea: everyone’s been there, right? You’re about to start a class or a workshop, the room’s kinda charged, everyone’s looking at you, and bam—the pressure’s on to make the first words out of your mouth. Fast-forward, and it’s wrap-up time, but instead of ending on a meh note, you’re dreaming of dropping the mic—metaphorically, of course.That’s where our latest AI-powered tools come into play. Introducing the coolest duo since PB&J: the AI icebreaker generator and the AI exit ticket. Picture them as the BFFs your classroom or conference never knew they needed, turning “uhh, what now?” moments into “aha!”...

The easy way to wow with Slidesgo for Google Slides
Get ready to create great presentations at the speed of light. Whether you're a teacher igniting the passion in your classroom, a professional seeking to sell an idea, or a student aiming to blow your classmates away, Slidesgo for Google Slides is your presentation BFF.Picture this: Slidesgo effortlessly integrates into your Google Slides workspace, unveiling a treasure trove of over 20,000 templates to make your presentations sparkle like a brilliant diamond. With this helpful plugin by your side, you'll breeze through the process of searching, adding, and customizing slides. The result? Presentations that not only look visually stunning, but also overflow with information, ensuring your presentations...

5 years creating great presentations, faster
Roll out the confetti—it’s our birthday! We've been on this ride for half a decade, filled with twists and turns, lots of creativity (of course), and the aim to help you create the best presentations, whatever your project is.After five years full of top presentations that express your powerful ideas, we can't wait to see what you'll do next. Much more is to come in the next few years for you to continue creating brilliant slides, so just stay tuned!All this would not have been possible without you, our users, and that’s why we want to thank you in the best way...

IMAGES
VIDEO
COMMENTS
Google Slides is a titan of editing and creating presentations. This online and offline platform (you have the advantage of being able to continue editing even without an internet connection) is part of the Google Drive suite along with other services such as Google Docs or Google Sheets. Nowadays, it is very common to have a Google account ...
How to Create a Blank Presentation. Now that you have a Google account, it's time to create your first presentation. Head over to Google Slides and place the cursor on the multicolored "+" icon in the bottom-right corner. The + turns into a black pencil icon; click it. Pro Tip: Type.
Benefits of PowerPoint. PowerPoint is a very popular presentation software and for a good reason. It offers numerous benefits for users, from easy collaboration to ease of use. These are some of the key benefits of PowerPoint. 1) Visual appeal: Microsoft PowerPoint allows you to create visually appealing presentations with its wide range of ...
If you're just getting started with making presentations in Google Slides, then this ultimate beginner tutorial guide is for you. Google Slides is a powerful alternative to PowerPoint. It's great for designing and sharing your presentations online. It's freely available, easy to start using, and packed with powerful tools.
Step 2: Edit and format a presentation. You can add, edit, or format text, images, or videos in a presentation. Insert and arrange text, shapes, and lines; Add, delete & organize slides; Add animations to a slide; Step 3: Share & work with others. You can share files and folders with people and choose whether they can view, edit, or comment on ...
Creating a great presentation starts with a great template. And a great PowerPoint slide design use the best presentation practices, for example: Use high-quality photos and graphics to help tell the story. Keep text to a minimum. Stick to one idea per slide. Designing a great template doesn't mean you've got to start from scratch, though.
Under Drawing Tools, choose Format. Do one of the following: To change the color of your text, choose Text Fill, and then choose a color. To change the outline color of your text, choose Text Outline, and then choose a color. To apply a shadow, reflection, glow, bevel, 3-D rotation, a transform, choose Text Effects, and then choose the effect ...
Community Answer. 1) Go to drive.google.com and log in. 2) Click the blue "New" button toward the top left corner of the page. 3) Select "Google Slides" next to the orange icon on the drop-down menu. 4) Drive will open your new presentation. Just start editing!
But you also have the option to use a blank slide to place items where you like. Step 1: To add a slide, do one of the following: Go to the Insert tab and choose New slide near the bottom. Go to ...
Create a presentation. Open PowerPoint. In the left pane, select New. Select an option: To create a presentation from scratch, select Blank Presentation. To use a prepared design, select one of the templates. To see tips for using PowerPoint, select Take a Tour, and then select Create, .
Apply the 10-20-30 rule. Apply the 10-20-30 presentation rule and keep it short, sweet and impactful! Stick to ten slides, deliver your presentation within 20 minutes and use a 30-point font to ensure clarity and focus. Less is more, and your audience will thank you for it! 9. Implement the 5-5-5 rule. Simplicity is key.
The best way to make sure the attention stays on you is to limit word count to no more than 10 words per slide. As presentation expert Nancy Duarte says "any slide with more than 10 words is a document.". If you really do need a longer explanation of something, handouts or follow-up emails are the way to go.
1. Open PowerPoint and click 'New.'. A page with templates will usually open automatically, but if not, go to the top left pane of your screen and click New. If you've already created a presentation, select Open and then double-click the icon to open the existing file. Image Source.
Here are a few tips for business professionals who want to move from being good speakers to great ones: be concise (the fewer words, the better); never use bullet points (photos and images paired ...
Use clear and legible fonts, and maintain a consistent design throughout the presentation. 2. Visual appeal: Incorporate visually appealing elements such as relevant images, charts, graphs, or diagrams. Use high-quality visuals that enhance understanding and make the content more engaging.
Placeholders aren't the only way to add content to your slides. At any point, you can use the Insert tab to add elements to your slides. You can use either the Title Only or the Blank slide layout to create slides for content that's different. For example, a three-layout content slide, or a single picture divider slide, as shown below.
Slides is the only presentation software that promotes itself as being "pixel perfect" as the editor includes a built-in grid to help with composition. Slides has a lower cost at the highest price tag which is good for smaller businesses. Price Tag. Slides is free to use, but finished presentations will be public and available.
Choose a design from our presentation templates or create your own from scratch. Customize your presentation with colors, fonts, and key information. Add animations, videos, images, illustrations. Use assets and other media content from your Brand Kit (Pro) to stay consistent with your business or school brand.
Microsoft PowerPoint is a widely accepted file format where slides are used to convey information. It is a standard component of the Microsoft Office Suite and is compatible with Google Slides, Keynote, and other open-source presentation software. ... The presentation's slides can also be saved and exported in .png or .jpg format. If needed ...
What is a Presentation? A communication device that relays a topic to an audience in the form of a slide show, demonstration, lecture, or speech, where words and pictures complement each other.
Download your presentation as a PowerPoint template or use it online as a Google Slides theme. 100% free, no registration or download limits. Content PowerPoint
Engage your audience with cool, actionable features. 2. Embed Microsoft Forms (Education or Business Only) If you plan to send your PPT presentation to others—for example, if you're a trainer sending step-by-step instruction presentation, a teacher sending an independent learning task to your students, or a campaigner for your local councilor sending a persuasive PPT to constituents—you ...
From then, you can link the bibliographical information to back up your research in a presentation handout or spare document. Slide Development. Convert each node or branch into a slide. This ensures that your presentation flows logically and covers all necessary points. As we've mentioned in our article on the 10-20-30 rule of presentations ...
Available as both a PPT template and Google Slides template, it's decked out in welcoming orange and beige, ensuring your presentation pops. Ideal for non-profits, schools, and community organizations, this slideshow template is your go-to for introducing team policies, roles, and expectations in a way that's easy to digest and even easier ...
For example, you can save individual slides as an image file (using .png or .jpeg formats) or as a separate presentation file. There's also a large library of free PowerPoint templates designed to ...
Slidesgo's partnership with Smartick is an effort to provide a 360° solution to teachers around the world. By partnering with education experts, Slidesgo can now offer ready-to-use content that meets both design and teaching standards.This way, educators can focus on engaging with their classes in a successful way while leaving the presentation-making process to us.
Intel Corporation's first-quarter 2024 earnings news release and presentation are available on the company's Investor Relations website. The earnings conference call for investors begins at 2 p.m. PDT today; a public webcast will be available at www.intc.com. More: Earnings Call Comments from CEO Pat Gelsinger and CFO Dave Zinsner