- Editor's Choice: Tech Gifts for Mom
- New! iPad Air 6 Details

How to Make Google Slides Portrait
Switch the slide's orientation from landscape
:max_bytes(150000):strip_icc():format(webp)/JenAllen-214879-65542c15d7fa42b6ba2c61cc14c4a8b8.jpg "how to make google slides presentation portrait")
- Swansea University, Staffordshire University
What to Know
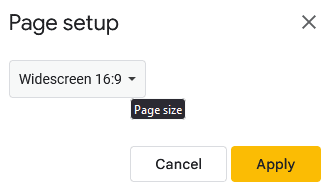
- Open the presentation in Google Slides. Select File > Page setup .
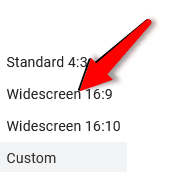
- Choose the drop-down box that displays Widescreen 16:9 (or a similar horizontal ratio.)
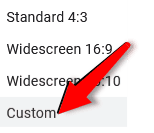
- Select Custom > swap the numbers listed in the two boxes to rotate the slide to vertical.
This article explains how to change all the slides in a Google Slides presentation from landscape (horizontal) mode to portrait (vertical) mode, and then back to landscape mode.
How to Change Slide Orientation in Google Slides to Portrait
After you use Google Slides to make a presentation , it only takes a few moments to go back in and change a slide's orientation from landscape to portrait. This process changes the orientation for all the slides in the presentation; there's no method for doing it for individual slides. Here's what you need to do to change things around.
Go to Google Docs in a web browser. You can't do this on an Android or iOS app.
Select menu (three lines).
Select Slides .
Choose the presentation you want to edit.
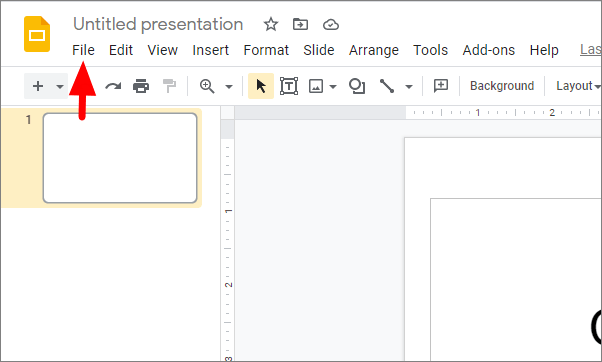
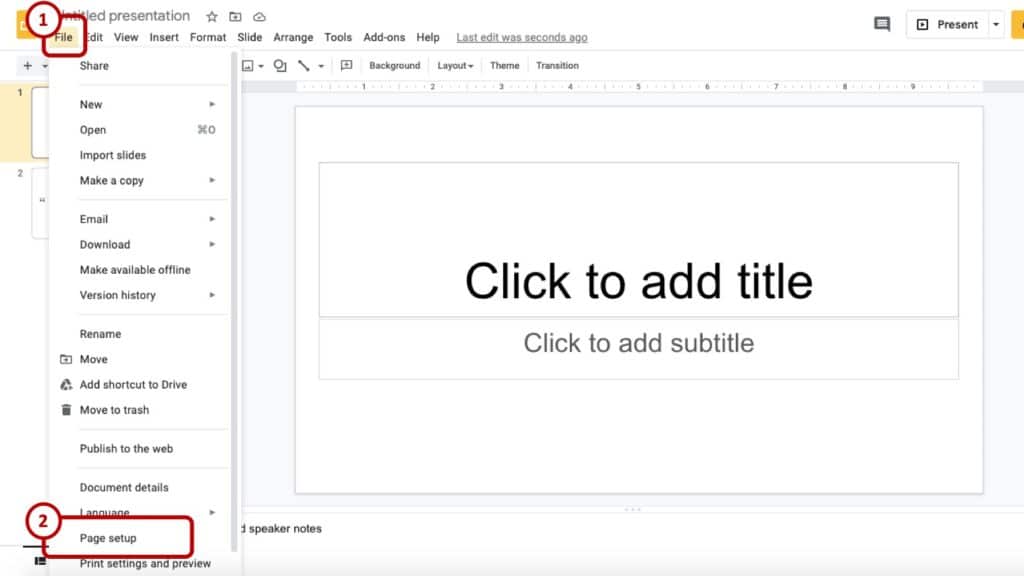
Select File .
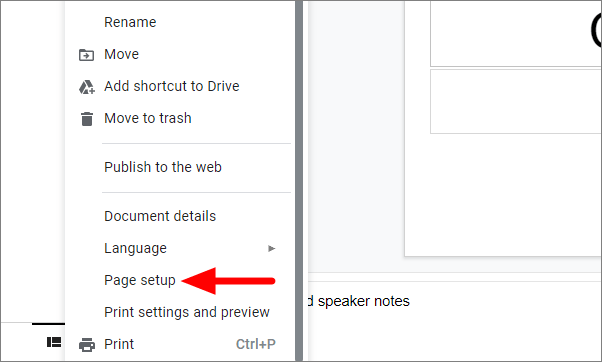
Select Page setup .
You may need to scroll down to see this option.
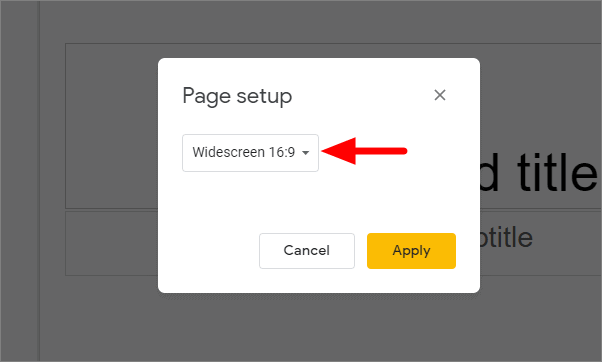
Select the drop-down box currently displaying Widescreen 16:9 .
This may be a different size, depending on how your presentation is set up.
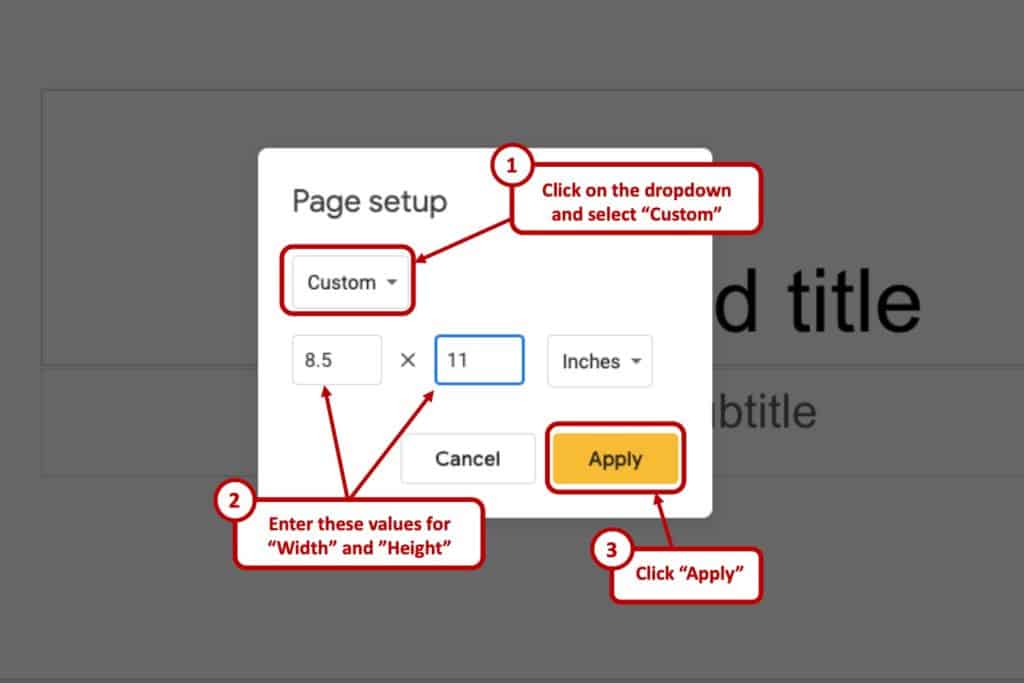
Select Custom .
Swap the two numbers listed around to rotate the slide into a vertical position.
Another way to change the slide size in Google Slides is to enter a figure here. We recommend 7.5 inches by 10 inches if you want to create a portrait image that looks good when printed.
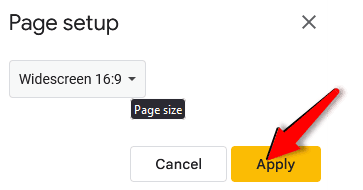
Select Apply .
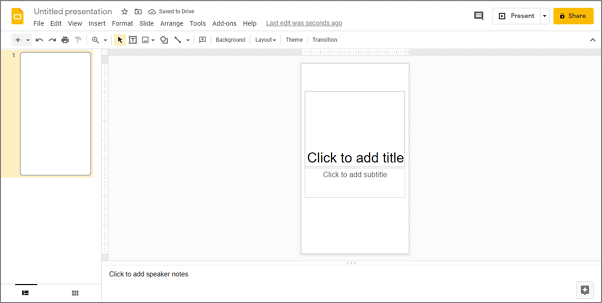
The slide has now been correctly moved to the Portrait perspective.
How to Change Slide Orientation to Landscape
Is your presentation set up for Portrait mode and you're now regretting everything? Don't worry. It's just as simple to change your slides back to Landscape perspective. Here's what to do.
Go to Google Docs.
Want to change the size in a different way? Enter a figure here. We recommend 10 inches by 7.5 inches if you want to create a landscape image that looks good when printed.
The slide has now been correctly moved to the Landscape perspective.
When to Use Different Perspectives on Your Presentation
You may be wondering why you need to switch between Portrait and Landscape perspective with your Google Slides presentations. We've looked at a few key reasons why it can be worthwhile doing.
- Newsletters . If you're creating a newsletter in Google Slides, a portrait view is often far better for reading than landscape. It looks better for everyone and is far easier to hold too if you're printing it out.
- Different posters . Depending on what you're designing, different posters can look better either in Portrait or Landscape perspective. It's useful to be able to see which looks better for your design.
- Infographics . Similarly, if you're designing an infographic for your presentation, graphs will look better in Landscape while more text-heavy results will look better in Portrait.
To add audio to Google Slides , insert a link to a sound file. For example, if you find a SoundCloud file you want to use, select Share and copy the URL. In your Google Slide, choose where you want the sound to play and go to Insert > Link . Paste the link > Apply .
To embed a video in Google Slides , select the slide where you want to insert the video, and then select Insert > Video . Search for and choose the video you want to add, or enter the video's URL. To adjust its size and specifications, right-click and select Format Options .
To do a hanging indent in Google Slides , ensure the ruler is visible, and then add your text. Highlight the text where you want a hanging indent, and select and drag the indent control (downward triangle) in the ruler area. Grab the left indent control (blue bar above triangle) and drag it where you want the first line of text to start to create the hanging indent.
Get the Latest Tech News Delivered Every Day
- How to Do a Hanging Indent in Google Slides
- How to Avoid Picture Distortion on Portrait Slides in Powerpoint
- How to Change PowerPoint Slide Orientation
- How to Group Objects in Google Slides
- How to Change the Slide Size in Google Slides
- How to Use Portrait and Landscape Slides in the Same Presentation
- How to Use Google Duet in Slides
- The 8 Best Google Drive Add-ons for 2024
- How to Create a Microsoft Sway Presentation
- How to Use Google Slide Animations and Transitions
- How to Make an Image Transparent in Google Slides
- How to Add Bullet Points to Google Slides Presentations
- How to Add Music to Google Slides
- How to Link Slides in Google Slides
- Car Audio/Accessory Reviews & Top Picks
- How to Embed Video in Google Slides
How to Change Google Slides to Portrait (Easy Guide)

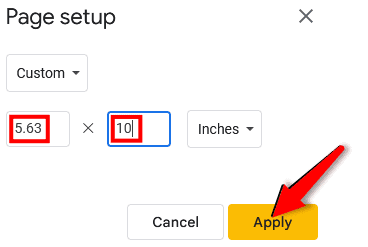
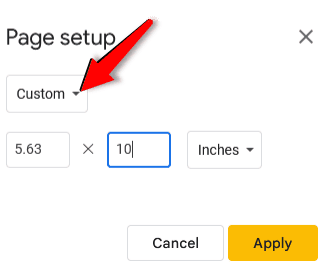
To change Google Slides to Portrait Mode, open the presentation > click ‘File’ menu > “Page Setup” > “custom” > enter “5.63 x 10” in the box > “Apply”. Google Slides default orientation is Landscape (horizontal), which is ideal for projectors and screens.
However, you may need to switch to Portrait mode in certain situations, whether due to your projector’s compatibility or to use additional vertical space . Whatever the reason, changing your Google Slides presentation orientation is an easy process.
Let’s see the simple steps you need to follow for this:
Step 1: Open the Presentation File
Step 2: go to file menu, step 3: select portrait from orientation option, step 4: click on apply, how to change the google slides to landscape, google slides orientation: when to use landscape and portrait mode.
Go to Google Slides and open the presentation files you want to change the orientation.

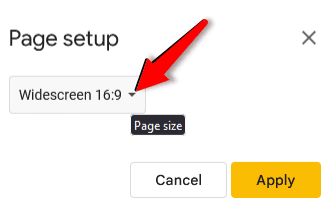
Click on “ File ” from the top menu bar and select “ Page setup ” from the drop-down menu.

In the “ Page setup ” window, choose “ Custom ” from the dropdown box, then replace the default number with 5.63 x 10 in the box below.

Click on the “ Apply ” button to save the changes. You will see your slides have now changed to portrait orientation.

That’s it! These steps will help you change the orientation of your Google Slides presentation from landscape to portrait mode.
If you want to change it back to landscape mode, simply follow the same steps as above. But in Step 3, select “ Widescreen 16:9 ” from the orientation option. This will change your slides back to the default setting .

Both landscape and portrait mode have their own advantages. If you’re not sure which one to use, here are some things to consider:
Pros of Landscape Mode:
- It’s the most common setting and compatible with most projectors and screens.
- You get more horizontal space to work with, which is excellent for adding more information or images to specific slides.
- It’s easier to read long lines of text in landscape mode.
- Landscape mode is perfect for infographics or other text-heavy slides .
Pros of Portrait Mode:
- You get more vertical space , which can be useful for adding extra content or images .
- It’s a good option if you’re presenting on a screen with a limited width.
- It can be easier to focus on one thing at a time in portrait mode.
- Portrait mode is great for posters or presentations with a lot of visuals.
Changing the orientation of your Google Slides presentation is a pretty easy task. Simply follow the steps outlined in this article, and you’ll be able to change it in no time. We hope this article was helpful. If you have any questions, feel free to leave a comment below.
Related Posts:

Home Blog Google Slides Tutorials How to Make Google Slides Vertical
How to Make Google Slides Vertical

Presenters frequently ask how to change Google Slides to portrait orientation. This includes not only the Standard 4:3 slide design but something more customized to accommodate infographics, tables, charts, dashboards, and legal documents or to make the slide more focused for mobile UIs.
In this article, we will go through the process so you can make Google Slides go vertical. It’s more than just how to rotate a Google Slide when the design is already done; but how to actually set up your layout to design a vertical slide directly. Let’s get started!
Change Slide Orientation in Google Slides
To make Google Slides vertical, go to the File menu and scroll down to Page Setup.

This will open a menu where you can choose between Standard 4:3, Widescreen 16:9 or 16:10, and Custom orientation.

The menu also provides options to change the layout by inches, centimeters, points, and pixels. Add the desired size for your slide and click Apply . You can get the help of online tools to obtain the exact dimensions for the “paper” area to work.

You can choose a size that best matches your needs. For example, to insert an illustration, such as a diagram to a slide, check the image size in image properties and set the page accordingly. The below example shows a vertical layout in 8.5 x 11 inches Letter orientation.

Examples of Vertical Slide Sizes
The example below shows how you can use custom orientations using Google Slides Templates to accommodate content that might be suited to a vertical layout. If you aren’t sure about which one to use, simply focus on increasing the height of the page to give it a vertical design.
You can also check orientations for vertical layouts such as Legal (8.5 x 14 inches), Letter (8.5 x 11 inches), Tabloid (11×7 inches), and Ledger (17×11 inches). These standard sizes might also be handy if you need to print the slides for offline documentation. However, you don’t necessarily need to stick to a standard size and can customize the slide size according to need.

IMPORTANT: Unlike Google Docs, Google Slides does not allow setting a different page size for selected content. Once you set up a size for your presentation, it applies to the whole slide deck and does not enable editing individual slides. Hence, you cannot have a widescreen layout for some slides and a vertical one for others.

Like this article? Please share
Google Slides, Presentation Skills, Presentation Tips Filed under Google Slides Tutorials
Related Articles

Filed under Google Slides Tutorials • May 3rd, 2024
How to Work with Google Slides Version History
Go back to previous changes or check who edited your presentation. Learn how to work with Google Slides Version History here.

Filed under Google Slides Tutorials • April 29th, 2024
Best Google Slides Add-Ons
Optimize your Google Slides experience by installing the best Google Slides add-ons available in the market. Full list with photos.

Filed under Google Slides Tutorials • April 26th, 2024
How to Print Multiple Slides on One Page in Google Slides
Discover how to print multiple slides on one page in Google Slides to optimize your presentation handouts.
Leave a Reply
Home » Google Slides » How to change Google Slide Format to Portrait
How to change Google Slide Format to Portrait
When you open Google Slides, by default, all slides are in the landscape or horizontal orientation. The landscape orientation is the most common setting for presentation screens and projectors. However, in some cases, you may want to change the orientation to portrait mode.
You may want to take advantage of the extra vertical space when the slide is in the portrait mode. Or, your printer or projector supports only that mode. Please note that Google Slides does not allow you to select a specific mode for a single slide—all slides must be in either landscape or portrait mode.
Changing the orientation of Google Slides to portrait mode is fairly simple.
You can also change back to the landscape mode equally easily.
Let us walk you through the steps involved.
Change Format to Portrait Mode
Step #1: open google slides.
Fire up your favorite browser.
Go to the Google home page .
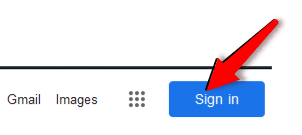
In the top right corner, click Sign in and login to your Google accounts using your credentials.

Click the nine dots to open Google apps.

Scroll to and click the Slides icon.
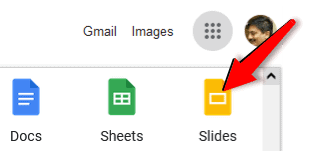
Google Slides will open.
Step #2: Open a Presentation
Open a new presentation or an existing one.
In this tutorial, we will open a new presentation.
Hover the mouse pointer over the + button in the bottom right corner.

The button will change to two new buttons.
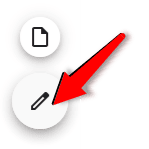
Click the bottom button, Create new presentation .
A new presentation slide will open.
The slides are in the landscape orientation.
Step #3: Open Page Setup
Click the File tab in the top menu bar.

A menu will open.
Click the Page setup icon.
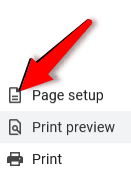
The Page setup dialog box will open.
Step #4: Change the Page Size
Click the small triangle next to Widescreen 16:9 .
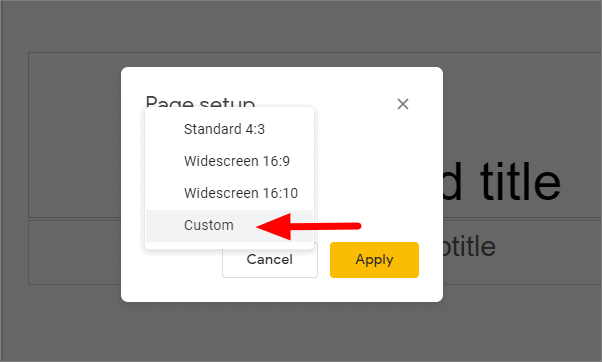
Click the Custom tab.
The Page setup dialog changes to show Custom setup.
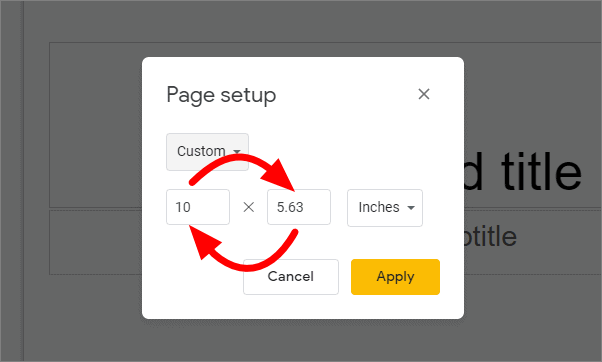
Under Custom, interchange the dimensions from 10×5.63 to 5.63×10 inches.
Click the Apply tab.
The slide will change to the portrait orientation.
Change Format to Landscape Mode
In the top right corner, click Sign in and go to your Google accounts using your credentials.
In this tutorial, we will open an existing presentation.
Choose a presentation which you know is in the portrait mode.
Click on the presentation to open it.

Click the small triangle next to Custom .
Click the Widescreen 16:9 tab.
The Page setup dialog changes to show Widescreen setup.
The slide will change to the landscape orientation.

We have shown you how to change the format of Google Slide to portrait. We have also shown you how to change it back to the landscape format. If you have any questions, put them in the comments below.
Leave a Comment Cancel reply
Save my name, email, and website in this browser for the next time I comment.
- Slidesgo School
- Google Slides Tutorials
How to Change Slides Orientation in Google Slides

A change of perspective is always good! Do you want your public to look at your slides in a new way? Changing slides orientation will do the work. In this tutorial you’re going to learn how to go from horizontal slides, to vertical ones (and vice versa!).
How to change page orientation in Google Slides
Google Slides usually comes in horizontal layout. If you want to change the format and have vertical slides , you only need to follow three simple steps :
- Go to File → Page Setup . Here, you can change the format, but Google Slides does not have a premade vertical option.
- Click on Custom and you will be able to change the actual size of the canvas. The value on the left represents how wide your slide will be, and the one on the right is how tall. You can choose the values you want, but we recommend just swapping the values, this way the slide will be the same size but it will be vertical instead of horizontal.

Note that the changes in format you make will apply to the whole presentation, it is not possible to change the layout of a single slide.
Have you changed your mind and want to know how to change the slide orientation again? This time it is even easier, you only need to select any of the three presets on Page Setup .
Pro tip: you can create a printable slide, if you select 21.4 cm x 29.7 cm. Those are the values for a standard A4 sheet of paper.
Now your creations will know no barriers, neither horizontal nor vertical! Take a look at our web and choose a template to start practising. Or, if you want to keep learning, read one of our many Google Slides Tutorials .
Do you find this article useful?
Related tutorials.

New feature available: edit our templates with Canva
Whenever you need to create, Slidesgo is there. We’re continually enhancing your presentation design process with templates that are primed to impress for any occasion. And in order to let your ideas flow best, comfort is key. How could Slidesgo help you with this? By making you feel right at home with our resources, no matter your preferred platform.You spoke, and we listened. Now, your favorite slides can be accessed on a new platform: Canva! This new format adds to our existing options (PowerPoint and Google Slides), expanding your ways to utilize our first-rate presentation content. We’ve started with a selection of Canva-ready...

How to print PowerPoint notes
Crafting an impactful PowerPoint slideshow and delivering a captivating presentation are distinct skills. The first focuses on designing appealing visuals to convey a clear message, while the second involves employing effective presentation techniques to ensure the audience grasps the idea. The content of this article will help you with the latter part of this process, guiding future presenters on how to print PowerPoint with speaker notes to enhance your presentations success and effectiveness.

Discover Our Online Presentation Software for Free
We have great news for you today! If you’ve been a Slidesgo fan for years (or months, or weeks, or days, or mere hours, we welcome everyone!), you’ll probably know for now that our templates are available mostly in two formats: for use in Google Slides and PowerPoint.Google Slides is a free tool, since you only need a Google account in order to use it. PowerPoint, on the other hand, is part of the Microsoft Office suite, so it’s not a free program, but that didn’t stop it from being one of the most popular options in the world!What if we...

Webinar: Presentation Audit
With more than 15,000 templates released on Slidesgo and a user base composed of millions of people, we estimate that the total number of presentations created adds up to… um, a lot! Our team of professional designers work very hard to provide you with editable slides so that the only thing you need to do is, well, customize the elements to your liking. Starting from any given template, the results may vary a lot depending on the person who edited the contents.Have you ever wondered “Is my presentation good enough?” and wished that an expert on presentations looked at your template...
How to Make Google Slides Orientation (to Vertical and Back)
For mobile phones or to make it pop
If you want to create a slideshow that displays nicely on a mobile phone screen or simply go outside the norm, you can change the slide orientation. We’ll show you how to make Google Slides vertical instead of the default horizontal view.
Standard Portrait Page Sizes
Before you begin, you should have an idea of the size you want to use for your vertical slides. Unlike Microsoft PowerPoint, you won’t see a list of portrait orientation options.
Here are some common paper sizes you might consider.
- Letter or Standard : 8.5 by 11 inches
- Legal : 8.5 by 14 inches
- Tabloid or Ledger : 11 by 17 inches
Common A-Series Paper Sizes
Note that you can round up the following A-series paper sizes if you like.
- A3 : 11.69 by 16.54 inches
- A4 : 8.26 by 11.69 inches
- A5 : 5.83 by 8.26 inches
How to Make Google Slides Vertical
You can change the orientation for your presentation easily in Google Slides on the web. As of this writing, you don’t have this ability in the Google Slides mobile app.
Additionally, when you adjust the orientation, this changes all slides in the presentation by default. You cannot use different orientations for individual slides.
- Visit Google Slides , open your presentation, open the File menu, and pick Page setup .

- In the drop-down menu, choose Custom .

- Enter the dimensions you want to use for the slide size and pick the measurement to the right. You can choose Inches, Centimeters, Points, or Pixels. Again, you can use the paper sizes listed above or your custom sizes.

- Select Apply .

You’ll then see the slides in your presentation displayed vertically instead of horizontally. If you already have content on the slides, you may need to adjust your items to accommodate the vertical layout.

How to Make Google Slides Horizontal Again
If after you change the orientation in Google Slides, you decide that landscape slides would work better, you can revert it just as easily.
Select File > Page setup from the menu. In the drop-down box, choose one of the standard horizontal sizes or use the Custom option to enter your dimensions. Then, select Apply .

Like changing the orientation to vertical, you may then want to adjust your elements for the horizontal slide view.

Which View Is Good for You?
Whether you’re creating a Google Slides presentation for a newsletter, poster, infographic, or one that looks good on mobile devices, you can change the orientation in just a few steps.
Now that you know how to make Google Slides vertical, take a look at our tutorial for how to hide and unhide slides too.
Related Posts
- How to Convert PDF to Google Slides Presentations
- How to Check Word Count in Google Slides Presentations
- How to Add Audio to Google Slides
- How to Hide and Unhide a Slide in Google Slides
- Where To Find Themes For Google Slides

Sandy Writtenhouse is a freelance technology writer and former Project, Department, and Program Manager. She turned her education, job experience, and love of technology into a full-time writing career. With all sorts of gadgets in her home and her hands, she seeks to help others make life easier through technology. Read Sandy's Full Bio
Leave a Reply
Your email address will not be published. Required fields are marked *
How to Make Google Slides Vertical (5 Quick Steps)
The steps in this guide are going to show you how to make Google Slides vertical.
- Switching to portrait mode from the landscape orientation in Google Slides requires you to change a setting on the Page Setup menu and adjust the slide size.
- Google Slides doesn’t let you change the orientation of individual slides. If you have one portrait slide then the entire slide show needs to be in the portrait orientation.
- You can download a copy of your Google Slides presentation in the Microsoft Powerpoint file format, or as a PDF. This article will show you how.
While you may have already discovered how to rotate a picture in a Google slideshow , Google Slides doesn’t have a page orientation setting as you might find in other Google Apps such as Google Sheets or Google Docs. In fact, if you’ve tried to change a landscape slide to a portrait slide before, then you probably only found things like Widescreen 16:9 as options.
Microsoft Powerpoint users are likely familiar with how to change the orientation of their Powerpoint slides if they have ever tried to print their presentations before, as the option to do so can be found on the Slide Size menu of the Design tab in that application. However, the Google Slides version of that menu is lacking a similar choice.
Luckily you can switch from horizontal slides to vertical slides in Google Slides by taking advantage of the Custom Slide Size option. Our guide below will show you how.
How to Make a Slide Vertical in Google Slides
- Open your slideshow.
- Click the File tab.
- Select Page setup .
- Choose the Custom option.
- Enter the desired portrait dimensions, then click Apply .
Our guide continues below with additional information on changing Google Slides to portrait, including pictures of these steps.
Note that once you have completed this guide on how to make Google Slides vertical you are likely going to need to scroll through all of your slides and fix everything that Google Slides couldn’t adjust automatically.
This flip image in Google Docs guide will show you many of the image editing tools that are available when working with documents in Google Docs.
How to Make Google Slides Portrait (Guide with Pictures)
The steps in this article were performed in the desktop version of the Google Chrome Web browser. If you are using the Google Slides app on an iPhone or Android device, then you won’t be able to adjust the slide orientation on those devices.
Step 1: Sign in to your Google Drive at https://drive.google.com and open an existing Slides file or create a new presentation.
Step 2: select the file tab at the top of the window..
 1")
Step 3: Choose the Page setup option.
 2")
Step 4: Click the drop down menu and select the Custom option.
 3")
Step 5: Enter 8.5 into the Width field and 11 into the Height field, then click Apply .
 4")
Note that any existing content in your slide show will likely be re-positioned due to the change in the slide orientation.
If this doesn’t help with what you need, then you can always learn how to insert a link in Google Slides and point it to a document or PDF in Google Drive.
If you have Microsoft Powerpoint then you can always convert between Powerpoint and Slides to use whichever application offers the better tools for your current task.
Our tutorial continues below with additional discussion on changing orientation in Google Slides.
More Information on How to Make a Slide Vertical in Google Slides
This workaround for making Google Slides portrait assumes that you are creating slides meant for letter sized paper. If you are using a different size paper then you will need to adjust the custom slide size dimensions accordingly.
Note that Google Slides only allows you to set the slide dimensions for the entire presentation. You won’t be able to make one slide portrait and the rest of them landscape, for example.
If you need to do this then you will need to create multiple presentations and combine them when you print or switch between them when giving the presentation.
If your presentation allows for it then you may be better off using Google Docs, where you are now able to change the orientation of individual pages in a document. You can make one page portrait in Google Docs by selecting the content to rotate, then clicking the Format tab, choosing Page orientation, then selecting the Portrait option under Orientation.
While this article has focused on how to adjust to the portrait layout in Google Slides presentations, you can often make your slides vertical by just adjusting the layout of the content on the slides. By putting your content in the vertical position on a slide and leaving the sides blank you might not even need to worry about switching landscape to portrait or messing around with custom dimensions.
While we focus on how to make Google Slides vertical in this article so that you can print on standard sized paper a bit more easily, you can always make these dimensions anything that you want.
For example, you might be making a slideshow where you are planning to download each of the slides as images that will be used in another document, so you may want specific pixel dimensions for the length and width instead.
Find out how to make a landscape document in Google Docs if there are other files in Google Drive for which you need to change the orientation.

Matt Jacobs has been working as an IT consultant for small businesses since receiving his Master’s degree in 2003. While he still does some consulting work, his primary focus now is on creating technology support content for SupportYourTech.com.
His work can be found on many websites and focuses on topics such as Microsoft Office, Apple devices, Android devices, Photoshop, and more.
Share this:
- Click to share on Twitter (Opens in new window)
- Click to share on Facebook (Opens in new window)
Related Posts
- How to Make Text Vertical in Google Docs
- How to Rotate a Powerpoint Slide Presentation
- How to Change Paper Size in Google Docs Quickly [5 Steps + Infographic]
- How to Change Margins in Google Docs (A Quick 4 Step Guide)
- How to Set Google Docs Background Image
- How to Flip an Image in Google Docs
- How to Do a Powerpoint Google Slides Presentation Conversion
- How to Remove Background Color in Google Docs
- How to Add a Hyperlink on Google Slides
- How to Change Slide Size in Powerpoint 2016
- Can You Print a Google Slide?
- Can You Download Google Slides Files?
- How to Change Google Docs Language
- How to Make Google Docs Landscape
- How to Show Vertical Ruler in Google Docs
- How to Bring an Image to the Front in Google Slides
- How to Use Google Docs Dark Mode
- How to Make a New Page in Google Docs
- How to Mirror Image in PPT Files (An Easy 6 Step Guide)
- How to Add a Link to a Picture in Google Docs
Get Our Free Newsletter
How-to guides and tech deals
You may opt out at any time. Read our Privacy Policy
How to Make a Google Slide Vertical/Portrait
Changing the orientation of slides in Google Slide to portrait or vertical is simple and can be done from the Page setup option.

Google Slides, an alternative to Microsoft Powerpoints, is a free web-based presentation program. Its user base has been growing over the years, and with new features being brought in, you can expect the trend to continue.
One of the drawbacks of Google Slides is the inability to change the orientation to portrait. There is no direct option or method to do it. However, you can change the orientation to portrait through the ‘Page setup’ in the file menu.
Before we proceed to the method, we must understand the need for a portrait or vertical orientation. For instance, you made a presentation for a specific display device but the display dimensions have been changed. In such a case, you may want to change the orientation from landscape (default orientation) to portrait/vertical.
Making a Google Slide Vertical
To change the orientation, open Google Slides. The default orientation is landscape, with an aspect ratio of 16:9.

After you open the presentation, click on ‘File’ at the top-left corner under the file name.
Scroll down and select ‘Page setup’ from the menu.
Click on the box that displays the current orientation and aspect ratio.
You can select any of the first three options to change the aspect ratio, but it won’t change the orientation. To change the orientation to portrait/vertical, click on ‘Custom’.
You can now see the current slide dimensions in the first two boxes and the measurement unit in the third one. If you reverse the dimensions, the orientation will change accordingly. Therefore, interchange the values in the first two boxes.
After you interchange the values, click on ‘Apply’ at the bottom.
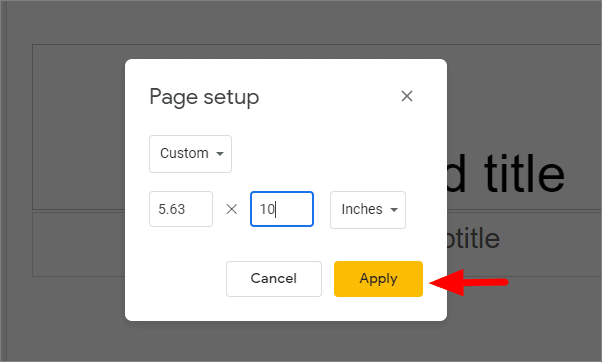
The slide orientation is changed to portrait/vertical. You can see that the height of the slide is more in comparison to the width, which is opposite to the earlier orientation.
Now you can easily change the orientation of a slide in Google Slides as per your requirement.

How to Use Gemini Code Assist in VS Code

How to Code Using AI

Microsoft Copilot Pro Review: There is a lot of Unrealized Potential
Get all the latest posts delivered straight to your inbox., member discussion.

How to Clear Discord Cache on Windows 11

How to Fix "Premium Images Can't Be Exported On Their Own" Error in Canva

Best Password Managers in 2024

14 Tips for Organizing Your Gmail Inbox

How to Enable and Use Arc Sync in Arc Search Browser on iPhone
How-To Geek
How to make slides vertical in google slides.
Should you need a presentation with vertical slides, don't worry. Google Slides has a way to switch them into a vertical orientation.
When you open a new presentation in Google Slides, the slides are horizontal by default. Luckily, if you want to change them from horizontal to vertical, it's a simple process you can do in a couple of steps.
Fire up your browser, head to Google Slides , and open a new presentation.
After the presentation opens up, click File > Page Setup.
Next, click on the drop-down list and choose "Custom" from the choices below.
In the text fields that appear, type in the dimensions you want your slides to appear. The first box is for width, and the second is for height, while the drop-down box provides other measurements, such as centimeters, pixels, and points.
For a default slide, the dimensions are 10 x 5.62 inches. Swap the two numbers around to rotate the slide into a vertical position. It will look like this:
When you're done, hit the Enter key or press "Apply" to make your slides vertical.
All slides added will be in the vertical orientation. There isn't a way to incorporate both vertical and horizontal slides in a single presentation at the time of writing.
That's all there is to it. This method can be applied to existing slides in a presentation as well. However, it's not recommended since the content on each slide would need to be resized and repositioned.
How To Make Google Slides Vertical: A Step-by-Step Guide
Michelle Harris - Guest Contributor

What is Google Slides?
- How to change a Google Slides presentation's orientation?
How do I create a vertical Google Slides template?
- Some tips & tricks for creating vertical Google Slides
How do I print Google Slides in vertical orientation?
- Common mistakes when creating vertical Google Slides
Compare the best presentation software
Change the orientation of your slide deck in a few clicks..
Google Slides is a popular presentation design tool. It's relatively simple to work with and offers many features for customization, multimedia, accessibility, and more. While Slides makes it relatively easy to create online slideshows, you may hit a brick wall if you try to change the orientation of your slides. In this article, we’ll review the steps you can take to make your presentation vertical.
Google Slides is a web-based presentation software solution, which is also a part of Google Workspace. Individuals and teams can create, edit, and share presentations seamlessly over the internet. It lets you use unique templates to make attractive slideshows for various purposes, such as school or work.
Google Slides enables real-time collaboration. Multiple users can work together on a presentation simultaneously, encouraging teamwork and increasing efficiency. You can convey your ideas by adding text, images, charts, and multimedia elements. Plus, Google allows creating and giving presentations from any web-enabled device.
By default, newly created presentations are horizontal (landscape mode) and made for widescreen devices such as computer monitors. But you may have tables, charts, and other graphics that work better vertically (portrait mode) or are more user-friendly for smartphones and tablets. Let’s learn how to change slides to portrait mode.
How do I change the orientation of a Google Slides presentation to vertical?
Changing the slide orientation in Google Slides is a straightforward process. Here are the steps for how to make vertical slides:
Step 1: Open the Google Slides presentation that you want to edit. If you haven't created one yet, start a new presentation.

Step 2: Look for the "File" option in the top left corner of the screen. In the "File" menu, click "Page Setup." This option is where you can adjust the settings for your slides.

Step 3: In the "Page Setup" dialog box, you will see options for "Standard" and "Widescreen." Choose the "Custom" option.

Step 4: Once you've selected "Custom," you'll see options for width and height. Swap the values for width and height to switch from horizontal to vertical or vice versa. For example, if your slides measure 13.3" x 7.5" (widescreen), you might change it to 7.5” x 13.3” (custom vertical).

Step 5: After adjusting the width and height, click the "Apply" button to see the changes in your preview. If you're satisfied, click "OK" to confirm and save the new orientation.

This is how to make a Google Slide vertical. Remember that adjusting the orientation might affect the layout of your content. So, be sure to review your slides and make any necessary adjustments. Next, we'll show you how to create a vertical template.
Changing Google Slides’s layout to portrait for a template involves adjusting the slide orientation and customizing the design to suit your preferences. Here are step-by-step instructions:
Step 1: Start by opening Google Slides to create a new presentation. Do this by selecting "File," "New," and then "From Template Gallery."

Step 2: Browse through the list of premade templates. Choose one that best matches your desired presentation style and click it to open.

Step 3: Once you've chosen a template, follow the same steps above to make Google Slides vertical. Simply go to "File," then "Page Setup," and "Custom" to modify the width and height. Check for text boxes, images, and other elements that need adjusting to fit the new format.

Step 4: After setting the orientation to vertical, you're ready to customize the template. To do this, you'll need to click "Slide" in the top menu and then click on "Edit Theme."

Step 5: You can customize the template with various design elements that match your preferences. You have the option of changing the entire theme, background color or background image, and the different slide layouts.
To change the background color or image, select "Background" in the menu. To change the theme colors, click "Colors" in the top menu and "Choose a Theme Color" in the right side panel. To change the slide layouts, you can access each in the left side panel. Once done, click the "X" in the top right panel to view changes on your slides.

Step 6: You can use this new template for future presentations. Simply open an existing or blank presentation. Then, click on "Import Theme" in the lower right-hand panel. Click on your template and then click "Insert" to import it.

What are some tips and tricks for creating vertical Google Slides presentations?
Working with vertical Google Slides presentations can be a bit tricky as compared to traditional horizontal slides. Consider the following tips and tricks:
Map it out before designing the slides. That way, you ensure your presentation aligns with your goals, message, and audience.
Focus on the layout. Your Google Slides may have attractive colors and fonts, but the layout is what really matters most. Check your margins and the alignment of all elements to ensure a good balance of text, graphics, and white space.
Use vertical images and graphics. In many cases, horizontal images may not work well. Your images should provide context to your content rather than merely make it look attractive.
Break up the layout. Since your slides will be in a vertical format, it helps to break them into parts. You could split the slides in half so that the titles and text are at the top and the images are at the bottom. You could also split the slides into thirds.
Use fonts and colors that stand out. Vertical slides give you an advantage by looking different from most other presentations. You can also make your presentation memorable by using large fonts and bold colors that stand out.
Test your presentation before sharing. Creating your slides in portrait view makes them user-friendly for mobile devices. After you've designed your Google Slide presentation, test how it displays on smartphones, tablets, and other devices.
You can print vertical slide presentations easily. Just make sure your printer specifications are set to "portrait orientation." Otherwise, your slide content will be cut off, and you'll waste paper and ink doing a reprint.
Here are the steps to print your vertical slides:
Step 1: Click the printer icon.
Step 2: Change your printer settings to your desired output. This includes the number of copies, color vs. grayscale, scale, etc., depending on the type of printer you have. You can also preview the slides to make sure everything looks okay. When satisfied, click "Print."

What are some common mistakes to avoid when creating vertical Google Slides presentations?
Most people create and present Google Slides shows using the horizontal orientation. That's the default setting. However, those who decide a vertical orientation works better for their presentation often make the following mistakes:
Distorted images. If the original presentation or template contains horizontal images, some of your images will look stretched or compressed when converted to a vertical orientation. This happens especially to background images or those that take up quite a bit of the slide's surface. Be sure to check each image and crop or resize accordingly.
Misaligned elements. Going vertical can also cause the elements not to align properly. Text within the text boxes may not have enough room to flow correctly. Graphics may be positioned so that there's too much white space. Check each slide to ensure everything lines up as desired.
Overcrowded text. Trying to jam as much small text as possible on a slide is common. However, in vertical format, too much text can be challenging to follow. Use a readable font size of about 24 points or larger so the audience doesn't have to strain their eyes to read it. Make use of bullets and lists.
By following these steps, you'll better understand how to make a slide vertical. With that knowledge, you can create a vertical Google Slides template that suits your presentation style and content. Learn more about other presentation software available, including our shortlist of the best presentation software .
For more resources on slide presentations, check out the following articles:
Basics of Graphic Design: Principles and Elements
How to Assess Software Functionality and Features With This Comparison Template
4 Signs It's Time to Move On and Check Out New Software
Disclaimer: The steps to make Google Slides vertically were researched in November, 2023. The screenshots are provided by the author and reflect how to perform such steps on a computer and are subject to change. Refer to Google Docs Editors Help for additional information.
Was this article helpful?
About the author.

Michelle Harris is a strategist residing on Florida’s beautiful Gulf Coast. Providing global clients with solutions to head-banging problems is her passion at Shel-Shok, LLC. She is a Ph.D. candidate researching finance decision-making and holds graduate degrees in management and marketing. Her background includes art, education, medicine and conservation (she is a glorified bug hugger!). When not strategizing, you will find her motorcycling, belly dancing, roller derbying and beach bumming.
Related Reading
Should you outsource lead generation, 5 key employee recognition software features and top products that offer them, how capterra collects and verifies reviews, how capterra ensures transparency, here’s how inflation is affecting employees around the world, signs that it's time to outsource bookkeeping services, capterra value report: a price comparison guide for fleet management software, capterra value report: a price comparison guide for inventory management software, 5 key performance management software features with top products that offer them.
- How to Make Google Slides Vertical or Portrait
- Member lounge
- Devops & Admin
- Workspace Tools
- User Productivity
- Change Owner
- Copy Folder
- Filename Editor
- Software Development
- Website Builders
- CRM Solutions
- Backup Solutions
- Admin and Security
- HR Software
- Productivity
- Google Workspace
How to Make Google Slides Vertical and Change the Perspective?
- Share on Facebook
- Share on Twitter
By Nikolay Kaloyanov
in How-To Tutorials
2 years ago
Viewed 913 times
Spread the word about this article:

Google Slides offers plenty of options to customize your slides – you can add audio and video, insert transitions, change the theme colors, and many other options. In this article, we will see how to make Google Slides vertical and why.
Article overview: 1. Why would you need to make Google Slides vertical? 2. How to make Google Slides vertical? 3. Common presentation formats
Why would you need to make Google Slides vertical?
As we’ve already said, Google’s presentation software allows for many changes to be made. But you have to find a good reason to change the position of your slides. Let’s see some of the cases when vertical slides make more sense than standard, landscape slides:
💡 You have an original concept – if you have an original idea, you can garner it with some exciting layout change. Making Google Slides vertical will be a step in the right direction, and it will be considered a fresh move, making an impression on your audience.
🖨️ Printing a presentation? Why not . – people choose the print their presentations for many reasons. Some would also like to give their listeners a chance to read the content at home afterward. If there are some important details, the author wants to create a more lasting impression, or “warm” some leads, printing a presentation before the speech and giving the audience sheets might be a clever idea.
📱 Mobile-first approach – almost 84% of the world’s population owns a smartphone. It means you have to adapt presentations for mobile users sooner or later. Obviously, it’s more valid for corporate presentations, as business people are often on the road and most of their communication happens by phone, which will add extra convenience. Teachers would also be able to impress their students, especially those who have tablets.
How to make Google Slides vertical?
By default, all Google Slides presentations are horizontal, and turning them into vertical happens in a couple of quick steps.
Step 1. Open the presentation you wish to modify
Open a presentation of your choice. You can either create a new presentation or edit the layout of an existing one. In most cases, it’s better to decide to go vertical at the start of the presentation, as changing the settings after the beginning could result in misplaced shapes and designs.
Step 2. Open the page settings
It’s time to open the page settings. Click on File , and then select Page Setup.

Step 3. Select a custom size
Once you open the menu, you will see four options available to you: Standard (4:3) , Widescreen (16:9) , Widescreen (16:10) , and Custom . To achieve a vertical view, you should pick Custom , as currently, Google Slides doesn’t support vertical slides as default options. For slides to appear in portrait mode (vertical), the height should be a bigger value than the width.

Step 4. Pick your measurement unit
During step 5, you should select how to calculate screen size. You have to choose between 4 options: Pixels , Cm , In , and Points . Then press Apply .

Recommendation : If you aim to make your presentation suitable for mobile devices, you will better select pixels since mobile resolutions are measured in pixels. You won’t have to convert the sizes. On the other hand, if you want to print your Google Slides presentation, Cm/In are more popular options.
3. Common presentation dimensions
If you would like to play with your Google Slides presentation, you will have to be aware of common industry standards before changing things. This way, you can show professionalism and avoid silly mistakes that can cost you dearly.
A presentation has to bring long-term benefits for those who listen to it. However, it’s doubtful that lecturers could say what they want to say and get understood instantly. That is why it is crucial to make your Google Slides presentation more accessible – and this is achieved by making it vertical. This way, you can grab the attention of your audience post-factum when they can either read the slides on their mobile phones or have them printed on A4 paper sheets.
If this tutorial was useful for you, you can also check some other Google Slides guides:
- 20 Great Google Slides tutorials to master the software
- How to do a Hanging Indent in Google Slides?
- How to Draw on Google Slides?
- How to Add Fonts to Google Slides?

Add some character to your visuals
Cartoon Characters, Design Bundles, Illustrations, Backgrounds and more...
Like us on Facebook
Subscribe to our newsletter
Be the first to know what’s new in the world of graphic design and illustrations.
- [email protected]
Browse High Quality Vector Graphics
E.g.: businessman, lion, girl…
Related Articles
How to add a gif to google slides and make it look nice, how to design graphics for social media like a guru: tutorials & tips, color theory basics for non-designers: everything you should know, 20 google slides tutorials to master your presentation skills, get started with adobe illustrator: 12 tutorials to step up your game [2022], 500+ free and paid infographic templates compatible with google slides:, enjoyed this article.
Don’t forget to share!
- Comments (0)
Nikolay Kaloyanov
Nikolay is a copywriter with vast experience in Technology, Marketing, and Design. When he isn't playing with words and crafting texts, he watches sports and asks questions. He is a funny person...until you put him on a diet.

Thousands of vector graphics for your projects.
Hey! You made it all the way to the bottom!
Here are some other articles we think you may like:

How to Get Started with PowerPoint + Guide and Resources
by Al Boicheva
![What is a Storyboard [Theory, Examples and Mega Inspiration]](https://i.graphicmama.com/blog/wp-content/uploads/2020/11/26125451/what-is-a-storyboard.jpg "how to make google slides presentation portrait")
How-To Tutorials
What is a storyboard [theory, examples and mega inspiration].
How to do a Hanging Indent in Google Slides in a Few Steps?
by Nikolay Kaloyanov
Looking for Design Bundles or Cartoon Characters?
A source of high-quality vector graphics offering a huge variety of premade character designs, graphic design bundles, Adobe Character Animator puppets, and more.
Creating Vertical Slides in Google Slides: A Step-by-Step Guide
Creating vertical slides in Google Slides is a simple task that can be completed in just a few clicks. By changing the slide orientation from landscape to portrait, you can easily make your presentation stand out and give it a unique look. Ready to learn how? Let’s dive in!
Step by Step Tutorial for Creating Vertical Slides in Google Slides
Before we jump into the step-by-step process, it’s important to understand what we’re aiming for. Vertical slides are great for presentations that require more depth than width, such as mobile app designs or social media stories. Following these steps will help you create a vertical slide layout in your Google Slides presentation.
Step 1: Open your Google Slides presentation
Open the presentation you want to edit or create a new one.
Once you’re in Google Slides, make sure you’re on the slide that you want to change to a vertical orientation. If you’re creating a new presentation, you’ll start with a blank slide.
Step 2: Click on ‘File’ in the menu bar
Navigate to the ‘File’ menu at the top of the screen.
Clicking on ‘File’ will open a dropdown menu with various options for managing your presentation, including the option to change the page setup.
Step 3: Select ‘Page setup’ from the dropdown menu
Find and click on ‘Page setup’ within the dropdown menu.
‘Page setup’ is where you can adjust the dimensions and orientation of your slides. By default, Google Slides is set to a widescreen format, but we’re going to change that.
Step 4: Choose ‘Custom’ from the ‘Slides sized for’ dropdown
In the ‘Page setup’ window, click on the dropdown menu and select ‘Custom.’
Selecting ‘Custom’ allows you to manually input the dimensions for your slides, giving you the flexibility to create a vertical orientation.
Step 5: Enter the dimensions for a vertical slide
Input the width and height dimensions for a vertical slide, such as 8.5 inches by 11 inches, and click ‘OK.’
Remember that the first number you input will be the width, and the second number will be the height. For a vertical slide, the height should be greater than the width.
After completing these steps, your slide will now be in a vertical orientation. You can begin designing your presentation with this new layout, utilizing the space to fit your content appropriately.
Tips for Creating Vertical Slides in Google Slides
- Tip 1: Keep in mind the aspect ratio of your content when choosing dimensions for your vertical slides.
- Tip 2: Use vertical slides for content that is naturally taller than it is wide, such as infographics or mobile interfaces.
- Tip 3: Consider your audience’s viewing devices; vertical slides may be more suitable for viewers on mobile phones or tablets.
- Tip 4: Experiment with different layouts and designs to make the most of the vertical space.
- Tip 5: Remember to adjust the slide orientation back to horizontal if you need to switch between vertical and horizontal slides in the same presentation.
Frequently Asked Questions
Can i mix vertical and horizontal slides in the same google slides presentation.
Yes, you can have both vertical and horizontal slides in the same presentation. Just follow the steps above for each slide you want to change.
Will changing the slide orientation affect my existing content?
Changing the slide orientation may affect the layout of your existing content. You may need to adjust text, images, and other elements to fit the new dimensions.
Can I use a template with vertical slides?
While most Google Slides templates are designed for horizontal slides, you can still apply a template and then change the slide orientation to vertical.
How do I create custom dimensions for my vertical slides?
In the ‘Custom’ option of the ‘Page setup’ menu, you can input any dimensions you like, as long as the height is greater than the width.
Is there a standard size for vertical slides?
There is no strict standard size for vertical slides, but a common size is 8.5 inches by 11 inches, which is the size of a standard piece of paper.
- Open your Google Slides presentation.
- Click on ‘File’ in the menu bar.
- Select ‘Page setup’ from the dropdown menu.
- Choose ‘Custom’ from the ‘Slides sized for’ dropdown.
- Enter the dimensions for a vertical slide.
Creating vertical slides in Google Slides is a breeze once you know where to look. Whether you’re designing a presentation for a mobile app, creating a digital story, or simply looking for a fresh layout, vertical slides can give your work a unique edge. And the best part? You’re not limited to just one orientation. Mix and match vertical and horizontal slides to create a dynamic presentation that keeps your audience engaged. So go ahead, try out these steps, and see how vertical slides can elevate your Google Slides game. Happy presenting!

Matthew Burleigh has been writing tech tutorials since 2008. His writing has appeared on dozens of different websites and been read over 50 million times.
After receiving his Bachelor’s and Master’s degrees in Computer Science he spent several years working in IT management for small businesses. However, he now works full time writing content online and creating websites.
His main writing topics include iPhones, Microsoft Office, Google Apps, Android, and Photoshop, but he has also written about many other tech topics as well.
Read his full bio here.
Share this:
Join our free newsletter.
Featured guides and deals
You may opt out at any time. Read our Privacy Policy
Related posts:
- How to Do Vertical & Horizontal Slides in PowerPoint: A Step-by-Step Guide
- Can I Convert My Powerpoint to Google Slides?
- How to Set Time for Slides in Powerpoint
- How to Change the Font on All Slides in Google Slides
- How to Insert a Horizontal Line in Google Docs
- How to Rotate a Slide in PowerPoint: A Step-by-Step Guide
- How to Delete Multiple Slides in Google Slides
- How to Make a Powerpoint Slide Vertical in Powerpoint 2013
- How to Drag Slides From One PowerPoint to Another: A Step-by-Step Guide
- How to Save a Slide from Google Slides as a Picture
- Google Slides – Change Aspect Ratio
- How to Add Page Numbers in Powerpoint 2010
- How to Make Google Docs Landscape
- How to Unhide a Slide in Powerpoint 2013
- How to Add a Border to a Picture in Google Slides
- How to Make a New Slide in Google Docs: A Step-by-Step Guide
- How to Delete a Slide in Powerpoint 2010
- How to Convert Google Slides to PDF
- How to Insert a Google Slides Page Number
- How to Save Powerpoint as PDF with Notes
Can Google Slides be Made Vertical or Portrait?
By: Author Shrot Katewa

One of the most important parts of a good presentation is tailoring your content to your audience, and presenting the information in a way which gets the point across. Thus, although generally presentation slides are meant to be in landscape format, sometimes you might need to have portrait slides. So, can Google slides be portrait ? If so, how?
To make slides portrait or vertical in Google Slides, first, click on the “File” menu. From the dropdown, select “Page Setup”. A new window will pop-up. Choose “Custom” from the dropdown in the first option. Then, set your dimensions to 8.5 inches (width) by 11 inches (height) and click “Apply”.
But that’s just a short answer to the question. In this article, I’ll be sharing with you how to make slides vertical in Google Slides. Additionally, I’ll also be sharing with you how to make a single slide vertical or portrait in Google Slides! So, for a more detailed step-by-step explanation, continue reading this article.
Can you Change Google Slides to Vertical or Portrait Orientation?
When creating a presentation there might be times when you might want to use portrait orientation. While popular presentation programs like PowerPoint lets you do it easily, Google Slides offers a similar solution.
However, find the right location for in order to enable the portrait orientation is key.
To change the layout of slides to Portrait in Google Slides, all you need to do is change the page setup. From there simply punch in the dimensions you want. That is all, you are all set.
Pro Tip: You can also change the layout and dimensions for other use cases. Like newsletters, for example.
If you wish to watch the step-by-step tutorial, then make sure that you watch the above video. However, if you prefer to read and follow along, then continue with the article below. (Of course, you can also do both! :-))
How to Rotate a Slide to Portrait In Google Slide?
Alright, let’s get into the details on how to turn a slide portrait in Google’s free presentation software. It is quite simple. Here is how to do it.
Step 1 – Open Google Slides
This step is pretty obvious. But hey, if we are going to make a guide, we are going to make it the right way. Launch Google Slides (click on this link). You will see these options.
If you already have a Google Slides presentation open in front of you, then skip over to step 3 directly.

Step 2 – Create a New Presentation
You will then land on a blank Google Slides presentation. From here, we can get to work.
Step 3 – Change Page Layout
If you want all your slides to be in portrait, you will need to change the page layout itself. To do this, click on ‘ File ’ on the upper left.
You will see a drop-down menu. Click ‘ Page Setup ’ to open slide customization.
Step 4 – Customize Slide
You will see four options to customize the slides. The top three are all landscape slides just in different aspect ratios. What you are looking for is the ‘Custom’ option. Click ‘Custom’.
Step 5 – Punch in the Dimensions
When you first click ‘Custom’ you will see the dimensions of the landscape slides. This would typically be 10 X 5.63.
Pro Tip : To make convert the slide to portrait, reversing the numbers given in the width and the height in the page setup menu should do the trick.
Then you can click ‘ Apply ’ and you will have turned your slides into portrait layout.
It is important to note that simply swapping the dimensions does not always give you good results. In fact, 5.63 X 10 inches slides make pretty long and skinny slides.
If you want to create an A4 like-slide in Google Slides, you need to keep the custom dimensions of the slides as 8.5 X 11 inches. This way, you not only get aesthetically pleasing portrait slides, but you also get a layout dimension that works well when you need to print the slides!
Can You Mix Portrait and Landscape Slides In Google Slides?
Sometimes, you may want to convert just one slides to portrait in Google Slides. More so, this one slides can be either at the top or perhaps in the middle of the slides. So, how does one mix portrait and landscape slides in Google Slides?
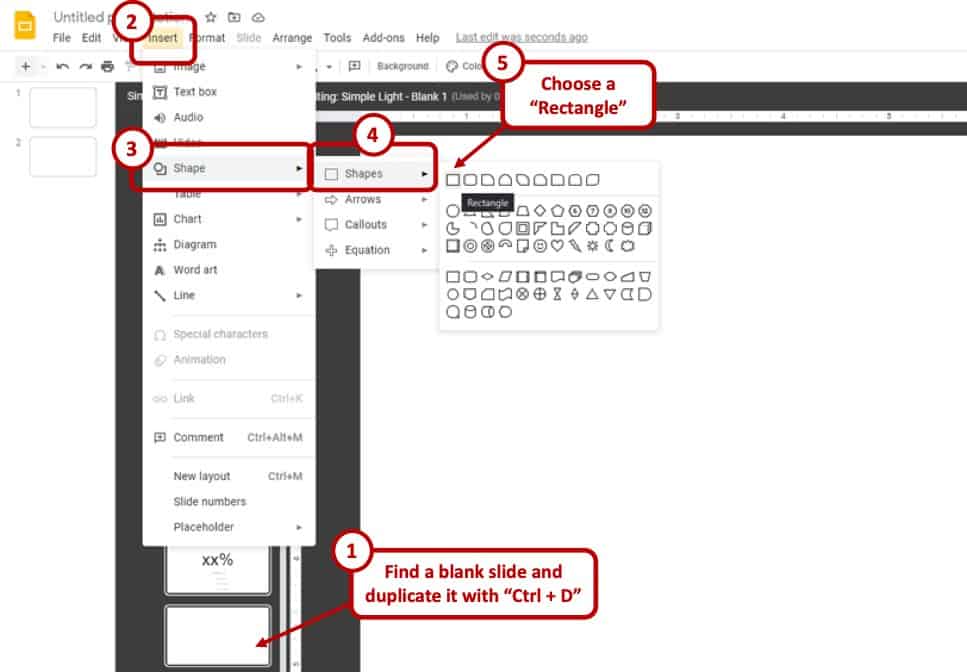
Google Slides DOES NOT allow both landscape and portrait slide layout in the same presentation. However, there are ways you can work around this problem. You can insert a rectangle in the master slide that plays the role of a verticle slide.
This isn’t the most elegant method. However, when you’re in a pinch, this method can come in really handy!
So, let’s understand this step-by-step below –
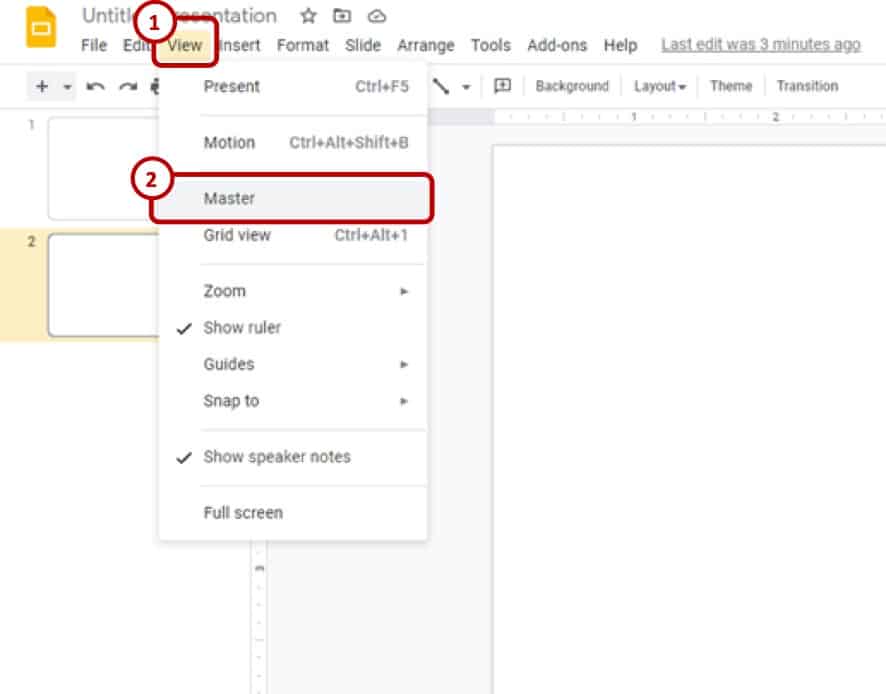
Step 1 – Go into Master View
Since you cannot mix orientations in a single presentation, you need to create a portrait effect. To do this, you need to go into the master view.
Step 2 – Insert a Rectangle Shape
From the master view, scroll all the way down to a blank slide. Click the blank slide and press CTRL + D to duplicate. Then insert a rectangle shape.
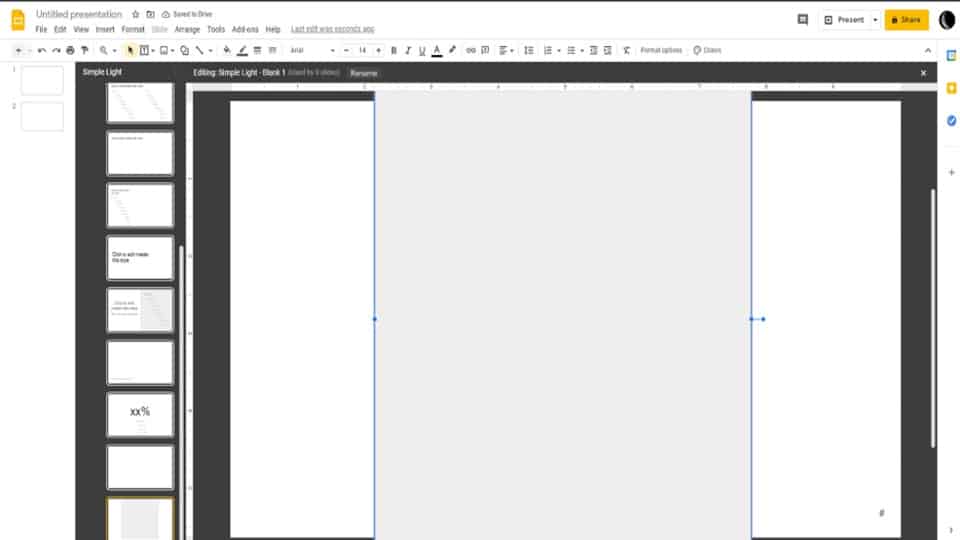
Step 3 – Resize the Rectangle to Fit the Slide
Stretch the shape to match the exact dimensions of the slide behind it. You can simply drag it by the sides or the corners. Your shape will look something like after adjusting the size.

After you adjust it to the size of the slide behind it, the shape should cover the whole slide completely.
Step 4 – Rotate the Rectangle 90-degree and Change the Color
After that, you will need to rotate the shape 90-degrees. Right-click on the shape and click ‘Rotate Clockwise 90°’. (as indicated in the image in step 3)
After you rotate the shape, your slide will look this:
At this point, you will need to change the color of the original slide to grey. The shape’s color and border color needs to be white.
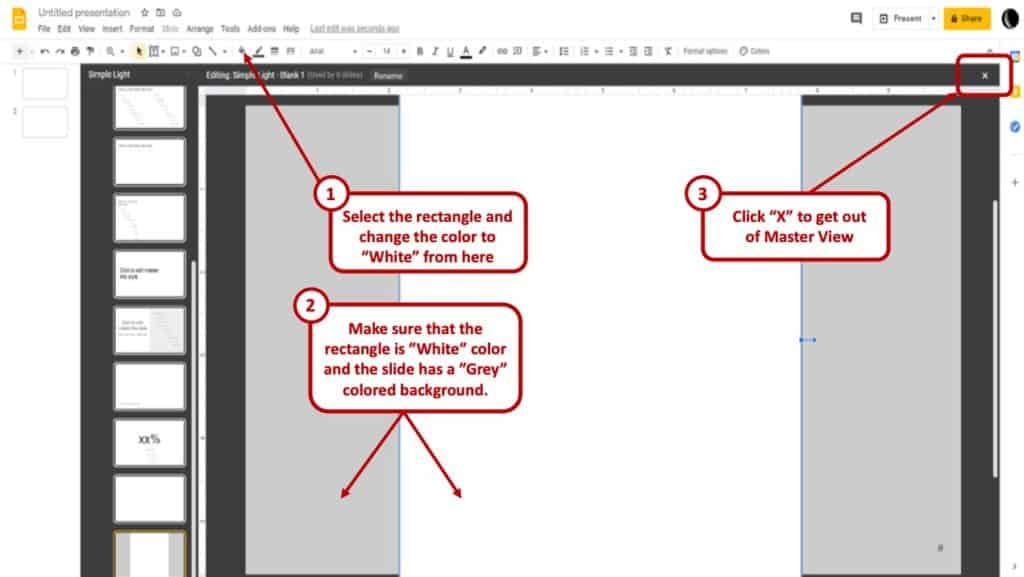
It will look like this. You can use this layout as an unmovable object on your usual slides.
Step 5 – Apply Layout
After you have created the layout, close the master view. You can do this the same way you entered master view. Click ‘View’ and uncheck ‘Master’. Go to the ‘Slide’ header at the top when creating a presentation and then click ‘Apply Layout’.
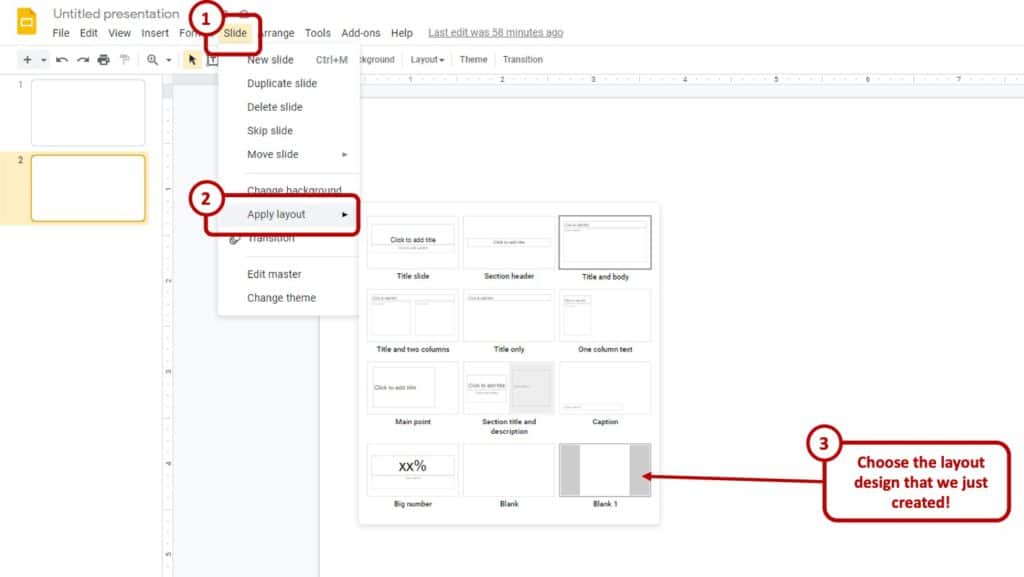
Choose the layout you created and you should have a portrait layout for your side like the picture above.
Albeit, it isn’t a seamless solution. You will still have the grey background and that will be visible in presentation mode as well. But as of now, this is the best you can do in Google Slides.
Pro Tip: You can also create a similar rectangle on any blank slide instead of creating it in the Master Slide section. However, using the master slides will ensure that you can easily use the format for multiple slides!
Do Portrait Slides Add any Value?
You might even be asking “Do I even need to include any portrait slides into my presentation?”.
Quite honestly, you are almost always going to be able to utilize the slides better without have the vertical box included on the slide or wanting to convert the slides to a portrait format. This is because presentation applications are designed to be used on a widescreen mode; either on laptop screens, projectors or widescreen LED TVs.
It might be worth noting that when a presentation is viewed even on a mobile phone (which is the only place where a portrait slide might be useful) in a slide show mode, it still is displayed in a widescreen mode!
That said, there are times when perhaps you need to create newsletters or even a project proposal that looks well when designed in a traditional A4 size format.
This is when a vertical slide format can come in really useful.
However, whether you wish to choose landscape or portrait, it will all depend on your presentation, the data you are trying to present, and your audience. Make sure you make the content easily understandable.
The same presentation basics still apply with portrait slides too. Do not put too much information into one slide – clutter is never good. Use good color combinations and do not overdo it.
Final Thoughts
Well, that brings us to the end of this article!
If you ever wondered whether Google Slides allows for portrait slides , hopefully, this article has answered your question. With a few clicks of your mouse, you can easily use Google slides in portrait mode for your next presentation.
I hope this article was of help to you. Be sure to check out some of the other helpful articles on our website related to Google Slides.
Credit for Featured Image
How to Make Google Slides Orientation Portrait

Most digital content is presented in a horizontal 16:9 ratio which has been around for decades. Over the years, we get wider and wider screens, but around the same time, we also saw the increased use of taller screens fueled by the advancement of modern smartphones.
This is one example of why the widescreen format is not one size fits all. A lot of services have to adapt vertical screens to satisfy the demand.
Google Slides uses widescreen as the default slide size. But with a few tweaks, you can change the dimension to be vertical or portrait. Check out the guide below!
1. Open a Google Slides presentation you want to switch to portrait.

2. Then go to File > Page setup .

3. Choose Custom .

4. Select the unit first. It would help you adjust the size accurately. In this example, I’m using Pixels but feel free to use others.

5. Enter the width and height then click Apply .

6. The slide has been converted from widescreen to portrait.

Changing a slide’s dimension will greatly affect its content. A wide photo might not be best served with a portrait orientation. Further editing after the conversion may be necessary to ensure the quality of the presentation.
About The Author
Related posts.

How to Make a Shape Transparent in Google Slides

Method to Remove Background in Google Slides

How to Get Speaker Notes on Google Slides

How to Convert Canva Presentation to Google Slides

Ms. Cotton's Corner
Resources and insights to grow your teaching, changing the orientation of one google slide.
Maybe you have been doing what I have been doing lately – a crash course into all things Google! If so, I can’t wait to share this tip that I just learned!
Often when I create Google Slides for my students, I need some of them to be portrait orientation and others to be landscape. Because Google Slides is meant as a presentation platform, that just isn’t possible. But, we teachers need it to be so much more! We need kids to drag and drop, underline, insert, and interact with the slides. AND we need the slides to go the way we need them to go. Here’s how I’ve solved that problem.
First, since my students need to interact with the slides, they know NOT to use the slides in Present mode. When I’m teaching them, I DO use present mode. This work around WILL NOT work in Present mode, but it is awesome for students.
- Create the content you need. In my classroom we are working on grammar, so I’ve created this Grammar Adventure for my students. As you can see, most of the slides need to be Portrait orientation, but the brochure about Tikal really needs to be Landscape.

2. I created the slide in Portrait orientation by creating text boxes and images, and then rotating them.
3. Then I downloaded the brochure as a png. Making it a png means the content is locked and no one can edit it – not you and not your students.
4. Next, I created a new blank slide. I inserted the image of the brochure I had just downloaded. Don’t make it a background, insert it as an image. It will fill the entire slide. You are probably thinking, um, yeah, it looks just like it did a minute ago.
5. Now, the work around. Rotate the image. It will hang off the edges of the slide.

6. Go ahead and resize it to cover the entire slide. Now it will really hang off the edges!

7. That’s it. If you want to see a video of this, check it out here!
For other great tech tips for you and for your students, be sure to follow me on You Tube . I regularly post tech tips and instructional videos .
And I have tons of awesome print and digital resources on TPT, including this resource, Grammar Agents – the Quest for the Missing Mayan Medallions! Follow me so you find out about all my newest resources and insights to grow your teaching.
Share this:
- Uncategorized
One comment
Pingback: Christmas Mad Lib - Twas the Night Before Christmas
Leave a Reply Cancel reply
Featured on "9 Tips for Blended and Digital Learning" on TPT!
Discover more from Ms. Cotton's Corner
Subscribe now to keep reading and get access to the full archive.
Type your email…
Continue reading
- PDFelement for Windows
- PDFelement for Mac
- PDFelement on Mac App Store
- PDF Reader for Windows
- PDFelement for iPhone/iPad
- Get from App Store
- PDFelement for Android
- Get from App Google Play
- PDF Scanner for iPhone
Cloud & SDK
- Document Cloud
- PDFelement Pro DC
- PDFelement SDK
Online PDF Tools
- PDF to Word
- Compress PDF
- Word to PDF
Educational Users
- Annotate PDF
- Combine PDF
Personal Users
- Convert PDF
- Organize PDF
Professional Users
- eSign PDFs Legally
- Extract Data from PDF
- Password Protect PDF
PDF Solutions for
- Chat with PDF
- AI PDF Summarizer
- AI PDF Translator
- AI Content Detector
- AI Rewrite PDF
- Proofread PDF
- Add Bookmarks to PDF
- Explain PDF
- Mac Software
- OCR PDF Tips
- Online PDF Tips
- Edit PDF like Word
- PDF Converter Tips
- PDF Compressor Tips
Why PDFelement
- Customer Stories
- PDF Software Comparison
- Contact Support
- PDFelement for iOS
- InstaScan for iPhone
Explore More
- Reviews See what our users say.
- Free PDF Templates Edit, print, and customize free templates.
- PDF Knowledge PDF-related information you need.
- Download Center Download the most powerful and simple PDF tools.
- Download Download Pricing Pricing
How to Make Google Slides Portrait

Audrey Goodwin
2024-04-30 11:11:42 • Filed to: Google Tips and Tricks • Proven solutions
Google Slides is a prolific platform that many people have considered and have developed as their primary habit of making presentation slides for work. This platform has taken the production of presentation slides to a completely new level, where they offer similar features that are offered in conventional platforms such as Microsoft PowerPoint while exempting the requirements of downloading the software onto the device. Different features such as amending the orientation of the presentation are quite basic and common in the existing platforms. However, Google Slides offers a similar experience, which will be explained through a guide defining how to make Google Slides portrait .
As mentioned above, Google Slides have taken over the market with their intuitive system. It not only provides a similar experience in making presentations across an online system but allows the users to collaborate with other people in real-time to amend the files as desired. This is what makes this platform a primary choice for many users in the market. While designing an office presentation, there might be a case where you encounter the need to change the orientation of your file to make it look flattering and adequate. To cover this, it is important for you to understand the following steps explaining how to make a Google Slide vertical.
Step 1. Access Page Setup
Access Google Slides from the browser and opens the presentation that you wish to edit. Tap on "File" to open a drop-down menu and then select the "Page Setup" option.

Step 2. Access Page Setup
Now a small window pops up, and you can customize the page orientation. To make Google slides portrait, you can swap the two numbers of the width and height displayed in the dimensions. Or you can customize the page size as you desired. Then tap on "Apply" to change the orientation of your file into a vertical format.

Tip : Learn how to convert PDF to Google Slides
An All-in-one PDF Solution for You
As you know more about methods explaining how to make slides vertical in Google Slides, you should get introduced to a very proficient platform that manages a very common file format. PDF file format is quite common in transferring official documents and requires an appropriate PDF editor for managing the file with ease. Wondershare PDFelement - PDF Editor offers a very comprehensive set of features to the users where they can easily manage and cover all requirements with ease.
Its editing tools provide the user with an effective environment to apply all edits across a PDF file. The converting tools allow the user to conserve the quality of the PDF file even after conversion. Along with that, the platform is not restricted to providing such features. PDFelement features different commenting and reviewing tools that allow you to annotate a file without going into another platform. With significant features such as adding digital signatures, the user can protect their files through password protection and information redaction.
The latest version of PDFelement is diverse and distinctive, where it provides the user with a better interface and impressive performance to work on. It added digital signatures and cloud storage into the system and sought to offer a 300 times better processing speed, making it a perfect PDF editor choice.
How to Rotate Page in PDF
Since you have learned a detailed guide on how to change to portrait in Google Slides, it is significant to understand the method that explains rotating the page of your PDF document. PDFelement provides the best environment to cover all aspects and focus on providing you all features over a single platform. Although the process seems quite simple to cover, it is necessary to provide the users with a clear understanding of utilizing the appropriate tools to rotate the page in a PDF file successfully. To understand this, look over the steps provided as follows.
Step 1. Open the PDF File
You need to download and launch the platform on your desktop. Following this, open the PDF document that you wish to rotate by accessing the “Open Files” option from the home window.

Step 2. Access the Thumbnail
Tap on the “Thumbnail” icon on the left-hand panel of the screen. With a new panel emerging on the screen, you need to right-click on the respective PDF page you wish to rotate. Select “Rotate Page” from the drop-down menu to proceed.

Step 3. Rotate Page
A pop-up window appears on the screen. Select the angle of orientation that you want to fix. You can also select the page range that you want to apply. Then, click the "OK" button.

There is another way to rotate page orientation. Go to the "Page" menu and directly click the Rotate icon to change the page orientation as you desired.

As you can see, changing the orientation of your presentation on Google Slides is quite convenient. This article provides a simple guide on how to make slides portrait in Google Slides and also gives you a method to change PDF page orientation.
Free Download or Buy PDFelement right now!
Buy PDFelement right now!
chief Editor
Speak Your Mind
Related articles.
- How to Open PowerPoint in Google Slides
- How to Print Google Slides with Notes
- How to Save an Image from Google Slides
- How to Share Google Slides
- How to Make a Brochure on Google Docs
IMAGES
VIDEO
COMMENTS
Select Custom . Swap the two numbers listed around to rotate the slide into a vertical position. Another way to change the slide size in Google Slides is to enter a figure here. We recommend 7.5 inches by 10 inches if you want to create a portrait image that looks good when printed. Select Apply .
To change Google Slides to Portrait Mode, open the presentation > click 'File' menu > "Page Setup" > "custom" > enter "5.63 x 10" in the box > "Apply". Google Slides default orientation is Landscape (horizontal), which is ideal for projectors and screens. However, you may need to switch to Portrait mode in certain situations ...
To make Google Slides vertical, go to the File menu and scroll down to Page Setup. This will open a menu where you can choose between Standard 4:3, Widescreen 16:9 or 16:10, and Custom orientation. The menu also provides options to change the layout by inches, centimeters, points, and pixels. Add the desired size for your slide and click Apply.
Click the nine dots to open Google apps. Scroll to and click the Slides icon. Google Slides will open. Step #2: Open a Presentation. Open a new presentation or an existing one. In this tutorial, we will open an existing presentation. Choose a presentation which you know is in the portrait mode. Click on the presentation to open it. Step #3 ...
Google Slides usually comes in horizontal layout. If you want to change the format and have vertical slides, you only need to follow three simple steps : Go to File → Page Setup. Here, you can change the format, but Google Slides does not have a premade vertical option. Click on Custom and you will be able to change the actual size of the canvas.
You cannot use different orientations for individual slides. Visit Google Slides, open your presentation, open the File menu, and pick Page setup . In the drop-down menu, choose Custom . Enter the dimensions you want to use for the slide size and pick the measurement to the right. You can choose Inches, Centimeters, Points, or Pixels.
How to Make a Slide Vertical in Google Slides. Open your slideshow. Click the File tab. Select Page setup. Choose the Custom option. Enter the desired portrait dimensions, then click Apply. Our guide continues below with additional information on changing Google Slides to portrait, including pictures of these steps.
Google Slides: How to Change The Page Orientation This is a video tutorial on how to change the page orientation from landscape to portrait in a Google Slide...
Step 1 - Open your presentation and click on the 'File' menu. Select 'Page Setup' from the pop-up window. Step 2 - The default aspect ratio, i.e., Widescreen 16:9, will get displayed in front of you. Click on the drop-down arrow to change the orientation. Step 3 - Click on the option 'Custom.'.
Making a Google Slide Vertical. To change the orientation, open Google Slides. The default orientation is landscape, with an aspect ratio of 16:9. After you open the presentation, click on 'File' at the top-left corner under the file name. Scroll down and select 'Page setup' from the menu. Click on the box that displays the current ...
Google slides don't allow you to change the orientation of a single slide. This means you won't be able to make one slide portrait and the rest of the slides landscape. All the content in the presentation will be re-positioned because of the change in slide orientation. Pro tip: If you want to create a printable slide, then you should ...
Swap the two numbers around to rotate the slide into a vertical position. It will look like this: When you're done, hit the Enter key or press "Apply" to make your slides vertical. All slides added will be in the vertical orientation. There isn't a way to incorporate both vertical and horizontal slides in a single presentation at the time of ...
Here are the steps for how to make vertical slides: Step 1: Open the Google Slides presentation that you want to edit. If you haven't created one yet, start a new presentation. Step 2: Look for the "File" option in the top left corner of the screen. In the "File" menu, click "Page Setup."
Everything your team needs to get work done, from anywhere. Use Google Workspace for messaging, meetings, docs, and tasks. Try it free for 14 days. Elevate your presentations with vertical slides in Google Slides. Learn when to use vertical orientation, how to set standard portrait dimensions and craft.
To change slide orientation and make your Google Slides vertical, you need to: Open your Chrome and go to Google Slides. In the Google Slides tab, select a blank presentation. Click the "File" menu and select " Page Setup " from the drop-down box. Then click the "Custom" option for your slide orientation.
For slides to appear in portrait mode (vertical), the height should be a bigger value than the width. Step 4. Pick your measurement unit. ... That is why it is crucial to make your Google Slides presentation more accessible - and this is achieved by making it vertical. This way, you can grab the attention of your audience post-factum when ...
Following these steps will help you create a vertical slide layout in your Google Slides presentation. Step 1: Open your Google Slides presentation. Open the presentation you want to edit or create a new one. Once you're in Google Slides, make sure you're on the slide that you want to change to a vertical orientation.
To make slides portrait or vertical in Google Slides, first, click on the "File" menu. From the dropdown, select "Page Setup". A new window will pop-up. Choose "Custom" from the dropdown in the first option. Then, set your dimensions to 8.5 inches (width) by 11 inches (height) and click "Apply". But that's just a short answer ...
1. Open a Google Slides presentation you want to switch to portrait. 2. Then go to File > Page setup. 3. Choose Custom. 4. Select the unit first. It would help you adjust the size accurately.
Don't make it a background, insert it as an image. It will fill the entire slide. You are probably thinking, um, yeah, it looks just like it did a minute ago. 5. Now, the work around. Rotate the image. It will hang off the edges of the slide. Rotate the image, making the orientation Landscape. 6.
To use Google Slides portrait mode, go to File > Page setup. To open the Page setup menu in Google Slides, go to the File drop-down. You'll find it in the upper left corner of the screen. Click on File, and from the listed options, select Page setup. 2. Select and Apply a Custom Orientation to Make Slides Vertical.
Use the Insert > Audio option to add audio to your Google Slides. If you want to add some soft music to your presentation, you can. In fact, this method of how to make Google Slides look good has nothing to do with visuals! First, click on Insert. From the menu that drops down, click on the Audio option.
Access Google Slides from the browser and opens the presentation that you wish to edit. Tap on "File" to open a drop-down menu and then select the "Page Setup" option. Step 2. Access Page Setup. Now a small window pops up, and you can customize the page orientation. To make Google slides portrait, you can swap the two numbers of the width and ...