
How to Record a PowerPoint Presentation with Narration
Can be helpful in creating a dramatic narrative
Microsoft PowerPoint has a built-in recording tool that allows you to narrate your presentations using recorded audio. You can export and share recorded presentations as video files.
This tutorial covers everything about recording PowerPoint presentations on Windows and Mac computers.

Record PowerPoint Presentation with Narration
Open the PowerPoint file/presentation you want to record and follow the steps below.
Record PowerPoint Presentation on Windows
- Select the slide you want to start recording from on the slide thumbnail pane.

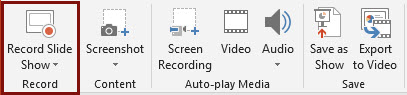
- Head to the Record tab on the ribbon and select the Record button to start recording from the current/selected slide.

To record from the first slide, select the down-facing arrow icon below the Record button and select From Beginning .

You can also record a presentation from the Slide Show tab. Select Slide Show on the ribbon and select Record , From Current Slide , or From Beginning .

That’ll open PowerPoint’s presentation recorder in a fullscreen window.
- Select the Record icon and start speaking after the three seconds countdown.

PowerPoint records the presentation window and captures your voice and webcam feed as you navigate the slides. Select the left-facing and right-facing arrows to move to the previous and next slides in the presentation.
Record PowerPoint Presentation in macOS
- Open the Slide Show tab and select Record Slide Show .

- Select the Record button on the toolbar to start recording your narration.

Use your keyboard arrow keys to move back and forth between slides. Press N or Space Bar to move to the next slide or animation in the presentation. Press P or Backspace to return to the previous slide or animation.
Select Tips in the top-left corner for more keyboard shortcuts and other presentation tips.

Note: The narration tool doesn’t record slide transitions. When moving between slides, wait for the destination slide to appear on the screen before speaking.
PowerPoint Recorder Control/Settings
You’ll find a handful of controls and options on the recording tool. We’ll show you how to use these controls to include voiceovers or audio recordings in your presentation.

Using Presentation Pointer Tools
PowerPoint provides several tools to mark up your slides when narrating your presentation. There’s a pen tool, eraser, laser pointer, and highlighter.
With the Pen tool, you can draw on slides during narration/recording. Press Ctrl + P (Windows) or Command + P (Mac) to use the pen tool. You can also select the Pen icon to convert the pointer to a pen.

The Laser pointer tool converts your cursor to an onscreen laser. Use the laser pointer to draw attention to something on a slide/presentation.
Press Ctrl + L (Windows) or Command + L (Mac) to use the laser pointer. There’s also a Laser pointer icon on the toolbar.

Pressing Ctrl + I (or selecting the Highlighter tool ) converts your cursor to a highlighter.

Use the Eraser tool to remove inks and highlight from slides. Select the Eraser icon or press Ctrl + E and select the ink to erase.

On macOS, select the Erase Pen icon (or press E ) to erase all drawings and highlights on the slide.

You can change the pointer tools ink from the color selection boxes. However, one major limitation is that you can’t change the size of these pointer tools.
Pause and Resume Your Recording
In Windows, press I on your keyboard or select the Pause button in the top-left corner to pause your recording.

Press I again or select the Record icon to resume the recording.

If you use a Mac, select the Pause icon in the top toolbar to pause the recording.

Unmute or Mute Microphone
Check that your microphone is unmuted before recording. Select the microphone icon in the bottom-right corner to mute or unmute your mic.

PowerPoint for Windows allows you to mute and unmute your microphone in real time while recording video/audio narrations. The macOS version of PowerPoint only lets you configure your camera and microphone settings before recording.
Switch Microphone or Camera
Want to record your presentation with an external microphone or camera? Press Ctrl + M or select the audio/camera settings icon in the top-right corner and choose your preferred microphone/camera.

In macOS, select the microphone icon to mute or unmute your microphone. Select the arrow-down icon next to the microphone or camcorder icons to switch input devices.

Enable and Disable Camera
The recorder displays your camera or webcam feed in the bottom-right corner of the presentation slides.
Select the camcorder icon to remove your webcam feed from the recording. Select the icon again to display your webcam feed in the presentation.

You can also use the Ctrl + K keyboard shortcut on Windows computers to enable or disable your camera.
On Mac computers, you’ll find the video control icon on the top toolbar.

Note: The recording tool greys out the camcorder icon if your microphone is turned off.
Enable or Disable Camera Preview
PowerPoint allows you to disable the camera preview without turning off your camera or webcam.
Press Ctrl + J (Windows) or select the Camera Preview icon in the bottom-right corner to disable or enable the camera preview.

End a Recording
Press S on your Windows keyboard or select the Stop icon to end the recording.

Replay or Preview Your Recording
When you end a narration, press V on your keyboard or select Replay to preview or watch the recording.

The recorded narration will include all pen inks, highlights, and laser pointer gestures made during the presentation.
You can also preview/replay the narration outside the recording tool. Open the Slide Show tab and choose to watch the playback From Beginning or From Current Slide .

PowerPoint allows you to preview the playback on individual slides. A speaker/audio icon appears in the bottom-right of PowerPoint slides with narrations.
Choose the slide you want to preview, hover your cursor on the speaker icon in the bottom-right corner, and select Play .

Delete Current Narration/Recording
Did you spot an error when previewing your presentation? Want to delete the current narration and start from scratch?
Select the Clear existing recordings icon and choose whether to Clear Recordings on Current Slide or Clear Recordings on All Slides .

On Mac, select the Bin icon to delete the entire narration/recording.

Close the Narration Tool
Select the X icon on the title bar to close the presentation narration tool and return to Powerpoint.

Select End Show in the top-left corner to close the recording tool on a Mac computer.

Delete Narrations from Slides
Want to delete the narration or timing on an individual slide or the entire presentation? Select the slide with the narration you want to delete and follow the steps below.
- Open the Record tab and select the down-facing arrow below the Record icon.
- Select Clear and choose to clear timing or narration on current or all slides.

Export Recorded or Narrated Presentation
You can export a narrated PowerPoint presentation as a video file. The video output includes ink strokes, recorded audio/video, laser pointer gestures, and webcam/camera recording.
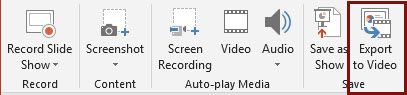
- Open the Record tab and select Export to Video .

Alternatively, open the File menu, select Export on the sidebar, and select Create a Video .

- Choose the quality of the video export in the first drop-down box—Ultra HD (4K), Full HD (1080p), HD (720p), Standard (480p).

- Choose Use Recorded Timings and Narrations in the next drop-down box and select Create Video .

- Give the recorded presentation a file name and select Save .

Narrate Your PowerPoint Presentations
The Microsoft PowerPoint web app doesn’t have a recording tool. As a result, you can only record presentations with narrations using PowerPoint for Windows or Mac.
You might meet issues recording a slide show if you use an outdated version of PowerPoint. Also, the recording tool on older versions of PowerPoint has a different interface and lacks some controls. Update PowerPoint and restart your computer if you cannot record a slide show.

Sodiq has written thousands of tutorials, guides, and explainers over the past 4 years to help people solve problems with Android, iOS, Mac, and Windows devices. He also enjoys reviewing consumer tech products (smartphones, smart home devices, accessories, etc.) and binge-watching comedy series in his spare time. Read Sodiq's Full Bio
Read More Posts:

Leave a Reply
Your email address will not be published. Required fields are marked *
Home Blog PowerPoint Tutorials How to Record a Presentation in PowerPoint
How to Record a Presentation in PowerPoint

Recording PowerPoint presentations can have several benefits. They can serve as recordings of a session that can be uploaded online, shared with participants who might not be able to attend a presentation session, or used as tutorials for passing on instructions.
How to Record a PowerPoint Presentation
PowerPoint provides multiple options for initiating recording for a presentation. You can also choose to record audio and yourself presenting the slides using your camera. When recording your presentations, you can choose PowerPoint templates or something minimalist made by you to record the session. Just be mindful of the graphics to ensure the video does not appear overpowering to the viewer.
How do I Record a PowerPoint Presentation as a Video?
You can start recording your presentation using the following method.
- Record Tab: To record a PowerPoint presentation, go to the Record tab and select whether you wish to record from the beginning, from the current slide, a specific area on the screen, or record audio.
- Slide Show Tab: you can also initiate recording a PPT via Slide Show -> Record to initiate recording from the current slide or the beginning of your presentation.
Record Button: If you’re using the latest version of PowerPoint, you can start Recording your presentation from the current slide via the Record button in the top right corner.

Record from the Current Slide or Beginning of the Presentation
Starting your recording from the beginning of the current slide will open your presentation in recording mode. Hit Record to start the recording.

Screen Recording in PowerPoint
If you initiate screen recording in PowerPoint, you can start recording a screencast by selecting the area you wish to record. This is similar to recording a PowerPoint presentation as a video, with the added advantage of recording other parts of your desktop. This method can also be used for recording a screencast, even if you’re not using a PowerPoint presentation in your video recording.
To start the recording, click Record or use the Windows+SHIFT+R hotkey. To stop the screen recording, click Pause to temporarily halt the recording to resume later or Stop or the Windows+SHIFT+Q hotkey to end the recording session.

The recorded video will be instantly added to your slide once you click Stop .

Record Audio
Another option in the Record tab in PowerPoint is to record audio narrations for your PowerPoint presentation. Simply click Record to start, Pause to temporarily halt, and Stop to stop the recording process.

Once the recording stops, the audio will be added to your PowerPoint presentation.

How can I Annotate Slides in PowerPoint During a Recording?
Once you enter recording mode, you can start annotating your slides using the Pen or Highlighter tool. Other tools in the menu include a Laser pointer and Eraser.

How can I Record a PowerPoint Presentation with Audio?
To enable audio for your Powerpoint recording, unmute the mic from the audio icon on top, CTRL+M hotkey, or click the three dots ( More options for recording menu), followed by the Microphone to select the audio device for recording. You can only record audio if an audio device is connected to your computer. This is a fairly simple process, unlike other presentation platforms. For example, in an earlier article, we showed you how to do a voiceover on Google Slides , which entails a slightly more elaborate process.

How to Record Yourself Presenting a PowerPoint?
Enable the camera during a recording session.
Like turning on audio, you can toggle the camera on or off using the icon on top. The camera input device can also be selected via the Camera option or CTRL+K hotkey, which can be revealed via the three dots from the top menu.

Insert Video Recording in a Slide using Cameo
PowerPoint’s Cameo feature enables recording a video to insert in a slide. You can use the feature to quickly insert a video message in your slides that can be played during a presentation session. This option might also be relevant if you intend to convert PowerPoint to video . If you are looking how to video record yourself presenting a PowerPoint, then follow the steps below.

Once Cameo is turned on, you can also choose to stylize the camera shape, style, border, and add effects. Cameo is quite a unique feature in PowerPoint that currently does not have alternatives in rival presentation apps. For example, you cannot use a similar feature if you wish to convert Google Slides to video .

How to Save Recording for a PowerPoint Presentation?
After you have completed your recording, click Export to save the presentation recording.

You can customize your recording settings via Customize Export or continue the process via Export Video .

Using the Customize Export option, you can choose between a desired output quality for your video, including Ultra HD (4K), Full HD (1080p), HD (720p), and Standard (480p).

Other options in the menu include the ability to choose and preview timings and narrations.

After you are satisfied with your recording settings, you can export your presentation to video.

The video recording of your PowerPoint presentation can be played using any standard video player. The video can also be embedded in PowerPoint slides, uploaded online, such as to a YouTube channel, or shared via cloud storage apps like Dropbox, Box, OneDrive, etc.

Final Words
Recording a PowerPoint presentation can provide a record of a session that might be required for further sharing. The best way to record a presentation is to ensure that your slides aren’t visually overpowering, your audio is clear and audible, and if using a camera, the cam input isn’t hazy, grainy, or too dark.
Once you are familiar with how to record a presentation on PowerPoint, it might take a bit of practice to make your video recording look professional and crisp. It’s best to practice your sessions before recording them until you can seamlessly record presentation decks.

Like this article? Please share
PowerPoint Addins, PowerPoint Tips, Presentation Tips, Presentations, Screencasts Filed under PowerPoint Tutorials
Related Articles

Filed under Google Slides Tutorials • April 29th, 2024
Best Google Slides Add-Ons
Optimize your Google Slides experience by installing the best Google Slides add-ons available in the market. Full list with photos.

Filed under Design • April 23rd, 2024
How to Create the Perfect Handouts for a Presentation
Learn how to create effective handouts for presentations and the recommended structure for handouts with this guide.

Filed under Google Slides Tutorials • April 19th, 2024
How to Find Trash on Google Slides
Don’t worry if you accidently delete a presentation file. Learn how to find trash on Google Slides with this guide.
One Response to “How to Record a Presentation in PowerPoint”
How do I generate webcam option in PowerPoint 2016 ?
Leave a Reply
How to Record A PowerPoint Presentation [2022 User Guide]
- Share on Facebook
- Share on Twitter
By Nikolay Kaloyanov
in How-To Tutorials
2 years ago
Viewed 618 times
Spread the word about this article:

If knowing how to record a PowerPoint presentation wasn’t necessary a decade ago, this isn’t how things stand today. The pandemic taught us a valuable lesson – if we don’t catch up with technology, we will fall short.
Fortunately, Microsoft’s app is the global leader in presentation software and provides you with all the required tools to create an excellent presentation you can show in front of your audience. But how to record a presentation on PowerPoint, and is it easy to do so?
Article overview: 1. What are the benefits of recording PowerPoint presentations? 2. How to record a PowerPoint presentation? 3. How to live stream a PowerPoint presentation? 4. Frequently asked questions
1. What are the benefits of recording PowerPoint presentations?
I am are pretty sure that if recording presentations weren’t helpful, PowerPoint wouldn’t offer it to its users. Well, we all know that’s not the case. Recording your PowerPoint slides can bring a ton of benefits. Let’s see which they are:
- Save time – regardless if you’re a lecturer or present in front of colleagues, having a video of your recording will save you many hours. Imagine speaking in front of your marketing team, but 2 members are on summer holidays. It’s fine. They’ll catch up later when they watch your PowerPoint recording.
- Focus on the presentation – usually, if you’re presenting in front of an audience, it’s typical to get asked many questions that you need to answer promptly. But that is a good reason to get distracted from your core information. Thus, it makes sense to record your presentation beforehand.
- Practice before presenting – the best way to carry out a great presentation is to spend some time at home, focusing on key details. When you record your PowerPoint slides, you can find areas of improvement and work on them.
2. How to record a PowerPoint presentation?
There are many tools that you can use to record a PowerPoint presentation. From Loom and Panopto, and even Apple’s basic Quicktime and Windows’ own recording tool. But here we will discuss none of the other options. Why? The answer is simple: PowerPoint has its own in-built, robust recording tool.
Unlike other options, PowerPoint’s recording feature enables you to record slide by slide. This effectively means you can create as many recordings as you like, until you like the playback version, and move on to the next slide.
Pro tip : PowerPoint doesn’t record slide transitions. You need to start recording each slide when it is opened and finish the recording before you move on to the next one.
Let’s see how to record a PowerPoint presentation with video and audio in just a few steps.
Step #1: Open your PowerPoint presentation
The first step is to open the PowerPoint presentation you wish to record. Ensure you have all the necessary slides and information on them. While this seems logical, there aren’t one or two cases when presenters have recorded wrong or unfinished slides, which leads to a disappointing outcome.
Step #2: Prepare your video and audio devices
Before you start the recording, you should check your camera and microphone. Try to make a sound check and see if your camera works properly.
Step #3: Select the slides you wish to record
PowerPoint gives you the option to record a presentation right from the beginning, or from a specifically selected slide.
- Pick “ From Beginning ” (1) from the Record tab of the Ribbon if you wish to start from the first slide.
- Pick “ From Current Slide ” (2) from the same tab in case you would like to start from a selected slide (which isn’t the first one).
- Click the Record button (3) which is positioned in the top right corner, between the Comments and Share buttons. It starts the recording from the slide you have currently selected.

Step #4: Start the recording
Once you click on one of the options, you are ready to start narrating your PowerPoint presentation. You will see a countdown timer, after which you can start narrating slides.

Step #5: Manage your PowerPoint recording
You have probably seen a couple of other options aside from the recording one. Let’s see which they are:
- Timer with a grey/red light – if you are recording your narration, you will see a timer and a small circle with a red light that indicates you are recording. If you pause, the small circle indicator will become grey again and the timer will stop counting.
- Refresh icon – right next to the timer there is a refresh-like icon but it serves a different purpose – to re-take the recording. You have the option to record again the current slide or all slides.
- Start/Stop button – the big red button serves as a start/stop button for your recordings. Only stop the recording when you want to move on to the next slide.
- Pause button – if you would like to stop the slide recording, in order to drink some water or read your speaker notes, you can use the Pause button, and then resume the recording. Bear in mind you cannot pause and move to the next slide. You have to stop the recording, to indicate you have finished with the current slide.
- Camera button – clicking the camera button will work as a toggle on/off.
- Microphone Button – clicking the microphone button will work as a toggle on/off.
- Ellipsis – this is the place where you can select camera and microphone settings, as well as erase recordings from the current slide or all slides.

Step #6: Export your PowerPoint video recording
The last button from the menu is the Export setting. You can export your narration as an mp4 file in Full HD size by default. However, you can customize your export and get your narration in 4 sizes – 480p, 720p (HD), 1080p (Full HD – standard), and 4K. We don’t recommend Ultra HD exports.
Pro Tip : Exporting 4K PowerPoint presentation recordings doesn’t necessarily mean you will get better quality (unless you have 4K resources within your presentation) but it does guarantee a significantly larger file size – up to 4 times more than on standard Full HD recordings.

3. How to live stream a PowerPoint presentation?
If you have already honed your skills and would like to stream your PowerPoint slides directly to your audience, there are many ways to do so. We are going to cover two of them.
3.1. How to stream a PowerPoint presentation from OneDrive?
Microsoft has invested a lot of resources to make OneDrive a powerful cloud service, and so far they have been quite successful. Let’s see how to record a PowerPoint presentation in front of live audiences.
Step 1 – save your PowerPoint presentation in OneDrive.

Step 2 – open your PowerPoint slides from PowerPoint online.

Step 3 – go to Present Live from the Slideshow Ribbon tab.

Step 4 – share a live link with your audience.

3.2. Stream your PowerPoint presentation in Zoom

Zoom is one of the most popular conference call apps which has plenty of tools, including live streaming presentations. Since PowerPoint is the leading presentation program in the world, Zoom developers have created some amazing things, like PowerPoint presentation recording with a web camera on a transparent background. If you’re interested, you can check our guide on how to record a Zoom presentation .
Does PowerPoint have a screen recording?
PowerPoint has a screen recording window and you can select the area you would like to be recorded. Go to Record (from the Ribbon), then select Screen Recording , choose the area and start recording.
Can I view speaker notes while recording narration?
You are able to access your speaker notes if you have created them beforehand. To insert speaker notes, you have to go to View -> Notes Page and you will have a text box that you can utilize for speaker notes.
What format does PowerPoint use for video?
PowerPoint records videos in mp4 format. The default resolution is 1080p (Full HD).
Recording your PowerPoint presentations can make the difference between a successful and smooth speech and a bad narration. Being able to record each slide means you can get the best narration possible for your whole presentation.
And if you would like to stream your presentation live, there are more than enough options to do so – both via the online version of PowerPoint or via third-party apps like Zoom.
If you found this article helpful, you can also check some of our other PowerPoint tutorials:
- Add Audio to PowerPoint: The Quick Step-by-Step Guide
- Insert GIFs into PowerPoint – a 2022 Pocket Guide
- How to Convert Your PowerPoint Presentation into Google Slides ?

Add some character to your visuals
Cartoon Characters, Design Bundles, Illustrations, Backgrounds and more...
Like us on Facebook
Subscribe to our newsletter
Be the first to know what’s new in the world of graphic design and illustrations.
- [email protected]
Browse High Quality Vector Graphics
E.g.: businessman, lion, girl…
Related Articles
Adobe character animator: everything you need to know + free puppets, top 16 tutorials to learn adobe character animator [2022], how to create an online course in 7 simple steps, how to use zoom for education [+ useful tips and ideas], what is google slides and how to get started, enjoyed this article.
Don’t forget to share!
- Comments (0)
Nikolay Kaloyanov
Nikolay is a copywriter with vast experience in Technology, Marketing, and Design. When he isn't playing with words and crafting texts, he watches sports and asks questions. He is a funny person...until you put him on a diet.

Thousands of vector graphics for your projects.
Hey! You made it all the way to the bottom!
Here are some other articles we think you may like:

How to Get Started with PowerPoint + Guide and Resources
by Al Boicheva

How-To Tutorials
25+ wonderful cartoon character design tutorials.
by Iveta Pavlova
How to Record a Presentation on Google Slides?
by Nikolay Kaloyanov
Looking for Design Bundles or Cartoon Characters?
A source of high-quality vector graphics offering a huge variety of premade character designs, graphic design bundles, Adobe Character Animator puppets, and more.
- All-Access Subscriptions
- Business Licensing
- Lightroom Classic
- Photoshop Elements
- Crystal Reports
- Interview Skills
- Resume Skills
- Excel for Lawyers
- Outlook for Lawyers
- QuickBooks for Lawyers
- Word for Lawyers
- Microsoft Office Suite
- Outlook on the Web
- Microsoft Project
- Microsoft Teams
- QuickBooks Online
- QuickBooks Pro
- Video Course Options
- SUBSCRIPTIONS
- Photoshop Elements 2024
- Photoshop Elements 2023
- Photoshop Elements 2022
- Photoshop Elements 2021
- Photoshop Elements 2020
- Photoshop Elements 2019
- Photoshop Elements 2018
- Photoshop Elements 15
- Google Classroom for Teachers
- Google Docs
- Google Drive
- Google Forms
- Google Sheets
- Google Slides
- Mac OS Keyboard Shortcuts
- Excel Formulas and Functions
- Excel Keyboard Shortcuts
- Excel Tables PivotTables and Charts
- Access for Microsoft 365
- Excel for Microsoft 365
- Microsoft Office 365
- Outlook for Microsoft 365
- PowerPoint for Microsoft 365
- Publisher for Microsoft 365
- Word for Microsoft 365
- Access 2021
- Microsoft Office 2021
- Outlook 2021
- PowerPoint 2021
- Publisher 2021
- Access 2019
- Microsoft Office 2019
- Outlook 2019
- PowerPoint 2019
- Publisher 2019
- Access 2016
- Microsoft Office 2016
- OneNote 2016
- Outlook 2016
- PowerPoint 2016
- Publisher 2016
- Microsoft Office 2013
- OneNote 2013
- Outlook 2013
- PowerPoint 2013
- Microsoft Office for iPad
- QuickBooks Pro 2024
- QuickBooks Pro 2023
- QuickBooks Pro 2022
- QuickBooks Pro 2021
- QuickBooks Pro 2020
- QuickBooks Pro 2019
- QuickBooks Pro 2018
- QuickBooks Pro 2017
- QuickBooks Pro 2016
- QuickBooks Pro 2015
- QuickBooks Pro 2014
- Sage 50 Accounting
- Windows 11 and 10 Keyboard Shortcuts
- Chrome OS for Chromebooks
- Word and Excel (Mac) 2022
- Word and Excel (PC/Windows) 2021-2016 and 365
- QuickBooks Desktop (PC/Windows) 2024
- QuickBooks Desktop (PC/Windows) 2023
- QuickBooks Desktop (PC/Windows) 2022-2015
- Windows 11 and 10
- Our History
- Customer Service
- Testimonials
- Lost Password
- Register a Product
- Manage My Account
- Member Login
Record a Slide Show in PowerPoint – Instructions
How to record a slide show in powerpoint: video.
This video lesson, titled “ Record a Slide Show ,” shows how to record a slide show in PowerPoint. This video lesson is from our complete PowerPoint tutorial , titled “ Mastering PowerPoint Made Easy v.2019 and 365 .”
Overview of How to Record a Slide Show in PowerPoint:
What to know before you start recording a slide show in powerpoint:.
Before you record a slide show in PowerPoint, you must have a computer with a sound card, speakers, and a microphone. To optionally record video, too, you must have a camera. These tools let you record your presentation, slide by slide, as you deliver it. When recording the slide show, PowerPoint records its narration, slide advancement timings, annotations, and any optional video you record.
PowerPoint saves this data on a per-slide basis, so you can easily reorganize the slides after recording without losing recorded content. This also lets you re-record only a selected slide if you need to correct a mistake during recording. However, PowerPoint doesn’t record audio or video during slide transitions, so do not speak during slide transitions or it will be lost. You should also give yourself a small buffer before and after a slide transition to ensure all your narration is recorded.
After you finish recording, you can play the recording in Slide Show view or save the presentation as a video file. This helps you deliver a presentation to others if you cannot deliver it in person.
How to Record a Slide Show in PowerPoint:
To record a slide show in PowerPoint, click the “Record Slide Show” drop-down button in the “Set Up” button group on the “Slide Show” tab of the Ribbon. Alternatively, if you have the “Recording” tab in the Ribbon enabled in your version of PowerPoint, you can click the same drop-down button which also appears in the “Record” button group there. To start recording from the first slide in the presentation, then select the “Record from Beginning…” command. Alternatively, to start recording from the currently active slide, choose the “Record from Current Slide…” command.
At that point, the presentation then opens in the Recording window, which is very similar to the Presenter View. The selected slide appears in the center of the window. To record, pause, or stop recording, click the desired button in the upper-left corner of the Recording window.
Optionally, to disable audio, video, or the video preview, click the desired button in the lower-right corner of the window. To change your camera or microphone, if needed, click the “Settings” button in the upper-right corner of the window, roll over the desired category, and then select your choice from the side menu that appears. To show speaker’s notes, click the “Notes” button at the top of the window.

A picture showing how to record a slide show in PowerPoint using the Recording window in PowerPoint for Microsoft 365.
To start recording the slide show, click the “Record” button, which looks like a red circle. A three second countdown then starts, after which you can start delivering your presentation. To make annotations, click the desired tool at the bottom of the Recording window. Then select a color to the left, if needed. Then draw the annotation. Annotations are also recorded with the slide.
To pause the recording, if needed, click the “Pause” button in the upper-left corner of the Recording window after the recording starts. To stop the recording, when finished, click the “Stop” button in the upper-left corner of the Recording window.
How to Clear Slide Recordings, Replay Recordings, and Close the Recording Window:
To clear all recording from a slide when you are not recording, navigate to the slide in the Recording window. Then click the “Clear” drop-down button towards the upper-right corner of the window. Then select the “Clear Recordings on Current Slide” command from the drop-down menu that appears. You can then re-record the content for the slide. Alternatively, to delete all recordings from all slides, select the “Clear Recordings on All Slides” command from the drop-down menu, instead.
To play the recording from the current slide, if desired, click the “Replay” button in the upper-left corner of the Recording window. To return to Normal view after you finish recording, press the “Esc” key on your keyboard click the “X” button in the upper-right corner of the Recording window.
Playing a Recorded Slide Show and Clearing Slides in Normal View:
To play the recorded slide show in Slide Show view, just click the “From Beginning” or “From Current Slide” button in the “Start Slide Show” button group on the “Slide Show” tab of the Ribbon when in Normal view, as usual.
To clear either recorded slide timings or narrations (meaning audio, video, and annotations) from one or all slides in PowerPoint when using Normal view, first select the desired slide, if needed. Then click the “Record Slide Show” drop-down button on either the “Slide Show” or “Recording” tab of the Ribbon. Then roll over the “Clear” command in the drop-down menu. Finally, select the desired type of element to clear and from which slides to clear it from the four choices in the side menu that appears.
How to Manually Present a Recorded Slide Show:
After you record a slide show in PowerPoint, you may want to manually present it again without the recorded narrations or slide timings. You can toggle those settings off to accomplish this. If you want to disable recorded timings and/or narrations for a slide show, click the “Slide Show” tab in the Ribbon. To disable slide timings, uncheck the “Use timings” check box in the “Set Up” button group. To disable narrations, uncheck the “Play Narrations” checkbox in the “Set Up” button group.
Instructions on How to Record a Slide Show in PowerPoint:
Things to know before recording a slide show in powerpoint:.
- Before you record a slide show in PowerPoint , you must have a computer with a sound card, speakers, and a microphone.
- To optionally record video, too , you must have a camera.
Instructions on Recording a Slide Show in PowerPoint:
- To record a slide show in PowerPoint , click the “Record Slide Show” drop-down button in the “Set Up” button group on the “Slide Show” tab of the Ribbon.
- Alternatively , if the “Recording” tab of the Ribbon is enabled in your version of PowerPoint, you can click the same drop-down button in the “Record” button group there.
- To start recording from the first presentation slide , select the “Record from Beginning…” command.
- Alternatively, to start recording from the currently active slide , choose the “Record from Current Slide…” command.
- The presentation then opens in the Recording window and the selected slide appears in the center of the window.
- To record, pause, or stop recording , click the desired button in the upper-left corner of the Recording window.
- Optionally, to disable audio, video, or the video preview , click the desired button in the lower-right corner of the window.
- To change your camera or microphone, if needed , click the “Settings” button in the upper-right corner of the window, roll over the desired category, and then select your choice from the side menu.
- If you want to show speaker’s notes , click the “Notes” button at the top of the window.
- To start recording the slide show , click the “Record” button, which looks like a red circle.
- A three second countdown then starts, after which you can start delivering your presentation.
- If you need to make annotations , click the desired tool at the bottom of the Recording window, select a color to the left, if needed, and then draw the annotation. Annotations are also recorded with the slide.
- To pause the recording, if needed , click the “Pause” button in the upper-left corner of the Recording window after the recording starts.
- To stop the recording, when finished , click the “Stop” button in the upper-left corner of the Recording window.
Instructions on How to Clear Slide Recordings, Replay the Recording, and Close the Recording Window:
- If you want to clear all recording from a slide when you are not recording , navigate to the slide in the Recording window.
- Then click the “Clear” drop-down button towards the upper-right corner of the window.
- Then select the “Clear Recordings on Current Slide” command from the drop-down menu that appears.
- You can then re-record the content for the slide.
- Alternatively, to delete all recordings from all slides , select the “Clear Recordings on All Slides” command from the drop-down menu, instead.
- To play the recording from the current slide, if desired , click the “Replay” button in the upper-left corner of the Recording window.
- To close the Recording window and return to Normal view after you finish recording , press the “Esc” key on your keyboard.
- Alternatively, click the “X” button in the upper-right corner of the Recording window.
Instructions on How to Play a Recorded Slide Show and Clearing Slides in Normal View:
- To play the recorded slide show in Slide Show view , just click the “From Beginning” or “From Current Slide” button in the “Start Slide Show” button group on the “Slide Show” tab of the Ribbon when in Normal view, as usual.
- To clear either recorded slide timings or narrations (meaning audio, video, and annotations) from one or all slides in PowerPoint when using Normal view , first select the desired slide, if needed.
- Then click the “Record Slide Show” drop-down button on either the “Slide Show” or “Recording” tab of the Ribbon.
- Then roll over the “Clear” command in the drop-down menu.
- Finally, select the desired type of element to clear and from which slides to clear it from the four choices in the side menu that appears.
Instructions on Manually Presenting a Recorded Slide Show:
- After you record a slide show in PowerPoint, you may want to manually deliver it again without the recorded narrations or slide timings. You can toggle those settings off to accomplish this.
- If you want to disable recorded timings and/or narrations for a slide show , click the “Slide Show” tab in the Ribbon.
- To disable slide timings , uncheck the “Use timings” check box in the “Set Up” button group.
- To disable narrations , uncheck the “Play Narrations” checkbox in the “Set Up” button group.

About Joseph Brownell
Blog > Record voice narration for PowerPoint
Record voice narration for PowerPoint
01.11.21 • #presentation #powerpoint #voiceover #narration.
In this blog post, you'll learn how you can add a narration for your PowerPoint presentation. Adding audio or video narration can be very helpful, especially in a time where many seminars and meetings have to be conducted online. If you would rather give your presentation using a live stream (which has many benefits), scroll down to the bottom and learn how you can do that!
Here's what you need for recording:
- a microphone (your computer's microphone should do)
- a finished set of PowerPoint slides
- a video camera (only if you want to record video as well)
- Open your PowerPoint presentation or create a new one.
- In the taskbar, select Slide Show . Then click Record Slide Show .
- Choose the option Record from Beginning .

- You'll now get to a different view, which we'll call "Recorder View". Here's an overview:

- In the bottom right corner, you'll see three icons. The one on the left is for switching the microphone on/off. Make sure this function is turned on. The icon in the middle is for turning on/off your camera. You can choose if you want to switch the video recording on or not. The last icon is only available if you've chosen the video recording function. If the function is enabled, you'll be able to see a video preview.
- In the top right corner under "Settings", you can choose what microphone (and camera) you'd like to use. This is only relevant if you have an external recording device that you would like to use. If you're recording with your computer, you don't have to set anything here.
- Now it's time to record. Click the big red Record button on the top left and start speaking.
- Tip: You can either record all the slides at once without pressing pause, or you record each slide individually, then click pause, then go on to the next slide and record again. However, it's important to note that PowerPoint creates an individual audio file for each slide, even if you record all at once.
- Important : PowerPoint does not record during transitions, so only speak when you're on a slide.

- You can also draw on your slides with the painting tools on the bottom. These drawings will be saved to your presentations.
- On the bottom left corner, you'll see what slide you're on. You can also see two time counts. The first one is for the recording on the current slide, the second one is for the recording of the presentation overall.
- If you want to delete the whole voiceover, click Clear and Clear Recordings on all Slides . If you only want to delete the recording on the specific slide you are on, click Clear Recording on current Slide.
- If you want to re-record the audio from one slide after deleting it, just go to that slide and click Record again. Record what you want to say, then click Stop when you're done.
- Once you're done, leave the Recorder View. Click the small x in the top right corner or hit Esc .
- You can now either save the presentation as a regular PowerPoint file (just click Save and you're done) or as a video. If you'd like a video, follow the instructions below:
Save Presentation as Video
- Go to File in the PowerPoint taskbar

- Choose Export on the left, then Create a Video .

- Select the quality you'd like. We recommend Full HD (1080p).
- In the following drop-down menu, make sure Use Recorded Timings and Narrations is selected.

- The setting Seconds spent on each slide is only for the slides where there is no recording (if you have recordings on all of your slides, you can just ignore this setting.)
- Click Create Video and choose where the video should be saved. The video creation might take a while, so don't close PowerPoint right away!

Live interaction with polls & quizzes
If you prefer to give a talk where you can also interact with your audience, then the free software SlideLizard is the ideal solution! Using live polls , Q&A and feedback , your presentations will become even more exciting and interactive. SlideLizard integrates directly with PowerPoint, making it a breeze to use.

Can I record a presentation in PowerPoint?
Yes, PowerPoint also allows you to record your presentation with voice and video narration. You can read about how this works in our blog .
How can I record a presentation in PowerPoint with audio and video?
At first create your presentation. For the recording you will need a microphone (the one on your computer should do), your finished presentation and a video camera (if you also want to record a video). We have created a tutorial on our blog where you can read the further steps.
Related articles
About the author.

Pia Lehner-Mittermaier
Pia works in Marketing as a graphic designer and writer at SlideLizard. She uses her vivid imagination and creativity to produce good content.

Get 1 Month for free!
Do you want to make your presentations more interactive.
With SlideLizard you can engage your audience with live polls, questions and feedback . Directly within your PowerPoint Presentation. Learn more
Top blog articles More posts

How to change languages in PowerPoint

Create and insert GIFs in PowerPoint

Get started with Live Polls, Q&A and slides
for your PowerPoint Presentations
The big SlideLizard presentation glossary
A podcast is an audio or video contribution that can be listened to or viewed via the Internet. Podcasts can be used for information on specific topics but also for entertainment.
Online Communication
Online communication is communication over the internet. Online communication is often anonymous and over social media platforms you can communicate with people around the world.
An e-lecture is a lecture that is held online. Many schools and universities offer e-lectures as technical opportunities improve.
Impromptu Speech
A speech that is given without any preparation, notes, or cards, is called an impromptu speech. It is often delivered at private events (e.g., weddings or birthdays) or for training presentation skills.
Be the first to know!
The latest SlideLizard news, articles, and resources, sent straight to your inbox.
- or follow us on -
We use cookies to personalize content and analyze traffic to our website. You can choose to accept only cookies that are necessary for the website to function or to also allow tracking cookies. For more information, please see our privacy policy .
Cookie Settings
Necessary cookies are required for the proper functioning of the website. These cookies ensure basic functionalities and security features of the website.
Analytical cookies are used to understand how visitors interact with the website. These cookies help provide information about the number of visitors, etc.
How-To Geek
How to record voiceover narration in powerpoint.
If you're not able to physically present your slideshow, record a voiceover narration to make sure no points are missed.
Quick Links
Preparation, record a voiceover for your presentation.
If you’re sending out your presentation instead of giving it in front of an audience, but you feel adding a vocal explanation would better help to deliver the message, record a voiceover narration. Here’s how to do it.
Before you begin your PowerPoint narration, you’ll need to make sure you’ve made the proper preparations.
Set Up Your Mic
First, you’ll need a microphone. Most modern computers have a built-in microphone that gets the job done, but investing in a USB microphone will increase the audio quality of the narration by quite a bit.
The built-in microphone will be set as your input device by default, so if you plan on using it for the PowerPoint narration, you don’t need to take any additional steps in setting it up. However, if you plan to use a USB microphone for the narration, be sure to set it as the input device.
To do this on Windows, right-click the volume icon found on the right of the taskbar. In the menu that appears, select “Open Sound Settings.”
The “Sound Settings” window will appear. Here, scroll down to the “Input” section and click the box under “Choose your input device.”
If you’re using a USB microphone, it will appear here. Select it to set it as the input device.
The steps for Mac users are extremely similar. The only difference is you should go to "System Settings" and select "Sound" instead of right-clicking the volume icon like on Windows. From there, the steps are the same.
Take Notes and Rehearse
With your mic set up, you’re ready to start recording, right? Well, not quite. While you may not be physically standing in front of the audience delivering this presentation, you still need to treat it as though you are. This means going through the basics---taking notes and rehearsing your delivery.
One thing you can do to help you record a successful narration is to write out a script. As with a live presentation, though, you don’t want to sound like you’re reading straight from your notecards. Practice reading through the script a few times so that it sounds natural and fluid.
Once you’re confident in your delivery, it’s time to start recording.
Open the PowerPoint presentation in which you would like to record a voiceover narration. Head over to the “Slide Show” tab and, in the “Set Up” group, select “Record Slide Show.” Once selected, a drop-down menu will appear. Here, you can choose to start the narration from the beginning or from the current slide. If you choose to start recording from the current slide, make sure that you’re on the slide you’d like to start recording from.
Related: How to Record Your Screen with Microsoft PowerPoint
In this example, we’ll choose “Record from Beginning.”
Now, you’ll be in full-screen mode. You’ll notice a few extra tools appear, including a record button at the top-left corner of the screen. When you’re ready to start recording, click this button.
When you select the record button, a countdown timer will appear, giving you a three-second delay between clicking the button and starting your recording.
You can now start recording your voiceover narration! Continue through the presentation by clicking the right arrow to go to the next slide.
You can pause the recording at any time by pressing the pause button in the top-left corner of the window. The recording will automatically end when you make it to the last slide. Alternatively, you can press the stop button, also located at the top-left corner of the screen.
If you want to play your narration back, you can select the replay button.
A speaker icon will appear at the bottom-right corner of each slide that has a recorded narration. You can also play your narration back on each slide by hovering over the icon and pressing the play button.
If you’re not satisfied with the narration, simply repeat these steps to re-record.

- Outlook & Office 365 Help
How to Record My PowerPoint Presentation (and save it as MP4)?
I’m taking a class through the local junior college and my professor requires us to record our presentations and submit them as .mp4 movies. We’re also supposed to be on camera in an inset! How can I do that in PowerPoint on my PC?
There are actually a number of ways you can record yourself delivering a speech or presentation on your PC with an inset video from your Webcam. One straightforward option: Zoom . Open up a Zoom meeting in the Zoom app, share your presentation, press ‘record’ within Zoom, and you’re ready to go. Third-party apps like Loom offer similar functionality if you want to go that route too. But it turns out that Microsoft PowerPoint also has the ability for you to record a narrated slide show and can also record you on video and then export the resultant file as an mp4 video!
There are some caveats, however. Your computer needs a working webcam and microphone, and for best results, I recommend you position yourself in front of a blank wall or similar so you look good on camera. Light your face too, so you aren’t a dark silhouette (as too many people end up being on camera). Don’t worry, you can practice, test things out, record, and then re-record until you’re comfortable with this feature.
HOW TO RECORD YOUR POWERPOINT PRESENTATION
Let’s start by looking at how to find and prepare the presentation recording tools in Microsoft PowerPoint. I’m using the latest standalone app on a Gateway laptop running Windows 10. I’ve created just the first few slides of a presentation on Clubhouse, and want to practice recording my narration…

Your presentation probably looks similar. Along the top, just below the orange window frame, are the main categories of “ribbon”: choose “ Slide Show “, as shown. But where is the record presentation feature? If the window were only just a little bit wider, it’d be much more obvious:

The tiny square with the even smaller red dot is Record Slide Show , as you can now see. Click on the downward facing “V” adjacent to that button and you can set up some basic configuration:

Odds are good you want to record a full presentation starting with the first slide, so choose “ Record from Beginning… ” and PowerPoint rather dramatically takes over the entire screen. Here’s what you’ll see:

Notice along the top the standard record / stop / replay buttons, and that in the center you can choose to view your presentation notes (they won’t be part of the recording. PowerPoint is really smart about that!) and, on the right side of the top toolbar, the close “X” and audio/visual settings button. On the left is previous slide, the right is next slide and the bottom includes a running timer showing overall presentation time and time on this particular slide, followed by a long strip of annotation tools and colors. Finally, a mic, a video camera, and a tiny user icon. Want to record audio but not be on camera? Click on the user icon on the lower right corner and you can disable the camera, for example.
Start by making sure the camera and microphone are set correctly. That’s done by clicking on the A/V settings icon on the top right…

Looks good to me. Let’s do this!
RECORDING YOUR POWERPOINT SLIDE SHOW
To actually record yourself delivering the presentation in PowerPoint, take a deep breath, make sure you look good on camera in the little window, then press the red RECORD button on the top left. It’ll give you a 3… 2… 1… countdown and you’ll be recording!

A few things to notice on the above image: The RECORD button has become a PAUSE button, the timers on the lower left are both now tracking time, and there’s a tiny red dot on the top left of the video inset window. Now, you’ll need to say something smart about your first slide and when you’re ready, click on the “>” on the right side to move to the second slide. Keep talking, it’s still recording!
Done recording? Click on the STOP button on the top left and those buttons will change to reflect that there’s a recording saved:

Press REPLAY and watch. You’ll see exactly how it all works, hear the potentially loud CLICK of you moving to the next slide, and generally get a good sense of whether your presentation is engaging and lively or showing instead that you’re distracted. Try re-recording until you’re happy with the results, and don’t be discouraged if it takes a few times through to get a good slide show.
Once recorded, click on the “X” on the top right and you’ll go back to the main PowerPoint window:

Notice now that the slide has the video inset on the lower right and that the ribbon includes some slightly different options, including “Present Online”. You can click on the “From Beginning” if you want to watch your slides show again, and why not? You did a great job!
SAVE YOUR POWERPOINT SLIDE SHOW PRESENTATION
Now that you’ve recorded your presentation, it’s time to save it. I recommend you first save the presentation as a PPTX presentation, so you can open it later and edit it as needed. That’s done by going to File along the very top and choosing “ Save As… ” on the left side:

Notice that the filetype is still PPTX, the same as it would be with a regular presentation. This is confusing, but we’ll solve the problem by saving it as an MP4 movie a bit later…
I strongly encourage you to add “narrated” or “recording” or similar to the filename so you can know immediately which presentation is just the slides and which includes your narration recording. You can see at a glance the video and audio definitely adds to the file size:

My slide show is a modest 625K, but once I narrate it, the new version explodes up to 11.5MB. Surprisingly, the MP4 will prove to be smaller than the PPTX that includes the narration.
EXPORT YOUR NARRATED SLIDE SHOW AS MP4 MOVIE
To export your recorded slide show as an MP4 movie, go back to the FILE menu, but this time choose EXPORT, as shown:

Notice that I’ve chosen File > Export > Create a Video. On the right side are two critical settings before you proceed: Video size and presentation timing. Let’s start with output resolution, which defaults to “ Full HD “. Click and there are a lot of choices:

Unless you’ve been given explicit instructions to save as Full HD or Ultra HD by your professor, I strongly recommend you save in 720p. It’s good enough resolution it looks great full screen (or even on a TV or projected) but the file size is still modest. I recommend to my own students that they choose HD 720p for their presentations.
The second option to check relates to the timing of the presentation:

Rather long-winded options, but I definitely encourage you to choose “ Use Recorded Timings and Narrations ” to ensure that the recording you just made is the basis of the movie!
Once you’ve specified exactly what you want, choose “ Create Video “, the button on the bottom of the screen. You’ll be prompted for a file name, as usual:

Notice that the format is MPEG-4 Video, the long, fancy name for “MP4”. Pay attention to where you’re saving it and click “ Save ” to proceed. Now you’ll see a progress bar along the bottom as PowerPoint does its thing:
Depending on how long your presentation is, this could take upwards of a minute or two. Patience!
Finally, you’ll have the .mp4 file that your professor requires:

Notice that the original slides only file is 625KB, the saved PowerPoint presentation with narration is 11.5MB, but the MP4 movie is only 4.8MB. As I said earlier, it ends up being surprisingly smaller than the full PPTX file (if you choose 720p. Choose Ultra HD 4K and it’ll be quite a bit bigger!)
That’s it. Now you know how to record your presentation and turn it into a movie. Want to see the very beginning of my presentation? Here’s an excerpt of my Intro to Clubhouse:
(Don’t panic when I stop talking mid-sentence. I did that to keep the files small and easy to work with). Good luck with your class.
Pro Tip: I’ve been using and writing about Microsoft’s Office Suite for many years. Please check out my PowerPoint help library for plenty of useful tutorials, as well as additional Office help pages ! Thanks.
Leave a Reply Cancel reply
Your email address will not be published. Required fields are marked *

Want to create or adapt books like this? Learn more about how Pressbooks supports open publishing practices.
Working with Video (Kaltura, Canvas, Zoom, and PowerPoint)
Recording an individual or group presentation with PowerPoint 365 or 2019
These instructions are for Office 365 or Office 2019 for Windows . You can download Office 365 from IUWare for free . Office 2019 is available on all computer lab Windows computers and via IUAnyWare . (See instructions on setting up and using IUAnyWare .)
If you are using a Mac
If you are using the latest version of Office 365, you can export a presentation narrated in Slide Show as a video file which can then be submitted as a previously recorded video . Note that when you export your presentation as a video, any narrated audio that was recorded in Slide Show will play, but other embedded media files will not play .
You can also record audio onto slides in Keynote and export them to a QuickTime .mov file which can then be submitted as a previously recorded video .
Video Walkthrough
Instructions.
The following steps presume you have Office 365 or 2019 on a Windows computer.
- The Recording tab does not appear on the Ribbon in PowerPoint 365 or 2019 by default so you may need to enable it. Go to File > Options and choose “Customize Ribbon.”
- On the right side list of Main Tabs scroll down to Recording, check the box next to it, and click “OK.”
- Check and make sure your microphone and webcam (if using) are recording properly by clicking the small microphone and video camera icons at the bottom right of the recording screen.
- Click the red “Record” button at the top left to start. You can stop after each slide and review your recording or you can continue through the whole presentation. If you continue, make sure to pause between slides. The 1-2 seconds of silence allow PowerPoint to tell what audio goes with what slide.
- When you are done, click the “X” at the top right to finish.
- Select the quality you would like the video to be. Normally 1080p (the default) is fine and leave “Use Recorded Timings and Narrations ” selected.
- Click “Create video” and tell PowerPoint where to save your video file. The small black status bar at the bottom of PowerPoint will show you the progress of your export. Do not do anything else in PowerPoint while a video is processing or it will cancel the job.
- Once the video has been processed, you are ready to upload your video to Kaltura and submit. See submitting a previously recorded video for instructions.
Group Recording with PowerPoint
If your group prefers to record the individual sections independently and at least one person has Office 365 or 2019 or can access it at a computer lab, you can compile your separate recordings in PowerPoint. Each person in the group would
- begin with a copy of the master PowerPoint file,
- delete the slides that they are not responsible for recording,
- record their audio and/or video on their slides only, and
- send the file with their recorded slides to the group member responsible for putting together the slide deck.
The person putting the slides together would add the other members’ slides into their PowerPoint file and export it to video.
Recording tips
- Team members using Powerpoint for Mac or an older version of PowerPoint for Windows can record audio onto their slides by using the “Audio” option on the “Add” tab on the Ribbon. To do this,
- open your PowerPoint file in the version of PowerPoint that you have
- go to the Insert tab,
- click the Audio button and choose “Record audio”
- Starting from the same PowerPoint file is very helpful for the person who is compiling the recorded slides.
- After your video is created, the person who will submit the assignment for the group will upload the video file to their Kaltura account.
Submit Your Assignment
See Upload a previously recorded video for instructions on adding your video to Kaltura. Then, based on your instructor’s instructions, submit your video in one of the two following ways.
- Submit your video by embedding it in a text box in an Assignment or Discussion .
- Submit your video by adding it to the Kaltura: Media Gallery for your course
Verify the Automatic Captions on Your Video
All video uploaded to Kaltura is automatically mechanically captioned using speech-to-text technology. If you’ve ever used speech-to-text, you know it’s never 100% accurate so you need to check your captions and edit as needed to make sure they are correct and not saying anything embarrassing. The mechanical captions appear fairly quickly on short videos once they’re uploaded. You can check them either in Kaltura: My Media if it is available in your course, or at Kaltura Mediaspace. Instructions on checking and editing your captions are at Accessible Videos in this book.
Note on Video Processing
When a video is first uploaded to Kaltura you will see a “media is being processed” animation where you expect your video to be.
Please be patient. Processing time depends on the length of the video and the number of other videos Kaltura is processing. It will appear once it has completed processing, though you may need to refresh your page to see it. You can embed a video that is still processing in Kaltura .
A Canvas Semester Checklist Copyright © by Trustees of Indiana University is licensed under a Creative Commons Attribution-NonCommercial-ShareAlike 4.0 International License , except where otherwise noted.
PowerPoint Recorder
Record your PowerPoint presentations online
Powerful Online PowerPoint Recorder
Make your presentations look professional using VEED’s online PowerPoint recorder. It’s fast, easy to use, and gives you access to video editing tools to make your presentation stand out. You can upload your slides or record your screen while you are presenting. Add yourself to the scene by recording your webcam and audio as well.
No need to install software. Open your browser and start recording! Choose from different layouts and customize your video after you record. You can also edit your recording using our professional video editor.
How to Record Your PowerPoint Presentation:
1 upload slides and select a layout.
Select from our list of layouts (you may need to click to ‘Allow’ permission to access your screen, camera, or microphone). You can record just your screen, your webcam, or both at the same time! You can either upload your slides or record while you’re presenting.
2 Start recording
Click the red button to start recording! You'll see a countdown before the recording starts. Don't worry if you mess up. You have unlimited time and unlimited retakes. You can navigate to other pages, and don't worry, you are still recording.
3 Review, edit, and export
You can playback your recording to review it, click ‘Share’ to share with friends and colleagues, or ‘Edit’ to edit your video (perfect for adding text, subtitles, and professional touches to your screen recording)

‘PowerPoint Recorder’ Tutorial

Highly customizable PPT recording software
VEED lets you easily customize your Microsoft PowerPoint presentation recordings. Select from different layouts and backgrounds. You can record your screen, webcam, audio, and upload your PowerPoint slides to present while recording. If you choose to record your entire desktop, you can easily switch the view between your presentation slides and other windows. When you’re finished, edit your video using our free video editor, where you can also add royalty-free music from our Stock Library.
All the things you need in a screen recorder
Our video capture software is packed with features that will help you create professional-looking recordings. When you press record, the countdown timer will appear to prompt you when your recording starts. To make sure that your audio is being picked up, check the little microphone icon on the bottom of your screen. It should be animated to indicate that your audio is being recorded. It only takes a few clicks. It’s the best app to record your Microsoft PowerPoint presentations.
Fast, free, and easy-to-use screen recorder software
Our screen recorder and video editor are free to use and beginner-friendly. However, if you need to record longer videos, you may need to subscribe to our premium plans. Check out our Pricing Page to see which plan suits your needs. It is super easy to use. It only takes a few clicks!
Frequently Asked Questions
Microsoft does allow you to record your presentation as well as your voice or audio. But you might be limited because you can’t switch screens. Use VEED to record your entire desktop and switch between windows.
With VEED, you can record your audio, webcam, screen, and presentation slides all at the same time!
To add yourself or your camera to the recording, select the layout that includes “webcam.” Choose the size and positioning of your camera feed and start recording!
Although there are many screen recorders out there, VEED is your best choice when it comes to recording your PC screen! It’s free and online. No need to install software. Plus you can use our free video editor to enhance your recording even more.
What they say about VEED
Veed is a great piece of browser software with the best team I've ever seen. Veed allows for subtitling, editing, effect/text encoding, and many more advanced features that other editors just can't compete with. The free version is wonderful, but the Pro version is beyond perfect. Keep in mind that this a browser editor we're talking about and the level of quality that Veed allows is stunning and a complete game changer at worst.
I love using VEED as the speech to subtitles transcription is the most accurate I've seen on the market. It has enabled me to edit my videos in just a few minutes and bring my video content to the next level
Laura Haleydt - Brand Marketing Manager, Carlsberg Importers
The Best & Most Easy to Use Simple Video Editing Software! I had tried tons of other online editors on the market and been disappointed. With VEED I haven't experienced any issues with the videos I create on there. It has everything I need in one place such as the progress bar for my 1-minute clips, auto transcriptions for all my video content, and custom fonts for consistency in my visual branding.
Diana B - Social Media Strategist, Self Employed
More than a PowerPoint recorder
VEED is a complete browser-based tool that lets you do so much more than just record and share your Microsoft PowerPoint presentations. You can annotate your videos to make your presentation more informative. Edit your recording to add images, subtitles, and more. It is a professional all-in-one video-creation and editing software that’s great for beginners and pros alike. Create professional-looking videos in just a few clicks. You don’t need any video editing experience. Create stunning videos that you can share on social media in just minutes. Try VEED to create professional PowerPoint recordings today!

- Add, change, or remove transitions between slides Article
- Animate text or objects Article
- Use the Morph transition in PowerPoint Article
- Insert a video from YouTube or another site Article
- Add or delete audio in your PowerPoint presentation Article
- Record your screen in PowerPoint Article

Record your screen in PowerPoint
You can record your computer screen and related audio, and then embed it in your PowerPoint slide—or you can save it as a separate file.

Open the slide that you want to put the screen recording on.
On the Insert tab of the ribbon, select Screen Recording .

Tip: PowerPoint automatically records the audio and the mouse pointer, so by default those options are selected on the control dock. To turn them off, deselect Audio and Record Pointer.
Select Record . Use Pause as needed and Stop when you're done.
Note: Unless you pin the Control Dock to the screen, it will slide up into the margin while you record. To make the unpinned Control Dock reappear, point the mouse cursor at the top of the screen.
Your video is added to the slide. Right-click the video frame, select the Start icon and pick how you want your video to start: In Click Sequence , Automatically , or When Clicked On .
You can change the look of the video by right-clicking the video frame, select the Style icon, and pick another shape.
Save your screen recording as a separate file
Right-click the video frame and select Save Media as .
In the Save Media as box, choose a folder, and in the File name box, type a name.
Select Save.
Trim your video
Right-click the video frame and select Trim .
To determine where you want to trim your video footage, in the Trim Video box, select Play .
When you reach the point where you want to make the cut, select Pause . Use the Next Frame and Previous Frame buttons to specify precise timing.
Do one or more of the following:
To trim the beginning of the clip, select the start point (shown in the image below as a green marker). When you see the two-headed arrow, drag the arrow to the desired starting position for the video.

To trim the end of the clip, click the end point (shown in the image above as a red marker). When you see the two-headed arrow, drag the arrow to the desired ending position for the video.
Select OK .

Need more help?
Want more options.
Explore subscription benefits, browse training courses, learn how to secure your device, and more.

Microsoft 365 subscription benefits

Microsoft 365 training

Microsoft security

Accessibility center
Communities help you ask and answer questions, give feedback, and hear from experts with rich knowledge.

Ask the Microsoft Community

Microsoft Tech Community

Windows Insiders
Microsoft 365 Insiders
Was this information helpful?
Thank you for your feedback.
How to Record a Presentation with Webcam, Narration, and More

Everyone has, at some point, put a load of time and effort into creating the perfect PowerPoint presentation, only to use it once or twice. But isn’t it a shame for all that hard work to be discarded so quickly? Is every slide deck destined for deletion after just a couple of uses?
Isn’t there a better way to make the most out of your presentations? Well, yes. Yes, there is.
Rather than simply creating and presenting your work once or twice, recording your presentations can give them a new lease of life. Whether it’s a data report or a self-recorded PowerPoint, you can record a presentation in real-time, or in advance to make it available on-demand.
In this guide, we’ll explore two distinct ways of recording your presentation. First, we’ll discuss how to record a presentation from PowerPoint with audio and webcam, and then we’ll look at how to turn your .ppt slides into a video.
Benefits of Recording a Presentation
As well as there being many different ways to record a presentation, there are also many benefits of recording them. So, before we show you the ‘how,’ let’s talk about the ‘why.’
- Encouraging asynchronous communication : One key benefit is fostering asynchronous communication . By recording presentations, you’re letting your audience engage with the content in their own time, breaking the constraints of time zones and scheduling conflicts. This also ensures your viewers can absorb information at their own pace, and revisit it as needed.
- Boosting SEO : You can use your presentation to create a YouTube video and share it on your website to increase your online visibility and attract prospective customers. This can be a great way to expand your audience, increase web traffic, and establish yourself as an expert in your field.
- Perfecting your presentation : Whether it’s in-person or over Zoom, you don’t get second chances with live presentations. However, a pre-recorded keynote lets you perfect the content and the narration before anyone sees it. This is a great way to combat stage fright while honing your presentation skills and building confidence.
With this in mind, turning your slides into a video is a no-brainer. It’s an easy way to grow your audience and make the information you’re sharing more accessible and easier to digest.
Record your presentation today!
Download a free trial of Snagit to quickly and easily record your presentation.
How to record your presentation (with Snagit)
Depending on your audience and the type of presentation you need to deliver, TechSmith’s Snagit could just be the perfect tool for recording your PowerPoint. With its user-friendly interface and advanced features, Snagit is ideal for capturing top-notch presentation videos, in just a few clicks.
Now, there’s no denying that presentations are better when you can see the presenter… Fortunately, Snagit lets you capture your screen and webcam at the same time to create a Picture-in-Picture video.
In this section, we’ll guide you through the steps to record your presentation and webcam with Snagit.
Step 1: Open video capture
First, open Snagit and navigate to the Capture window. Select the Video tab, and start by clicking the big red Capture button.
Step 2: Select a recording area
Next, you’ll be prompted to choose which parts of your screen you want to record. Use Snagit’s orange crosshairs to select a specific region, window, or your entire screen.
Step 3: Configure recording settings
With the Video Recording toolbar, you can set options like Cursor Capture and Effects, System Audio, and Webcam.
If your webcam isn’t showing, click on the webcam icon. If you have an external webcam, select the one you want to use by clicking the dropdown arrow next to the webcam icon.
Step 4: Adjust your webcam
Next, adjust your webcam options to ensure your Picture-in-Picture recording looks how you want it. Here you can change the Picture-in-Picture placement as well as the shape and size of your webcam recording. You can even toggle between Picture-in-Picture and fullscreen webcam modes as you like.
The best part? You can make these adjustments even while recording.
Step 5: Manage recording
When you’re ready to roll, hit the Record button and click the Stop button when you’re finished. It’s that simple!
And remember, if there’s an interruption (like an unexpected visit from the mailman), just hit Pause. It’s okay to take a break — your video won’t be ruined by a little interruption.
Step 6: Edit your video
Once you’ve finished recording, Snagit will automatically open your video in the Snagit Editor, which is super easy to use. From here, you can make light edits to the footage as needed.
For example, if you need to cut or trim your footage , you can! Here’s how:
- Set Start Point : Drag the Start handle (green) on the timeline to your desired starting point.
- Set End Point : Similarly, drag the End handle (red) to where you want to end the cut.
- Review the Segment : Before making any cuts, you can review the segment by dragging the Playhead (white) left and right across the timeline. This ensures you’re only cutting the footage you intend to.
- Make the Cut : Once you’re satisfied with the selection, click the Cut button, which will pop up once you’ve made a selection.
And that’s all there is to it! If you want to go the extra mile, you can also use Snagit to save individual frames of your video as images , which can be used to create a thumbnail for your video .
How to record a presentation from PowerPoint with audio and webcam
Now, Snagit is great for recording less formal videos in a flash, but if your presentation is intended for a particularly large or important audience, you might be looking to create something more polished. This is where TechSmith’s Camtasia comes in.
Camtasia is one of the smartest and most intuitive pieces of editing software out there, but it also makes for a pretty nifty screen recorder too. Camtasia is great for recording presentations when you need more control and editing powers over the final product.
But best of all, Camtasia streamlines the process by letting you record your presentation and voice over directly within PowerPoint.
Step 1: Set up your presentation video recording
If you’re a Windows user, you’ll have the option to include a PowerPoint Add-in Toolbar when you install Camtasia. While this feature isn’t currently available on MacOS, the Camtasia Add-in Toolbar allows you to start, stop, and control your recordings from within PowerPoint — so you don’t need to switch between applications.

Just open the presentation you want to record and locate the Add-in toolbar under the Add-ins tab.
Don’t see the add-in toolbar? Go to File > Options > Add-ins, to enable it. Click on the Manage drop-down, select Disabled Items, then click Go. If the Camtasia Add-in is listed, select it, and click Enable.
If you’re an Apple user, don’t panic! You can still record your screen (with audio) on a Mac using Camtasia, and it’s just as easy. Alternatively, you can skip ahead to the next section and import your slides directly into Camtasia.
Step 2: Customize your recording options
Now let’s walk through each of the options on the toolbar before we begin recording.

Record audio
The microphone button controls whether or not audio is recorded as part of your presentation. When you enable it, you’ll be able to record your narration using a microphone.
If you are planning to record audio, this is where you’ll select your microphone. If you want to record great audio , we suggest using an external microphone, rather than the one that’s built into your laptop.
Some of the best microphones for recording video are likely to be less expensive than you think. But, if you’re on a shoestring budget, even the mic that’s built into your headphones could produce better audio than your laptop.
Once you’re set up, be sure to test the mic and adjust the volume slider as needed. You’ll also need to decide whether or not to record your system audio, which is any sound that comes out of your speakers, such as email notifications.
Record webcam
If you have a webcam, you can also record your camera during the presentation to create a Picture-in-Picture clip — just as you can with Snagit!

To customize even more of the recording settings, click the Recording Options button. Here you’ll find settings that let you record with a watermark and adjust your video frame rate . There are a few more options too, but the default settings should work just fine.
When you’re ready, click OK to close this window and save any changes made.
Step 3: Record your presentation
The final step is as simple as clicking the Record button in the toolbar. This will launch your slides into the Presentation Mode and start recording.
When you exit Presentation Mode or reach the end of your slideshow, you can either continue recording your screen, or stop recording and save your file. Pretty easy right?
Before you get started, let us show you another way to turn your presentation into a video, without recording your desktop .
How to turn your PowerPoint presentation slides into a video
Another way to create a video from your presentation is to import your PowerPoint slides into Camtasia. This way you can adjust how long each slide appears on screen, as well as add Behaviors and Annotations to personalize your presentation and highlight important information.
By importing your slides into Camtasia, and recording your voice over separately, you get a lot more flexibility with the editing process, which means you have more control over the finished article.
If you do decide to record your audio separately, you might want to take a look at TechSmith’s Audiate . This advanced audio recorder will transcribe your voice over in real-time and let you edit the audio file as if it were a text-based document. We don’t want to brag, but it’s probably the best way to add a voice over to a PowerPoint .
Regardless of how you decide to narrate your PowerPoint, here’s how to turn your presentation into a video:
1. Import your PowerPoint slides
First, start by importing your PowerPoint slides directly into Camtasia. Once your media is imported, you can edit it by dragging your slides into the Editing Toolbar.

You can now add the images to the Timeline, and edit them like any other media in a Project.

If you drag your slides to the Timeline, the slides will be placed in the order of the presentation, each with a default 5-second duration.

With your presentation on the timeline, use Ripple Move to create space in between slides to adjust the timing of each one. To do this, hold shift, then click and drag.

Once you’ve imported your slides and adjusted the duration of each one to correlate with your voice over, it’s time to start editing.
How to edit a presentation video (in Camtasia)
Add behaviors.
Firstly, add some visual interest with Camtasia Behaviors . A Behavior is an animation that brings movement to your slides, making them stand out on screen. This is a great way to bring parts of your presentation to life and take it from ordinary to extraordinary — because nobody likes a boring presentation .
To add a Behavior, click and drag the Behavior you wish to use onto the slide you want to animate. Once added, you can adjust the Behavior using the Properties tab.
Add annotations
Another good way to grab and direct your audience’s attention is to add some Annotations, which are great for highlighting important information.
To insert an Annotation, click the Annotation tab on the left side of the screen and drag it into the designated slide. You can then re-position and edit the Annotation in the Properties tab as needed.
Recording a PowerPoint Presentation, the FAQs
Absolutely! Both Snagit and Camtasia are excellent choices for recording a professional and polished presentation. Snagit is perfect for no-fuss recording and editing. If you require more sophisticated editing capabilities, Camtasia is the ideal choice, offering the added convenience of recording your slideshow and voice over directly within PowerPoint.
Click the Record button in the toolbar to launch your slides into the Presentation Mode and start recording. When you exit Presentation Mode or reach the end of your slideshow, you can either continue recording your screen or stop and save your file.
If you’re planning to record audio, select your microphone in the recording options. The microphone button controls whether or not audio is recorded as part of your presentation. If you have a webcam attached to your computer, you can also record your camera to create a Picture-in-Picture clip, perfect for showing the presenter during the presentation.
With Snagit, you can conveniently record your voice over as you go through your presentation, capturing both the audio and visuals in one go. If you’re looking for more advanced recording and editing options, you might also consider using Camtasia, which allows you to record your voice over while presenting. For even more control, use Audiate to record your audio separately and then import it into Camtasia for fine-tuning.

Justin Simon
Global Content Strategy Manager at TechSmith. I play a lot of golf and watch a lot of football.
- How To Rotate a Video
- How to Write A Shot List That Will Transform Your Video
- YouTube vs. Vimeo: What’s the Difference?
Subscribe to TechSmith’s Newsletter
Join over 200,000 people who get actionable tips and expert advice every month in the TechSmith Newsletter.
Free All-in-One Office Suite with PDF Editor
Edit Word, Excel, and PPT for FREE.
Read, edit, and convert PDFs with the powerful PDF toolkit.
Microsoft-like interface, easy to use.
Windows • MacOS • Linux • iOS • Android

- Articles of PPT
How to Record a PowerPoint Presentation (Step-by-Step)
Recording a PowerPoint presentation is a dynamic way to engage your audience in various scenarios, from e-learning to business pitches. However, many people are unsure about the process. In this article, we'll provide a comprehensive guide on how to record a PowerPoint presentation effectively.
Part 1. What Is the Record a PowerPoint Presentation?
Recording audio on PowerPoint is a valuable feature that allows you to enhance your presentations by adding spoken explanations, commentary, or narration to your slides. By recording your voice alongside the slides, you can create a more engaging and informative experience for your audience.
Part 2. How to Record a PowerPoint Presentation?
Welcome to the world of dynamic presentations! In this section, we'll show you how to bring your PowerPoint slides to life by adding audio and video. Whether you want to explain concepts using your voice or include captivating visuals, these simple steps will help you create presentations that truly stand out. Let's dive into the exciting realm of recording a PowerPoint presentation with audio and video.
1. Demonstrating PowerPoint Solo:
When it comes to delivering a captivating presentation, there's nothing quite like guiding your audience through your content. Recording a PowerPoint presentation allows you to do just that, enabling you to take control and lead your viewers step by step. In this section, we'll show you how to confidently demonstrate your PowerPoint presentation by yourself. By following these steps, you'll be able to engage your audience and deliver your message effectively.
Step 1: Launch your PowerPoint presentation and open the "Slide Show" tab by clicking on it at the top of your screen.
Step 2: Click on "Record Slide Show" from the Slide Show tab's options.
Step 3: A pop-up box will appear. Choose "Start Recording from Beginning" or "Start Recording from Current Slide," depending on your preference.
Step 4: As you present, your narration will be recorded along with the slide progression. Use the spacebar or arrow keys to move through your slides while speaking.
Step 5: To pause or stop recording, press the "Esc" key on your keyboard. You'll be prompted to save the recorded timings and narrations for your presentation.
2. Adding Audio and Video for Enhanced Engagement:
Incorporating audio and video elements into your PowerPoint presentation can transform it into an immersive and interactive experience. Imagine your slides coming to life with narration and dynamic visuals, enhancing your message and captivating your audience. In this part of the tutorial, we'll guide you through the process of adding audio and video to your presentation. By following these steps, you'll be able to create a multimedia-rich presentation that resonates with your viewers on a whole new level
Step 1: Open your PowerPoint presentation and navigate to the "Insert" tab located at the top of the window.
Step 2: Click on "Audio" from the "Media" group. Choose "Record Audio" from the dropdown menu.
Step 3: A recording window will appear. Click on the red circle to start recording your narration for the current slide. Click the square icon to stop recording.
Step 4: To add video, go to the "Insert" tab again and select "Video" from the "Media" group. Choose "Online Video" to insert a video from a streaming site, or "Video on My PC" to use a video file from your computer.
Step 5: After adding the video, you can resize and reposition it on your slide. To ensure proper playback, adjust the video's playback options in the "Video Format" tab that appears.
Step 6: To test the audio and video, play the slideshow by clicking on the "Slide Show" tab and selecting "From Current Slide."
By following these comprehensive steps, you'll be able to effectively demonstrate your PowerPoint presentation, whether by guiding your audience through it personally or by incorporating engaging audio and video elements. Your presentations will gain a new dimension of interactivity and impact, leaving a lasting impression on your viewers.
Part 3: Alternative Choice——WPS Office
Looking for a modern and robust office suite that goes beyond the ordinary? Say hello to WPS Office! This powerful suite of applications is designed to cater to your every document processing need. What's more, it's available to you absolutely free. With WPS Office, you're not just accessing software; you're embracing a new level of efficiency and creativity.
One standout gem within the WPS Office suite is WPS Presentation. This dynamic tool empowers you to craft compelling presentations that leave a lasting impact. But it doesn't stop there—WPS Presentation offers something truly extraordinary: a built-in screen recorder function. Yes, you read that right! With WPS Presentation, you can seamlessly capture your screen as you navigate through slides, making it an excellent choice for recording your presentations.
How to Record the Screen in WPS Presentation:
Capturing your screen with WPS Presentation is a breeze. Follow these simple steps to harness the screen recording magic:
Step 1: Open WPS Presentation and create or open the presentation you want to record.
Step 2: Navigate to the "Tool" tab and select "Screen Recorder" from the menu.
Step 3: A selection box will appear. Choose the area of your screen you want to record by clicking and dragging.
Step 4: Click the "Record" button to start capturing your screen. Narrate your presentation or provide commentary as you progress through your slides.
Step 5: When you're done recording, click the "Stop" button in the recording toolbar.
Step 6: Save your recording as a video file and seamlessly integrate it into your presentation.
With WPS Presentation's screen recorder function, you can effortlessly elevate your presentations by adding an interactive touch. Your audience will appreciate the enriched experience, and you'll appreciate the convenience of this innovative feature.
Use Word, Excel, and PPT for FREE, No Ads.
Edit PDF files with the powerful PDF toolkit.
Microsoft-like interface. Easy to learn. 100% Compatibility.
Boost your productivity with WPS's abundant free Word, Excel, PPT, and CV templates.
Downloading WPS Office:
Ready to embrace the advantages of WPS Office? Simply visit the official website and follow these steps to download and install the software:
Step 1: Visit: https://www.wps.com/
Step 2: Navigate to the "Downloads" section.
Step 3: Choose the version compatible with your operating system.
Step 4: Download and run the installer.
Step 5: Follow the on-screen instructions to complete the installation.
With WPS Office, you're not just using software—you're embracing a dynamic and versatile toolset that empowers your creativity, efficiency, and presentation prowess. Elevate your work and explore new horizons with WPS Office today!
1. How Can I Ensure My Audio Quality Is Clear and Professional?
To achieve top-notch audio quality for your presentation, consider these straightforward steps:
Pick a quiet spot.
Use a good microphone.
Test and adjust audio levels.
Speak clearly and steady.
Pop filter helps reduce noise.
Mind mic distance for clarity.
Choose an echo-free space.
Edit for enhancement.
Practice your narration.
Listen, adjust, and record.
By following these uncomplicated steps, you'll guarantee your presentation boasts clear, professional, and captivating audio that leaves a lasting impact.
2. Can I Edit My Recorded Presentation After Finishing the Recording Process?
Absolutely! After recording your presentation, you can edit it as needed. You have the flexibility to:
Trim or remove parts.
Adjust audio levels.
Add or change visuals.
Enhance overall quality.
Editing ensures your presentation is polished and perfect, even after recording.
This guide has uncovered the art of enriching PowerPoint presentations through audio and video elements. Whether you're personally guiding viewers or adding multimedia magic, these steps enhance engagement. Notably, WPS Office stands out as a modern, powerful solution, featuring WPS Presentation's unique screen recorder function. With WPS Office, your presentations reach new levels of impact and creativity in the digital age.
- 1. How to Record Audio on PowerPoint in WPS Office [Step-by-Step]
- 2. How to Record PowerPoint as a Video (Easy Steps)
- 3. How to Record a Presentation on Mac (Step-by-Step)
- 4. How to Video Record Yourself Presenting a PowerPoint (Step-by-Step)
- 5. How to Record Voice on PowerPoint Online –A Comprehensive Guide
- 6. How to Record PowerPoint Presentation with Audio & Video on Mac

15 years of office industry experience, tech lover and copywriter. Follow me for product reviews, comparisons, and recommendations for new apps and software.
Contribute to the Microsoft 365 and Office forum! Click here to learn more 💡
April 9, 2024
Contribute to the Microsoft 365 and Office forum!
Click here to learn more 💡
PowerPoint Top Forum Contributors: Steve Rindsberg - John Korchok 👍✅
April 17, 2024
PowerPoint Top Forum Contributors:
Steve Rindsberg - John Korchok 👍✅
- Search the community and support articles
- Microsoft 365 and Office
- Search Community member
Ask a new question
It’s not allowing me to record a voiceover my PowerPoint presentation
It’s not allowing me to record a voiceover my PowerPoint presentation
- Subscribe to RSS feed
Report abuse
Replies (2) .
- Microsoft Agent |
Dear Gabriella,
We are glad to help you and we may need more information for troubleshooting.
Regarding "It’s not allowing me to record a voiceover my PowerPoint presentation", do you mean that the recorded video has no voice? Could you provide the reproducing steps of the issue and some related screenshots if some error pops up when you record a video?
Note: Remove any private information before uploading the screenshots.
If yes, does the issue occur suddenly? If yes, what did you do before the issue occurred?
If it is convenient, please provide the version number of the PowerPoint for Mac application and the Mac operating system you are using for our reference.
Welcome to share your updates at your convenience.
Thank you for your effort and time.
Cliff | Microsoft Community Moderator
Was this reply helpful? Yes No
Sorry this didn't help.
Great! Thanks for your feedback.
How satisfied are you with this reply?
Thanks for your feedback, it helps us improve the site.
Thanks for your feedback.
- Volunteer Moderator
As Cliff pointed out, you didn't give us much to go on. Can you record anything at all in any application? Did you check the sound settings in Mac OS System Preferences?
Question Info
- For business
- Norsk Bokmål
- Ελληνικά
- Русский
- עברית
- العربية
- ไทย
- 한국어
- 中文(简体)
- 中文(繁體)
- 日本語

An official website of the United States government
Here’s how you know
The .gov means it’s official. Federal government websites often end in .gov or .mil. Before sharing sensitive information, make sure you’re on a federal government site.
The site is secure. The https:// ensures that you are connecting to the official website and that any information you provide is encrypted and transmitted securely.
Take action
- Report an antitrust violation
- File adjudicative documents
- Find banned debt collectors
- View competition guidance
- Competition Matters Blog
New HSR thresholds and filing fees for 2024
View all Competition Matters Blog posts
We work to advance government policies that protect consumers and promote competition.
View Policy
Search or browse the Legal Library
Find legal resources and guidance to understand your business responsibilities and comply with the law.
Browse legal resources
- Find policy statements
- Submit a public comment

Vision and Priorities
Memo from Chair Lina M. Khan to commission staff and commissioners regarding the vision and priorities for the FTC.
Technology Blog
Consumer facing applications: a quote book from the tech summit on ai.
View all Technology Blog posts
Advice and Guidance
Learn more about your rights as a consumer and how to spot and avoid scams. Find the resources you need to understand how consumer protection law impacts your business.
- Report fraud
- Report identity theft
- Register for Do Not Call
- Sign up for consumer alerts
- Get Business Blog updates
- Get your free credit report
- Find refund cases
- Order bulk publications
- Consumer Advice
- Shopping and Donating
- Credit, Loans, and Debt
- Jobs and Making Money
- Unwanted Calls, Emails, and Texts
- Identity Theft and Online Security
- Business Guidance
- Advertising and Marketing
- Credit and Finance
- Privacy and Security
- By Industry
- For Small Businesses
- Browse Business Guidance Resources
- Business Blog
Servicemembers: Your tool for financial readiness
Visit militaryconsumer.gov
Get consumer protection basics, plain and simple
Visit consumer.gov
Learn how the FTC protects free enterprise and consumers
Visit Competition Counts
Looking for competition guidance?
- Competition Guidance
News and Events
Latest news, razer, inc. to pay more than $1.1 million for misrepresenting the performance and efficacy of supposed “n95-grade” zephyr face masks.
View News and Events
Upcoming Event
Older adults and fraud: what you need to know.
View more Events
Sign up for the latest news
Follow us on social media
--> --> --> --> -->

Playing it Safe: Explore the FTC's Top Video Game Cases
Learn about the FTC's notable video game cases and what our agency is doing to keep the public safe.
Latest Data Visualization

FTC Refunds to Consumers
Explore refund statistics including where refunds were sent and the dollar amounts refunded with this visualization.
About the FTC
Our mission is protecting the public from deceptive or unfair business practices and from unfair methods of competition through law enforcement, advocacy, research, and education.
Learn more about the FTC

Meet the Chair
Lina M. Khan was sworn in as Chair of the Federal Trade Commission on June 15, 2021.
Chair Lina M. Khan
Looking for legal documents or records? Search the Legal Library instead.
- Cases and Proceedings
- Premerger Notification Program
- Merger Review
- Anticompetitive Practices
- Competition and Consumer Protection Guidance Documents
- Warning Letters
- Consumer Sentinel Network
- Criminal Liaison Unit
- FTC Refund Programs
- Notices of Penalty Offenses
- Advocacy and Research
- Advisory Opinions
- Cooperation Agreements
- Federal Register Notices
- Public Comments
- Policy Statements
- International
- Office of Technology Blog
- Military Consumer
- Consumer.gov
- Bulk Publications
- Data and Visualizations
- Stay Connected
- Commissioners and Staff
- Bureaus and Offices
- Budget and Strategy
- Office of Inspector General
- Careers at the FTC
Fact Sheet on FTC’s Proposed Final Noncompete Rule
- Competition
- Office of Policy Planning
- Bureau of Competition
The following outline provides a high-level overview of the FTC’s proposed final rule :
- Specifically, the final rule provides that it is an unfair method of competition—and therefore a violation of Section 5 of the FTC Act—for employers to enter into noncompetes with workers after the effective date.
- Fewer than 1% of workers are estimated to be senior executives under the final rule.
- Specifically, the final rule defines the term “senior executive” to refer to workers earning more than $151,164 annually who are in a “policy-making position.”
- Reduced health care costs: $74-$194 billion in reduced spending on physician services over the next decade.
- New business formation: 2.7% increase in the rate of new firm formation, resulting in over 8,500 additional new businesses created each year.
- This reflects an estimated increase of about 3,000 to 5,000 new patents in the first year noncompetes are banned, rising to about 30,000-53,000 in the tenth year.
- This represents an estimated increase of 11-19% annually over a ten-year period.
- The average worker’s earnings will rise an estimated extra $524 per year.
The Federal Trade Commission develops policy initiatives on issues that affect competition, consumers, and the U.S. economy. The FTC will never demand money, make threats, tell you to transfer money, or promise you a prize. Follow the FTC on social media , read consumer alerts and the business blog , and sign up to get the latest FTC news and alerts .
Press Release Reference
Contact information, media contact.
Victoria Graham Office of Public Affairs 415-848-5121
IMAGES
VIDEO
COMMENTS
Near the upper right corner of the PowerPoint window, select Record. Choose from two options. When you're ready, select the round, red Record button, wait for the countdown, then start speaking. To record from a specific slide, go to it, and then select Record. Note: Narration isn't recorded while the transition between slides happens, so pause ...
You can record your PowerPoint presentation—or just a single slide—and capture voice, ink gestures, and your video presence. The completed recording is like any other presentation. You can play it for your audience in Slide Show or you can export it as a video file. So instead of just handing the deck to someone, people can see your ...
In this video tutorial from Microsoft, you will learn how to record your PowerPoint presentation.You can record your PowerPoint presentation—or a single slid...
Record narration and timings for your presentation in Microsoft PowerPoint to give it a professional and polished feel. Record narration and timings:1. Selec...
Learn how to record a PowerPoint Presentation with audio and video simply by using the build-in PowerPoint functionalities and tools. You will learn how to...
Select the Record button on the toolbar to start recording your narration. Use your keyboard arrow keys to move back and forth between slides. Press N or Space Bar to move to the next slide or animation in the presentation. Press P or Backspace to return to the previous slide or animation.
You can start recording your presentation using the following method. Record Tab: To record a PowerPoint presentation, go to the Record tab and select whether you wish to record from the beginning, from the current slide, a specific area on the screen, or record audio. Slide Show Tab: you can also initiate recording a PPT via Slide Show ...
Let's see how to record a PowerPoint presentation in front of live audiences. Step 1 - save your PowerPoint presentation in OneDrive. Step 2 - open your PowerPoint slides from PowerPoint online. Step 3 - go to Present Live from the Slideshow Ribbon tab. Step 4 - share a live link with your audience.
To start recording the slide show, click the "Record" button, which looks like a red circle. A three second countdown then starts, after which you can start delivering your presentation. To make annotations, click the desired tool at the bottom of the Recording window. Then select a color to the left, if needed.
Tutorial. Open your PowerPoint presentation or create a new one. In the taskbar, select Slide Show. Then click Record Slide Show. Choose the option Record from Beginning. You'll now get to a different view, which we'll call "Recorder View". Here's an overview: In the bottom right corner, you'll see three icons.
Open the PowerPoint presentation in which you would like to record a voiceover narration. Head over to the "Slide Show" tab and, in the "Set Up" group, select "Record Slide Show.". Once selected, a drop-down menu will appear. Here, you can choose to start the narration from the beginning or from the current slide.
Once you've specified exactly what you want, choose " Create Video ", the button on the bottom of the screen. You'll be prompted for a file name, as usual: Notice that the format is MPEG-4 Video, the long, fancy name for "MP4". Pay attention to where you're saving it and click " Save " to proceed.
Step 3: Open Your PowerPoint Slides and Capture the Screen. Open your PowerPoint presentation and put it in "Slide Show" mode. With Panopto Express, you'll have two options for recording your slides: You can either record your slides by recording your screen or by recording the slides within the PowerPoint application.
Record your presentation Open your PowerPoint file, go to the Recording tab, and click the "Record Slide Show" button to start recording. Check and make sure your microphone and webcam (if using) are recording properly by clicking the small microphone and video camera icons at the bottom right of the recording screen.
More than a PowerPoint recorder. VEED is a complete browser-based tool that lets you do so much more than just record and share your Microsoft PowerPoint presentations. You can annotate your videos to make your presentation more informative. Edit your recording to add images, subtitles, and more. It is a professional all-in-one video-creation ...
Open the slide that you want to put the screen recording on. On the Insert tab of the ribbon, select Screen Recording. On the Control Dock, choose Select Area (or if you want to select the entire screen for recording, press Windows logo key+Shift+F). You'll see the cross-haired cursor . Select and drag to select the area of the screen you want ...
A step-by-step tutorial on how to record a slide show and narrate with PowerPoint. This uses the Microsoft PowerPoint "Record Slide Show" feature. This incl...
Step 1: Set up your presentation video recording. If you're a Windows user, you'll have the option to include a PowerPoint Add-in Toolbar when you install Camtasia. While this feature isn't currently available on MacOS, the Camtasia Add-in Toolbar allows you to start, stop, and control your recordings from within PowerPoint — so you don't need to switch between applications.
Choose "Record Audio" from the dropdown menu. Step 3: A recording window will appear. Click on the red circle to start recording your narration for the current slide. Click the square icon to stop recording. Step 4: To add video, go to the "Insert" tab again and select "Video" from the "Media" group.
This setting is controlled by the Mute button, found on the left side of the menu bar. Press Record to begin audio and video recording of your PowerPoint deck in Zoom. To record your PowerPoint in Zoom, click Record. From this point on, anything you share on-screen or say aloud will be captured in your recording.
Record narration and timings for your presentation to give it a professional and polished feel.Record narration and timings:1. Select Slide Show -- Record Sl...
Replied on April 24, 2024. Report abuse. Dear Gabriella, We are glad to help you and we may need more information for troubleshooting. Regarding "It's not allowing me to record a voiceover my PowerPoint presentation", do you mean that the recorded video has no voice? Could you provide the reproducing steps of the issue and some related ...
Fewer than 1% of workers are estimated to be senior executives under the final rule. Specifically, the final rule defines the term "senior executive" to refer to workers earning more than $151,164 annually who are in a "policy-making position.". The FTC estimates that banning noncompetes will result in: Reduced health care costs: $74 ...