
The Michael Schwartz Library
- Michael Schwartz Library
- Ask A Librarian

Q. How do I number pages differently in the various sections of my thesis or dissertation?
- 18 General (hours, borrowing, employment, etc)
- 10 Remote Access to Library Resources & Services
- 12 Research
- 16 Technical Support
Answered By: Jeff Beuck Last Updated: Apr 03, 2020 Views: 1380071
See Also: How do I add page numbers in Microsoft Word?
To use different page numbering schemes in different sections of your Word document, there are two tricks: 1) you must include a "Section Break - Next page" between each section of your document where the numbering will change, and 2) you must "unlink" each section's footer from the one before it.
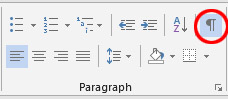
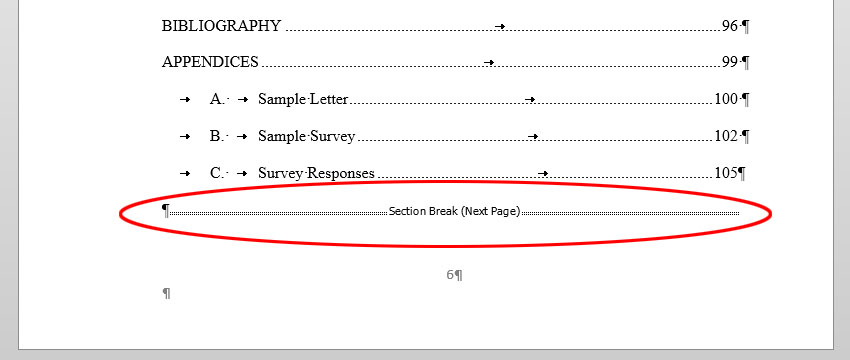
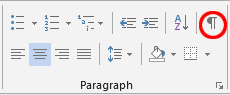
To start, temporarily turn on the viewing of hidden formatting symbols by clicking the "Show/Hide" symbol on the "Home" tab in the "Paragraph" box -- this will enable you to see the Section Breaks between sections of your document.
One of the required page numbering changes for your thesis or dissertation is that you need to use Roman numerals (e.g., "i, ii, iii") for your introductory sections (Abstract, Table of Contents), and then switch to Arabic numerals (e.g., "1, 2, 3") and begin the page numbering at "1" at the start of Chapter I of your main text.
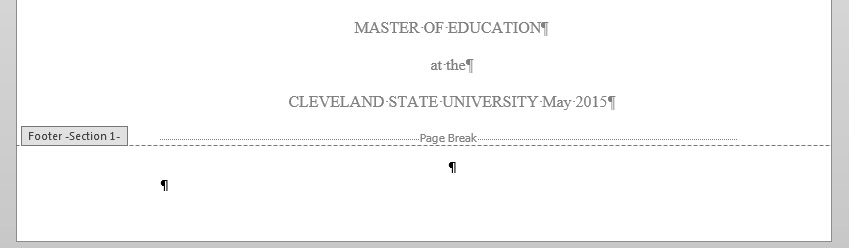
If you do not already have a "Section Break" between these two sections of your document, you will need to add one. Place your cursor at the very end of the text in the first section (after your Table of Contents and any Lists of Tables and Figures), being careful NOT to place it in the footer where the page number is (if the text above becomes grayed out, you are in the footer – try clicking higher).
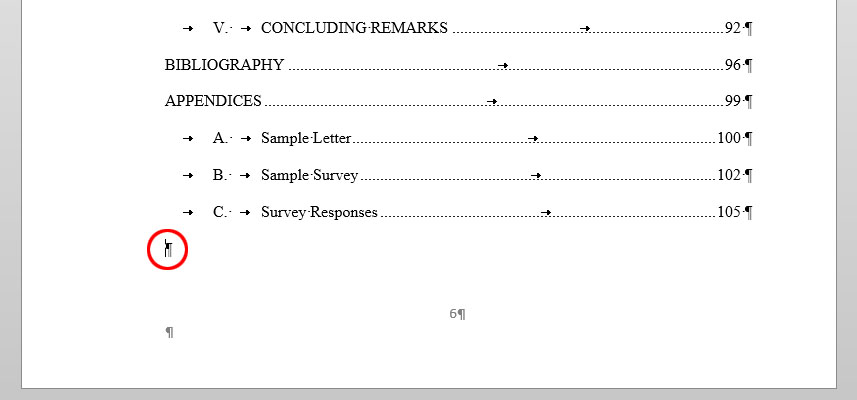
Add a "Section Break – Next Page" by selecting the "Page Layout" tab on the menu, clicking the arrow next to "Breaks", and selecting "Next Page" under Section Breaks.
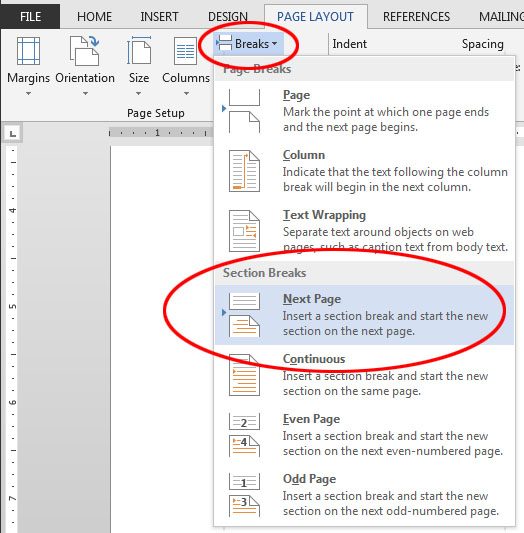
After doing this, you should see a "Section Break (Next Page)" code inserted into your document. This tells Word that the next page begins a new section which may have a different header or footer.
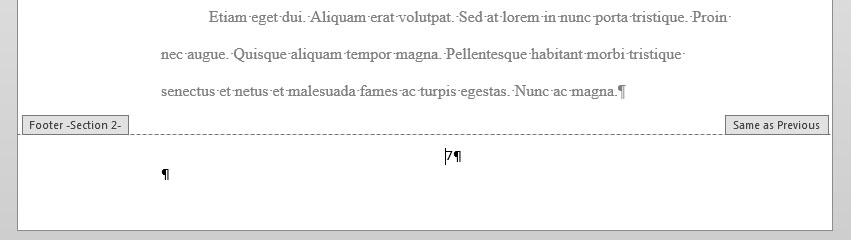
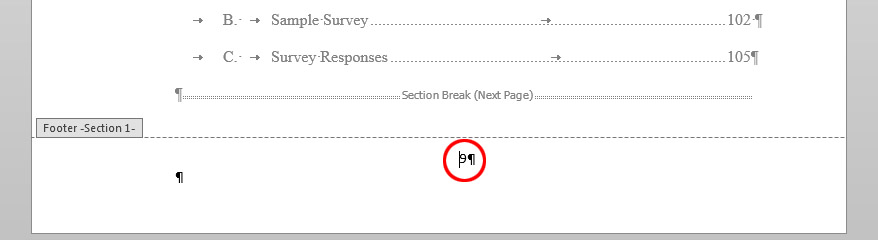
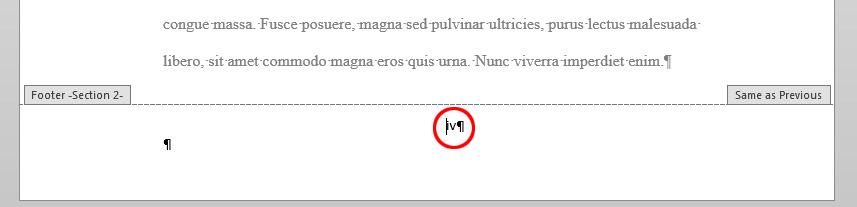
Go down to the next page below the section break (in this example, the first page of Chapter I), and click on the page number in the Footer. If your cursor is in the Footer, you should see "Footer -Section [#]-" to the left, and "Same as Previous" on the right.
You should also see a new tab appear on the menu, labeled "Header & Footer Tools: Design". Select this. (Be careful not to confuse this with another tab labeled "Design" between the "Insert" and "Page Layout" tabs.) In the "Navigation" section of this tab, you will see a highlighted button labeled "Link to Previous" which tells Word to link the footer in this section to the previous section and to continue its page numbering scheme. Click the "Link to Previous" button to UNSELECT it.

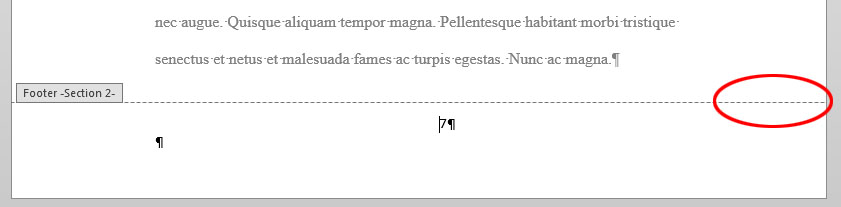
After clicking this, the "Link to Previous" button should no longer be highlighted. The "Same as Previous" box to the right of your footer should also disappear.
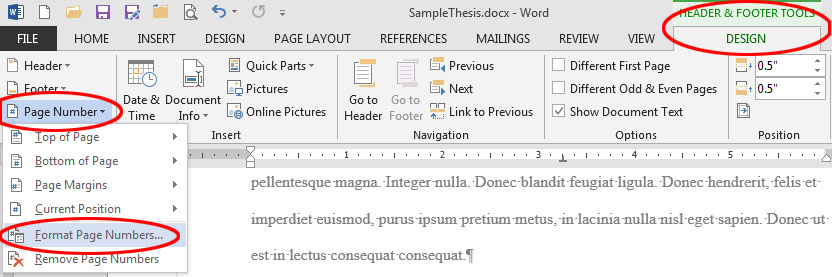
Confirm your cursor is still next to the page number in the Footer, then go back to the Header & Footer Tools – Design tab on the menu, and in the "Header & Footer" section, select Page Number > Format Page Numbers.
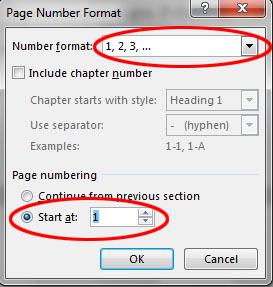
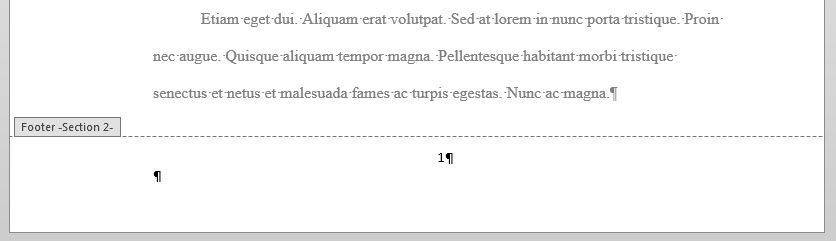
The "Page Number Format" window will appear. Select the appropriate "Number format" for this section ("1, 2, 3," or "i, ii, iii", etc.), and tell Word whether to continue the page numbering from the previous section or to start at "1" or another number. In this example, we want Section 2 (which begins at Chapter I and contains the main text of our thesis or dissertation) to use Arabic numerals and to start numbering this section from page 1. Click "OK" to finish.
You will notice that the page numbering for the current section has now been corrected, and if you unlinked it properly from the previous sections, the numbering in those sections should remain as it was before.
Next, you will need to change the page number format to lower-case Roman numerals (i.e., "i, ii, iii, ...") for the section with your Abstract and Table of Contents. Click your cursor on the footer of your Abstract or Table of Contents page.
Open the "Format Page Numbers" window by going to the Header & Footer Tools – Design tab on the menu, and in the "Header & Footer" section, select Page Number > Format Page Numbers.
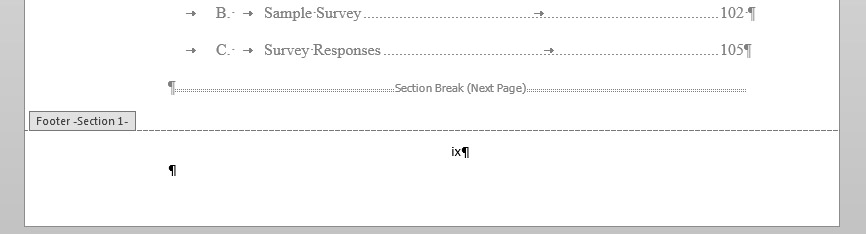
Next to "Number format", select the "i, ii, iii, ..." option for lower-case Roman numerals, then click "OK".

The page numbering for the section with your Abstract and Table of Contents should change to lower-case Roman numerals. As long as you correctly unlinked the following section from this one, the page numbering in the following section, the main body of your text, should remain Arabic numerals starting with 1.
You will also need to remove page numbers completely from the title page and other preliminary pages of your thesis or dissertation. To do this, you will use the same method as above, but delete the page numbers from the first section of your document.
Place your cursor at the very end of the last page which will not be numbered (probably your approval page, dedication, or acknowledgment), being careful NOT to place it in the footer where the page number is (if the text above becomes grayed out, you are in the footer – try clicking higher).
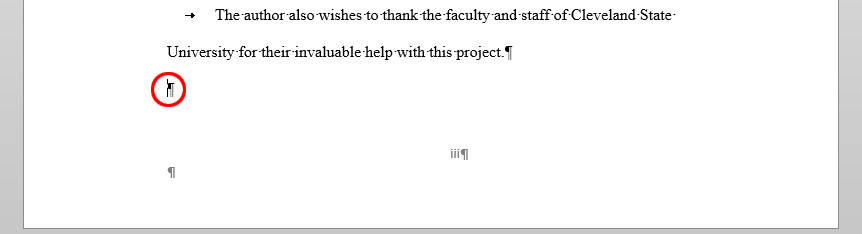
After doing this, you should see a "Section Break (Next Page)" code inserted into your document on the page before your Abstract.

Go down to the next page below the section break (in this example, the Abstract), and click on the page number in the Footer. If your cursor is in the Footer, you should see "Footer -Section [#]-" to the left, and "Same as Previous" on the right. Be sure you are not in Section 1 of your document.
On the main menu, select the "Header & Footer Tools: Design" tab, then in the "Navigation" section of this tab, click the "Link to Previous" button if it is highlighted to UNSELECT it and unlink this section from the section above. This will allow you to modify the page number in the first section without affecting this or subsequent sections.
Return to your Title Page (or any page in Section 1 which will not be numbered) and click on the page number in the footer. Click-and-drag your cursor over the page number to select it.

Click the "Delete" key on your keyboard to delete the page number from this section. As long as you removed the "Link to Previous" connection from the next section, you should the page number disappear from the first section, but remain in the following sections.
If your paper includes additional sections (for example, if your Approval Page was added as a separate section from your Title page), you may have to experiment with linking and unlinking sections from each other -- unlink a section if its page numbering will be different from the one before it, but link together any sections where the page numbering will continue from the one before it. It is generally a good idea to start with the last section of your document and work your way backwards.
When you are finished, don't forget that you can hide the formatting symbols to make it easier to view your text by turning off the "Show/Hide" symbol on the "Home" tab in the "Paragraph" box.
Footer Sections and page numbering can be very complex, especially if your document has multiple sections. If you need additional assistance getting your page numbering correct, contact Jeff Beuck at 216-523-7486 to set up an appointment.
- Share on Facebook
Was this helpful? Yes 0 No 0
Comments (378)
- Very helpful by Tashy on Nov 16, 2017
- Thank you so much!!! by Wraith on Feb 26, 2018
- Excellent and easy to follow instructions. Exactly what I needed. by Mira on Mar 12, 2018
- Thanks Sir So much. You are very kind to people. by Nur Alam on Apr 04, 2018
- Thank you so much! This was extremely helpful and a total time saver! by Brittany on Apr 10, 2018
- Thank you, it really is helpful by Sadia on Apr 29, 2018
- Wow impressive it was very helpful to me. Am glad with the informative words and direction. Shalom. by Josphine Gwehona on May 17, 2018
- EXTREMELY Helpful - Thank you so much. I learnt something too by TIM on May 25, 2018
- Interesting by Dawit Yosef on Jul 02, 2018
- Thank you, your article is very helpful http://glodoksafety.com by Andre Kurniawan on Aug 14, 2018
- it worked well for me..thank you sir.. by Kalya on Aug 18, 2018
- Useful for me. Thanks very much. by Kwesi on Aug 19, 2018
- This was of great help, thanks by Euny on Sep 12, 2018
- Very helpful, concise and comprehensive. Keeps it up Jeff! by Nawas on Sep 15, 2018
- Wow very informative and helpful. Thanks! by Uchy Masika on Sep 19, 2018
- You are so good, thank you by olanrewaju balogun on Oct 25, 2018
- super very helpful. I finally understood it. by Michael on Nov 22, 2018
- This has been very helpful. Thank you. by J on Nov 30, 2018
- Thank you so much for this, it is so helpful! by thankfulalmostmaster on Dec 04, 2018
- This post was a life saver. It was crunch time and I underestimated the pagination of my APA action research. "Hidden formatting symbol", "Section Break"? I NEVER would have thought to do those things. Thanks to you I submitted at 11:51 pm, lol, in the nick of time, lol. by KMo on Dec 13, 2018
- This really was the most useful ''how to'' on the topic - I really battled with the other sites. by Francois on Dec 28, 2018
- Very detail with clearly explained, simple and helpful by Dave T on Jan 06, 2019
- Very helpful.... by Reginescorner on Jan 08, 2019
- Thank you so much by Augustine on Jan 10, 2019
- EXCELLENT!!!!!!!!!!!!!!!! by Natasha on Jan 11, 2019
- Great tip. Thanks for adding. I had the same question for my thesis. by Manuel Duarte on Feb 08, 2019
- This was so helpful and clearly presented; I would have never figured it our otherwise - thank you!!! by Janice on Feb 26, 2019
- Great help 👍🏽👍🏽👍🏽 by Nge on Mar 01, 2019
- Spot on! Thanks! by Jonathan E on Mar 15, 2019
- awesome procedure. by Derick Musi on Mar 31, 2019
- Thank you! Saved me. by KK on Apr 01, 2019
- very helpful, thank you by silas on Apr 04, 2019
- Thank you for this elaborate explanation. Very helpful. by Prucy on Apr 18, 2019
- Brilliant! Got me a first ! by Bob on Apr 25, 2019
- noice by ye_boi on Apr 25, 2019
- very very helpful, thank you. by Lucy Jackson on Apr 28, 2019
- This was really helpful and straightforward. by Deeya on Apr 30, 2019
- Jeff Beuck is the Hero we deserve by anonymous on May 05, 2019
- Thank you from the University of Kansas! by Owen on May 14, 2019
- THANK YOU! your info help me a lot (",). by AURORA on May 15, 2019
- Exceptionally helpful - thank you! by Karin W on May 28, 2019
- Thanks! I watched a couple of youtube videos before seeing this and had been struggling with pages refusing to take any number at all. It's all useful, but the most satisfying statement here was "begin at the bottom". by Tracie Hall on Jun 04, 2019
- Life is saved! by Uki on Jun 05, 2019
- Useful by Naveed on Jun 08, 2019
- Very helpful indeed by Mwanakasale Muche on Jul 09, 2019
- So helpful! Thank you very much for the detailed tutorial. by Jes on Jul 17, 2019
- Very helpful by Shauri Mbugua on Jul 21, 2019
- Thank you very much. This is the best material I have ever read on this subject. The writer wrote in detail. by Abraham on Jul 26, 2019
- Thanks so much, very useful by Henlee on Jul 29, 2019
- Thank you Very helpful by Zayn on Aug 02, 2019
- Very very useful, i didnt have any idea to number different sections. by Rashid Mwatebela on Aug 07, 2019
- It resolve my querry.... really very helpful Great work👍 by Shikha on Aug 11, 2019
- very helpful and thank u😍 by madhushi on Aug 17, 2019
- Thanks,just got it. by Emmanuel on Aug 21, 2019
- Very helpful by Monseur on Aug 26, 2019
- I am so grateful for this important information. i have used it successfully insert preliminary pages in my report. I am so grateful. by Caroline N. Ateenyi on Aug 28, 2019
- Incredibly helpful. I looked at several different sites for an answer to this, and none of them mentioned the section break (I thought page break did this for me). Thank you for explicitly detailing every step. by Jeremy on Sep 07, 2019
- This was amazingly helpful and straight to the point. Other people have made fifteen minute long videos to explain what this post does in a quick five minute read. Thank you kindly for putting this online! by Kate F. on Sep 07, 2019
- Very helpful indeed by JOJO on Nov 04, 2019
- Very very helpful by Mbogora Malima on Nov 07, 2019
- A detailed step by step explanation. Thank you. by Kavitha Gopalakrishnan on Nov 11, 2019
- Very helpful find it hard to change page number by section but after i've seen this info its way more easier by now by Omni.shade on Nov 26, 2019
- it was very useful. by Esther on Dec 06, 2019
- Thank you ...really clear instructions saved me a lot of time. by Rich on Dec 14, 2019
- Thank you very much. Very helpful! by Dusan on Dec 16, 2019
- Super helpful, thanks. by PhD Student on Jan 24, 2020
- Very helpful, sorted out such a frustrating problem I couldn't work out. by Labeeb on Feb 10, 2020
- Thank you so much. This material was much more helpful than YouTube videos. Very detailed. God bless the writer. Totally time saving. by Judith on Mar 09, 2020
- Very helpful article indeed. This has solved a very important for my articles. Many thanks! by Jamil Ahmed on Mar 21, 2020
- This is very helpful. Thank you so much!! by Glen Parry on Mar 27, 2020
- Was very helpful. Thank you. by Hunja Amos on Apr 16, 2020
- Excellent description, it worked for me. Thank you !!! by Akshay on Apr 20, 2020
- Your information saved me some embarrassment. It works like a " where there is no doctor" strategy. I gratefully appreciate you. by DAMIAN BAKYENGA on Apr 26, 2020
- Very helpful, thank you! by Tugce on Apr 30, 2020
- Thank you SO MUCH for this easy-to-follow tutorial. You made my day! by Don, Graduate Student, CSUN on May 02, 2020
- This is very helpful and thank you a million. by Tafirenyika Gwenzi on May 12, 2020
- Thank You!! This was Helpful!!! by Kehinde Miracle Alabi on May 18, 2020
- So clear and helpful🧡 by Wel on May 25, 2020
- Very helpful indeed! by Havelinus Shemuketa on Jun 06, 2020
- These instructions were excellent - very clear and detailed - user friendly. I had viewed some videos here on Google and they were not as clear as these instructions. Thank you!! by Sharon W. on Jun 06, 2020
- Wow, unbelievable by Tito Titus on Jun 07, 2020
- very helpful. thank you very much by verah Tena on Jun 12, 2020
- This really helped me by Berto on Jun 12, 2020
- THANK YOU!! Very clear and helpful directions!! Thank you! by PhD Student on Jun 15, 2020
- Very Helpful. Thank you so much by Amanuel Zinare on Jun 17, 2020
- Does anyone know how to do this with page numbers in the main body of the document rather than the header/footer? by John on Jun 19, 2020
- Many thanks by Melosum on Jun 21, 2020
- Extremely helpful!!! by Esther on Jun 23, 2020
- Thank you so much for this. Very helpful for my dissertation. by Amelia on Jun 25, 2020
- Thank you so much by hadi on Jun 28, 2020
- Thanks a lot for evrything this saved me by Sasikafsal on Jul 03, 2020
- This was really helpful. Exactly what I needed. Thank you. 👍 by PAP on Jul 03, 2020
- This was very helpful. Thank you so much for providing such a detailed description. by Zainab on Jul 07, 2020
- Very useful. Thank you. by Issah on Jul 16, 2020
- Thank you so much....i have really been battling with numbering pages....your guide made it very smooth.. by Eben on Jul 16, 2020
- Great work. This is the best guide for inserting page numbers on thesis. Great relief for me. Thanks a lot. by abdul quddus on Jul 19, 2020
- Thanks alot by Yasser on Jul 24, 2020
- Easier to follow and so helpful. Thank you by Hawa on Jul 29, 2020
- Very clear and concise. It works exactly as explained. Many thanks indeed. by Adhiambo on Aug 06, 2020
- Very helpful! by Erin on Aug 07, 2020
- Wow, that was lovely. Thanks so much for the help by Emmanuel Macnelly on Aug 10, 2020
- Great resource and simple to understand by Valentine on Aug 20, 2020
- Thank you so much. very helpful by Ay on Aug 20, 2020
- What a wonderful piece, very easy to follow tutorial. Thanks alot. It is something I had failed to learn but now, I am good to go🙂 by Shalom. on Aug 21, 2020
- Wow!! This was super helpful.. I owe you a lot!! Wow!! Super easy to follow!! I never knew this before today.. Many many many thanks.. You're a life saver!! by Bileme Miller on Aug 25, 2020
- Thanks so much for dis, its really helpful 😍 Ave gone through a lot of troubles only to find dis here by Abby on Aug 28, 2020
- Thank you very much, this is so helpful by MoyinOlúwa on Aug 31, 2020
- wow, thanks so much. you can also tell us how to remove the empty pages that show up after the page break. Thanks by DCT on Aug 31, 2020
- Thanks for the remarkable advice and the step by step made it easy for me. by Lynette Wyatt on Sep 01, 2020
- Thank you so much! by Dene on Sep 04, 2020
- This was very very helpful by Ratakane Baptista Maime on Sep 07, 2020
- Wonderful step-by-step detailed explanation!! Wonderful and very helpful indeed!! by Rajsekhar Choudhury on Sep 07, 2020
- This my guy just saved me. Thank you by Andy on Sep 09, 2020
- This is so helpful... Many thanks! by Dieudonne on Sep 10, 2020
- Extremely helpful, many thanks! by Enesi on Sep 22, 2020
- Very easy to follow. Excellent work, thank you very much. by Vimbie on Sep 23, 2020
- This is absolutely educational, thank you so much by Ahadyson on Sep 25, 2020
- thank you so much.it has been very helpful by joan on Oct 02, 2020
- Bery helpful thanks by Kanjau on Oct 05, 2020
- Excellent Explanation by Jayanarasimha on Oct 07, 2020
- Very useful and clear explanation. It was very helpful. Thanks a lot by NJoshi on Oct 08, 2020
- thanks by blabla on Oct 09, 2020
- very helpful, thank you by Celestina Chinenye on Oct 09, 2020
- Thanks for the help, I'm very grateful. by Josephine on Oct 15, 2020
- Thank you so much! You are good in teaching! by Fanta on Oct 15, 2020
- Thankyou. Very nice. by Abd.k on Oct 17, 2020
- This was actually the MOST useful explanation I found on google. Thank you so much, you really deserve an award. by B on Oct 19, 2020
- Aww..it was really helpful. Thank you so much! by Nishinki on Oct 27, 2020
- You are blessed in simplifying things. Great! keep at it by Dtk on Nov 01, 2020
- Thank you so much for your help. I have been thinking of how to do this. by Dr Shamsuddeen Yusuf on Nov 04, 2020
- This is amazing. It worked perfectly. Thanks alot. by Majale_Jr on Nov 04, 2020
- Thanks a lot, really helped a lot. by AbdulWaahid on Nov 09, 2020
- Very very helpful...Thank you so much!!!! by Lucy.K on Nov 13, 2020
- Absolute legend, I spent hours onto microsoft helpdesk at the end of my dissertation to get this fixed. Completely forgot how to do it again for my next dissertation and this page had me sorted in 5 minutes. You are an total lifesaver, thank you!!! by James on Nov 14, 2020
- This was very helpful. Thank you very much. by Tony on Nov 16, 2020
- Wow.... This was really helpful......... Thanks a lot by Boo on Nov 16, 2020
- AMAZIIIIIIIIIIIIIIIING!! Very helpful, many thanks. by Wambui on Nov 18, 2020
- Oh my gosh - it worked! by SJCD on Nov 18, 2020
- It is best info thank you I have aquestion how to insert page number without the first three document page by nigus on Nov 18, 2020
- this was very helpful. thank you so much by Zakaa Zuamo Zechariah on Nov 19, 2020
- Exactly what I wanted. Thank you. by Sokiri Richard on Nov 22, 2020
- Thanks so much! This was extremely helpful! by Yembu on Nov 24, 2020
- This is the best explanation for inserting page numbers. Thanks for a lot for this. by Furqan on Nov 30, 2020
- Thank you very much. this has really helped me. by Mary Chioma on Dec 06, 2020
- Very helpful! Thank you so much! by Dhea on Dec 08, 2020
- Thank you, this was really helpful and easy to understand! by Christina on Dec 08, 2020
- This is on point and super helpful, and exactly what I needed. Thank you. by NB on Dec 23, 2020
- Thank you that was helpful by KellyMuchenje on Dec 30, 2020
- Very helpful. Thx by Aidah on Jan 02, 2021
- This information is fantastic and helpful✔ by https://delightedgloryservices.com.ng on Jan 05, 2021
- MANY MANY THANKS. THIS IS 100% ACCURATE AND VERY USEFUL. THANK YOU SO SO MUCH by God's grace on Jan 07, 2021
- This is very helpful...thanks a ton by Kenpaul on Jan 08, 2021
- been searching for a way to do this, and yours explanation was the one that really help me, thank you! by bel on Jan 11, 2021
- Many thanks. This is a very good guide! by Joe on Jan 11, 2021
- Very helpfull, thanks a lot. by cyrus on Jan 12, 2021
- Very helpful. At a glance I got scared when I saw its length, but this was resolved by including illustrations. They were quite useful. Thanks so much. by Emmanuel 12/01/2021 on Jan 12, 2021
- thank you, super helpful!! by aiyana on Jan 17, 2021
- Thank you very much! This helped a lot by Ibrahim on Jan 17, 2021
- Am greatful by Muhammad on Jan 18, 2021
- Thank you so much for this simple and clear explanation. by Jihene on Jan 19, 2021
- This was really helpful. It was by far the most useful bit of information I've found online. Thank you by Corey on Jan 23, 2021
- Very helpful. Thank you. by TRams on Jan 25, 2021
- I felt the need to write this message and thank you for your perfect explanation! I was struggling with numbering every section differently until I found this article of yours! thank you and God bless you! by Andrea on Jan 31, 2021
- thank you so much it was boring for me before i get this guidance keep it up for other difficulty also by betelhem on Jan 31, 2021
- Wonderful.Easy to follow.Thank you. by Esperanza Lizz on Feb 03, 2021
- This is so well explained. Thank you by Janet on Feb 07, 2021
- Thank you! ^_^ by Pranjal on Feb 07, 2021
- Thank you, than you, thank you!! I finally did it! Why did MS make this so convoluted? by GM on Feb 09, 2021
- Thanks for this explicit presentation of knowledge . It was apt and accurate. I deeply appreciate your time by Nsikak CICERO on Feb 15, 2021
- Thanks a lot for the guidance. It helped me a lot. by Sudeepa on Feb 17, 2021
- Extremely helpful, thank you so much! by Rasha on Feb 21, 2021
- This is really helpful by Abiodun on Feb 25, 2021
- At 1:00am, these instructions were a relief. Thank you! by Brandy on Feb 28, 2021
- Excellent service, am thankful by James Gachau on Mar 01, 2021
- Thanks, much better than microsoft help! by Bioprocess engineer on Mar 05, 2021
- Thanks a million! This was very helpful! by Esther on Mar 08, 2021
- Very systematic, informative and to the point steps. Thank you by Doris on Mar 09, 2021
- Very helpful thank you by Edgar on Mar 22, 2021
- The Guide is very beneficial. Thank you so much by Gideon Biwott on Mar 22, 2021
- Thanks. Very helpful indeed by Felix Wanjala on Mar 23, 2021
- Excellent ! This article helped me paginate my dissertation as expected. Thank you very much by Latha on Mar 24, 2021
- really helpful, totally a good guide by jann on Mar 25, 2021
- Excellent explanation, thank you! by Dionne on Mar 25, 2021
- Thanks a lot sir, this is cool, it helped me a lot by Sir Richard on Mar 30, 2021
- very helpful and easy to understand, thank you sir! by FASYA on Apr 02, 2021
- Just want to thank the person, who explained this so well! This is how it must be done, highly appreciated, thanks again! by Ilja on Apr 06, 2021
- Very helpful. Thank you! by Tobi on Apr 07, 2021
- You're a godsend, dont know why this isnt easier to do on word but I'm very happy that you uploaded this guide. My thesis is saved! by Josh Herrera on Apr 07, 2021
- Thank you so much ,it is very helpful by Suji on Apr 10, 2021
- Thank you very much. Was very stuck and I got it now by Yola on Apr 13, 2021
- Very useful information indeed. Thank you so much! by Anthony on Apr 15, 2021
- Thank you very much. Quite helpful, had been looking through YouTube videos, and something was still not showing on my word document, but your steps solved the problem. :) by Taflex on Apr 15, 2021
- Very useful. Thank you so much. by BangTanS on Apr 17, 2021
- wow, have been struggling with this for now, finally got help on my own pace, this is very helpful, thank you so much by ken on Apr 26, 2021
- This is really helpful. Thank you so much. by Swapnika on Apr 27, 2021
- Thank you so so much the data is so so helping by Mugizi Gilverse and Mugizi Ronnet on May 01, 2021
- well explained thank you! by RASH on May 05, 2021
- Thank you so much! by Just J on May 08, 2021
- Excellent by Balendran Nanthini on May 09, 2021
- On point. Well explained and easy to follow.Am impressed.🤗🤗🤗 by Proc on May 09, 2021
- This was very simple and easily understandable.I was amazed and respect your profession. by Aregawi on May 10, 2021
- Very simple and easy to follow! Thank you. by Yash on May 10, 2021
- Thank you so much! This was so easy to follow! by J Lee on May 13, 2021
- This is very helpful because of the detailed explanation. Thank you so much by Thank you so much on May 20, 2021
- Thank you so much. It has helped me by Naume on May 21, 2021
- Very helpful and very well done, congratulations and thank you for your help. by Cesare on May 29, 2021
- Thank you, that was vey helpful. by Rose P on Jun 02, 2021
- Very Very Helpful Cudos by Dipesh Bista on Jun 09, 2021
- Amazing by Sagar on Jun 09, 2021
- Bro.. om’gosh dude, this is amazing... I would legit pay someone 500$ to figure this out for me, but your website was free...yo how can I show my support, no cap, this is amazing.. by Bk on Jun 10, 2021
- Thank you so much for this! Very helpful and easy to follow - appreciate it! by MMason on Jun 15, 2021
- Thank you very much for these helpful tips and easily understandable. by Mathias Mahenge on Jun 26, 2021
- Woooow brilliante xplanation, you really helped by Fafie on Jun 27, 2021
- Whooohoo thank you so much for clear cut explanation saved almost a 6 hours by Ashok on Jul 01, 2021
- It has always been helpful to use this! by Alim on Jul 01, 2021
- This was completely Helpful by Kingsley on Jul 02, 2021
- Thank you!! super concise instructions!! :)) big thanks by d on Jul 04, 2021
- Wow! It was very helpful, God bless you for the wonderful explanations and easy guidance of yours by Lembao on Jul 05, 2021
- Perfect explanation by June on Jul 07, 2021
- Very helpful. Thanks by Smartoskylalasky on Jul 11, 2021
- Excellent and easy to follow instructions. Exactly what I needed. by Ahmad Hussain on Jul 13, 2021
- Wow!! Brilliant guide. This is really helpful by Racheal on Jul 19, 2021
- helpful thank you by Justin on Jul 20, 2021
- Thank you so much Mr Beuck for your excellent explanation / illustration, it’s so clear and helpful. It’s also heart-warming to see the many comments of gratitude (and relief!) above; you’ve helped so many people! Thank you! :) by Sinead on Jul 31, 2021
- very helpful.thank you by julia muteyo on Aug 08, 2021
- It was very helpful thank you by Ivy on Aug 23, 2021
- Thank you very much! Very detailed and helpful with screenshots. by Sasha on Aug 23, 2021
- Awesome👍👍 Your instructions are clear and precise, showing unparallel clarity! Thank you so much! by Manouri on Aug 25, 2021
- Very useful and easy to follow the steps! by Mo on Aug 25, 2021
- Thanks a million. This was highly helpful. by Mashazi Mahoto on Aug 30, 2021
- This is a MUST SAVE page!! I come back here every time I need to format my document. You are a life saver! Thank you! by Zoe on Sep 10, 2021
- Thanks by Caleb Onyango on Sep 12, 2021
- Thank you, this is very helpful and simple to follow. by Abdislam Rhebi on Sep 18, 2021
- Thank you so much so helpful by Beauty on Sep 18, 2021
- Thanks a lot! Helped a lot. Quick, easy and to the point explanation. :-) by Pragya on Sep 20, 2021
- Thank very much. Easy to understand by Nana Kwame on Sep 23, 2021
- The best guidance ever!!!!! by Godfridah on Sep 30, 2021
- Practical step-by-step guidance. This is easy to follow and simply can't forget by NICHOLAS GWENGI on Oct 04, 2021
- This was so explicit and clear. Thank you so much! by Manisha on Oct 08, 2021
- You have absolutely made my work easy by RICHK on Oct 10, 2021
- So helpful. Thank you. by Jade on Oct 11, 2021
- Thank you so much for the clear instructions! It was really helpful. by Nirmal HETTIARACHCHI on Oct 13, 2021
- Very easy and straightforward Thank you by Luke on Oct 13, 2021
- Very helpful thank you so much by Sabelo on Oct 16, 2021
- whao! thanks greatly.... it was straight and easy to grasp by geoeffy on Oct 21, 2021
- Used this for my undergrad thesis, still used it for my postgrad paper. So helpful, thank you. by Wambui on Oct 23, 2021
- Thank you very much. That was awesome. Really helpful by Phd Candidate on Nov 10, 2021
- Am grateful you are my mentor thank you so much may God Bless you for me by Calvince Juma on Nov 19, 2021
- Excellent, thank you so much! by Cristiana on Nov 21, 2021
- very helpful. thank you so much by Faith Ashley on Nov 26, 2021
- That was perfect. I have been writing reports for school for a couple years and this is by far the best explanation and demonstrations I have come across! Thank you!!! by Benjamin on Nov 27, 2021
- Simple and straight forward quick steps, totally helpful by Esther on Nov 29, 2021
- FANTASTIC, thorough, clear, and detailed instructions!! I am so grateful for this super helpful guidance during the horrendous last stages of dissertation defense! I hope the human that wrote this knows how much they are appreciated by stressed graduate students! by Brielle on Dec 03, 2021
- Very much helpful. Many thanks!! by Abebe on Dec 06, 2021
- Thank you so much. This was so helpful. by Faves on Dec 08, 2021
- thank you. it is very helpful. by Abdul Rehman on Dec 09, 2021
- Thank you so much. This was very helpful and easy to follow! by Chinedu Anyaji on Dec 21, 2021
- Very insightful. I've appreciated it. by Makuei Ghai Makuei on Dec 23, 2021
- The guide is perfect. I was almost resorting to go and ask at some business centre and low and behold I found this!! Thank you very much by Casserdy Magaya on Dec 31, 2021
- I liked the way it is "explained" in detail. I was able to understand. Thank you very much! by Vida Nunez on Jan 03, 2022
- Like everyone else in the comments, I would just like to say thank you for this saving grace of a post. So helpful and the visuals really made it so easy to use. by hanseoulo on Jan 03, 2022
- Very excellent,; precise and concise by Aliyu idris KANKARA on Jan 04, 2022
- Very helpful, thank you! by gshoffma on Jan 06, 2022
- The help topics on Microsoft website are useless. After struggling there I fortunately found this page. Thank you very much. by Firas on Jan 17, 2022
- Its so easy to use and very helpful. i doing it will easy after reading the comment..keep it up... by Mukoya Edward Rumeta on Jan 27, 2022
- Thank you very much Sir ,much appreciated this has been very very useful to me by Gimses on Feb 09, 2022
- Very wonderful how-to and appreciate the screenshots throughout. Helpful, succinct, excellent work by the librarians at CSU Ohio. I think I'll consider sending my son to this university as I can see they really care about solving problems and adding value to society. by Hugh Janus on Feb 09, 2022
- Correct and direct explanation. Thanks so much by Alexander Talam on Feb 15, 2022
- Amazing!! Thank you so much! by Angie on Feb 17, 2022
- Are you kidding. This was AWESOME!! I was doing all the right things for 4 days; but here, we completed this in literally less than 20 minutes. So cool, keep this website going, Thanks Ben!! by Pam on Feb 17, 2022
- Great Minds!!! Thank you very very helpful by Esther on Mar 10, 2022
- This is great help, exactly what I was looking for. Thanks a lot. Really appreciated. by Umar on Mar 12, 2022
- Thank you!! Wonderfully helpful!! by Andi on Mar 15, 2022
- Internet is undefeated because of people like you. Thanks a lot! by Arun on Mar 20, 2022
- Easy to follow, explained in a lucid manner. Was very helpful. by Ivin Tomy on Mar 23, 2022
- This was SOOOO darn helpful! Whew! by Kels on Mar 24, 2022
- Thank you! by Paul on Mar 27, 2022
- I hate numbering word pages but this is THE BEST and MOST HELPFUL guide ever!! by Melissa on Mar 27, 2022
- Thank you for the guide, super easy to follow and very helpful. by Minky Masombuka on Apr 10, 2022
- Very helpful, thanks indeed by Joel Oraku on Apr 13, 2022
- very very helpful and interesting . thank you very much by zubieda on Apr 23, 2022
- thanks ,very helpful. by Modester on Apr 26, 2022
- Thanks,this was helpful by Metuge on Apr 26, 2022
- Very helpful!! by Gladness on May 07, 2022
- OMG THE MOST HELPFUL POST. Thank you SO MUCH!! I have never seen a better tutorial.🤩🤩🤩 by Katerina on May 10, 2022
- Excellent really clear and so helpful.. Thanks by Queen Bee on May 13, 2022
- Thank you.. this was very helpful by F Abujalala on May 13, 2022
- Very helpful! Thanks! by MS on May 15, 2022
- Very explicit. Good by Divine on May 17, 2022
- You are the best. You just saved us from days of a headache around this pagination. Well explained with images. I salute you and your team. Thumbs up. by Ola on May 26, 2022
- Very helpful. Thanks a lot! by Beatrice on May 30, 2022
- Thank you soo much! Very useful. Clear and easy guidance by Chaminie on Jun 08, 2022
- Very helpful indeed. Easy to follow and understand by Wilson Maiyo on Jun 11, 2022
- You're the man Jeff by LeBron on Jun 23, 2022
- I love the simplification of this, very easy to understand. by Azenda Cephas Dajo on Jun 27, 2022
- I highly appreciate your sincere help by Bildad on Jun 29, 2022
- Exactly what i wanted and to the point without wasting much of the readers time. I salute you sir. by Steve on Jun 29, 2022
- This was incredibly helpful! I was so confused until I came across this, thank you so much!! by McKenna O'Shea on Jul 06, 2022
- Fantastic and detailed procedure this is. Keep it up! by Xquort on Jul 07, 2022
- Perfect explanation. Thanks very much for this. by Sylvain Mbuta on Jul 11, 2022
- This was helpful and easy to follow,thank you by Bree Hildah on Jul 12, 2022
- Can we also change the total number of pages? I tried using this and it does restart the page number but the total number of pages do not change. by Mayur on Jul 13, 2022
- You have been super helpful, thank you. by Chichi on Jul 13, 2022
- Thank you! It is really helpful by Andinet on Jul 17, 2022
- Very useful. Thanks by OLAOSEBIKAN on Jul 21, 2022
- Extremely useful, easy to follow. by KANDASWAMY CHENNIMALAI on Jul 22, 2022
- Thank you. Very helpful by Ife on Jul 24, 2022
- much appreciation. the step by step procedure was very helpful. by IAN ARABU on Aug 30, 2022
- thank you.easy to follow by chamunoorwa matanhike on Aug 30, 2022
- Thanks a lot it was very helpful by Amabel on Sep 05, 2022
- I am extremely grateful by Kwabena Agyare on Sep 07, 2022
- Thank you so much. it is conducive. by fatima tayyab on Sep 15, 2022
- Thank you so much, this is the most helpful explanation, i have received on this subject. Excellent job. by Law on Sep 15, 2022
- OMG amazing, thank you thank you!!! by Mariana on Sep 19, 2022
- It was really helpful. Thank you very much indeed. by Adeteju Adeniran on Oct 03, 2022
- This was very helpful. Thanks. by Stephen on Oct 10, 2022
- A very detailed response to the problem. Thank you so much for giving a procedure that is easy to follow by Gummadivalli Shiva Kumar on Oct 12, 2022
- it was very helpful and its very easy to follow because you have used very easy words to explain. Thank u sooo much (JazakAllah u Khaiira) by Osama Shabir on Oct 14, 2022
- very helpful!! Thank you. by Monsurat Raimi on Oct 20, 2022
- If I were to meet I'll give you a kiss, this really helped alot by Ahmad Nalado on Nov 06, 2022
- Thank you very much. Pretty easy steps to follow. by Nandila on Nov 06, 2022
- Thanks, it's very helpful by Adebayo R.O on Nov 12, 2022
- very helpful, thanks by Simiyu Omuriti on Nov 15, 2022
- Was very helpful, thank you very much by Eddy_Yang on Nov 19, 2022
- This was very very helpful. It was indeed very easy to follow. thank you so much for uploading this by Taiwo on Nov 22, 2022
- Easy steps to follow toward the target. A lot of thanks to you. Now nimeelewa ahsante kwa maelezo mazuri😇👏🤝🏼 by Fadhili on Nov 30, 2022
- I followed the instructions exactly as they are laid down, and voila, I got the page numbering right! by Cherry on Nov 30, 2022
- People like you make it possible to do everything in word and avoid latex. Cant thank you enough by Pranav on Dec 01, 2022
- Such a life safer!! by Flashy on Dec 07, 2022
- Thankyou. Jah Bless ! by Kalidou on Dec 16, 2022
- Very useful document ! by Cyprien on Dec 17, 2022
- One word, THANKS 😊 by Masher on Dec 18, 2022
- Thank you very much. Pretty easy steps to follow. google games by Smith on Dec 24, 2022
- Thank you so much for your help by Mshelia on Jan 05, 2023
- This is the most elaborate and clear help in page formatting I have ever received. Thank you. by Yunia on Jan 07, 2023
- Thanks, got to understand section break for different page number by Rashil Maharjan on Jan 08, 2023
- Very useful. Thank you! by Sara on Jan 10, 2023
- It is very interesting and helpful by Mohammed A on Jan 14, 2023
- Thank you very much.... Problem solved by Ian Yohane on Jan 18, 2023
- Very helpful. Thank you for the effort by Success on Jan 24, 2023
- thank you by kiya fikadu on Jan 26, 2023
- wao your illutrations makes the work so easy to follow. by ziizozi on Jan 30, 2023
- Very clearly expressed and helpful. Thank you! by Roland on Feb 09, 2023
- This was of great help to me today, thank you soo much. by Sevu Mueni on Mar 05, 2023
- I give it a 5 star, perfectly explained and elaborated!! thank you.... by cornelius Kiprotich on Mar 07, 2023
- This was well illustrated and clearly elaborated. Thank you, you have really saved my time. by RBI on Mar 17, 2023
- This was such a helpful and concise mind refresher thank you very. I am even more grateful that I could send my gratitude. So much better than listening to a whole 5 min YouTube video. Though also helpful. by Nomonde Foli on Mar 19, 2023
- Thank you so much. I struggled with this numbering on my previous degree, now I know. I am already applying the knowledge gained on my current thesis. Many thanks indeed! by Edmore on Mar 30, 2023
- it is very supportive and interesting ! by Andualem on Apr 01, 2023
- thank you by onyango on Apr 03, 2023
- Wow, this is exactly what I needed to number the pages of my dissertation. Amazingly clear instructions, thank you so much! by Jac on Apr 12, 2023
- Thank You Very Much😊 by Hardik on Apr 19, 2023
- Wow, I followed step by step and made it👍👍 Thanks for this information by Sseguya on Apr 21, 2023
- To the person who created this how-to guide, THANK YOU. This was perfect in every way. Thank you so much for making this available to us all. by supermegstar on Apr 23, 2023
- This is great for section numbering, for which I've added to the bottom of the page. Now, is it possible to add an overall document page number to the top of the page? Essentially, have two different page numbering systems in the same document. by Abbi on Apr 26, 2023
- Super helpful and saved so much time troubleshooting! I went through every step exactly and was able to finally get it! by Haley Cari on May 12, 2023
- Amazingly well explained...You have saved me a great amount of time dealing with page numbers writting my thesis... Thank you! by MS on May 14, 2023
- it is indeed helpful to me. I was about to pay for it to be done for me. I was reluctant to give out my work to an external person to avoid data misplacement. Thank you a million. by Adeduntan on May 20, 2023
- Thanks a lot. Best concise guide! by Stan on May 27, 2023
- Finally, with these instructions, I did it. Thanks by Bernice-kay on May 28, 2023
- Very helpful info! I'm grateful by Praise on May 31, 2023
- Thanks so much. I spent my time watching a YouTube but it did not work. Just two clicks and it's done. Thanks again by VANEN on Jun 06, 2023
- Amazing!! Thanks Jeff Beuck, this is very helpful. by Sine on Jun 07, 2023
- thank you so much by Lillian on Jun 11, 2023
- Starting a new format of paging after the preface was daunting. I tried for a long time to have it done until after got How to do pages differently in the previous section on Ask library. by Loding Joseph on Jun 12, 2023
- Thank you so much for this! It was easy to follow and exactly what I needed 😍 by Kate on Jun 13, 2023
- This is very good article. I followed the steps and succeeded 100% Thank you very much by Nakudo on Jun 18, 2023
- Just awesome writing. Its essential for all researches. by Khanom Popy on Jun 19, 2023
- Thank you very much! This was of such tremendous help while formatting my dissertation. by ts on Jun 26, 2023
- Thank you so much, you saved my life with this write-up... by Nosa on Jun 28, 2023
- very helpful thankyou so much by Mrs G on Jun 29, 2023
- Thank you so much for your online lessen. It is very easy to understand the way you presented. I used it at the time when I badly needed it. Nice and supportive material. by Eyob Getachew on Jul 02, 2023
- its working thank you very much. by aizak on Jul 04, 2023
- You, my man, are a lifesaver. Thank you so much for this. I needed this like yesterday and all other tutorials are just not working for me for some reason. Thank you and I hope you have a nice day or night wherever you are in the world. by Cw on Jul 11, 2023
- Thank you 😊, was a relief indeed. Perfect and comprehensive instructions. by Nana Akomea on Jul 29, 2023
- This was really helpful. Thank you so much by Divine Yancho on Aug 02, 2023
- This saves me from materials I've searched for decates. I really appreciate. by Mohammed Amin on Aug 12, 2023
- Thank you so much for the valuable tutorial! by Basil on Aug 16, 2023
Related Topics
- Mardigian Library
- Subject Guides
Formatting Your Thesis or Dissertation with Microsoft Word
- Page Numbers
- Introduction
- Copyright Page
- Dedication, Acknowledgements, & Preface
- Headings and Subheadings
- Citations and Bibliography
- Tables and Figures
- Rotated (Landscape) Pages
- Table of Contents
- Lists of Tables and Figures
- List of Abbreviations
- Some Things to Watch For
- PDF with Embedded Fonts
Page numbers
Microsoft Word will keep track of page numbers for you, so you can add and delete pages, move tables and figures from one page to another, etc. Then, you can create a Table of Contents, a List of Tables, a List of Figures, etc. and Word will automatically create those lists (or, you can update the lists by clicking an update button). This will save you much time compared to manually adding page numbers to your pages and manually creating your Table of Contents, List of Tables, etc. However, in order for Word to do all this automatically, page numbering needs to be set up appropriately. The video tutorial below demonstrates how to set up the page numbering.
- << Previous: Citations and Bibliography
- Next: Tables and Figures >>
- Last Updated: Mar 21, 2024 2:35 PM
- URL: https://guides.umd.umich.edu/Word_for_Theses
Call us at 313-593-5559
Chat with us
Text us: 313-486-5399
Email us your question
- 4901 Evergreen Road Dearborn, MI 48128, USA
- Phone: 313-593-5000
- Maps & Directions
- M+Google Mail
- Emergency Information
- UM-Dearborn Connect
- Wolverine Access
- PRO Courses Guides New Tech Help Pro Expert Videos About wikiHow Pro Upgrade Sign In
- EDIT Edit this Article
- EXPLORE Tech Help Pro About Us Random Article Quizzes Request a New Article Community Dashboard This Or That Game Popular Categories Arts and Entertainment Artwork Books Movies Computers and Electronics Computers Phone Skills Technology Hacks Health Men's Health Mental Health Women's Health Relationships Dating Love Relationship Issues Hobbies and Crafts Crafts Drawing Games Education & Communication Communication Skills Personal Development Studying Personal Care and Style Fashion Hair Care Personal Hygiene Youth Personal Care School Stuff Dating All Categories Arts and Entertainment Finance and Business Home and Garden Relationship Quizzes Cars & Other Vehicles Food and Entertaining Personal Care and Style Sports and Fitness Computers and Electronics Health Pets and Animals Travel Education & Communication Hobbies and Crafts Philosophy and Religion Work World Family Life Holidays and Traditions Relationships Youth
- Browse Articles
- Learn Something New
- Quizzes Hot
- This Or That Game New
- Train Your Brain
- Explore More
- Support wikiHow
- About wikiHow
- Log in / Sign up
- Computers and Electronics
- Microsoft Office
- Microsoft Word
Easily Add Page Numbers to a Word Document on Any Platform
Easily add page numbers to the header or footer in your Microsoft Word document
Last Updated: April 8, 2024 Fact Checked
Inserting (PC & Mac)
Formatting (pc & mac), inserting (mobile), expert q&a.
This article was co-authored by wikiHow staff writer, Kyle Smith . Kyle Smith is a wikiHow Technology Writer, learning and sharing information about the latest technology. He has presented his research at multiple engineering conferences and is the writer and editor of hundreds of online electronics repair guides. Kyle received a BS in Industrial Engineering from Cal Poly, San Luis Obispo. This article has been fact-checked, ensuring the accuracy of any cited facts and confirming the authority of its sources. This article has been viewed 767,633 times. Learn more...
Adding page numbers in Microsoft Word is easy! Whether you’re writing a 10-page essay or a thesis paper, there are a variety of ways to customize the page numbers. Use the Insert tab to quickly add page numbers. From there, you can change the formatting and numbering options. This wikiHow guide will show you how to add page numbers to your Microsoft Word document on Windows and macOS, as well as in the Word mobile app on your Android, iPhone, or iPad.
Things You Should Know
- On desktop or mobile, go to the Insert tab, then select "Page Number" to add page numbers.
- Double-click the page number to make changes to the font, color, or style.
- Double-click the header or footer, then go to Page Number > Format Page Numbers for additional options.

- Don’t forget to save your work as you go !

- In the Insert menu, Page Number is near the center.
- In the Header & Footer design tab, Page Number is on the left.

- You can also toggle the option to include the page count in the page numbering (e.g. 1 of 3).
- Selecting a page number position will open the “Header & Footer” tab.

- You could even cross out the page numbers if that’s your style.

- Double-click the header or footer to open the Header & Footer design tab.
- Check the “Different First Page” checkbox.
- Click Page Number then Format Page Numbers .
- Select “Start at” and change it to 0.

- Place your cursor at the beginning of the page you want to restart the numbering on.
- Go to the Layout tab, then click Breaks .
- Select Next Page in the Breaks options menu.
- Double-click the header or footer in the second section. This will open the Header & Footer design tab.
- Select the radio button labeled "Start At," then select "1" to restart the page count at 1.

- The number format. You can change this to Roman numerals, letters, or another style.
- The chapter number.
- The starting number.

- When working in Online mode, any changes made in the app will appear on your desktop version of Word.

You Might Also Like

- If you plan on creating a complex header or footer (like your name, or a title), try and add the page numbers first. They will be much easier to work with. Thanks Helpful 0 Not Helpful 1
- For more Microsoft Word guides, check out how to use document templates and how to merge documents . Thanks Helpful 0 Not Helpful 0

- ↑ https://support.microsoft.com/en-us/office/insert-page-numbers-9f366518-0500-4b45-903d-987d3827c007
About This Article

1. Click Insert . 2. Click Page Number . 3. Select a position. 4. Choose a style. Did this summary help you? Yes No
- Send fan mail to authors
Is this article up to date?

Featured Articles

Trending Articles

Watch Articles

- Terms of Use
- Privacy Policy
- Do Not Sell or Share My Info
- Not Selling Info
Keep up with the latest tech with wikiHow's free Tech Help Newsletter
Formatting Your Dissertation (or Thesis): Insert page numbers
- Table of Contents
- List of Figures and Tables
- Chapters and Sections
- References or Bibliography
- Font and Typography
- Margins and Page Layout
- Headings and Subheadings
- Pagination and Page Numbering
- Change page orientation
- Add a border to a page
Insert page numbers
- Change margins
- Microsoft Word Tips and Tricks
- Managing Images and Graphics
- Collaboration Tools and Version Control
- Templates and Style Guides
- Checking for Consistency and Coherence
- Grammar and Spelling
- Formatting Checks
- Seeking Feedback and Peer Review
- Professional Editing Services
Select Insert > Page Number , and then choose the location and style you want.
If you don't want a page number to appear on the first page, select Different First Page .
If you want numbering to start with 1 on the second page, go to Page Number > Format Page Numbers , and set Start at to 0 .
When you're done, select Close Header and Footer or press Esc.
- Video: watch how to insert page numbers
page numbering in Word
Word for Microsoft 365 Word for Microsoft 365 for Mac Word 2021 Word 2021 for Mac Word 2019 Word 2019 for Mac Word 2016 Word 2016 for Mac Word 2013 Word 2010
A header or footer can contain text, information about the document, or even images. However, the most common elements in a header or footer are page numbers. Page numbers can be continuous though a document, all but the first page, or start over in each section.
Note: The best way to work with page numbers is in Word on a laptop or desktop computer, rather than in a web browser or mobile app.

Additional Information
On the Insert tab, click the Page Number icon, and then click Page Number .
Select a location, and then pick an alignment style. Word automatically numbers every page, except designated title pages.
To change the numbering style, select Format and then choose the formatting you want to use.
Select OK twice to close both dialog boxes.
For more info on page numbers, see Page numbering in Word .
- << Previous: Add a border to a page
- Next: Change margins >>
- Last Updated: Jun 6, 2023 11:54 AM
- URL: https://libguides.unisa.ac.za/c.php?g=1324044
Research Guides
Submit and publish your thesis.
- The Graduate Thesis: What is it?
- Thesis Defences
- Deadlines and Fees
Formatting in MS Word
- Formatting in LaTeX
- Making Thesis Accessible
- Thesis Embargo
- Review and Release
- Your Rights as an Author
- Re-using Third Party Materials
- Creative Commons Licenses for Theses
- Turning Thesis into an Article
- Turning Thesis into a Book
- Other Venues of Publication
Thesis style template for MS Word is available on the School of Graduate Studies website . You are not required to use the template but using it will make some of the formatting requirements easier to meet.
►► Thesis template for Microsoft Word (.docx)
For formatting instructions and requirements see the Formatting section of the SGS website .
MS Word formatting tips
Section breaks and page numbers.
One of the most common formatting items that causes difficulty is the page numbering, since the front section and the rest of the thesis use different characters and placement. The way to properly format these sections is to add Section Breaks in between the front matter and the Introduction or Chapter One and between each of the following chapters, including the Bibliography and Appendices sections.
Adding Section Breaks and Page Numbers in Word 2016
You will need to insert “Section Break – next page” in between all chapters and between the front matter and the first chapter as well as between the last chapter and the appendices and the references.
- Click on the place where the break should be inserted and then go to the Layout tab.
- Click on the arrow beside Breaks and choose Section Break Next Page from the list. This allows you to format sections individually of each other.
- Go to the first chapter after the front matter, click in the header and footer area and in the Header & Footer tools, ensure that “Different First Page” is selected and then ensure that the “Link to Previous” option is not selected. This way, when you format the front matter with Roman numerals in the bottom centre, it won’t carry the formatting into the next section.
- Use the Insert Page Numbers and Format Page numbers to insert the page numbers in the appropriate place with the appropriate formatting.
Using Document Styles
The template has Styles that can be used to format your entire thesis. To use a style, select the text to apply the style to, then choose the appropriate style from the Styles window.
If you don’t want to use the template (for example, if you don’t want to use the numbered headings, you can create your own styles. To do this, format the heading (or other element) the way you want, then click New Style in the style window. Insert a unique name for the style and click OK . You can then use that style for those elements going forward.
Table of Contents (TOC)
To automatically generate a TOC, apply the appropriate Styles to all headings. The template has styles created for this purpose. If you are not using the template, you can create your own heading styles to apply.
Auto-generate the TOC in Word 2016 on both Mac and Windows
- Go to the References tab, choose Table of Contents and select Custom Table of Contents . Click OK .
Using your own styles
- If you have created your own styles with custom names, go to the References tab, choose Table of Contents and select Custom Table of Contents , then click Options .
- Put numbers beside the styles you created that correspond with the level of heading they represent. Click OK , then OK again.
Manual formatting of TOC
To add right-aligned tabs with leaders:
- From the Home tab, open the Paragraph settings and click on the Tabs button.
- Enter the tab stop position, choose Right Tab and for Leader , choose the … option. Click Set (or the + sign on Mac), then click OK .
- Type the TOC entry, press tab, then insert the page number.
Miscellaneous tips
- Use page breaks instead of pressing Enter or Return
- Use paragraph first-line indent or tab consistently throughout doc (best to use Styles)
- Use consistent spacing around headers
- Use Shift + Return/Enter to keep headings that run over 2 lines in the same paragraph
- Ensure there are no Widow/Orphan headings or paragraphs
- When inserting longer quotes, use margins to indent rather than tabbing in and inserting a hard return after each line
- Always use tabs rather than spaces. Set tab stops so you aren’t using multiple tabs
Formatting issues and examples
When creating your own table of contents , be sure to format the space between the text and the numbers properly. Do not use multiple tabs or periods to separate them. This will result in a jagged right margin. You want to set a right-aligned tab with leaders in order to have the numbers properly aligned to the right margin. The auto-generate TOC feature does this automatically.

When starting content on a new page, do not use the return key until you get to the next page. If you add content to that section later on, it will move everything down the page, even on the following page. Instead, use the Insert Page Break feature.

When formatting indented quotes, do not use tabs to indent the lines , or put a return at the end of each line. The test in the paragraph won’t flow properly if you need to add more text or change the margins. Instead use the margin controls in the Ruler to indent the paragraph on each side.

- << Previous: Formatting
- Next: Formatting in LaTeX >>
- Last Updated: Sep 15, 2023 3:23 PM
- URL: https://guides.library.utoronto.ca/thesis
Library links
- Library Home
- Renew items and pay fines
- Library hours
- Engineering
- UT Mississauga Library
- UT Scarborough Library
- Information Commons
- All libraries
University of Toronto Libraries 130 St. George St.,Toronto, ON, M5S 1A5 [email protected] 416-978-8450 Map About web accessibility . Tell us about a web accessibility problem . About online privacy and data collection .
© University of Toronto . All rights reserved. Terms and conditions.
Connect with us

Formatting Theses & Dissertations using Word 2010: Numbering
- Footnotes and Endnotes
- Images, Charts, Other Objects
- Cross-References
- Applying a Style
- Modifying a Style
- Setting up a Heading 1 Example
- Setting Margins
- Creating and Using Templates
- Combining Chapters
- Finalizing Without Styles
- Adding Page Numbers
- Landscape Pages
- Automatic Table of Contents and Lists
- Commenting and Reviewing
- Quick Links
Page Contents
Learn about making subsections and appendices easier to number
- Customizing Your Numbers (different numbers in different places on the page on different pages)
Automatic Chapter and Subsection Numbering
Outline numbering in appendices, customizing your numbering, add different page numbers or number formats to different sections.
Let's say you want to use different page numbers or number formats and styles in different parts of your document. You could use page numbers such as i, ii, iii… for the introduction and table of contents and 1, 2, 3… for everything after. The trick is to divide the document into sections and to make sure those sections aren’t linked. Then, set the page numbering for each of those sections by following these steps.
Notes:
If you're using Word Online, you can add page breaks but not section breaks. If you have the Word desktop application, use the Open in Word command to open the document. When you’re done and you save the document, it will continue to be stored where you opened it in Word Online. If you don’t have Word, you can try or buy it in the latest version of Office now.
Click at the very beginning of the first page where you want to start, stop, or change page numbering.
Choose Layout (or Page Layout ) > Breaks > Next Page .

Tip: You might find it helpful to see section breaks and other formatting marks as you type. On the Home tab, in the Paragraph group, choose Show/Hide (¶) to turn on the display of formatting marks. Choose the button again to turn off the display.
On the page after the section break, double-click in the header (top of page) or footer (bottom of page) area where you want to display page numbers. This will open the Design tab under Header & Footer Tools .
Click Link to Previous to deselect the button and disconnect your header or footer from the header or footer in the previous section.

Note: If Link to Previous is dimmed, it means there is no section break between the page you're on and the previous page. Make sure you've successfully added a section break (see step 2) and that you've opened the header for the appropriate section.
In the Header & Footer group, click Page Number , pick a location, and then choose a style in the gallery.

Note: If your change only affects the first page of your section, make sure Different First Page is not selected. Double-click the header or footer area of the first page of the section, and look in the Options group on the Design tab.
To choose a format or to control the starting number, in the Header & Footer group, choose Page Number > Format Page Numbers to open the Page Number Format dialog box.

Do either or both of the following:
Click Number format to select the format for the numbering, such as a, b, c or i, ii, iii.
Under Page numbering , choose Start at and type a number that you want to start the section with.
Tips:
If you just want to change or delete the first page number of a section, double-click to open the header or footer on that page, and in the Options group on the Design tab, click Different First Page . Then delete or format the first page number as you like.
You also can change the appearance of the page numbers. On the Home tab, choose Font , and change, for example, the font style and family, and font size and color.
When you’re done, choose the Close Header and Footer , or double-click anywhere outside the header or footer area to close it.

Format Page Number in Word 2010 and 2007 .
To Format the page numbering for different sections, follow these steps.
- Click between two parts of your document that you want to number differently.
- on the Page Layout Tab , Click Breaks .
- Click Next Page , Even Page , or Odd Page , and then click OK .
- Click in the first section of your document.
- On the Insert Tab Click Header and then Click Ed it Header
- Click in the header or footer where you want the page number
- On the Header & Footer Tools tab Click Page Number
- Click The option that puts the page number where you would like
- On the Header & Footer Tolls tab Click Page Number
- Click Format Page numbers
- In the Number Format box, click the format that you want for the numbers in this section.
- Do one of the following:
- If you want the page numbering for the first page in this section to start at a particular number other than the first number in the format series, click Start at under Page numbering , and then enter the first number that you want to appear on the first page of the section.
- If you want the page numbering to continue from the previous section, click Continue from previous section.
- Click OK
- On the Header and Footer tools tab, click Next in the Navigation Group
- Repeat steps 1 through 3 and 9 through 11 to change the page numbering for another section
- On the Header and Footer tools tab, click Close
Important Note: Not everyone needs this type of numbering; if your discipline doesn’t require it, skip this section!
Word can automatically number sections (Chapter 1, 1.1, 1.2, etc.) of your document and include the chapter number in the captions (Figure 1.2, 2.2, etc.).
- Make sure each of your chapter titles are in the Heading 1 style, and then click on one of your chapter titles.
- Click OK when you are finished.
- If you typed in the text “Chapter #”, and now it is duplicating your efforts, delete the text you typed and leave the automatically generated chapter number.
- To follow the automatically generated chapter number with the title of your chapter on a new line, click just before the text of your title, hold down the Shift key on the keyboard, and then press the Enter key.
Note: If you have any problems with word automatically adding outline numbering to parts of your front matter, simply delete it. Your chapter numbers will reset to show the correct number of chapters.
Start Numbering on Page 2
How do i start page numbers on the second page of my word 2010 document.
Word 2010, by default, starts page numbers on the first page of a document. If the first page is a cover page, or a title page, then the second page of the document should be page 1.
- Insert page numbers by clicking on the Insert tab and choosing Page Number in the Header & Footer tab. Then select the position of the numbering.
- Because the new page numbers will be selected, the Design tab for Header & Footer Tools will appear. Under Options , select Different First Page . ( This will start page numbering page 2, but the second page will be labeled "2". This isn't what we wanted. There is an extra step to making this page say "1". )
- While the Design tab for Header & Footer is still up, select Page Number in the Header & Footer group. Then choose Format Page Number .
- The resulting window is shown to the right. Change the radial button at the bottom to Start at and type in 0 . Then click ok .
Follow the instructions at this link for roman numerals .
This was taken from the Just Tips webpage from the website for Mission Critical Training in Denver.
Customizing Your Numbers
If you want to change anything about the numbers – for example, you are using the 1.1, 1.2, etc. style but would like the word “Chapter” to display automatically in front of the Heading 1 number, you want to change Arabic numbers to Ordinal, or you want to change the spacing after the numbers, you can.
Click one of your headings, then go back to the Home Ribbon, and in the Paragraph Group click the Multilevel List icon (see screen shot above) and select Define New Multilevel List…. Click the More>> button, then select the relevant list level.
- You can use the Number style for this level: pulldown menu to choose from a various styles, as seen in the screenshot (below the Enter formatting for number: box).
- In the screenshot, with the Level on the left set at 1, we added the word “Chapter”. Moving to the second level, you can change the period in between the level and sublevel to a dash or anything you want in the Number format box.
You may also restart number for captions in your appendices or other separate areas of your dissertation. You will need to change your outline numbering settings before inserting your captions.
We are going to do a variant of the steps above, but instead of defining new levels for your list, you will be editing the first level from this point forward. This should work, but sometimes Word acts up, and even though you’ve followed all the steps, it doesn’t take. If that happens, set up an appointment with the KNC and we’ll help you out.
- Apply the Heading 1 style to the title of your Appendix.
- On the Home Ribbon, go to the Paragraph Group , click the Multilevel List icon and select Define New Multilevel List…. Make sure the whole dialog box is showing by clicking on the More>> button (if it says <<Less instead, you are all set).
- Under Enter formatting for new number :, replace “Chapter” with “Appendix.”
- Choose the appropriate style, (such as A,B,C,… ) from the Number style for this level: pulldown menu.
- Set the correct letter or number in the Start at: pulldown.
- In the Apply changes to: pulldown, choose This point forward .
- Click OK to close the dialog box.
- << Previous: Setting Margins
- Next: Creating and Using Templates >>
- Last Updated: Dec 16, 2021 3:21 PM
- URL: https://research.auctr.edu/dissertation
How-To Geek
How to work with page numbers in microsoft word.
Microsoft Word offers an easy way to add different styles of page numbers to your document.
Quick Links
How to insert page numbers, how to make page numbering not appear on the first page of a document or section, how to number odd & even pages differently, how to add different numbers and formats to different sections, controlling page numbers using fields, fixing broken page numbers.
Microsoft Word offers an easy way to add different styles of page numbers to your document. If you've got a simple document, it works well enough. But if you've worked with Word for a while and use it to create more complex documents, you know page numbering can get a little flaky. So let's take a closer look.
To add page numbers to your Word document, switch over to the "Insert" tab on the Ribbon and then click the "Page Number" button in the "Header & Footer" section.
A drop-down menu shows several different options for where you'd like the page numbers to appear---top of the page, bottom of the page, and so on. The last couple of options let you format your page numbers more precisely (something we'll look at a bit later in this article) or remove page numbers from your document.
Hover over one of the first four options and a page number gallery appears. Each option in the gallery gives you a general idea of how the page numbers will look on your page.
Once you find an option you like, go ahead and click it to have Word automatically number all the pages of your document in that style. In this example, we've selected the "Accent Bar" style in the "Page X" format.
Related: How to Insert Page X of Y into a Header or Footer in Word
If you inserted page numbers at the top or bottom of the page, the header or footer area of your document automatically opens up, and you can make any addition you like around your new page numbers. When you're ready to get back to your document, you can tap the "Close Header & Footer" button on the Ribbon or double-click anywhere in your document outside the header or footer area.
That's the simple version of adding page numbers, and it works well enough if you've got a simple document---one where you want all the pages numbered, and you want them numbered using the same convention.
For some documents, though, you'll want to get a little fancier. For example, what if you don't want the page number to appear on the first page of the document (or on the first page of each section)? Or what if you want the page number placement to be different on odd and even pages, the way it is in a book? Or what if you have different sections that you want to be numbered differently---like an introduction or table of contents where you want Roman numerals instead of the Arabic numerals used in the rest of your document?
Well, Word has a way to do all of that.
When your first page is a title page, you might want to use a different footer or header for it than you use in the rest of your document and you might not want the page number to show up on that page. When you open your header or footer section by double-clicking somewhere in those areas, Word opens a new "Design" tab on the Ribbon in a section named "Header & Footer Tools."
On that tab, you'll find a "Different First Page" option.
The critical thing to know here is that this option applies to the section of the document where your insertion point is currently placed. If you only have one section in your document, selecting the "Different First Page" option makes the current header and footer disappear from the first page of your document. You can then type in different information for your header or footer on the first page if you want.
If you have multiple sections in your document, you can change the header and footer for the first page of each section. Say you were writing a book with different chapters and you had each chapter set up in its own section. If you didn't want the regular header and footer (and page numbers) showing up on the first page of each section, you can just place your insertion point somewhere in that section and then enable the "Different First Page" option.
You can also set up page numbering so that the position of the page numbers is different on odd and even pages. You'll find that most books take this approach so that the page number appears toward the left side on the left (even) pages and toward the right side on the right (odd) pages. This prevents the page numbers from being obscured by the book's binding and makes them easier to see as you flip through pages.
Word also has an option for that. On that same "Design" tab in the "Header & Footer Tools" section of the Ribbon, just click the "Different Odd & Even Pages" option.
Word automatically formats the page numbers to appear the way they would in a book, and you can then make any manual adjustments you want.
Most documents use Arabic numerals (1, 2, 3, etc.) in the main body of the document and some use Roman numerals (i, ii, iii, etc.) for different sections like the table of contents, introduction, and glossary. You can set up your document this way in Word, too.
The first thing you'll need to do is create different sections in your document for these different parts of your document. So, for example, if you wanted your table of contents and introduction to be numbered differently than the main body of your document, you'd need to create a different section up front to hold those parts.
To do this, place your insertion point at the very beginning of your document (if you haven't already created that preliminary content) or place it right before the first page of your main content (if you have already created the preliminary content).
Switch over to the "Layout" tab on the Ribbon and click the "Breaks" button.
In the drop-down menu, click the "Next Page" option. As the description says, this creates a section break and starts the new section on the next page.
Now that you've created the separate section, you can change the format of the page numbers there. The first thing you'll want to do is break the link between your new preliminary section and the next section where the main body of your document starts. To do that, open up the header or footer area (wherever you have your page numbers) in the main section of your document. On the "Design" tab in the "Header & Footer Tools" section of the Ribbon, click the "Link to Previous" option to break the link to the previous section's header and footer.
Now that you've broken the link, you can fix the page numbering the way you want it. This takes a few steps.
Start by opening up the header and footer area of any page in that preliminary section. You'll see that the page numbering persists from before you created the new section break.
Right-click the page number and choose the "Format Page Numbers" command from the context menu.
In the Page Number Format window, select the type of numbers you want to use for the section from the "Number Format" drop-down menu. Here, we've gone with standard lowercase Roman numerals. Click "OK" when you're done.
And you can see that our page numbering in that section has changed to Roman numerals.
There's one more step you'll need to take, though. Scroll down to the first page in your next section (the one with the main body of your document). You'll see that the page numbering likely doesn't start off at page one. That's because it maintained the same numbering it had before you created that additional section.
It's an easy fix, though. Right-click the page number and choose the "Format Page Numbers" command from the context menu.
In the Page Number Format window, select the "Start At" option and then set the box at the right to "1" to start the section off on page one.
That's all there is to it. Now you should have two sections with different numbers and formats.
Word numbers all your pages, but those numbers remain hidden unless you tell Word to display them. By inserting a field code anywhere on the page, you can tell Word to reveal the page number. This option gives you fine control over page numbers. It also lets you put numbers anywhere you need and not just in the headers, footers, and margins. For example, you could put them in a text box if you wanted to.
Place your insertion point where you'd like to insert page numbers and then press Ctrl+F9 to insert a pair field brackets, which look like this: { }. Then, type "PAGE" inside the brackets like this:
You can also use a few switches along with the PAGE command that gives you some control over the style in which your numbers appear. Use one of the codes below to give your numbers the look you need.
{ PAGE \* Arabic }
{ PAGE \* alphabetic }
{ PAGE \* ALPHABETIC }
{ PAGE \* roman }
{ PAGE \* ROMAN }
To finish, right-click anywhere between the brackets and choose the "Update Field" command from the context menu.
Here's an example of a page number we've inserted into a text box at the bottom right of our page.
If your page numbers are broken in a document---maybe they appear non-sequentially or restart seemingly at random---it's almost always because of problems with sections.
For Word, a document isn't really a thing when it comes to formatting. Word breaks things down into sections, paragraphs, and characters---and that's it.
To fix broken page numbering, start by identifying the sections in your document. The easiest way to do this is to switch over to the "View" menu on the Ribbon and then click the "Draft" button to enter draft view.
In draft view, Word shows you exactly where section breaks occur and what kinds of breaks they are.
When you've identified the location of your section breaks, switch back over to the Print Layout view (so you can see headers and footers easier). This is where you'll need to start doing some detective work.
Make sure that that the sections where you want continuous page numbering have their headers and footers linked together and that sections where you don't want continuous numbering have that link broken. You can also use the methods we've covered in this article to make sure the page numbering of sections start at the right number

Formatting your Thesis and Dissertation:Tools,Tips and Troubleshooting
- I am a new Graduate Student at Florida Tech!
- Thesis and Dissertation Templates
- Learn About Zotero
- Formatting Landscape Pages
- Line Spacing
- Page Numbers
- Page Break and Section Breaks
- Table of Contents or Figures
- Figures Turning Black
- Margin issues with Tables
- Page numbers not appearing
- PDF to PDF/A
- Section Breaks
- Landscape Page Numbers
- Troubleshoot LaTeX formatting issues
- Copyright and Creative Commons Licenses Primer
- Do I need to embargo my thesis or dissertation?
- I'm ready to submit my electronic copy - now what do I do?
- What is the process for obtaining print copies of my thesis or dissertation?
Formatting Page Numbers
Page Numbers (also Header & Footer)
1. On the Insert tab, in the Header & Footer group, click Header, Footer or Page Number.
2. Click the design that you want from the options.
3. The header or footer is inserted on every page of the document. You will also see the body text is now lighter.
4. You can now add/modify the text, format the text or change the position.
5. You will also notice the Ribbon bar has popped up header and footer, tools Design tab
Click on the header and footer tools Design tab to activate working in headers and footers. You also have options that can be applied to the Header & Footer bars.

Inserting page number in footers
In the header and footer design tab, select page number.

A. click on Bottom of page and select Plain number 2 (centered page number). As mentioned before, depending on the instructions.
B. This will take you back into the Design menu
C. You will notice in this menu whether Link to Previous is highlighted. Click on this to turn it off. This controls text and page numbers following through from section to section.

D. Click on Page number again and this time select Format page number.

E. Select the type of numbers you need. Select small Roman numerals (I, ii, iii etc.) for all pages from Contents to Chapter 1. Start the Arabic numerals (1, 2, 3 etc) from the first page of chapter 1. The title page has no page number. (In double-sided printing, you will need to turn off same as previous on the first odd and the first even page of each new section).
F. If you want page numbers to continue from the previous section/chapter, check ‘ continue from previous section’

G. If you want to start fresh numbering in the section or chapter, select ‘ start at’ and enter the starting number (usually 1).

Sections in the ‘Preliminaries’ file will have small Roman numerals for page numbering, while the rest of the document will have Arabic numerals. This is one of the reasons why it is important to keep the ‘same as previous’ option turned off. If it is on, all numbers or text in the header or footer will be the same throughout the entire document.
When working in headers and footers, you must have the cursor blinking in the header or footer space on the page, otherwise nothing will happen. When you click into the header or footer space, the Design menu will appear, which includes the header and footer sub-menu.
The page numbers also have to fit within the 1 - 1.2-inch margins of the page. In the Header and Footer design tab you will see options to adjust the margins of the header and footer. Adjust Footer from Bottom to your required spacing.

- << Previous: Line Spacing
- Next: Page Break and Section Breaks >>
- Last Updated: Apr 29, 2024 1:32 PM
- URL: https://libguides.lib.fit.edu/formattingyourthesisanddissertationtoolstipstroubleshooting
- University of Michigan Library
- Research Guides
Microsoft Word for Dissertations
- Introduction, Template, & Resources
- Formatting for All Readers
- Applying a Style
- Modifying a Style
- Setting up a Heading 1 Example
- Images, Charts, Other Objects
- Footnotes, Endnotes, & Citations
- Cross-References
- Appendix Figures & Tables
- Table of Contents
- List of Figures/Tables
- Chapter and Section Numbering
- Page Numbers
- Landscape Pages
- Combining Chapter Files
- Commenting and Reviewing
- The Two-inch Top Margin
- Troubleshooting
- Finalizing Without Styles
- Preparing Your Final Document
Help with Microsoft Word
Members of the University of Michigan community can get dissertation & thesis formatting assistance from the experts at ScholarSpace:
Please visit this link to make an appointment , or send an email to [email protected].
We're here to solve any formatting problems you've run into, and can give you guidance about captioning figures, solving numbering issues, creating a List of Tables/Figures/Appendices, and more.
Contact Information

Introduction to Word for Dissertations
Formatting your dissertation (or thesis) will likely take more time than you expect. But using the special features described in this Guide will save you a great deal of work , particularly if you use our template (available in the box below). The earlier you begin to use these tools, the more time you'll save and the less stress you'll have as your submission deadline approaches. Students at the University of Michigan are also encouraged to contact the experts at the Library's ScholarSpace anytime you run into a problem or have a question.
To meet Rackham’s Dissertation Formatting Guidelines you will need to modify the standard settings that Microsoft Word uses. This guide will show you how to use the tools to make the necessary modifications. While we do follow the requirements from Rackham’s formatting guidelines to demonstrate the tools, in the end, you are responsible for verifying that your document meets the requirements that Rackham sets.
To save yourself time and effort , please consider using our Dissertation Template (link available in the box below). Many of the settings discussed in this Guide are already included in that document.
Please note that, as a University of Michigan student, you have free access to the Microsoft Office suite of tools -- including Microsoft Word. Visit this link to learn more and to download Office to your own computer.
Dissertation Template and other Resources
- ScholarSpace Template for Dissertations This Microsoft Word document comes with many of the Rackham formatting guidelines built in, and can be used for dissertations and theses. Please note that this template doesn't follow the formatting direction of any particular Style Guide. It is your responsibility to make sure you are following the Style Guide predominant in your field, and to make any relevant formatting changes to heading styles, numbering, captions, etc... How to make many of those changes is described throughout this Guide.
- Rackham Dissertation Handbook Rackham's Dissertation Guidelines and Handbook
- Dissertation Formatting Checklist Rackham's list of formatting issues to watch out for in your dissertation.
- Using Microsoft Word for Large Documents (non-dissertation specific) Handout (This document was written for an older -- much older -- version of Word, but nearly all of the information is still accurate and useful)
- Guide to Copyright for Dissertations
A word about LaTeX
LaTeX is a writing and markup language often used in science and engineering documents because it allows for great control in creating complex equations and formulas. ScholarSpace does not maintain a template for dissertations created with LaTeX, and we can only provide very limited support for it. That said, there is a community of U-M folks who actively maintain this LaTeX template to keep it in line with Rackham's guidelines .
Here are some other very useful resources:
- Video recording of a UM Library Workshop on Dissertation Formatting with LaTeX
- Documentation for LaTeX and Overleaf
- Bibiliography Management with LaTeX
- How to Write a Thesis in LaTeX
- A huge collection of LaTeX resources
Can I use Google Docs for my dissertation?
No. Google Docs can get you pretty far down the road to something that looks like what Rackham requires, however, it's going to take a lot more work to get that far, and as you approach the finish line there will be obstacles that Google Docs just won't be able to get around. The issue is that Google Docs was not designed for complicated documents like a thesis or dissertation. To get it to do many of the special things that Rackham requires, you'll have to do a lot of work that Word will just do for you . A few examples:
- Rackham requires 1" margin on all pages, but a 2" margin at the top of each new section. You'll have to manually adjust every relevant page yourself in Docs to get this, but Word will just do it automatically.
- Docs gives you three choices for how your Table of Contents will look, none of which are suitable for Rackham. While you can adjust the format, many aspects of it (such as spacing) will revert to the original every time you update it. With Word, you're in charge of what your ToC looks like.
- In Docs, you'll have to manually type in your figure numbers ("Figure 3.6") and change them every time you add or move them. But Word will manage numbering and caption placement for you, it will renumber figures or tables as you add or move them, and it will create your List of Figures/Tables automatically – correct page numbers and all.
- With Word's figure/table numbering, you can also insert cross-references so when you refer to "(see Figure 4.2)" but then you add some new figures before that, not only will Figure 4.2 renumber itself automatically, but anywhere you've referred to it will be updated, too. No more anxiety about whether you've updated everything accurately.
- Page numbers: Rackham wants the first two pages to have no page numbers, the rest of the frontmatter to have small roman numerals, and the body of the document to have arabic numerals. Docs just plain can't do that.
If you're concerned about the learning curve of using Word, please know that this Guide goes over how to do everything, AND the Word template found here has nearly everything already set up for you. We also regularly offer a workshop that serves as an introduction to the most useful features, and you can set up a meeting with a ScholarSpace expert anytime you run into something that you can't figure out.
Writing Assistance
This Guide is all about how to properly format your dissertation -- how to make it look the way Rackham wants it to look. But what if you need help with the actual composition of your content? Our friends at the Sweetland Writing Center offer such assistance, through their Writing Workshop program. From their website:
These are just a few quick but especially important tips to help you get started. See our more expansive Tips & Troubleshooting section for suggestions that are a little more complex.
- Save early , save often, and create backup versions as you go along. Consider setting up Microsoft OneDrive (you have free access with your umich login credentials). With this, you can turn on "Autosave" in Word to automatically save your document at regular intervals.

- Use our template (available above), it will save you lots of time. Nearly all of the difficult formatting stuff we discuss in this Guide is already built into the template. Consider doing all of your writing in it -- even if you're working in separate files for each chapter, you can use a copy of the template for each one of those chapters.
- Set the margins including the two-inch margin for chapters titles ( Setting Margins ) .
- Define styles for Headings 1-3, Normal, Captions, and Quotes – these are most common; you may need others ( Working with Styles ).
- If headings need to be numbered (for example, 1.1, 1.2, 2.1, etc.), define a multi-level list ( Automatic Numbering ).
- If captions need to include the chapter number, define a multi-level list ( Automatic Numbering ).
- Share your file(s) with your advisors using Track Changes ( Commenting and Reviewing ) .
- If you use EndNote to manage your citations and create your bibliography, use only one EndNote library for your entire dissertation (see our EndNote Basics guide).
- Did we mention that you really ought to try out our template (available above)?
Library Subject Guides
4. writing up your research: thesis formatting (ms word).
- Books on Thesis Writing
- Thesis Formatting (MS Word)
- Referencing
Haere mai, tauti mai—welcome! These instructions are designed to be used with recent versions of MS Word. Please note there is no template or specific formatting guidelines for a thesis at UC. Please talk to your supervisor and take a look at theses in the UC Research Repository to see how they are usually formatted.
- Where to start
- Show/Hide Formatting
- Heading Styles
- Navigation Pane
- Table of Contents
- Numbered Headings
- List of Figures/Tables
- Page/Section Breaks, Page Numbering & Orientation
Word Thesis Formatting workshops run throughout the year.
Some useful documents.
- Word Formatting Instructions PDF This PDF contains the same instructions that are available on this page.
- Sample Thesis Document with No Formatting This sample thesis file can be used to practise formatting. It is not a template for how to format a thesis. UC does not provide any guidelines on formatting a thesis.
- APA 7th Edition Formatting Example This document is formatted according to APA 7th Edition formatting guidelines. It could be used as a template or as an example to follow. It contains some additional instructions for certain APA formatting in Word.
For more APA formatting advice see the APA Style Blog's excellent Style and Grammar Guidelines .
Finding Examples
Look at examples and ask your supervisor.
The best guide on how to format your thesis is a combination of:
- Looking at previous theses in your discipline. Search the UC Research Repository for your subject or department, and browse by issue date to get the most recent.
- Asking your supervisor for recommendations on specific formatting and details.
General Recommendations
The following is an example only of preliminaries to the thesis that could be included.
- Acknowledgements
- List of Figures
- List of Tables
- Abbreviations
- Toggle show Home ->Show/Hide formatting

Using styles for headings allows you to create an automatic table of contents.
- Select major headings one at a time and choose Home ->Styles ‘Heading 1’
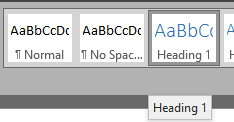
- Select subheadings and apply Home ->Styles ‘heading 2’ and ‘heading 3’
- Modify a style by right clicking on it and choosing Modify in the styles pane at the top of the screen.
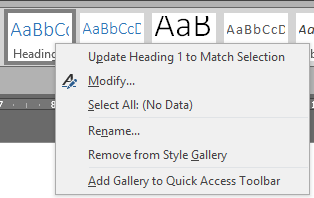
The Navigation Pain is useful for seeing the outline of your document as well as providing links to quickly go to any section of the document.
- View->check Navigation Pane

In order to create an automatic table of contents heading styles must be used.
- References -> Table of Contents -> Custom Table of Contents (no heading in table)

- Right click table of contents to ‘update field’ and choose ‘update entire table’

- Home->Multilevel list-> choose style with a number level for each heading level

- To change the heading level 1 number to say ‘Chapter 1’ right click on heading level 1 in the styles area Heading 1->Modify .

- In the modify screen click Format->Numbering.

- Then click ‘ Define New Number Format’.

- Then add the word ‘Chapter’ and a space before the ‘1’.

To create automatic lists of figures or tables you first have to give a caption to all your figures and tables.
- Right click figure or table and select Insert Caption

- Choose Label type eg. Figure, Table etc
- Choose position above or below
- Give the table or figure a title in the top box
- Go to the headings for List of Figures and List of tables and then click References->Insert Table of Figures -> select caption label type (Figure or Table)

- On the following menu select caption label type (Figure or Table) and click OK

This can be used to have different page numbering styles of different sections of your document or to have certain pages landscape to display a large table or graph.
- Insert a section break (next page) at the end of the title page ( Layout -> Breaks -> Next Page )

- Insert a section break at chapter 1 ( Layout -> Breaks -> Next Page )
- Insert page breaks for all other ‘heading 1’ headings ( Layout -> Breaks -> Page )
Adding Page Numbers
- Insert -> Page Number and choose a position on the page

- Double click on title page header or footer (top or bottom of the page) and tick ‘ Different First Page’ in the Design ribbon that appears

- Click in second page header or footer, right click on the page number and select ‘ format page numbers ’

- Select Roman numerals eg. ‘i, ii, iii, iv’ etc
- Select start at ‘i’ (start at ‘1’)

- Scroll to chapter 1 and change number style for this section back to ordinary numbers and start at 1
Change Page Orientation
- Insert a section break before and after the pages you want to change to landscape orientation (See instructions above for inserting a section break)
- Layout -> Orientation -> Landscape
NOTE: A section break is usually only needed if page orientation or separate page numbers are required.
- << Previous: Books on Thesis Writing
- Next: Referencing >>
- Last Updated: Feb 8, 2024 12:29 PM
- URL: https://canterbury.libguides.com/writingup

Start page numbering later in your document
Remove the page number from the first page.
Go to Insert > Header or Footer > Edit Header or Edit Footer .
Select Different First Page .
Note: Different first page can be applied to the first page of any section in your document, not just the very first page.
In the header or footer area, you should see a label on the first page that says First Page Header . Select the page number and press Delete.
Select Close Header and Footer or press Esc to exit.
Tip: If you want your second page to start at 1 rather than 2, go to Insert > Page Number > Format Page Numbers , and set Start at under Page Numbering to 0, rather than 1.
Start page numbering on Page 3 - double-sided printing
If the first page of your document is a cover page, the second page is a table of contents, and you want the third page to show “Page 1”, see Start page numbering on Page 3 - double-sided printing .
Choose the scenario that most closely matches what you want to do:
You don't want a page number to appear on your title page, but you want the second page to show "Page 2."

In the header or footer area, you should see a label on the first page that says First Page Header . Select the page number to highlight it and press Delete.
Go to Insert > Header & Footer .
Select Options on the right side, and then select Different First Page .

Select Options again, and then select Remove Page Numbers .
To see your page numbers and confirm deletion of the number from the first page, go to View > Reading View .
If all page numbers are deleted, go to Insert > Header & Footer and select Other Pages on the left side. Go to Insert > Page Number and choose a number placement.

For more info on page numbers, see Page numbering in Word .
Pre-numbered blank document templates with no page number on the first page:
Header page numbers
Designed for single-sided print or viewed online
Designed for double-sided print
Footer page numbers

Need more help?
Want more options.
Explore subscription benefits, browse training courses, learn how to secure your device, and more.

Microsoft 365 subscription benefits

Microsoft 365 training

Microsoft security

Accessibility center
Communities help you ask and answer questions, give feedback, and hear from experts with rich knowledge.

Ask the Microsoft Community

Microsoft Tech Community

Windows Insiders
Microsoft 365 Insiders
Was this information helpful?
Thank you for your feedback.
Free All-in-One Office Suite with PDF Editor
Edit Word, Excel, and PPT for FREE.
Read, edit, and convert PDFs with the powerful PDF toolkit.
Microsoft-like interface, easy to use.
Windows • MacOS • Linux • iOS • Android

Select areas that need to improve
- Didn't match my interface
- Too technical or incomprehensible
- Incorrect operation instructions
- Incomplete instructions on this function
Fields marked * are required please
Please leave your suggestions below
- Quick Tutorials
- Practical Skills
How to Delete a Page in Word for Your Thesis/Dissertation? [For Students]
Writing today involves more than just putting words on a document; it requires management across various digital intricacies that can suddenly throw you off course. As a writer who spends hours working with document processors, I've learned how to solve those unexpected digital problems, like unwanted blank pages that appear without warning.
If you're a student dealing with those pesky blank pages just when you're about to submit an important assignment or thesis, it can be incredibly frustrating. In this article, I'll demonstrate to you how to get rid of those unwanted pages and keep your work neat and presentable.
Common Problems About Deleting a Page in Word
Blank pages can be a real headache. They sometimes appear out of nowhere, and other times, trying to delete them messes up your formatting. These are among the most common issues when it comes to deleting pages in Word, enough to make you want to tear your hair out.
1.Deleting a Blank Page Caused by a Table
If you're working on a thesis dissertation, you're likely to include tables to present and organize data. However, when using Microsoft Word, you might find an extra page appearing unexpectedly, and your table could be the reason behind it. This occurs because tables in Word end with a paragraph mark. If the table is at the bottom of a page and there's no room for the paragraph mark, Word automatically adds a new page. This can be frustrating when you're aiming for a polished, professional document. The good news is that you can resolve this issue with a few simple steps to keep your thesis looking its best.
2.Deleting Blank Pages in the Middle of a Document
Stray paragraph marks, page breaks, and section breaks are just a few reasons why extra pages appear in a document. This can be especially problematic when these unwanted pages appear in the middle of a long document, such as a thesis or a report. Deleting these extra pages can eventually be a massive pain in the back, especially when you need to maintain a consistent layout throughout the document.
How to Delete an Extra Page Caused by a Table
A simple backspace is clearly not going to help you as you try to remove the annoying extra page. But believe it or not these methods and steps on how to remove and delete blank page in Word, is actually pretty simple:
Reduce Paragraph Mark Font Size to Remove Blank Page After Table
A somewhat simple method to remove a blank page in Word caused by a table is by altering the font size, so let's explore this method:
Step 1 : First, open the document in Microsoft Word where the extra page was added due to a table.
Step 2 : Now, let's activate the paragraph marks by going to the “Home” tab and then clicking on the “Paragraph Marks” icon to show paragraph marks in your document.
Step 3 : You will see a single paragraph mark on the blank page, select it using your mouse.
Step 4 : Now, in the “Home” tab, reduce the font size in the “Font” section. You might want to reduce the font to as little as '1' to remove the blank page.
This method is viable and can be considered as a quick fix to remove blank pages caused by tables in Word documents.
Apply the Hidden Text Attribute
If you're wondering how to remove a blank page in Word, one approach involves hiding the unwanted page rather than completely deleting it. This method doesn't actually remove the page but makes it invisible when printing or sharing the document. It's a quick workaround, but keep in mind that the blank page still exists in the document structure. Here's how you can hide the blank page:
Step 1 : First, let's open the document in Word, and then click on the "Paragraph Marks" icon in the "Home" tab.
Step 2 : Next, let's select the paragraph mark on the blank page using the cursor and then right-click to open the Context menu.
Step 3 : Now, click on the "Font" option to open the Font dialog.
Step 4 : In the Font Dialog, go to the "Effects" section and then tick the "Hidden" checkbox, and then press "OK" to exit.
Step 5 : After that, hide paragraph marks by clicking on the "Paragraph Mark" icon in the Home tab.
Step 6 : Now you will see that the blank page has been hidden in the document.
Step 7 : However, if the blank page is still not hidden, head over to the "File" menu in the top left.
Step 8 : Now click on the "Options" button in the left side panel.
Step 9 : In the Options dialog, go to the "Display" tab on the left panel and then make sure the "Hidden" checkbox is unchecked. Click "OK" to exit the Options dialog.
This method is effective because by default, hidden content cannot be viewed and is not printed as well. However, they do occupy some extra space in the hard drive or cloud.
Use Word, Excel, and PPT for FREE, No Ads.
Edit PDF files with the powerful PDF toolkit.
Microsoft-like interface. Easy to learn. 100% Compatibility.
Boost your productivity with WPS's abundant free Word, Excel, PPT, and CV templates.
How to Delete a Blank Page Amid Your Work in Word
Losing formatting while trying to remove a blank page from your document can be insanely frustrating, and it feels like hours of effort have gone to waste.To help you tackle this problem without losing all your hard work, I've outlined the steps below on how to delete a blank page in Word . These instructions are designed to be simple and easy that work across various platforms, including mobile, Windows, and Mac. For the demonstration, I'll use WPS Office, a free software that's fully compatible with Word documents and even allows you to convert files to PDF without affecting the format.
Using Navigation pane
Using the navigation pane provides a more comprehensive view of your entire document, allowing you to see all the pages at once. Let's take a look at how to delete pages in Word using the navigation pane.
Step 1 : In Microsoft Word, go to the View Tab and check the "Navigation Pane" checkbox in the Show section.
Step 2 : The navigation pane dialog box will appear on the left side of the screen. Click on the "Pages" tab to see an overview of the pages in your document.
Step 3 : Now simply scroll through the navigation pane, select the Blank pages, and press the "Backspace" or "Delete" key on your keyboard to delete the blank page from your document.
It was as simple as that. I can tell you were about to lose your cool because, as a writer, I've been there too, spending countless hours getting frustrated over something that seems trivial but isn't—like deleting a page. But once you know how, it's really simple. Knowing how to operate on a navigation pane is especially important when you're working on a thesis, where there are so many pages, and having a clear overview of your content is crucial.
The navigation pane can be a lifesaver, not just for deleting unwanted pages but also for quickly checking if everything is in order. It lets you easily skim through your document, ensuring you haven't missed anything or have extra pages hiding in plain sight.
How to Delete a Page with Text in Word
If you find an unwanted blank page in the middle of your thesis, you can remove it by following these methods to delete a page with text in Word:
1.Removing page break
Page breaks are simple shortcuts provided by Microsoft Word to insert a new page into the document. Without them, you'd need to press Enter repeatedly to begin a new page. However, these page breaks can sometimes go unnoticed and result in blank pages in a document, which may look undesirable in a thesis or dissertation. Here are the steps to remove the blank pages caused by page breaks in a document.
Step 1 : In Microsoft Word, go to the Home tab and click on the "Paragraph Marks" icon in the Paragraph section.
Step 2 : Once the paragraph marks are enabled, scroll down to the blank page in your document. You will see "Page Break" written in your document.
Step 3 : Either select it with your cursor or place the cursor right after the page break and press "Backspace" to remove the empty page from your document.
2.Use the Shortcut Ctrl+G and Navigation Pane
Now, let's suppose there are some empty pages in the document, and there are no page breaks or section breaks. Instead, a new page was created by pressing the "Enter" key on the keyboard several times. If there is such a blank page in your document, there is a simple method to quickly find the blank pages, select all the text on the blank page, and then delete it from the document. Let's look at the step-by-step process of deleting pages in Word:
Step 1 : So, let's open our thesis in Microsoft Word, and at the bottom left on the status bar, click on the "Page" option to open the navigation pane.
Step 2 : Now, in the Navigation pane, identify the blank pages in your thesis and click on them to select the page.
Step 3 : Next, press the shortcut key "CTRL + G" to open the "Go To" feature in Microsoft Word.
Step 4 : In the "Go to what" pane, click on "Page" and then in the "Enter page number" field, enter "\page".
Step 5 : Now, click on the "Go To" button, and you will notice the entire page has been selected in the background.
Step 6 : Simply "Close" the "Go To" dialog by pressing the "Esc" key on your keyboard, and then press the "Backspace" key to remove the blank page.
Students working on a thesis can breathe a sigh of relief with these methods. Removing blank pages in Word is simple and straightforward, making it easier to maintain a clean and organized document. Not only will these methods help you get rid of unwanted pages, but they'll also give you a better overview of your entire thesis, allowing you to focus on the content without worrying about formatting issues.
Use WPS AI to Polish Your Writing
WPS Office has done a great job by establishing a name for itself by offering a free, user-friendly alternative to expensive office software, providing a range of tools that are ideal for students across various fields. Now, with the introduction of WPS AI, it's making student life even easier by generating accurate content, providing writing assistance, and helping to refine English in a tone that suits your writing style. If you're a student looking to lighten your workload and improve the quality of your work, WPS AI could be a valuable addition to your toolkit. Start with WPS AI and see how AI can ease the burden of your academic tasks.
Converting Your Thesis/Dissertation to PDF Without Losing Format
It's definitely not rare to experience formatting issues when you convert your thesis to PDF at the last minute, especially when you're preparing for submission. This is a peak frustration moment, as you thought you were all set, but now your document looks like a messed up pile of jumbled words. To avoid this stress, I'll guide you on how to effectively convert to PDF using WPS PDF to ensure that your formatting stays intact. By following these simple steps, you'll get a perfect PDF version of your thesis without the hassle and worry.
Step 1 : First, open the Word document using WPS Office, then navigate to the Menu located at the top left corner of the page.
Step 2 : Within the menu, choose "Save as" and then opt for "Other formats" from the menu that appears.
Step 3 : Within the Save as options, switch the file type to "PDF" in the "File Type" field, and then click on "Save" to save your document as a PDF.
FAQs about Deleting a Page in Word
Q1. how do i delete an extra page in word for mac.
Here are the methods for deleting a page in Microsoft Word on macOS, based on whether the page is at the end or in the middle of the document:
1. Delete Blank Page at the End :
Step 1: Place your cursor at the start of the blank page.
Step 2: Press the Delete key.
Step 3: The entire page, including text and formatting, will be removed.
2. Delete a Specific Page in the Middle: To delete a specific page within your document, use the Navigation Pane :
Step 1: Navigate to the "View" tab within Microsoft Word.
Step 2: Select the Navigation Pane; a sidebar will display on the left.
Step 3: Within the Navigation Pane, you'll find thumbnail previews of each page.
Step 4: Look for the page you want to delete.
Step 5: Right-click on the thumbnail of that page.
Step 6: Choose "Delete" from the context menu. The selected page will be deleted.
Q2. How do I Delete an extra page in Word after a section break?
To delete an extra page in Word after a section break, follow these steps:
Step 1 : Within Microsoft Word, navigate to the Home tab and select the "Paragraph Marks" icon located in the Paragraph section.
Step 2 : After enabling paragraph marks, scroll through your document until you reach the blank page. You'll notice the presence of "Section Break" written in the document.
Step 3 : Use your cursor to select the section break or position the cursor immediately after it, then press the "Backspace" key to eliminate the empty page from your document.
Q3. How do you Delete a page break in Word that won't Delete?
Here is a straightforward guide on how to delete a page break in Word :
Step 1 : Go to the "Home" tab.
Step 2 : Click "Show/Hide" to reveal non-printing characters like paragraph markers, section breaks, and page breaks.
Step 3 : Double-click on the page break you want to delete to select it.
Step 4 : Press the "Delete" key on your keyboard to remove the selected page break.
Wrapping Up: Removing Extra Pages in Word
This guide may seem overwhelming, especially with so many methods to choose from, but it has the solution to whatever problem you face regarding an extra page in Word that you need to remove. With these tips, you should be able to get back to submitting your paper with full confidence. If you're a student working on an important assignment, WPS Office is the perfect choice, thanks to its AI-backed capabilities and direct export to PDF, which keeps your formatting intact. Download WPS Office today for a seamless experience and to streamline your student life!
- 1. Creative thesis presentation templates
- 2. The 10 most stunning excel dissertation Gantt chart templates
- 3. How to Check Word Count for Your Essays in Word [For Students]
- 4. Creative sample thesis defense presentation
- 5. Best thesis defense presentation samples
- 6. The 10 most stunning excel dissertation Gantt chart templates
15 years of office industry experience, tech lover and copywriter. Follow me for product reviews, comparisons, and recommendations for new apps and software.
IMAGES
VIDEO
COMMENTS
One of the required page numbering changes for your thesis or dissertation is that you need to use Roman numerals (e.g., "i, ii, iii") for your introductory sections (Abstract, Table of Contents), and then switch to Arabic numerals (e.g., "1, 2, 3") and begin the page numbering at "1" at the start of Chapter I of your main text.
Microsoft Word will keep track of page numbers for you, so you can add and delete pages, move tables and figures from one page to another, etc. Then, you can create a Table of Contents, a List of Tables, a List of Figures, etc. and Word will automatically create those lists (or, you can update the lists by clicking an update button).
Roman Numerals - Go to the Footer on the next page. This is page two. If the page number format is not Roman numeral: a. Select the page number. b. On the Ribbon, select Page Numbers > Format Page Numbers. c. Select the Roman numeral format. Select Continue from previous section. This page should not be numbered "i"
Step 3: Adding the Page Numbers. Adding the Page Numbers. Scroll up to the section that contains your front matter and click in the footer of any page (don't do anything for your title page and other pages that don't require a page number). On the Insert Ribbon, in the Header & Footer Group, click on the arrow next to the Page Number icon ...
To choose a format or to control the starting number, select Page Number > Format Page Numbers. Do either or both of the following: Select Number format to select the format for the numbering, such as a, b, c or i, ii, iii for the intro. Under Page numbering, choose Start at and type a number that you want to start the section with.
Thesis/Dissertation Page Numbering in Microsoft Word This is easiest to do after you have completed a rough draft, but you can create your page numbers early and then reuse this document to double-check the format. 1. Put your cursor on the first page (the Title page). 2. Click Insert > Page Number > Bottom of Page > Plain Number 2. 3.
Start page numbering on second page. Open the Header & Footer Tools by double-clicking inside the header or footer area. Select Design > Page Number > Format Page Numbers. Set Start at to 0 and select OK. Select Different First Page. Select Close Header and Footer. Remove page numbers. Select Insert > Page Number. Select Remove Page Numbers.
2.2.1 Adjust heading level numbering As Heading 1 in the thesis templates has been assigned to the thesis title on the title page, it should not be numbered. You can adjust the multi-level list properties so that only Headings 2 - 6 will be numbered. 1. Click on the number at the start of the first section title that is assigned a Heading
This will open the Header & Footer design tab. Click Page Number then Format Page Numbers. Select the radio button labeled "Start At," then select "1" to restart the page count at 1. 4. Use "Format Page Numbers" for additional changes. This can be located by going to Insert > Page Number > Format Page Numbers.
macOS. On the Insert tab, click the Page Number icon, and then click Page Number.. Select a location, and then pick an alignment style. Word automatically numbers every page, except designated title pages. To change the numbering style, select Format and then choose the formatting you want to use.. Select OK twice to close both dialog boxes.. For more info on page numbers, see Page numbering ...
Manual formatting of TOC. To add right-aligned tabs with leaders: From the Home tab, open the Paragraph settings and click on the Tabs button. Enter the tab stop position, choose Right Tab and for Leader, choose the … option. Click Set (or the + sign on Mac), then click OK. Type the TOC entry, press tab, then insert the page number.
If you want to change anything about the numbers - for example, you are using the 1.1, 1.2, etc... style but would like it to be 1.a, 1.b, etc..., or you want to change Arabic numbers (Chapter 1) to Ordinal (Chapter One), or you want to put a colon or a tab after the numbers, you can.. Place your cursor into one of your chapter headings, then go to the Home Ribbon, and in the Paragraph Group ...
Insert page numbers. On the Insert tab, select Page Number, and then choose the location and style you want. If you don't want a page number to appear on the first page, select Different First Page. If you want numbering to start with 1 on the second page, go to Page Number > Format Page Numbers, and set Start at to 0. When you're done, select ...
Word 2010, by default, starts page numbers on the first page of a document. If the first page is a cover page, or a title page, then the second page of the document should be page 1. ... You may also restart number for captions in your appendices or other separate areas of your dissertation. You will need to change your outline numbering ...
Right-click the page number and choose the "Format Page Numbers" command from the context menu. In the Page Number Format window, select the type of numbers you want to use for the section from the "Number Format" drop-down menu. Here, we've gone with standard lowercase Roman numerals. Click "OK" when you're done.
F. If you want page numbers to continue from the previous section/chapter, check 'continue from previous section' G. If you want to start fresh numbering in the section or chapter, select 'start at' and enter the starting number (usually 1). Sections in the 'Preliminaries' file will have small Roman numerals for page numbering ...
Members of the University of Michigan community can get dissertation & thesis formatting assistance from the experts at ScholarSpace: ... correct page numbers and all. With Word's figure/table numbering, you can also insert cross-references so when you refer to "(see Figure 4.2)" but then you add some new figures before that, not only will ...
Click in second page header or footer, right click on the page number and select 'format page numbers' Select Roman numerals eg. 'i, ii, iii, iv' etc; Select start at 'i' (start at '1') Scroll to chapter 1 and change number style for this section back to ordinary numbers and start at 1 . Change Page Orientation
On the Insert tab, or the Design tab within Header & Footer Tools, click Page Number, and click Format Page Numbers, at the bottom of the menu. 4. If you want to change the look or system of the numbers, choose a setting in Number format. 5. You can also include a chapter number in front of the page number.
Next go to "Page layout" and then "Breaks". Next, choose the submenu "Next page". Switch to the side, where the numbering should begin (in this case, page 2). In the edit mode of the header or footer, choose "link to previous", after that click on "Move to footer" and click on the "Link to previous" again.
Tips on how to insert page numbers on a specific page in MS Word 2013 and up (for Research paper or Thesis). Please don't forget to click the SUBSCRIBE butt...
In the header or footer area, you should see a label on the first page that says First Page Header. Select the page number and press Delete. Select Close Header and Footer or press Esc to exit. Tip: If you want your second page to start at 1 rather than 2, go to Insert > Page Number > Format Page Numbers, and set Start at under Page Numbering ...
Pulling your hair out trying to put page numbers in your thesis? Watch this video and keep your hair!
Step 3: Now, click on the "Font" option to open the Font dialog.. Font option in Context menu in Word. Step 4: In the Font Dialog, go to the "Effects" section and then tick the "Hidden" checkbox, and then press "OK" to exit.. Hidden option in Font Dialog in Word . Step 5: After that, hide paragraph marks by clicking on the "Paragraph Mark" icon in the Home tab.