How to Create a Timeline in PowerPoint: A Step-by-Step Guide
Creating a timeline in PowerPoint is a breeze once you get the hang of it. It’s all about choosing the right template, adding your milestones, and customizing the design to fit your presentation. Here’s how you do it: Open PowerPoint, go to the Insert tab, select SmartArt, choose a timeline design, add your content, and tweak the design. Voila, you have a timeline that’s ready to impress your audience!

Step by Step Tutorial: Creating a Timeline in PowerPoint
Creating a timeline in PowerPoint is a fantastic way to visually represent a sequence of events. It can help your audience grasp the flow of a project, the history of a company, or the steps in a process. We’re about to walk through the steps to make your very own timeline.
Step 1: Open PowerPoint and Choose a Slide Layout
Select a slide layout that suits your timeline.
When you open PowerPoint, you’ll want to choose a blank slide or one that’s relatively plain. This gives you a clean canvas to work with.
Step 2: Insert SmartArt
Go to the Insert tab and click on SmartArt.
In the Insert tab, you’ll find a variety of options, but for timelines, SmartArt is your go-to. It’s a versatile tool that offers a range of graphics perfect for timelines.
Step 3: Choose a Timeline Design
Select a timeline layout from the Process category.
Once you click on SmartArt, a dialog box will pop up with different categories. Under the Process category, you’ll find timeline designs. Pick one that suits your content.
Step 4: Add Your Content
Type your milestones and dates into the SmartArt graphic.
After selecting your design, you can start adding your milestones and dates directly into the placeholders. This is where you personalize the timeline to match your needs.
Step 5: Customize the Design
Adjust the colors, fonts, and size of your timeline.
Don’t be afraid to get creative here. You can change the colors to match your brand or presentation theme, adjust the font for readability, and resize the graphic to fit your slide.
After you complete these steps, you’ll have a timeline that’s both informative and visually appealing, ready to be a standout feature in your presentation.
Tips for Creating a Timeline in PowerPoint
- Keep it simple. Don’t overcrowd your timeline with too much information.
- Use contrasting colors for different milestones to make them easily distinguishable.
- Align your timeline horizontally or vertically based on your slide layout and preference.
- Use icons or images to represent different points on the timeline for a more engaging look.
- Preview your timeline in Slide Show mode to make sure it’s clear and legible from a distance.
Frequently Asked Questions
How do i add more milestones to my timeline.
Click on your SmartArt graphic and use the “Add Shape” feature to insert additional milestones.
Can I animate my timeline in PowerPoint?
Yes, you can apply custom animations to your timeline elements to make them appear in sequence or all at once.
What if the SmartArt templates don’t fit my needs?
You can create a timeline from scratch using shapes and text boxes or look for downloadable timeline templates online that are compatible with PowerPoint.
How can I share my PowerPoint timeline?
You can save your presentation as a PDF, image, or video file, or present it live using PowerPoint’s presentation mode.
Is it possible to edit a timeline after I’ve created it?
Absolutely, just click on the timeline and make your changes. You can edit text, move shapes, or adjust the design as needed.
- Open PowerPoint and select a suitable slide layout.
- Insert SmartArt from the Insert tab.
- Choose a timeline design from the Process category.
- Add your milestones and dates to the graphic.
- Customize the design to your liking.
Crafting a timeline in PowerPoint is not just about getting your facts in order; it’s about telling a story that captivates your audience. Whether you’re mapping out the next big project, showcasing company milestones, or highlighting historical events, a well-constructed timeline can make your message resonate. Remember, a timeline is more than just dates and events; it’s a visual journey that can influence how your audience perceives the information. So, take the time to choose the right design, color scheme, and layout that best illustrates your narrative. And who knows, your PowerPoint timeline might just be the thing that sticks with your viewers long after the presentation is over. Now go ahead, give it a try, and watch your timeline come to life!

Matthew Burleigh has been writing tech tutorials since 2008. His writing has appeared on dozens of different websites and been read over 50 million times.
After receiving his Bachelor’s and Master’s degrees in Computer Science he spent several years working in IT management for small businesses. However, he now works full time writing content online and creating websites.
His main writing topics include iPhones, Microsoft Office, Google Apps, Android, and Photoshop, but he has also written about many other tech topics as well.
Read his full bio here.
Share this:
Join our free newsletter.
Featured guides and deals
You may opt out at any time. Read our Privacy Policy
Related posts:
- Can I Create a Timeline in Powerpoint?
- How to Add Page Numbers in Powerpoint 2010
- How to Set Time for Slides in Powerpoint
- How to Save Powerpoint as PDF with Notes
- How to Delete a Slide in Powerpoint 2010
- How to Loop a Slideshow on Powerpoint 2013
- How to Unhide a Slide in Powerpoint 2013
- How to Make a Timeline on Google Docs: A Step-by-Step Guide
- How to Rotate a Slide in PowerPoint: A Step-by-Step Guide
- How to Make a Powerpoint Slide Vertical in Powerpoint 2013
- How to End Powerpoint on Last Slide in Powerpoint 2010
- How to Create a PowerPoint Presentation Step by Step: 2024 Guide
- How to Hide a Slide in Powerpoint 2010
- How to Change Hyperlink Color in Powerpoint 2010 (An Easy 5 Step Guide)
- How to Add a New Slide to PowerPoint: A Step-by-Step Guide
- How to Insert Slide Number PowerPoint: The Ultimate 2024 Guide
- How to Insert Slides from Another Presentation in Powerpoint 2010
- How to Embed a Word Document Into PowerPoint 2000: A Step-by-Step Guide
- How to Insert a Pyramid in Microsoft Excel 2010
- How to Drag Slides From One PowerPoint to Another: A Step-by-Step Guide
How-To Geek
How to create a timeline in microsoft powerpoint.
If you want to visually display a sequence of events in your PowerPoint presentation, add a timeline. Here's how.
One of PowerPoint’s charms is the ability to visually represent information by using its large library of available graphics, such as charts and graphs. If you want to create a timeline, well, Microsoft has just the thing. Here’s how it’s done.
Open your PowerPoint presentation and navigate to the slide in which you would like to add a timeline. Once there, navigate to the “Insert” tab and select “SmartArt” from the “Illustrations” group.
The “Choose a SmartArt Graphic” window will appear. Here, select “Process” from the left-hand pane.
A library of several different process-focused SmartArt graphics will appear. You can choose the style you like best for your timeline. In this example, we’ll use the “Basic Timeline” option.
Once selected, information about the SmartArt option will be displayed in the right-hand pane. When you’re ready to insert the SmartArt, select the “OK" button.
Related: How to Create Star Wars Scrolling Text in PowerPoint
The timeline will now appear on the slide, along with a window where you will type the respective text for the timeline.
The text entered in the box will automatically reflect on the actual timeline.
By default, this timeline will have three bullets for you to fill out. To add more, place your cursor at the end of the last item on the list in the text window, press “Enter,” and then type the desired text. Repeat this step as many times as necessary.
The size of the text and the placement of the bullets on the timeline will adjust automatically.
When you’re finished adding text, select the “X” button at the top right of the text window.
If you need to adjust the colors of the timeline to better align with the presentation, select the timeline and then click “Change Colors” in the “SmartArt Styles” group of the “SmartArt Design” tab.
A menu will appear, displaying a large library of different color schemes for the timeline. In this example, we’ll use “Gradient Loop” from the “Accent 6” group.
Once selected, the change will take place on your timeline.
And, of course, you can adjust the bullets and the text in the timeline by clicking and dragging each item.
Finally, if you ever need to add or remove a bullet from (or edit text in) the timeline, you can bring back the text edit window by selecting the timeline and then clicking the "Left Arrow" icon found on the left side of the graphic box.
Related: How to Build a PowerPoint Organizational Chart With Excel Data
- PRO Courses Guides New Tech Help Pro Expert Videos About wikiHow Pro Upgrade Sign In
- EDIT Edit this Article
- EXPLORE Tech Help Pro About Us Random Article Quizzes Request a New Article Community Dashboard This Or That Game Popular Categories Arts and Entertainment Artwork Books Movies Computers and Electronics Computers Phone Skills Technology Hacks Health Men's Health Mental Health Women's Health Relationships Dating Love Relationship Issues Hobbies and Crafts Crafts Drawing Games Education & Communication Communication Skills Personal Development Studying Personal Care and Style Fashion Hair Care Personal Hygiene Youth Personal Care School Stuff Dating All Categories Arts and Entertainment Finance and Business Home and Garden Relationship Quizzes Cars & Other Vehicles Food and Entertaining Personal Care and Style Sports and Fitness Computers and Electronics Health Pets and Animals Travel Education & Communication Hobbies and Crafts Philosophy and Religion Work World Family Life Holidays and Traditions Relationships Youth
- Browse Articles
- Learn Something New
- Quizzes Hot
- This Or That Game New
- Train Your Brain
- Explore More
- Support wikiHow
- About wikiHow
- Log in / Sign up
- Computers and Electronics
- Microsoft Office
10 Easy Steps to Make a Timeline in Microsoft PowerPoint
Last Updated: May 22, 2023 Fact Checked
This article was co-authored by wikiHow staff writer, Rain Kengly . Rain Kengly is a wikiHow Technology Writer. As a storytelling enthusiast with a penchant for technology, they hope to create long-lasting connections with readers from all around the globe. Rain graduated from San Francisco State University with a BA in Cinema. This article has been fact-checked, ensuring the accuracy of any cited facts and confirming the authority of its sources. This article has been viewed 5,574 times. Learn more...
Do you want to create a timeline to showcase your data in Microsoft PowerPoint? Luckily, PowerPoint has plenty of timeline templates you can choose from with the "SmartArt" tool. You'll just need to pick a style, insert your data, and customize your timeline. This wikiHow will show you how to insert a free timeline in Microsoft PowerPoint using the SmartArt tool on your Windows or Mac computer.
Things You Should Know
- Go to "Insert" → "SmartArt" → "Process" → select a timeline layout → "OK". Click [Text] to add your data.
- To add more data slots, click your timeline, then click "Add Shape".
- To change the color, click your timeline, then click "Change Colors".

- Horizontal timelines work best with up to 8 points with short descriptions.
- Vertical timelines work best for timelines with fewer points and more text.
- Free-flowing timelines are appropriate if you have lots of points and a horizontal timeline won’t give you the space you need.

- Adding a colorful timeline can help you make a great presentation .
- You must have a subscription to Microsoft 365 to use the desktop version of PowerPoint.
- If you don't have the PowerPoint app on your computer, you can use PowerPoint on the web to create your timeline. [2] X Trustworthy Source Microsoft Support Technical support and product information from Microsoft. Go to source

- A new window will open.
- On Mac, a drop-down menu will open.

- On Mac, this will be underneath List in the drop-down menu.

- You'll be able to customize the color and size later.
- The timeline will be added to your slide. Make sure it's selected before proceeding to the next step.

- Click the [Text] field to enter a date or milestone for your timeline.
- Repeat this for all data.

- Click the newly added bullet points in the Text Pane to input your additional data.

- Select from the default palettes to change the theme.
- Click the drop-down menu for Color and select a color.

- To move the entire timeline, click and hold any section of the sizing box. Drag the timeline to where you want it.
- Timelines can also be created in Microsoft Excel or Microsoft Word .
Alternative: Building your PowerPoint Timeline Through Shapes

- To change the look of the circles you can dive back into the Format Shape tab.

Expert Q&A
You might also like.

- ↑ https://support.microsoft.com/en-us/office/create-a-timeline-in-powerpoint-for-the-web-d1bd35a0-bfa7-428b-ba3c-c8f5b6050791
- ↑ https://support.microsoft.com/en-us/office/how-certain-features-behave-in-web-based-powerpoint-a931f0c8-1305-4428-8f7c-9cfa00ef28c5
About This Article

- Send fan mail to authors
Is this article up to date?

Featured Articles

Trending Articles

Watch Articles

- Terms of Use
- Privacy Policy
- Do Not Sell or Share My Info
- Not Selling Info
Keep up with the latest tech with wikiHow's free Tech Help Newsletter
How to Make a Timeline in PowerPoint
If you are showing information in chronological information, you might need to know how to make a timeline in PowerPoint to communicate most effectively.
A timeline is primarily used to show information that follows a chronology for a list of events. These milestones can be visualized better in a timeline format, and chronologies can be forward or reversed.
There are a couple of ways to accomplish this. We’ll walk through the uses for PowerPoint timelines, the types of timelines you might use, and how to make them. Let’s get started!
Note: All of the timeline examples here are from Envato Elements and are available to download and use.
2 Million+ PowerPoint Templates, Themes, Graphics + More
Download thousands of PowerPoint templates, and many other design elements, with a monthly Envato Elements membership. It starts at $16 per month, and gives you unlimited access to a growing library of over 2,000,000 presentation templates, fonts, photos, graphics, and more.

Pitch PowerPoint

Maximus Template

Mystify Presentation

Ciri Template

Modern PPT Templates
New & innovative.

Explore PowerPoint Templates
Uses for a PowerPoint Timeline

PowerPoint is a great tool for showing timelines because they are an excellent addition to many presentations. PowerPoint is also a commonly used application and allows for the creation of this style of infographic without a lot of other graphic design knowledge.
Timelines are commonly used in business presentations, to show event information, and to highlight milestones in project management.
PowerPoint timelines are also practical for showing notable events or schedules, visualizing business or project plans, explaining the history of a company or project, or almost anything else that is a time-based collection of data and information.
The format and visual style of a timeline can help present information more clearly and concisely. PowerPoint makes it easy to create timelines of any size – from just a couple of milestones to hundreds – with built-in tools or templates for a more custom timeline design.
Types of Timelines

When you are learning how to make a timeline in PowerPoint, it’s important to think about the different types of graphics available.
For the most part, timelines break down into four categories:
- Horizontal timeline: Information moves chronologically from left to right
- Vertical timeline: Information moves chronologically from top to bottom
- Roadmap timeline: Information flows on a format that looks like a road with larger to smaller elements to show information; this is often used for milestone-based timelines
- Event timeline: Information is broken into a series of events, sometimes with horizontal and vertical elements to show steps or milestones

When you are figuring out how to make a timeline in PowerPoint, you have two options:
- Use timeline tools built right into PowerPoint
- Find a timeline template to start with and customize
For a very basic timeline that you create inside PowerPoint , you can use SmartArt to create a basic timeline. You’ll find it by clicking on the Insert menu, then SmartArt, Process category, and then Basic Timeline.
There are several options for adding sequential data. While you can customize everything, this can be a little cumbersome if you aren’t very comfortable with PowerPoint tools.
Start with a Template

Getting started with a template can make building an org chart a lot easier. A template will give you a visual idea of the type of chart you need, how to arrange elements, and what the design might look like.
Templates allow you to adjust colors, fonts, styles, and branding to suit your organizational needs while providing a ready-made design to jumpstart the project. Many PowerPoint templates, such as the ones featured here, many include multiple design options in the same downloadable file to help you create different versions of your org chart if you need them.
Often these different design styles are made to account for small versus large organizations or elements such as shape, size, or overall look and feel of the chart. They can also show charts of different types because not every organization wants to start with a typical flow chart style.
Choose a Timeline Style for Your Brand and Information

Once you pick out a template, you can match everything in it to your brand and style. The first step is probably to think about the information you are putting on the timeline and the type of graphic representation that might work best.
Then you can start to rework these timeline elements to match your color and font palettes. Reworking the template to your brand helps you create a timeline that will feel like it belongs to your company and will even encourage you to use it more.
Most PowerPoint templates come with a readme file that will help you understand any intricacies of the design as you customize it. But generally, you can do all of this on the master slides.
Fill in Your Information

Once you have the design set to your style, it is time to pick the slide variation you plan to use for your timeline. The option you choose probably depends on the amount of content you have to work with and the number of stops on the timeline. (Feel free to delete the others.) Then start filling in your information.
It can be helpful to construct the timeline on paper before you start working in PowerPoint to ensure you have all the elements you need.
Check Your Work

The final step is to edit everything for errors and check for mistakes. It’s a good idea to have someone else look at the timeline for errors in chronology, spelling, and even missing items. (It is challenging to proof your own work.)
Once all the proofing is finished, you can prep the PowerPoint timeline for use digitally or in printing. Add this slide to other presentation decks or export the slide as an image file that you can use in other locations.
The availability of export options from PowerPoint is a solid reason to use this tool when creating a timeline.
Once you learn how to make a timeline in PowerPoint, you’ll be able to level up your presentations with a visually appealing and informational graphic. Whether you create your own or start with a template, timelines can be a great addition to presentations, websites, and business documentation.
- Tech Deals at Target Right Now!
- The Electric Grill You Need This Year
How to Create a Timeline in PowerPoint
Use a template or copy it from another app
:max_bytes(150000):strip_icc():format(webp)/acp_casual_headshot-5b59662146e0fb002561f951.jpg "timeline in presentation")
- Villanova University
What to Know
- Import: Export the timeline from another program into a graphical format (JPG, GIF, or PNG). Insert the timeline graphic into PowerPoint.
- SmartArt: Select Insert > SmartArt . Choose a layout. Use text panes to create the timeline. Change colors or styles or reorder elements.
- Template: Use a PowerPoint template to create a timeline. Move and copy template objects to create new steps or milestones.
There are several ways to insert a PowerPoint timeline into your presentation. You can use copy and paste, SmartArt, a template, or an add-in. We show you how to do all four using PowerPoint 2019, 2016, 2013; PowerPoint for Microsoft 365; Powerpoint for Mac; or PowerPoint Online.
How to Paste a Timeline From Another Program Into PowerPoint
A straightforward way to get a timeline into your PowerPoint presentation file is to create it in another program, copy it, and paste it into PowerPoint. Just export the timeline from a program like Microsoft Project or Excel into a graphical format such as JPG, GIF, or PNG, then insert the timeline graphic into PowerPoint like you would insert pictures or clipart. It's also possible to link the timeline in a way similar to adding Excel data to Word , which updates automatically when you make changes.
How to Make a Timeline in PowerPoint With SmartArt
PowerPoint also offers a built-in function, called SmartArt, which makes adding timelines a breeze. SmartArt objects are configurable graphics that you set up in a point-and-click fashion.
To use a SmartArt graphic for a timeline:
Go to Insert .
Select SmartArt .
In the dialog box that appears, browse for the SmartArt graphic type that best suits your need.
Items in the Process category are good options. For example, choose Basic Timeline or Vertical Chevron List to get started on your timeline.
Select OK to insert the SmartArt into your presentation.
The SmartArt graphic appears on the slide along with a text pane where you'll edit the text. Add text to the objects by editing the bullets in the text pane. It works just like a regular list, press Tab and Shift + Tab to make an indent and outdent or press Enter to add a new bullet point.
Continue to decorate your SmartArt by changing the colors, choosing a different style, and reordering elements.
PowerPoint Online doesn't contain as many SmartArt graphics formats as the desktop version of PowerPoint. The ones mentioned in this article are available.
How to Make a Timeline in PowerPoint With a Template
There are pre-configured PowerPoint templates that allow you to quickly piece together a timeline.
The PPTX file pictured above is available from the Microsoft Office Template Gallery . Move and copy the existing objects on these timeline templates to create new phases of the timeline, or new milestones and annotations. This method is a bit more hands-on, but it allows you to get the exact results you want.
Templates in PPTX format are compatible with all versions of PowerPoint.
How to Create a Timeline in PowerPoint With an Add-In
Another approach is to use a PowerPoint Add-in specifically built for creating timelines. Office Timeline is an excellent choice if you're looking to add project timelines (e.g., Gantt Charts), and it's available in a free version.
You'll need a few minutes to get up and running with the following steps:
Download the Free Edition of the app from the Office Timeline website.
Double-click the .EXE file to start the installation.
Once the installation is complete, PowerPoint starts automatically, shows a quick introduction wizard, and provides a sample file.
Once installed, a new Office Timeline Free tab is added to Powerpoint. This tab contains tools to create new timelines, select the style of timeline to be inserted, and enter or import the data on which the timeline is based.
The Office Timeline Add-In is only available for Windows versions of PowerPoint. However, there's also Pincello , a web-based tool that outputs timelines in PowerPoint format.
Armed with the above options, you're now prepared to create any type of timeline you want in PowerPoint.
Get the Latest Tech News Delivered Every Day
- How to Make a Timeline in Word
- How to Make a Timeline on Google Slides
- Best Free Family Feud PowerPoint Templates
- How to Create a Microsoft Word Flowchart
- How to Draw Freehand in PowerPoint
- The 8 Best Slideshow Apps of 2024
- How to Create a Timeline in Excel
- How to Make a Word Cloud in PowerPoint
- 10 Free PowerPoint Game Templates
- Create a Default Presentation Template in PowerPoint
- 5 Best Free PowerPoint Background Sites
- How to Insert PDF Files Into PowerPoint Presentations
- Create Family Trees Using PowerPoint Organization Chart
- How to Make a PowerPoint Presentation
- How to Copy a PowerPoint Design Template to Another Presentation
- How to Create a Microsoft Sway Presentation

Create a timeline
If you want to create a graphical representation of a sequence of events, such as the milestones in a project or the main events of a person's life, you can use a SmartArt graphic timeline. After you create the timeline, you can add more dates, move dates, change layouts and colors, and apply different styles.

On the Insert tab, click SmartArt .

In the Choose a SmartArt Graphic gallery, click Process , and then double-click a timeline layout.
Tip: There are two timeline SmartArt graphics: Basic timeline and Circle Accent Timeline , but you can also use almost any process-related SmartArt graphic.

Click [Text] , and then type or paste your text in the SmartArt graphic.
Note: You can also open the Text Pane and type your text there. If you do not see the Text Pane , on the SmartArt Tools Design tab, click Text Pane .
Add more dates to your timeline
Click a shape in the timeline.

On the SmartArt Tools Design tab, do one of the following:
To add an earlier date, click Add Shape , and then click Add Shape Before .
To add a later date, click Add Shape , and then click Add Shape After .

In the new date box, type the date that you want.
Move a date in your timeline
On the timeline, click the date you want to move.

To move a date sooner than the selected date, click Move Up .
To move a date later than the selected date, click Move Down .

Change to a different timeline layout
Click the SmartArt graphic timeline.

Note: To view only the timeline and process-related layouts, at the bottom of the layouts list, click More Layouts , and then click Process .
Pick a timeline or process-related SmartArt graphic, like the following:
To show progression in a timeline, click Accent Process .
To create a timeline with pictures or photos, click Continuous Picture List . The circular shapes are designed to contain pictures.
Change the colors of your timeline
On the SmartArt Tools Design tab, click Change Colors .

Note: If you don't see the SmartArt Tools Design tab, make sure you’ve selected the timeline.
Click the color combination that you want.
Tip: Place your pointer over any combination to see a preview of how the colors look in your timeline.
Apply a SmartArt style
A SmartArt style applies a combination of effects, such as line style, bevel, or 3-D perspective, in one click, to give your timeline a professionally polished look.
Click the timeline.
On the SmartArt Tools Design tab, click the style you want.

Create a timeline in Visio
Import and export timeline data between Visio and Project
Create a timeline in Project
Get Microsoft timeline templates
When you want to show a sequence of events, such as project milestones or events, you can use a SmartArt graphic timeline. After you create the timeline, you can add events, move events, change layouts and colors, and apply different styles.

On the Insert tab, click SmartArt > Process .

Click Basic Timeline or one of the other process-related graphics.

Click the [Text] placeholders and enter the details of your events.
Tip: You can also open the Text Pane and enter your text there. On the SmartArt Design tab, click Text Pane .
Add more events to your timeline

On the SmartArt Design tab, click Add Shape , and then click Add Shape Before or Add Shape After .

Enter the text you want.
Move an event on your timeline
On the timeline, click the text of the event you want to move.

On the SmartArt Design tab, click Move Up (left), or Move Down (right).

On the SmartArt Design tab, point to the layout panel and click the down arrow.

On the SmartArt Design tab, click Change Colors , and then click the color combination you want.

Give your timeline a professional look by using a SmartArt style to apply a combination of effects, such as line style, bevel, or 3-D perspective.
On the SmartArt Design tab, click the style you want.

Need more help?
Want more options.
Explore subscription benefits, browse training courses, learn how to secure your device, and more.

Microsoft 365 subscription benefits

Microsoft 365 training

Microsoft security

Accessibility center
Communities help you ask and answer questions, give feedback, and hear from experts with rich knowledge.

Ask the Microsoft Community

Microsoft Tech Community

Windows Insiders
Microsoft 365 Insiders
Was this information helpful?
Thank you for your feedback.
How to Create a Timeline in PowerPoint

If you want to effectively communicate a complex process or highlight important events in a visual manner, creating a timeline in PowerPoint could be a great solution. This article will guide you through the entire process of creating a timeline in PowerPoint. From understanding the benefits of timelines in presentations to troubleshooting common issues, we cover everything you need to know about creating a standout timeline in a presentation.
Table of Contents
Understanding the Benefits of Timelines in Presentations
Incorporating timelines into presentations can vastly improve the understanding and retention of information. Timelines break down a large amount of information into a more digestible format while providing context. They help the audience understand the chronology of events or a process, which, in turn, can help explain cause and effect.
Another benefit of using timelines in presentations is that they can help to highlight key events or milestones. By visually representing important dates or moments, the audience can better understand the significance of these events and how they relate to the overall topic being presented.
Additionally, timelines can be used to compare and contrast different periods of time or processes. This can be particularly useful in business presentations, where timelines can be used to show the progression of a company’s growth or the development of a new product. By presenting this information in a timeline format, the audience can easily see the changes and improvements that have occurred over time.
Choosing the Right Design for Your Timeline
Before starting, it’s essential to choose the right design for your timeline. PowerPoint offers a variety of different designs, styles, and templates to choose from, ranging from basic to complex. A good design should take into account the audience, purpose, and content of the presentation.
Consider the tone and style of your presentation when choosing a design. If your presentation is formal, a clean and simple design may be more appropriate. If your presentation is more creative or playful, a design with bold colors and graphics may be more effective. Additionally, consider the amount of information you need to present and choose a design that allows for easy organization and readability.
Step-by-Step Guide to Creating a Simple Timeline in PowerPoint
The first step in creating a timeline is to determine the length of the timeline and the intervals between events. Once you have this figured out, you can create a simple timeline by following these steps:
- Go to the ‘Insert’ tab and select ‘SmartArt’.
- Choose the ‘Process’ category and select a suitable timeline layout.
- Enter your event’s information as required.
- Customize the design as necessary to match your presentation.
It is important to note that timelines can be used for a variety of purposes, such as project management, historical events, or personal milestones. When creating a timeline, it is essential to consider the audience and the purpose of the presentation. For example, a timeline for a business project may need to include specific dates and deadlines, while a personal timeline may focus more on significant life events.
Another useful feature of PowerPoint timelines is the ability to add visual elements, such as images or icons, to enhance the presentation. These can be used to represent different events or to add a creative touch to the timeline. Additionally, PowerPoint allows for easy editing and updating of timelines, making it a convenient tool for ongoing projects or events.
How to Add and Format Timeline Events in PowerPoint
Adding and formatting timeline events can be done using the ‘SmartArt’ feature in PowerPoint. Each event can include details such as a date, explanation, images, or icons. You can format events individually or the entire timeline to ensure consistency and visual appeal.
It is important to keep in mind the purpose and audience of your timeline when adding and formatting events. For example, if you are creating a timeline for a business presentation, you may want to include key milestones and achievements. On the other hand, if you are creating a timeline for a personal project, you may want to include more personal and meaningful events. Additionally, consider the visual design of your timeline and choose colors, fonts, and layouts that complement your content and message.
Tips for Making Your Timeline Look Professional and Visually Appealing
A professional and visually appealing timeline should be clear, concise, and consistent. Use colors, fonts, and icons that compliment your presentation’s overall design. Ensure that the timeline is easy to read and understand, and highlight critical events by using bold or contrasting colors.
Another essential tip for creating a professional timeline is to include relevant images or graphics. These visuals can help break up the text and make the timeline more engaging for your audience. However, be sure to use high-quality images that are relevant to the events or milestones you are highlighting.
Additionally, consider using a timeline tool or software to create your timeline. These tools can help you create a more polished and professional-looking timeline, with features such as customizable templates, interactive elements, and the ability to easily update and edit your timeline as needed.
Adding Interactive Features to Your PowerPoint Timeline
Interactive features can enhance the audience’s engagement and enrich their understanding of the presentation. Some interactive features include hyperlinks to additional information, clickable buttons, or animated elements. Use these tools with caution; they should add value and not detract from the message of the presentation.
One way to add interactive features to your PowerPoint timeline is by using the “Action” feature. This allows you to link specific elements on your timeline to other slides, websites, or files. For example, you could link a milestone on your timeline to a detailed report or a video that provides more information about that particular event.
Another interactive feature that can be added to your PowerPoint timeline is the use of quizzes or polls. This can be a great way to engage your audience and test their knowledge on the topic being presented. You can use tools like Kahoot or Mentimeter to create interactive quizzes or polls that can be integrated into your PowerPoint presentation.
How to Customize Your Timeline to Match Your Branding and Style
To customize your timeline, you can add your branding, such as logos, color schemes, and fonts. Create a consistent design language throughout the presentation and ensure that the timeline complements and enhances it.
Another way to customize your timeline is by adding relevant images and graphics. This can help to visually represent the events and milestones on your timeline, making it more engaging and informative for your audience. Additionally, consider using icons or symbols to represent different types of events, such as a graduation cap for educational achievements or a trophy for awards. By incorporating these elements, you can create a timeline that not only matches your branding and style but also effectively communicates your message.
Exporting and Sharing Your PowerPoint Timeline with Others
When you have finished creating your timeline, you can save it as a PowerPoint file or export it as an image or PDF. Sharing options include uploading it to cloud storage, sharing it via email, or presenting it live.
It is important to note that when exporting your timeline as an image or PDF, some of the interactive features may be lost. For example, if you have included hyperlinks or animations, these may not be preserved in the exported file. Therefore, it is recommended to save a copy of your timeline as a PowerPoint file if you want to retain all of its interactive features.
Common Mistakes to Avoid When Creating a PowerPoint Timeline
Common mistakes include using too much text, overcomplicating the design, using incorrect or inconsistent formats, and failing to check spelling or grammar. Other pitfalls to avoid include using too many animations or transitions, being inconsistent in details, or failing to communicate the purpose and message effectively.
Another common mistake to avoid when creating a PowerPoint timeline is not considering the audience’s perspective. It’s important to think about who will be viewing the timeline and what information they need to take away from it. If the timeline is too complex or difficult to understand, it may not effectively communicate the intended message. Additionally, not including enough context or background information can also lead to confusion for the audience.
Advanced Techniques for Creating Complex Timelines in PowerPoint
For complex timelines, you can use tools such as shapes, lines, and connectors to create custom designs. These tools, combined with the ‘SmartArt’ feature, can produce complex visuals that are concise and easy to understand.
Another useful technique for creating complex timelines in PowerPoint is to use animation. By animating each element of the timeline, you can create a dynamic and engaging presentation that captures your audience’s attention. Additionally, you can use PowerPoint’s ‘Merge Shapes’ feature to create custom shapes and designs that are unique to your timeline. This feature allows you to combine multiple shapes into one, creating a more cohesive and visually appealing timeline.
Examples of Creative Ways to Use Timelines in Presentations
Timelines can be used creatively, such as creating timelines that tell a story or one that highlights a specific theme. For example, timelines that show the evolution of a product or the chronological order of significant events in history can provide a unique and compelling way to present information to your audience.
Another creative way to use timelines in presentations is to create a timeline that showcases the growth and development of a company or organization. This can include milestones such as the founding of the company, major product releases, and significant partnerships or acquisitions. By presenting this information in a timeline format, the audience can easily see the progression and success of the company over time.
Additionally, timelines can be used to compare and contrast different events or periods in history. For example, a timeline that compares the timelines of two different wars or the timelines of two different political movements can provide a unique perspective and help the audience understand the similarities and differences between the two. This can be especially effective when presenting complex or nuanced information that may be difficult to understand through traditional presentation methods.
Troubleshooting Common Issues with PowerPoint Timelines
Common issues include incorrect or inaccurate information, overcrowding of events, unclear formatting, and technical issues such as missing links or broken images. Ensure you check your timeline thoroughly before presenting it live.
How to Use Animations and Transitions to Make Your Timeline Stand Out
Animations and transitions can help create more engaging and dynamic timelines. However, use them intentionally and sparingly to avoid creating confusion or detracting from the overall message of the presentation.
Best Practices for Using Timelines in Business, Education, and More
Suitable uses for timelines include business presentations, educational purposes, and marketing materials. Timelines can help enhance understanding, organize information and data, and provide context to processes or events. As with everything in a presentation, it is essential to ensure context, relevance, and accuracy.
This comprehensive guide has covered every detail involved in creating a timeline in PowerPoint. By following these guidelines, you can easily create professional-looking timelines that enrich your presentations and elevate your message. Remember, a timeline can be an effective tool, but it should work to supplement, not detract from, your overall message.
By humans, for humans - Best rated articles:
Excel report templates: build better reports faster, top 9 power bi dashboard examples, excel waterfall charts: how to create one that doesn't suck, beyond ai - discover our handpicked bi resources.
Explore Zebra BI's expert-selected resources combining technology and insight for practical, in-depth BI strategies.

We’ve been experimenting with AI-generated content, and sometimes it gets carried away. Give us a feedback and help us learn and improve! 🤍
Note: This is an experimental AI-generated article. Your help is welcome. Share your feedback with us and help us improve.

Discover our diverse collection of 48 Timeline templates for PowerPoint and Google Slides, expertly crafted to help you create visually stunning presentations that effectively showcase your project milestones, history, or plans.
Timelines are invaluable tools for illustrating a sequence of events, whether it’s for business, education, or personal use.
Our professional templates offer a variety of designs, styles, and formats to suit your specific needs.

Speech Bubble Timeline
Google Slides , PPTX

Neumorphic Bubble Timeline

Timeline Milestone Chart for PowerPoint and Google Slides

Block Timeline for PowerPoint and Google Slides

Alternating Speech Bubbles Timeline for PowerPoint and Google Slides

Radar Timeline for PowerPoint and Google Slides

Word Cloud Timeline for PowerPoint and Google Slides

Infographic Timeline for PowerPoint and Google Slides

Doodle Timeline for PowerPoint and Google Slides

Line Design Timeline for PowerPoint and Google Slides

Horizontal Timeline for PowerPoint and Google Slides

Search Templates by categories
Search templates by colors.
Love our templates? Show your support with a coffee!
Thank you for fueling our creativity.
Charts & Diagrams
Text & Tables
Graphics & Metaphors
Timelines & Planning
Best-Ofs & Tips
Terms and Conditions
Privacy Statement
Cookie Policy
Digital Millennium Copyright Act (DMCA) Policy
© Copyright 2024 Ofeex | PRESENTATIONGO® is a registered trademark | All rights reserved.

To provide the best experiences, we and our partners use technologies like cookies to store and/or access device information. Consenting to these technologies will allow us and our partners to process personal data such as browsing behavior or unique IDs on this site and show (non-) personalized ads. Not consenting or withdrawing consent, may adversely affect certain features and functions.
Click below to consent to the above or make granular choices. Your choices will be applied to this site only. You can change your settings at any time, including withdrawing your consent, by using the toggles on the Cookie Policy, or by clicking on the manage consent button at the bottom of the screen.
Thank you for downloading this template!
Remember, you can use it for free but you have to attribute PresentationGO . For example, you can use the following text:
If you really like our free templates and want to thank/help us, you can:
Thank you for your support
Got any suggestions?
We want to hear from you! Send us a message and help improve Slidesgo
Top searches
Trending searches

solar eclipse
25 templates

education technology
180 templates

32 templates

28 templates

thanksgiving
38 templates

Timeline Infographics
Free google slides theme, powerpoint template, and canva presentation template.
Timeline infographics are simply great if you need to create a list of events, steps or processes in chronological order or if you want to mark some milestones! Never miss a key action, a date or a deadline again! They are very visual, clear to follow and logical.
What will you find in these slides? We have added a lot of different timelines: curved, straight, resembling a road, hand-drawn, formal… You choose! Their designs are varied, so you can select your own one depending on the purpose: school, business, marketing… As usual, blue, yellow and red predominate- In addition, you will also find icons that you can relate to your timeline.
Features of these infographics
- Infographic templates with plenty of timelines
- 100% editable and easy to modify
- 30 different infographics to boost your presentations
- Include icons and Flaticon’s extension for further customization
- Designed to be used in Google Slides, Canva, and Microsoft PowerPoint and Keynote
- 16:9 widescreen format suitable for all types of screens
- Include information about how to edit and customize your infographics
How can I use the infographics?
Am I free to use the templates?
How to attribute the infographics?
Attribution required If you are a free user, you must attribute Slidesgo by keeping the slide where the credits appear. How to attribute?
Related posts on our blog.

How to Add, Duplicate, Move, Delete or Hide Slides in Google Slides

How to Change Layouts in PowerPoint

How to Change the Slide Size in Google Slides
Related presentations.

Premium template
Unlock this template and gain unlimited access

Home PowerPoint Templates Timeline
134+ Timeline PowerPoint Templates for Presentations
Download PowerPoint Timeline Templates and illustrations to make attractive timelines for PowerPoint presentations. These professionally crafted timeline templates have been designed to provide presenters with all the necessary layouts and appropriate imagery to create PowerPoint timelines with convenience.
Download a PowerPoint Timeline Template that best matches your presentation topic and customize it to create awesome timelines. These templates are suitable for making project timelines, sequential slides, timeline diagrams, etc.
Featured Templates
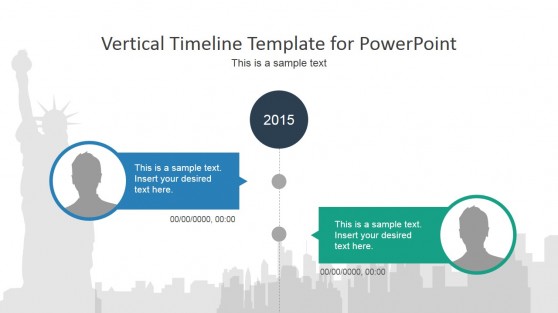
Vertical Timeline PowerPoint Template

Timeline Roadmap PowerPoint Template
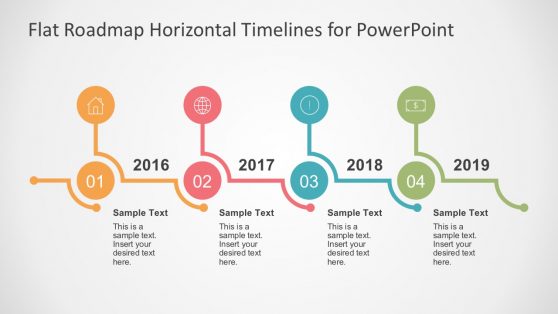
Flat Timelines PowerPoint Templates
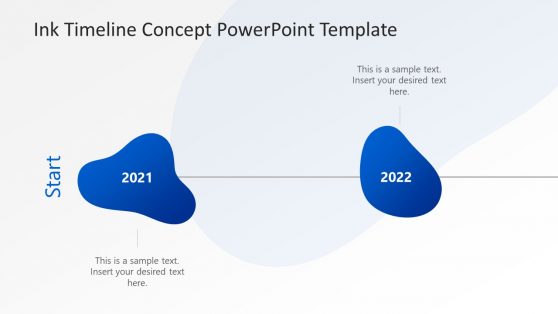
Ink Timeline Concept PowerPoint Template
Latest templates.
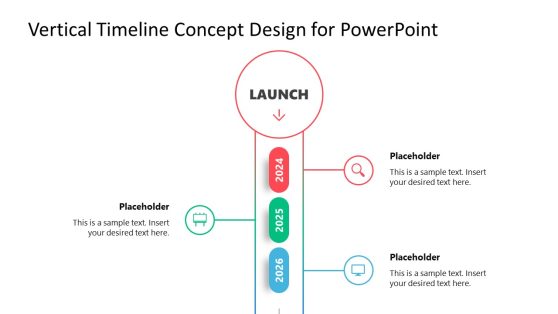
Vertical Timeline Concept Design PowerPoint Template
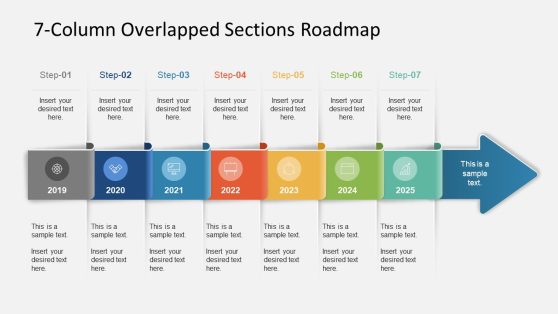
7-Column Overlapped Sections Roadmap
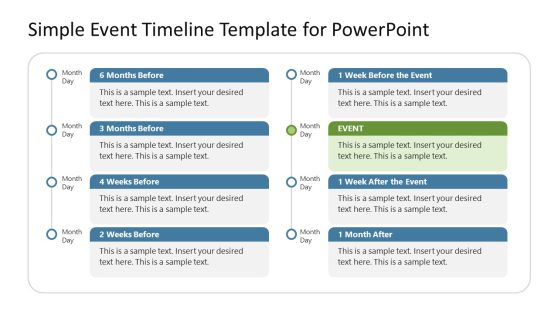
Simple Event Timeline PowerPoint Template
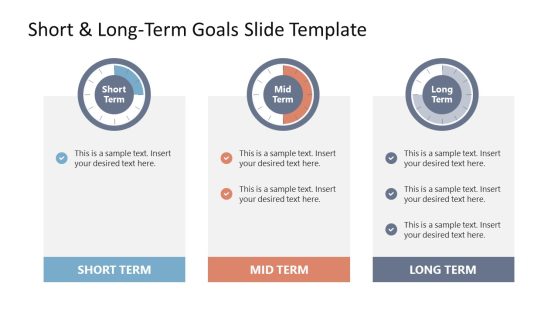
Short & Long Term Goals PowerPoint Template
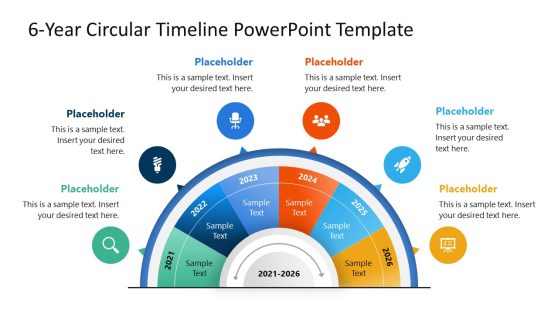
6-Year Circular Timeline PowerPoint Template
Business Statistics Infographic Template for PowerPoint
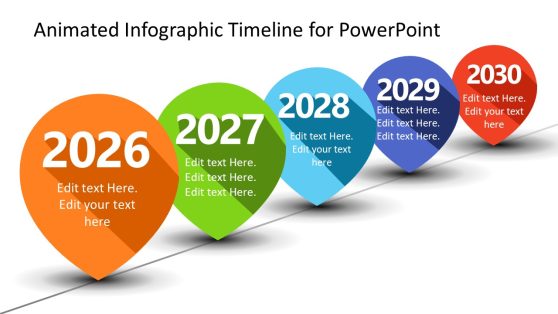
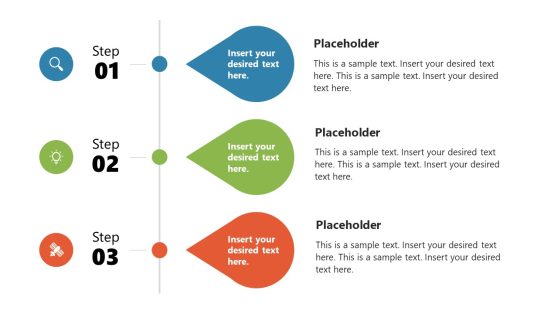
Animated Infographic Timeline for PowerPoint
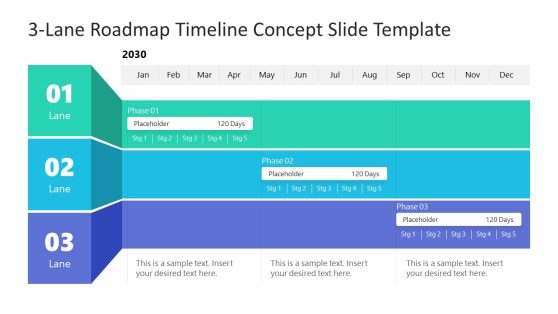
3-Lane Roadmap Timeline Concept PowerPoint Template
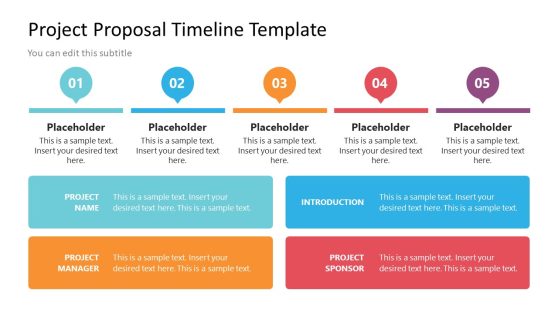
Project Proposal Timeline Template for PowerPoint
Animated 6-Year Vertical Timeline Template for PowerPoint
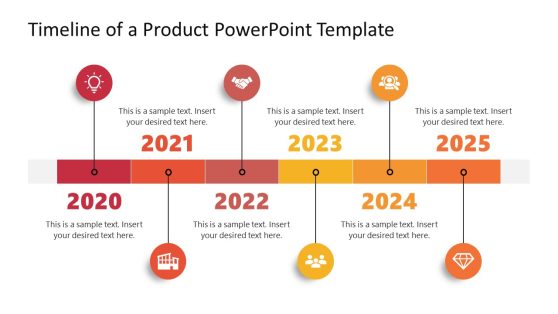
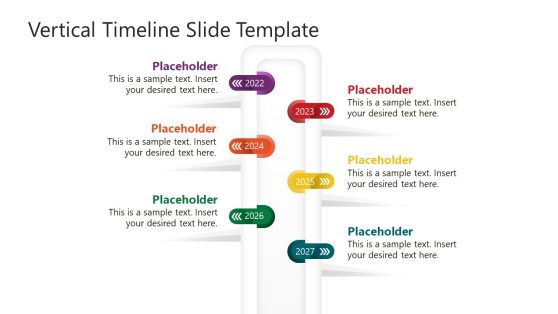
Timeline of a Product PowerPoint Template
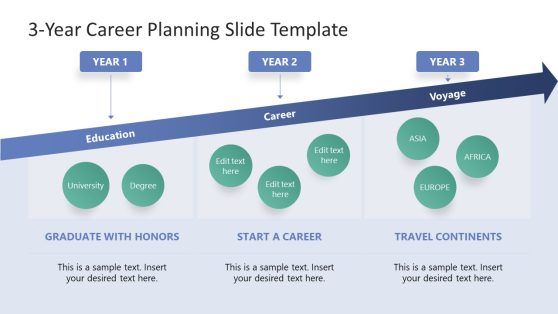
3-Year Career Planning Template for PowerPoint
Download unlimited content, our annual unlimited plan let you download unlimited content from slidemodel. save hours of manual work and use awesome slide designs in your next presentation..

Brightline begins behind-the-scenes work to replace aging St. Lucie River bridge in Stuart
STUART — Brightline has begun work on the new $218 million railroad bridge over the St. Lucie River. You just can't see it yet.
Behind-the-scenes design work already is underway, Stuart and Martin County leaders and representatives of the local marine industry learned last month from Brightline officials in a meeting at City Hall. All but $31.5 million of the cost has been secured to replace the 91-year old drawbridge, the only single-track stretch of the railroad's 235-mile corridor between Orlando and Miami.
Florida East Coast Railway — the freight line that owns most of Brightline's corridor — will be seeking a $31.5 million federal grant to close the funding gap, officials said.
Fifteen percent of the design is done, railroad officials said.
Vertical clearance still an issue
Passage of boats under the bridge remains a point of tension between the railroad and the maritime community. The bridge design presented at the meeting provides a vertical clearance of 17 feet 9 inches, an increase from more than the 16-foot clearance previously shared, although it remains subject to change, Stuart City Manager Michael Mortell said during the meeting.
Brightline has "pretty good confidence" that the 17-foot-9 clearance will be adequate for boaters, said Scott Gammon, senior vice president of construction for Brightline.
The current bridge has a vertical clearance of 6 feet 6 inches, according to Brightline's presentation.
While the Marine Industries Association of the Treasure Coast, which advocates for the region's marine industry, supports the current design, according to President Tom Whittington, it leaves some in the industry wishing for a little more.
Dan Romence, president of Indiantown Marine Center, said he would like a higher vertical clearance for the new bridge when it's closed, and would prefer a fixed-span bridge rather than another drawbridge. For example, he said, none of the boats serviced by the Indiantown Marine Center could get under a bridge with a 17-foot 9-inch clearance. That could negatively impact that sector of the marine industry, Romence said.
Brightline did not respond to a request for comment on the bridge height. The company will manage design and construction of the bridge.
Funding and timeline
The last $31.5 million needed to build the bridge may come from a Federal Railroad Administration Consolidated Rail Infrastructure and Safety Improvements grant.
Stuart secured $130.5 million federal grant and Florida East Coast Railway has secured $25.5 million.
More: Brightline to build new Treasure Coast station in downtown Stuart, city officials say
More: $130 million grant is major boost to replacing St. Lucie River railroad bridge in Stuart
Design of the bridge may take until the end of 2025, Brightline officials said. Construction may begin in the first quarter of 2026 and take up to three years.
The aim is to complete construction sooner, Gammon said. The only thing that could delay it getting approval required by the National Environmental Policy Act, Mortell said. That law focuses on protecting the environment and includes addressing historical concerns. The current bridge is a historical resource.
Keith Burbank is TCPalm's watchdog reporter covering Martin County. He can be reached at [email protected] or at 720-288-6882 .
This article originally appeared on Treasure Coast Newspapers: Brightline begins behind-the-scenes work to replace aging St. Lucie River bridge in Stuart

Community Challenge Grants Focus Groups
Below is a link to the presentation and a description of the process.
Focus Groups
Over 50 community members representing all eleven supervisorial districts attended the focus groups in March. Over half of the attendees had never applied to the program, reflecting positively on our efforts to reach new communities. This open process continues Community Challenge Grants' history of partnership between local government and community members.
Staff presented based on this file and shared a brief history of the program. They described past grant terms and projects. Then they shared their vision of the program's future.
Attendees responded to questions about:
- Types of potential Community Challenge Grants projects
- Community outreach
- Technical support
Staff will consider these responses as we revise the program.
The Community Challenge Grants program supports community-led, neighborhood improvement projects. This is a special partnership between the City and community leaders. We are #bettertogether.
Below are key moments in the next grant cycle:
- March 2024: Focus groups will collect community input. This will inform a new Request for Proposals (RFP).
- July 2024: Anticipated RFP release.
- July to November 2024: Workshops to answer questions about the grant opportunity.
- January 2025: Expected grant deadline.
- July 2025: Grant term starts.
IMAGES
VIDEO
COMMENTS
Here are three ways that you can insert a timeline in PowerPoint: 1. Create a timeline directly in PowerPoint.To do this, go to Insert > Illustrations > SmartArt.In the Choose a SmartArt Graphic dialog that opens, select Process on the left, and insert one of the suggested timeline graphics in the list (Circle Accent Timeline or Basic Timeline), then customize it to your liking.
Create a timeline. On the Insert tab, click SmartArt. In the Choose a SmartArt Graphic gallery, click Process, and then double-click a timeline layout. Tip: There are two timeline SmartArt graphics: Basic timeline and Circle Accent Timeline, but you can also use almost any process-related SmartArt graphic. Click [Text], and then type or paste ...
Summary. Open PowerPoint and select a suitable slide layout. Insert SmartArt from the Insert tab. Choose a timeline design from the Process category. Add your milestones and dates to the graphic. Customize the design to your liking.
2. Use PowerPoint's SmartArt to create your Timeline in seconds. Once your information is organized, PowerPoint's SmartArt will work its magic. Select the text box as follows: Ensure you are on the "Home" tab and look for the "Convert to SmartArt" button. Insert the timeline design you prefer (it can be changed later).
Here's how it's done. Open your PowerPoint presentation and navigate to the slide in which you would like to add a timeline. Once there, navigate to the "Insert" tab and select "SmartArt" from the "Illustrations" group. The "Choose a SmartArt Graphic" window will appear. Here, select "Process" from the left-hand pane.
Resize the timeline. Select the timeline. You'll see the sizing handles appear in a box around the timeline. Click one corner of the timeline and drag it outwards to make it bigger. Alternatively, drag it inwards to make it smaller. To move the entire timeline, click and hold any section of the sizing box. Drag the timeline to where you want it.
Why Timelines are Important in Presentations. Timelines serve as an essential way of simplifying content within presentations and making it easier to grasp for an audience. Instead of explaining about a concept, project or expected outcome by going back and forth; it can be much easier to simply use a timeline to show the entire layout in ...
Open your PowerPoint presentation. Select or create the slide you want to insert the timeline to. In Drawing, select Shapes → Lines. Here, you'll see different options including Line arrow, Arc, and Connectors. Select the option Line in Lines. Click and drag the cursor to draw a simple line. Pro tip: Hold down Shift while dragging to create ...
Using a template simplifies having a timeline in your presentation. Plus, it means that few edits are needed since the template was created by PowerPoint design professionals. The Project Timeline PowerPoint Infographics template from Envato Elements has many timelines in the template. For this tutorial, we'll edit slide 2.
Timelines are commonly used in business presentations, to show event information, and to highlight milestones in project management. PowerPoint timelines are also practical for showing notable events or schedules, visualizing business or project plans, explaining the history of a company or project, or almost anything else that is a time-based ...
In this video I show you how to make an amazing timeline using the Morph Transition in PowerPoint!*Affiliate Links*Download more than 30,000 Presentation Tem...
Insert the timeline graphic into PowerPoint. SmartArt: Select Insert > SmartArt. Choose a layout. Use text panes to create the timeline. Change colors or styles or reorder elements. Template: Use a PowerPoint template to create a timeline. Move and copy template objects to create new steps or milestones.
Create a timeline. On the Insert tab, click SmartArt. In the Choose a SmartArt Graphic gallery, click Process, and then double-click a timeline layout. Tip: There are two timeline SmartArt graphics: Basic timeline and Circle Accent Timeline, but you can also use almost any process-related SmartArt graphic. Click [Text], and then type or paste ...
1. Horizontal Timelines. Template Link. These timelines are mostly used to showcase a chronological series of events, forecasts, trends, workflow, progression of a task, etc. Horizontal timelines are the most commonly used timelines in presentations and are often preferred by project managers. 2.
Once you have this figured out, you can create a simple timeline by following these steps: Go to the 'Insert' tab and select 'SmartArt'. Choose the 'Process' category and select a suitable timeline layout. Enter your event's information as required. Customize the design as necessary to match your presentation.
Here are some steps you can follow when creating a timeline in PowerPoint: 1. Launch timeline template options. The first step when making a timeline on Microsoft PowerPoint is to create a template. To do this, start by launching the PowerPoint app and clicking the "Insert" tab on the top bar, which prompts a set of options.
Copy and paste the circle four times to produce a timeline with five milestones. Select the circle and hold down Ctrl + C to copy and Ctrl + V to paste or Cmd + C and Cmd + V if you are using Mac. Move the second circle to where you want the second milestone to be placed. Repeat to create the third, fourth, and fifth circles.
Here are the top 10 timeline presentation ideas proven effective for various types of storytelling. 1. Linear Timeline. Edit Now! Arranged vertically or horizontally, a linear timeline presentation is a sequence of events that appear in the order they have occurred. It's called linear because the timeline is often shown as a straight line.
Below are 11 types of timelines used in presentations. 1. Chronological timeline - Shows events or milestones in the order of occurrence. It shows the progression of events over time. Customize this template and make it your own! Edit and Download. 2. Linear timeline - A chronological representation of events.
Timelines. Discover our diverse collection of 46 Timeline templates for PowerPoint and Google Slides, expertly crafted to help you create visually stunning presentations that effectively showcase your project milestones, history, or plans. Timelines are invaluable tools for illustrating a sequence of events, whether it's for business ...
Free Google Slides theme, PowerPoint template, and Canva presentation template. Timeline infographics are simply great if you need to create a list of events, steps or processes in chronological order or if you want to mark some milestones! Never miss a key action, a date or a deadline again!
Timeline Presentation Templates. If you find the last one too casual and playful, then this timeline PowerPoint template might be the one for you! It also features 8 different models of timeline slides, but in a much soberer and simple grey color palette. It offers slides with quarterly, yearly, and monthly-based timelines.
Download PowerPoint Timeline Templates and illustrations to make attractive timelines for PowerPoint presentations. These professionally crafted timeline templates have been designed to provide presenters with all the necessary layouts and appropriate imagery to create PowerPoint timelines with convenience.
Funding and timeline The last $31.5 million needed to build the bridge may come from a Federal Railroad Administration Consolidated Rail Infrastructure and Safety Improvements grant.
Below is a link to the presentation and a description of the process. Focus Groups. Over 50 community members attended the focus groups in March. ... Timeline. The Community Challenge Grants program supports community-led, neighborhood improvement projects. This is a special partnership between the City and community leaders. We are # ...