
How to Create a Talking Presentation in Canva using 'Present and Record' Feature
Cannot present in a live session? No worries, pre-record your presentations with Canva's Talking Presentations.

Canva is a great tool for creating presentations, professional as well as personal. With thousands of templates and a rich content library for images, videos, and graphics, the presentations you can create with Canva are sure to stand out.
But that’s not all Canva is great for. Have you ever seen the words ‘Talking Presentation’ on Canva’s Home Page and wondered what they are? It’s Canva’s solution to a very real problem people face all the time.
A lot of people use presentations in webinars these days, or it’s a part of their website. The point being, presentations aren’t confined to just conference rooms these days. They have far greater reach. But presenting on the internet can be daunting. Talking presentations can help with that. They’re also great for when you cannot be present in person or maybe when some other people couldn’t attend.
Now, obviously, it isn’t really a presentation that talks, as in it doesn’t have any talking elements. You’re the one doing all the talking. It is basically a recording of the presentation with your video and voice-over. Canva studio makes the task so easy that you could do it with your eyes shut (metaphorically speaking, of course).
Creating a Talking Presentation
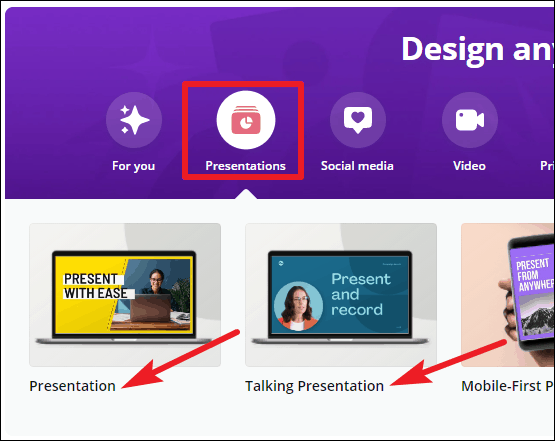
Go to canva.com and click on ‘Presentations’ to get started. It’s better to start with a template instead of a blank slate, but you can do either. Canva has a different category for ‘Talking presentations’. But it doesn’t matter whether you choose ‘Presentations’ or ‘Talking Presentations’, you can record for both types.
Create your presentation as you normally do. You can also go to Canva and open any of your existing presentations to convert them into a talking presentation.
Once your presentation is complete, go to the toolbar at the top of the editor.
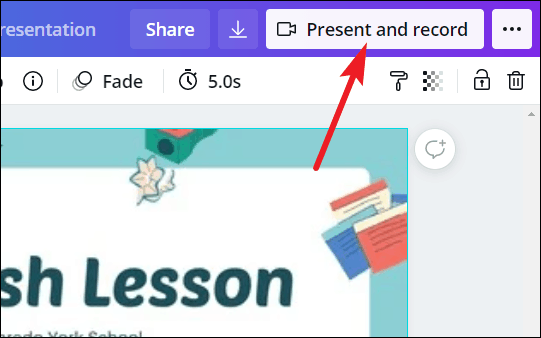
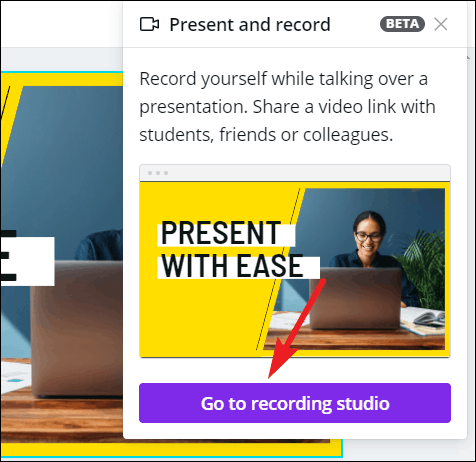
Now, if you chose ‘Talking Presentations’ while creating the presentation, the option for ‘Present and Record’ will appear on the toolbar itself.
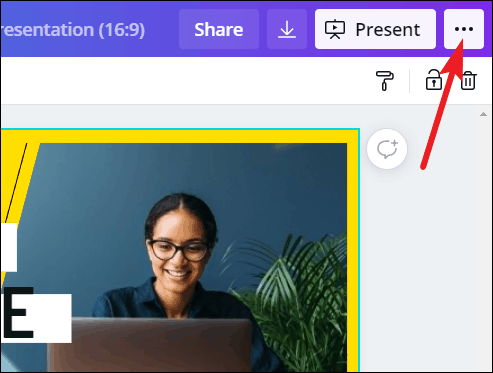
Otherwise, click the ‘three-dot’ icon next to the ‘Present’ button.
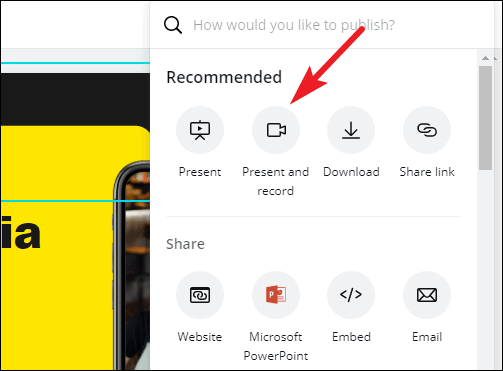
Then, select ‘Present and Record’ from the menu that appears.
Click the ‘Go to Recording Studio’ button.
Recording the Presentation
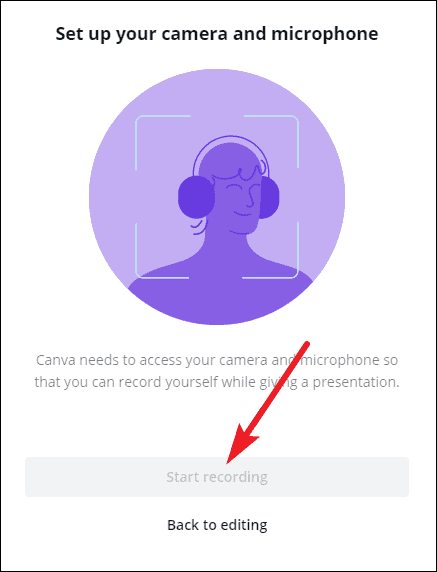
Your browser will display a pop-up that Canva wants access to your camera and microphone. Click ‘Allow’.

Once Canva has access to both, the ‘Start Recording’ button will become clickable. Canva needs access to both your camera and microphone for the Present and Record feature. If for some reason, access to either of these being blocked, you won’t be able to use the functionality.
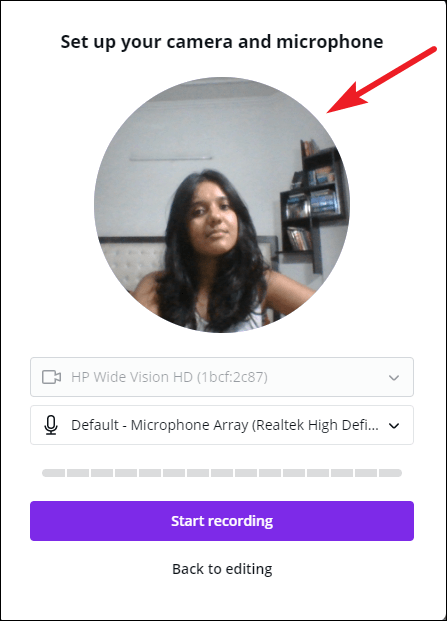
Before proceeding, check that your camera and microphone are working. You can see the preview of your video in the pop-up. You can also adjust your camera based on this preview, as this bubble represents how your video will appear while recording the presentation.
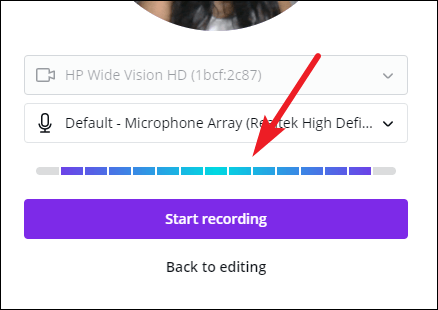
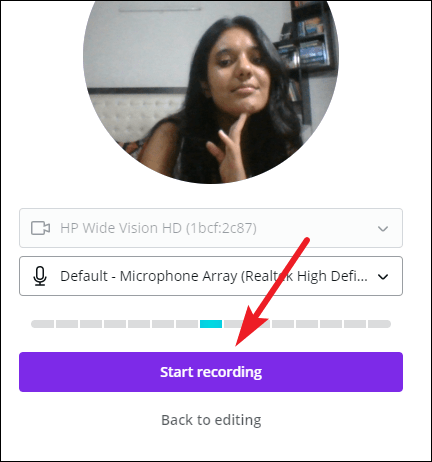
To check your microphone, say something. The bar beneath the microphone option will turn blue from gray if your microphone is working properly and Canva detects sound.
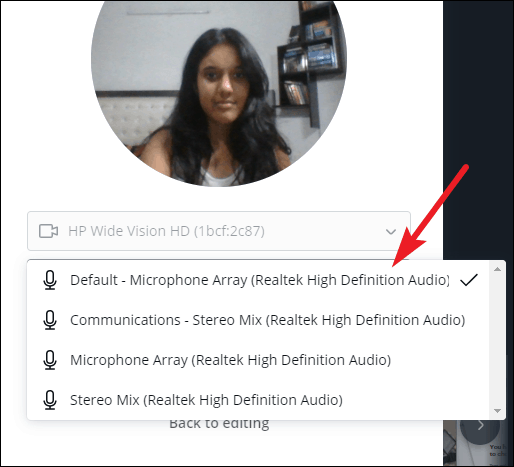
You can also change which camera or microphone to use (in case you have multiple) from the drop-down menus.
Once everything is spick and span, click the ‘Start Recording’ button to begin.
A 3-second timer will display on your screen; ready yourself for the recording during this time.

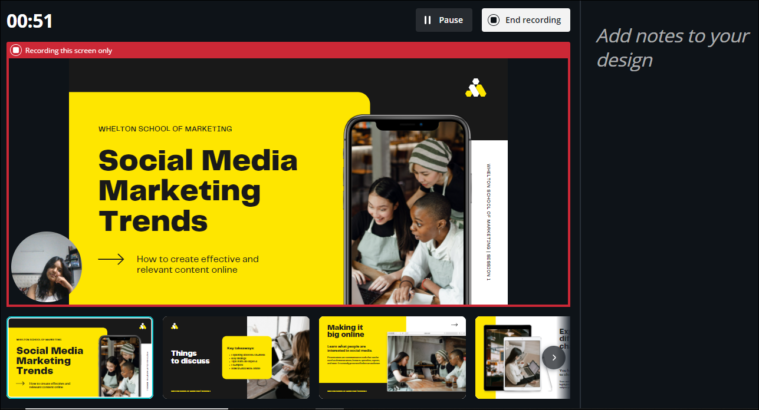
The recording screen will show all the slides in thumbnails and your notes in the right panel. But in the actual recording, only the presentation part (with your video in the lower-left corner) will be visible, which is highlighted in red during the recording session.
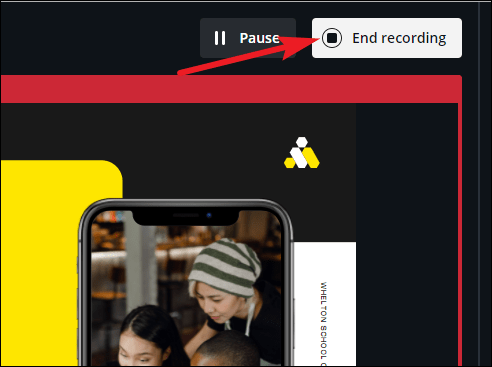
You can pause the recording at any time for a breather. Click the ‘Pause’ button to pause the recording.
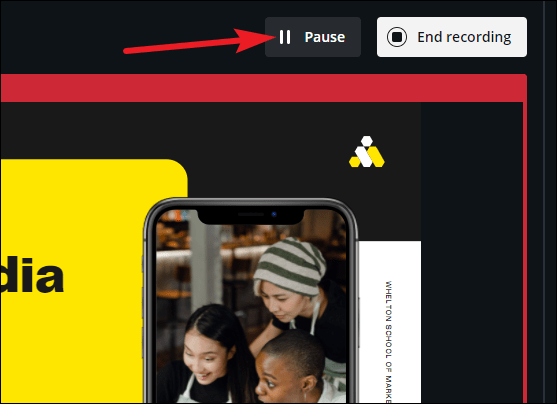
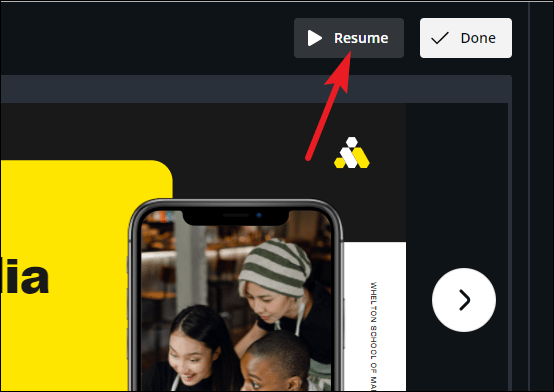
It’ll become the ‘Resume’ button when the recording is paused, click it restart the recording.
When you’re done, click the ‘End Recording’ button next to pause.
Sharing the Presentation
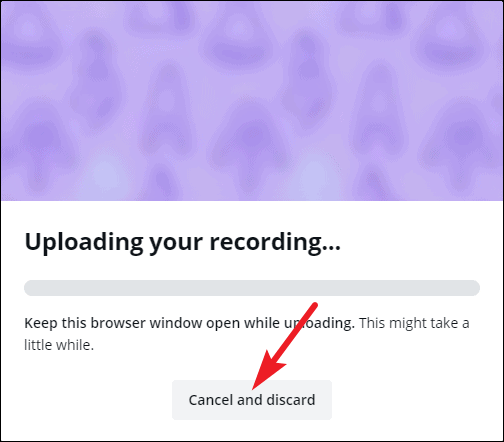
It’ll take a few seconds for your recording to process and upload. You can discard the recording at this stage if you weren’t happy with it and begin again.
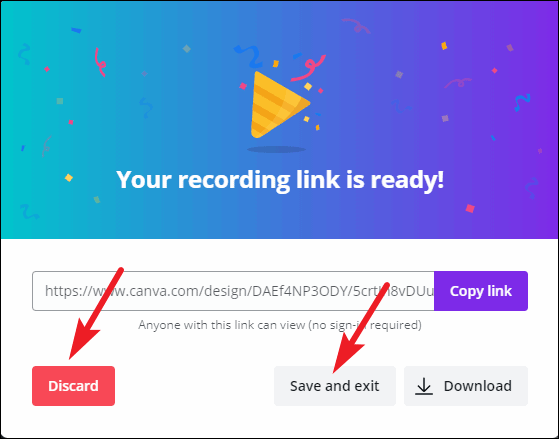
Once it uploads, the link for your recording will be ready. You can share it with others directly. Or you can download it on your computer. If you want to watch the recording before sharing it with others, you can either go to the recording link yourself or download it and then watch it.
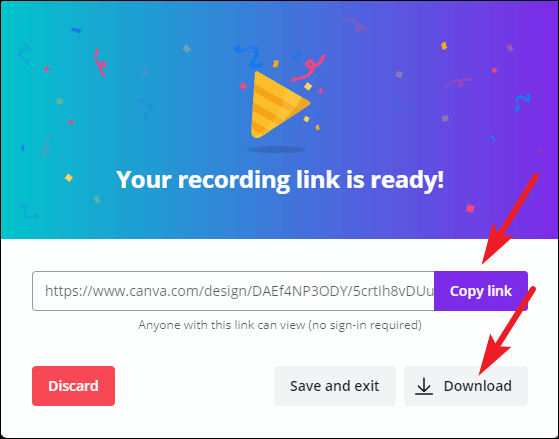
You can also just ‘Save and exit’ instead of choosing from either of the above options. Or click ‘Discard’ if you want to record again.
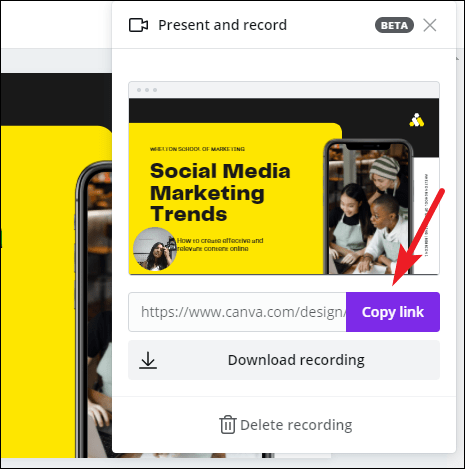
If you click ‘Save and exit’, you can access the recording again at any time. Open the presentation, and click the ‘Present and Record’ button.
The Present and Record menu will open, and it will have the link to the recording as well the options to download and delete it. If you want to re-record, you’ll first have to delete this recording.
Anyone can go to the link and watch the presentation without any requirement for a sign-in. Or you can download it and upload it to your website, or use it in your webinar. The options are boundless and it’s up to you.
If you want people to no longer be able to watch the presentation recording, simply delete it from the ‘Present and Record’ menu, and the link will no longer show the recording.
Canva is the perfect tool for your presentations. Not only can you create amazing presentations, but it also provides tools for what comes after. Like presenting it in circumstances when you cannot do it live. Recording the presentation adds that personal touch that simply sending it to people cannot capture.

How to Use Gemini Code Assist in VS Code

How to Code Using AI

Microsoft Copilot Pro Review: There is a lot of Unrealized Potential
Get all the latest posts delivered straight to your inbox., member discussion.

How to Cancel Snapchat Plus Subscription

What Does Time Sensitive Snapchat Notification Mean and How to Turn It Off

How to Clear Discord Cache on Windows 11

How to Fix "Premium Images Can't Be Exported On Their Own" Error in Canva

Best Password Managers in 2024
- Digital Planners
- Canva Templates
- PLR digital Products

Recording Voice Overs in Canva
- February 18, 2024
Recording voice overs can add a dynamic dimension to your Canva designs, whether you’re creating presentations, videos, or interactive content. Canva offers a simple and intuitive tool for recording voice directly within its platform, making it easy for users to add narration, commentary, or audio effects to their projects. In this guide, we’ll explore the ins and outs of recording voice in Canva, from accessing the feature to optimizing your recordings for maximum impact.
Exploring Canva
Canva is an innovative online design platform that empowers users to bring their creative visions to life without the need for extensive design experience or technical skills. It offers a diverse array of tools and features, allowing individuals and businesses alike to craft visually stunning graphics, presentations, videos, and more. With its user-friendly interface and vast library of templates, images, illustrations, and fonts, Canva serves as a one-stop destination for all design needs.
Whether you’re a seasoned designer looking to streamline your workflow or a novice seeking to explore your artistic side, Canva provides the flexibility and resources to support your endeavors. From social media graphics and marketing materials to educational resources and personal projects, Canva offers endless possibilities for creating captivating visual content. With its intuitive drag-and-drop editor, customizable templates, and collaborative features, Canva empowers users to unleash their creativity and produce professional-quality designs with ease.
One of the standout features of Canva is its ability to record voiceovers directly within the platform. This functionality enables users to add narration, commentary, or audio effects to their designs, enhancing engagement and interactivity. Whether you’re creating a presentation, video, or interactive content, Canva’s voice recording tool makes it easy to incorporate audio elements seamlessly into your projects. With just a few clicks, users can record, edit, and customize voiceovers to suit their specific needs, making Canva a versatile tool for multimedia content creation.
IN THIS ARTICLE
Step-by-step guide to recording voice in canva.
Setting Up :
- Creating an Account: To initiate the process of recording voiceovers in Canva, you’ll first need to have a Canva account. If you’re new to Canva, signing up is a straightforward process. Head to the Canva website and click on the “Sign Up” button. You’ll be prompted to enter your email address, create a password, or alternatively, sign up using your Google or Facebook account. Once you’ve completed the registration steps, you’ll have access to your Canva dashboard.
- Account Options: Canva offers users both free and paid subscription options, catering to a variety of needs and preferences. With the free plan, you’ll have access to a wide range of design tools, templates, and resources, making it an excellent starting point for beginners or those on a tight budget. On the other hand, Canva’s paid plans, such as Canva Pro or Canva for Enterprise, unlock additional features and functionalities, including advanced design tools, larger storage capacities, and collaborative capabilities. Consider your design requirements and budget constraints when choosing between the available subscription options.
- Writing Your Voiceover Script: When crafting your voiceover script, it’s essential to have a clear understanding of the message you want to convey to your audience. Start by outlining the key points you want to cover, considering the purpose and context of your design. Whether you’re narrating a presentation, guiding viewers through a video, or adding commentary to an infographic, your script should be concise, engaging, and relevant to your target audience. Take the time to brainstorm ideas and organize your thoughts before putting pen to paper.
- Script Editing: Once you’ve drafted your script, it’s time to refine and polish your content to ensure it effectively communicates your message. Review your script for clarity, coherence, and consistency, eliminating any unnecessary or redundant information. Pay attention to the flow of your narrative, ensuring a smooth transition between ideas and sections. Consider the tone and style of your voiceover, adapting your language and phrasing to resonate with your audience. Keep your sentences clear and concise, avoiding jargon or complex terminology that may confuse listeners. By editing your script with care, you can enhance the impact and effectiveness of your voiceover, captivating your audience and delivering your message with clarity and conviction.
- Recording Space: Choosing the ideal recording space is crucial to ensuring high-quality audio for your voiceover. Look for a quiet environment with minimal background noise to minimize distractions and ensure clarity in your recording. Opt for a room with soft furnishings or carpeting to dampen echoes and reduce reverberation. Consider using soundproofing materials such as acoustic foam panels or curtains to further improve the acoustics of your recording space. By selecting a suitable environment, you can create an optimal setting for capturing clear and professional-grade audio.
- Equipment: Investing in the right equipment is essential for achieving crisp and high-fidelity audio recordings. Start by selecting a quality microphone that suits your recording needs and budget. Choose a microphone with a cardioid or condenser pickup pattern for capturing clear and detailed sound while minimizing background noise. Additionally, consider using a pop filter or windscreen to reduce plosive sounds and breath noises for smoother recording. Pair your microphone with a set of headphones to monitor your audio levels and ensure accurate playback during recording sessions. By investing in reliable equipment, you can elevate the quality of your voiceovers and deliver professional-grade audio content to your audience.
Recording Your Voice Over:
Access Voice Recorder: Locate the “More” option in the editor toolbar, typically situated at the top or side of the screen. Click on “More” to reveal a dropdown menu of additional tools and features. From the menu, select “Voice Recorder” to access the recording functionality within Canva.
Record: Once the voice recorder interface appears, you’ll see a prominent record button that initiates the recording process. Before you begin recording, ensure your microphone is properly set up and positioned for optimal audio capture. When you’re ready, hit the record button and start speaking clearly into your microphone. Articulate your words and maintain a consistent pace throughout your narration. When you’ve finished recording your voiceover, press the stop button to halt the recording process. Canva will automatically save your recorded audio for further editing and integration into your design.
Editing Your Voice Over in Canva:
Import Audio: After recording your voiceover, Canva seamlessly integrates the audio file into your design project. The recorded audio automatically appears within your Canva workspace, ready for editing and placement within your design.
Add to Design: To incorporate your voiceover into your design, simply drag the audio file from the sidebar or designated folder onto your design canvas. Position the audio file wherever you prefer within your layout, ensuring it complements the visual elements and enhances the overall user experience.
Adjust Settings: Canva provides a range of editing options to customize your voiceover and optimize its impact on your design. Utilize the audio toolbar to fine-tune various settings, including volume levels, playback speed, and audio effects. Adjust the volume to achieve the desired balance between your voiceover and other audio elements within your design. Experiment with playback speed to control the pacing of your narration, catering to the preferences of your audience. Additionally, explore available audio effects to enhance the quality and atmosphere of your voiceover, such as equalization, reverb, or noise reduction. By leveraging these editing capabilities, you can refine your voiceover to perfection and elevate the overall audiovisual experience of your design.
Exporting Your Design with Voice Over:
Save Design: Once you’ve completed your design and integrated the voiceover, it’s time to export the finished product. Navigate to the toolbar and locate the “Download” button. Click on it to reveal a dropdown menu with various format options for exporting your design. Select the format that best suits your needs, such as PDF, JPG, PNG, or MP4, depending on the intended use and distribution channels.
Customize Settings: Before finalizing the export process, take a moment to customize any settings relevant to your chosen format. For instance, if exporting as an image file (e.g., JPG or PNG), you may have the option to adjust image quality or resolution. Similarly, if exporting as a video file (e.g., MP4), consider configuring parameters such as video dimensions, frame rate, and compression settings to optimize playback quality and file size.
Save or Download: After configuring the export settings to your satisfaction, proceed to save or download the design with the embedded voiceover. Depending on your Canva subscription plan, you may have different options for saving and downloading files. Free users typically have access to basic export options, while Canva Pro subscribers enjoy additional features such as higher-quality downloads, transparent backgrounds, and animated exports. Select the desired download option and confirm the export process to generate the final file.
Share Your Design: With the exported design file in hand, you’re ready to share your creation with the world. Consider various distribution channels and sharing methods to reach your target audience effectively. Share the design via email, social media platforms, messaging apps, or embed it directly on your website or blog for broader visibility and engagement. By leveraging Canva’s versatile sharing capabilities, you can amplify the reach of your voiceover-enhanced design and captivate your audience across diverse digital platforms.
By following these steps, you can seamlessly record and add voiceovers to your Canva designs, enhancing their appeal and engagement.
Tips and Tricks for Optimal Voice Recording
Choose a quiet environment: Select a location with minimal background noise and distractions to ensure your voice recording remains clear and free from unwanted sounds. Consider quiet rooms, closets, or enclosed spaces with soft furnishings to help absorb ambient noise and echo.
Use a pop filter: If available, attach a pop filter or windscreen to your microphone to minimize plosive sounds and excessive air bursts when speaking. Pop filters help prevent harsh consonant sounds like “p” and “b” from distorting your voice recording, resulting in smoother and more professional audio quality.
Practice good microphone technique: Position your microphone at an optimal distance from your mouth to capture your voice accurately without distortion or clipping. Experiment with microphone placement and angles to find the sweet spot that delivers the clearest and most natural-sounding audio. Additionally, speak directly into the microphone to ensure consistent volume levels and avoid audio inconsistencies.
Experiment with different recording settings: Explore Canva’s recording settings to adjust microphone input levels, apply noise reduction filters, and fine-tune other audio parameters for optimal recording quality. Depending on your environment and microphone setup, you may need to tweak these settings to achieve the best results. Take the time to experiment with different configurations until you find the perfect balance between clarity and naturalness in your voice recordings.
Introducing the 2024 BLACK GIRL Digital Planner – your ultimate companion for a year of empowerment and organization! With an impressive 566 pages fully hyperlinked, this planner is designed to keep you on track and inspired every step of the way. Whether you’re juggling work, school, or personal goals, this planner has you covered. Compatible with popular note-taking apps like GoodNotes, Notability, and Xodo, it seamlessly integrates into your digital lifestyle. Plus, with additional templates for wellness, fitness, finance, and productivity, you’ll have everything you need to thrive in the year ahead. Don’t miss out on this essential tool for success. Get your 2024 BLACK GIRL Digital Planner today and start conquering your goals with confidence!
Can I record voice in Canva using a mobile device?
Absolutely! Canva’s voice recording feature is available on both desktop and mobile devices, allowing you to record audio on the go.
Are there any limitations to the length of recordings in Canva?
Canva does impose certain limitations on the length of recordings, depending on your subscription plan and the specific design project you’re working on. However, for most standard projects, you should have ample recording time available.
Can I edit my voice recordings in Canva?
Yes, Canva offers basic editing tools for trimming, splitting, and rearranging audio clips. You can also adjust volume levels and apply audio effects to enhance your recordings.
Can I add music or sound effects to my voice recordings in Canva?
While Canva’s voice recording tool primarily focuses on capturing spoken audio, you can incorporate music or sound effects into your projects by importing audio files from your device or Canva’s media library.
Can I download my voice recordings from Canva for use outside of the platform?
Yes, once you’ve completed your voice recording in Canva, you can save and export your project in your desired audio format (e.g., MP3, WAV). This allows you to use your recordings in other applications or platforms as needed.
Is it possible to record multiple audio tracks simultaneously in Canva?
As of now, Canva does not support recording multiple audio tracks simultaneously within the platform. Each recording must be done separately and then combined manually if necessary.
Can I add background music to my voice recordings in Canva?
Yes, you can add background music to your voice recordings by importing audio files into your Canva project. Simply place the music track on a separate layer below your voice recording for a layered audio effect.
Does Canva offer any voice enhancement tools or filters?
While Canva provides basic audio editing features, such as trimming and volume adjustment, it does not currently offer advanced voice enhancement tools or filters. However, you can use third-party software or apps to further enhance your recordings before importing them into Canva.
Can I record voiceovers for video projects in Canva?
Yes, Canva allows you to record voiceovers for video projects, enabling you to add narration, commentary, or dialogue to your multimedia presentations. Simply import your video file into Canva and use the voice recording tool to overlay audio onto your visuals.
Are there any privacy considerations when recording voice in Canva?
When recording voice in Canva, it’s essential to consider privacy and confidentiality concerns, especially if your recordings contain sensitive or personal information. Be mindful of who may have access to your Canva projects and take appropriate measures to protect your audio recordings from unauthorized sharing or distribution.
In conclusion, Canva’s voice recording feature offers users a convenient and versatile tool for adding audio narration, commentary, or sound effects to their designs. Whether you’re creating presentations, videos, or interactive content, the ability to record voice directly within the platform streamlines the design process and enhances the overall user experience. With Canva’s intuitive interface and robust editing capabilities, users can easily customize their voice recordings to align with their specific project requirements. From mobile devices to desktop computers, Canva empowers individuals and businesses alike to unleash their creativity and communicate their message effectively through the power of audio. So, dive into Canva’s voice recording feature today and elevate your designs with professional-quality audio enhancements!
Did you know that Canva offers an exclusive Pro discount for students and teachers? It’s a fantastic opportunity to enhance your design capabilities at a special rate. If you’re a student or educator, don’t miss out on this great deal! Learn more about getting your Canva Pro student discount on A Guide to Getting a Canva Student Discount

2024 BLACK GIRL Digital Planner
BLACK GIRL Digital Planner 2024, Daily, Weekly and Monthly Planner for iPad & Tablet Compatible with GoodNotes, Notability & XODO

SIGN UP TO RECEIVE THE LATEST TIPS & TRICKS, PLUS SOME EXCLUSIVE GOODIES! We don’t spam! Read our privacy policy for more info.
You’ve been successfully subscribed to our newsletter!
Related Posts

How To Print In Canva?
- April 28, 2024
Continue reading

How to Merge Two Elements in Canva
- April 25, 2024

Step-by-Step Guide to Editing Your Resume using Canva

Discovering the Transformative Definition of Mindfulness
- February 23, 2024

How to Create Text Masks in Canva
- February 22, 2024

5 Top Canva Video Downloaders
- April 21, 2024

Creating 300 DPI Images Using Canva
- February 28, 2024

Crafting Texture Effects in Canva with Transparent Overlays

How to Download a Folder in Canva
- March 28, 2024

How to Create a Website on Canva
- March 2, 2024

How to Create Hanging Indents in Canva

Social Media Scheduling with Canva Content Planner
- February 6, 2024
Leave a Reply Cancel reply
Your email address will not be published. Required fields are marked *
Save my name, email, and website in this browser for the next time I comment.
- Login / Register
Username or email address *
Password *
Lost your password? Remember me
No account yet?
We explain and teach technology, solve tech problems and help you make gadget buying decisions.
How to Create Presentations in Canva

Parth Shah is an evergreen freelance writer covering how-tos, app guides, comparisons, listicles, and troubleshooting guides on Android, iOS, Windows, Mac, and smart TV platforms. He has over five years of experience and has covered 1,500+ articles on GuidingTech and Android Police. In his free time, you will see him binge-watching Netflix shows, reading books, and traveling.
Canva recently introduced new tools to create docs, whiteboards, videos, websites, and presentations. As such, you no longer need to rely on traditional software solutions like Google Slides, PowerPoint, or Keynote to create an upcoming business presentation. You can easily create presentations in Canva using its familiar suite of editing tools.

Canva offers real-time collaboration, several export options, a present tool, AI add-ons, and much more to make a professional PPT. Canva also lets you make instant presentations with pre-filed slides. Without further ado, let’s get started.
Pick Up an Aspect Ratio and Template
Before you start, make sure to pick a relevant aspect ratio for your presentation. If it’s a traditional PPT, go with a 16:9 aspect ratio. If you plan to show your PPT on mobile, use the 9:16 aspect ratio.
Tablet users can start with a 4:3 aspect ratio. Canva also offers some ready-to-use templates to get started. We highly recommend starting with a template to save some time.

You can also filter templates via style, theme, feature, and color. For example, you can check company, marketing, corporate, marketing, school, and other templates. Most templates are free to use, while some may require a Canva Premium subscription.
Under templates, you also find an option to create instant presentations. You can enter a prompt and check Canva’s suggestions to get started.

Customize a Page With Editing Features
Once you pick up a template, you have the option to add all pages to your presentations. You can click ‘Apply all pages’ and check every slide at the bottom. You can always select a slide and hit delete to remove it from your presentation.

Canva lets you change every aspect of the template with different text styles, filters, and image editing tools. You can change color, tweak transparency, copy style, and more.

We suggest spending some time with editing tools to customize your Canva presentation and add some personal touches.
Add Graphics, Stickers, and Images
Your presentation will not seem as interesting without graphics, stickers, images, and videos. Unlike Google Slides or PowerPoint, you don’t need to import media files to Canva to complete your slides. You can easily add relevant elements from the sidebar.
Step 1: Open a slide in your Canva presentation.
Step 2: Select Elements from the sidebar. Add graphics, icons, stickers, tables, videos, and more.
Step 3: You can explore the AI image generator and turn your creative ideas into images and videos with a single click.

You can add simple descriptions and even turn generated images into videos. Canva also offers a long list of graphics packs in several categories. The possibilities are endless here. It’s up to you to make a compelling slide using useful tools.
Tweak Page Animation
Once you create a page, tweak its animation to make a smooth transition between pages.
Step 1: Select a slide in Canva.
Step 2: Click Animate at the top.
Step 3: Check basic, exaggerated, photo movement, and other animation types from the left sidebar.

You can also tweak the animation intensity, which is great.
Add Presenter Notes
Do you plan to present your Canva PPT on a video conference? You can add notes to each slide so they appear during the Presenter view (more on that later).
When you create a PPT, select a slide and hit Notes at the bottom. Enter your notes that you want to remember or talk about during a video meeting.

Collaborate and Edit in Real Time
Similar to Google Slides and Microsoft PowerPoint, Canva lets you share and edit a presentation in real time. You can take inputs from your colleagues and create a share-worthy presentation in no time.
Step 1: When you are done making changes to your presentation, click Share at the top.
Step 2: Enter people, groups, or your team. Expand the collaboration link menu and select Anyone with the link.
Step 3: Expand the permission menu and select Can edit.

You can also share a link with view or comment-only permission. Select the Copy link and share it with your co-workers.
Enable Presenter View
Presenter view is a thoughtful touch from Canva to give presentations over a Google Meet or Teams call.
You can open a presentation in Canva and select Present at the top. Click Presenter View and check two windows opening up on your computer.

One window shows your presentation with notes open on the sidebar. Another window displays the current slide you are sharing with others over a call.

Download and Share Your Presentation
As expected, Canva gives several options to share and export your presentation. When you complete your presentation, click Share in the top-right corner and expand Download.
You can convert a presentation to PDF, PPTX (Microsoft PowerPoint compatible), MP4, JPG, PNG and SVG formats. Check our dedicated post if you wish to print your Canva presentation .

Use Canva Like a Pro
Canva has done a solid job, granting users access to rich tools to create a convincing presentation. We can’t wait to see how the Australian startup enhances our PPT experience with AI features in the future. Speaking of which, we would love to see a feature similar to ‘Design Ideas from Microsoft PowerPoint’ on Canva. Do let us know if you use Canva for presentations in the comments below.
Was this helpful?
Last updated on 07 January, 2024
The above article may contain affiliate links which help support Guiding Tech. However, it does not affect our editorial integrity. The content remains unbiased and authentic.

The article above may contain affiliate links which help support Guiding Tech. The content remains unbiased and authentic and will never affect our editorial integrity.
DID YOU KNOW

More in Internet and Social

How to Get Dark Mode in Google Sheets (PC and Mobile)

Top 8 Ways to Fix Facebook Comments Not Loading on Android and iPhone
Join the newsletter.
Get Guiding Tech articles delivered to your inbox.
- Presentation
Best method for add voice over to canva presentation

- March 11, 2023

Audiences can get bored with traditional and common presentation methods, so you need to have creativity in your Presentation design services . Canva voice-over is one of the most creative and useful methods to avoid your audiences getting bored. Voiceovers can add visual cues to slides that otherwise look more exciting and fun, and graphic design tools features such as Canva voice over let you add voiceovers quite easily. This blog post is written for you if you need to know if you can add voiceover to Canva or if you want to learn how to add voice over in Canva per slide .
Table of Contents
can you add voice recording to Canva?
The answer is YES. Canva supports adding voiceover to presentations and videos. You can easily and directly Canva voice recording by your own voice with the help of an external recording studio or using AI tools to generate a voiceover for your presentation.
How to add voice over in Canva presentation with the audio file?
You should ensure the files are edited when uploading to Canva since it is almost impossible to have a customization option on the site.
When you are done with your slides, and they are completed, then upload them into Canva. Ensure that file names are properly spelled to avoid confusion when organizing the documents after creating one file per student. It is meant to name the files, like the number of slides.
Select the file and drag it on the first slide (with the voiceover). This is because it is an MP4 file, and you can see a black box on each slide.
Ensure your audio file plays smoothly by clicking the play button at the very top. When you are through, just click on an audio file block and go for the transparency tab.
Move the transparency slider towards your right so that you almost make the audio block disappear. Like that, you may adjust the audio file’s audio level/volume by clicking the Volume button along the upper ribbon.
You can also pull the audio block at the back of your slide when many pieces are running on your presentation. The end result will be that the audio block will not be seen out.
Follow the same steps for each of your slides. When you are ready, click the play button to watch your voiceovers live. Also, one can find a ‘Record Yourself’ button in the Upload panel of Canva. Nevertheless, our tests did not manage to work with it.
How to add voiceovers to your designs using Murf AI?
Turn your designs into reality using Murf’s lifelike AI voices. Choose among various good-quality voices in many languages, attitudes, and moods. The script is all you need to do the job. In order to utilize this application, you have to sign in your MURF AI account.
Note: Be aware that this app is only available in Australia, Canada, New Zealand, the UK, and the US on desktop.
From the homepage
1- Fires, go to Apps on your homepage.
2- Type “Murf AI” in the search bar and hit “Enter” to start searching.
3- Click on the Murf AI, and you will see a pop-up window open.
4- Choose Use an existing design to integrate the app into an already developed presentation. Browse through the folder named ‘Your Projects’ or ‘People shared with you.’
5- Select Use in the new design to use the app with the new design. From the following suggested list, select a design that suits you best.
From the editor
1) Open the side panel and select Apps.
2- Go to the search bar and type “Murf AI” and use the enter key on your keyboard to run the search.
3- By selecting Open, a Pop-up window will display that you can log in using your Murf AI account.
4- By logging in, you can start adding voice-over in Canva.
How to Add an AI voiceover to Canva?
1-Select a language by clicking on this option.
2- Choose the voice you prefer. In case you have Murf.AI Pro accessibility, you could click on see all and select more options from different voices.
3 – Paste your script into the Enter your text box section.
4- Go down to choose style and click on any emotion and voice styles available.
5- Other than this, you may also change the Speed and Pitch by dragging the sliders.
6 – click “generate voiceover” to hear the prepared voiceover. You need to make sure that you are content and then go ahead and click “Add to Design” to add it to your Canva presentation.
Canva is a powerful yet intuitive design platform. It’s Perfect for creating Canva voice over presentations and illustrations alike. Its user-friendly features, such as voiceovers, help give graphics and designs more personal touches. You can add voice-over in Canva, with these methods we introduced you in our blog post, to have a better and effective presentation.
Can I add different audio per slide in Canva?
Yes, Canva allows you to add multiple audio clips to a project, even if you are a free Canva user. You will have to create a Canva Video Project in order to accomplish this.
Can I record in Canva free of charge?
Save your video clips to add and edit them into your design with Canvas free online video recorder. Canvas online video recorder allows you to save and add video clips to your design

- Graphic Design , UI-UX
How to Become a Motion Graphic Designer?

A Brief Overview of Lean UX

UX Strategy and Its Components
you'r more than welcome
7 days a week, 9:30 AM – 5:30 PM
contact info
[email protected] +971581974748
- LB07129, Jebel Ali Freezone, Dubai, UAE
Got a Project?
We’re a team of creatives who are excited about unique ideas and help companies to create amazing identity by offering wide range of digital services
© 2021 All rights reserved.
Be the first one who knows about updates!
enter your email address 📩
Welcome to the club 🎉.
From now on, Temis will inform you of its most valuable content and offers. You can also subscribe to this list at the moment. We will also protect your privacy
How to Easily Record Voice Over in Canva
Home » Blog » How to Easily Record Voice Over in Canva

Founder of CanvaTemplates.com & Professional Graphic Designer
Jake Tucker
Canva Templates is reader supported. When you buy through links on our site, we may earn an affiliate commission. Learn more
Canva is a versatile graphic design tool that allows you to create stunning designs for various purposes, including social media, marketing, and presentations. One of the exciting features of Canva is the ability to add voiceovers to your designs, making them more engaging and interactive. In this article, we will explore how to record voice over in Canva, step-by-step.
Recording voiceovers in Canva is a straightforward process that requires a few simple steps. Whether you are creating a presentation, a social media post, or a marketing video, adding a voiceover can help you convey your message more effectively. In the following paragraphs, we will guide you through the process of recording voiceovers in Canva, using the built-in recording feature or an external recording tool.
Adding a voiceover to your designs can help you stand out from the competition and engage your audience on a deeper level. With Canva, you can record your voiceovers directly within the app or use an external tool to create high-quality recordings. Whether you are a marketer, a content creator, or a business owner, learning how to record voice over in Canva can help you create more compelling designs that resonate with your audience.
Setting Up Your Canva Account
Before you start recording voiceovers in Canva, you need to create an account and familiarize yourself with the platform. Here are the steps to get started:
Creating an Account
To create an account on Canva, follow these simple steps:
- Go to the Canva website and click on the “Sign up” button.
- You can either sign up with your Google or Facebook account, or create a new account by entering your email address and a password.
- Once you have created your account, you will be taken to the Canva dashboard.
Navigating the Dashboard
The Canva dashboard is where you will find all the tools and features you need to create your designs. Here’s a quick overview of the different sections on the dashboard:
- The “Create a design” button allows you to choose from a variety of templates for different design types, such as social media posts, presentations, and flyers.
- The “All your designs” section displays all the designs you have created or worked on.
- The “Templates” section contains a wide range of pre-designed templates that you can use as a starting point for your designs.
- The “Folders” section allows you to organize your designs into folders for easy access and management.
- The “Team” section is where you can invite other team members to collaborate on your designs.
Once you have created your account and familiarized yourself with the dashboard, you are ready to start recording voiceovers in Canva.
Preparing Your Voice Over Script
Before you start recording your voice over in Canva, it’s important to prepare your script. Writing and editing your script beforehand will help you stay on track and deliver a clear, concise message to your audience. Here are some tips to help you prepare your voice over script.
Writing Your Script
When writing your script, keep in mind who your audience is and what message you want to convey. Your script should be clear, concise, and easy to follow. Here are some things to consider when writing your script:
- Use simple language and avoid jargon or technical terms that your audience may not understand.
- Keep your sentences short and to the point.
- Use bullet points or tables to organize your information and make it easier to read.
Editing Your Script
Once you’ve written your script, it’s important to edit it for clarity and conciseness. Here are some tips to help you edit your script:
- Read your script out loud to make sure it flows smoothly and sounds natural.
- Eliminate any unnecessary words or phrases that don’t add to your message.
- Use active voice instead of passive voice to make your script more engaging.
By preparing your voice over script ahead of time, you’ll be able to deliver a clear, concise message to your audience. Keep these tips in mind when writing and editing your script to ensure that your message is effective and engaging.
Recording Your Voice Over
Recording a voice over in Canva is an easy process that can be done in just a few steps. However, to produce high-quality voice overs, it is essential to have the right equipment, set up your recording space correctly, and follow the proper recording techniques.
Selecting the Right Equipment
To record a voice over in Canva, you don’t need any fancy equipment. However, having a good quality microphone can significantly improve the quality of your recording. A USB microphone is a great option as it is easy to set up and use. Some popular microphone options for recording voice overs include the Blue Yeti, Audio-Technica AT2020, and Rode NT-USB.
Setting Up Your Recording Space
The environment in which you record your voice over can significantly impact the quality of your recording. A quiet and well-insulated room is ideal for recording voice overs. You can also use sound-absorbing materials such as blankets or foam to reduce background noise.
Make sure to turn off any sources of noise such as fans, air conditioning, or any other distracting sounds. It is also essential to eliminate any echoes or reverberations in the room by placing soft materials such as rugs or curtains to absorb sound.
Once you have selected the right equipment and set up your recording space, it’s time to record your voice over. Before you start recording, make sure to warm up your voice by doing some vocal exercises to prevent any strain or fatigue.
When recording, speak clearly and at a moderate pace. Try to maintain a consistent distance from the microphone to avoid any fluctuations in volume. It is also essential to avoid any background noise or interruptions during the recording process.
In Canva, you can record your voice over using the “Present and Record” feature. Simply click on the “Record” button and start speaking. Once you are done, click on the “Stop” button, and your recording will be saved.
In conclusion, recording a voice over in Canva is a simple process that requires the right equipment, a well-set-up recording space, and proper recording techniques. By following these steps, you can produce high-quality voice overs that will enhance your Canva presentations.
Editing Your Voice Over in Canva
Once you’ve recorded your voice over in Canva, you can edit it to make it sound perfect. Here are the steps to edit your voice over in Canva:
Importing Your Audio File
First, you need to import the audio file you recorded into Canva. To do this, click on the “Uploads” button on the left sidebar, and then click on the “Upload Media” button. Choose the audio file you want to use and upload it to Canva.
Adding Your Voice Over to Your Design
Once you’ve uploaded your audio file, you need to add it to your design. To do this, click on the “Audio” button on the left sidebar, and then click on the audio file you just uploaded. Drag and drop the audio file onto the design where you want it to play.
Adjusting the Audio Settings
Now that you’ve added your voice over to your design, you can adjust the audio settings to make it sound perfect. To do this, click on the audio file on your design, and then click on the “Audio” button that appears. Here, you can adjust the volume, fade in and fade out, and loop the audio file if necessary.
You can also add multiple audio files to your design and adjust their settings individually. This is useful if you want to add background music to your voice over or if you want to include sound effects.
In conclusion, editing your voice over in Canva is a simple process that can help you create high-quality presentations, videos, and more. By following the steps outlined above, you can make your voice over sound professional and engaging.
Exporting Your Design with Voice Over
Once you have recorded your voice over in Canva, you will want to export your design with the voice over included. This will allow you to share your presentation with others, or use it in your own projects. In this section, we will cover how to save and share your design with voice over.
Saving Your Design with Voice Over
To save your design with voice over, simply click on the “Download” button in the top right corner of the screen. From there, you can choose the file format that you want to save your design in. Canva supports a variety of file formats, including MP4, PDF, and PNG.
If you want to save your design with voice over as an MP4 file, you can choose the “Video” option from the download menu. This will export your design as a video file with the voice over included. You can then upload this video to social media or video sharing platforms.
Sharing Your Design with Voice Over
To share your design with voice over, you can use the “Share” button in the top right corner of the screen. This will allow you to share your design with others via email, social media, or a direct link. You can also choose to make your design public, which will allow anyone to view it.
When sharing your design with voice over, it is important to keep in mind the file size. If your design is too large, it may take a long time to upload or download. To reduce the file size, you can try compressing your video or using a lower resolution.
I hope you found this guide covering how to record a voice over in Canva, useful! Be sure to check out our blog for more article covering the essential tips, tricks, and advice for Canva! Also, if you haven’t already tried CanvaPro, you can try it for free for 30 days !
How to Add a Voice Over to Canva Video

Looking for our Text to Speech Reader ?
Featured In
Table of contents, creating your canva account and starting a project, familiarize yourself with the video editor, adding an audio file or recording your own voice, using ai voiceover tools, recording your own voice, customizing the voiceover, finalizing and exporting your video, speechify voiceover, how do you add voice over to a video, how do i add audio to a video in canva, how do i record myself on canva, can you separate audio from video in canva, can you add a voice over to a video in canva, what is the best microphone for canva, how do i edit audio in canva, what is the difference between a voice-over and a voice-off.
In the realm of graphic design and video content creation, Canva has established itself as a versatile and user-friendly tool. With the recent advancements...
In the realm of graphic design and video content creation, Canva has established itself as a versatile and user-friendly tool. With the recent advancements in AI tools and features, adding a voiceover to your Canva video has become more accessible than ever. This tutorial is designed for beginners and content creators who wish to enhance their Canva presentations or social media posts with high-quality voice narration. Here's a step-by-step guide to get you started.
Firstly, you need to have a Canva account. If you don’t have one, visit the Canva homepage, click on the sign-up button at the top right corner, and follow the registration process. Once logged in, you can start your project by selecting a template that suits your needs. Canva offers a wide range of templates for different types of video content, from YouTube videos to social media posts.
Canva’s video editor is intuitive and easy to navigate, even for beginners. The main toolbar includes options to customize your project with text, fonts, animations, and sound effects. You can drag elements onto your canvas, and adjust them according to your design vision.
If you have a pre-recorded audio file (such as an MP3 or MP4 file), you can add it to your project by clicking on the ‘Uploads’ tab and dragging the file onto your canvas. However, if you prefer to record your own voice, Canva has made it straightforward with its in-built recording studio.
For those who prefer an AI-generated voiceover, tools like Murf AI can be integrated with Canva. These AI tools offer a range of voice options in different languages, including English, and allow you to convert text to speech for a seamless voiceover experience.
To record your own voice, click on the ‘Record Voiceover’ button, typically located in the audio section of the video editor. This will bring up a pop-up recording studio. Ensure your microphone is connected and functional. Hit the recording button and start speaking. Once done, you can add the recording to your video timeline.
After adding your voiceover or AI narration, you can customize it to fit perfectly with your video. This includes adjusting the volume, playback speed, and syncing it with specific parts of your video. Canva allows you to drag the audio file along the timeline for precise placement.
Once you are satisfied with your video and voiceover, you can preview it by clicking the play button. Make any final adjustments and then export your video. Canva supports exporting in various formats, but for most uses, an MP4 file is recommended. Your high-quality Canva video is now ready to be shared on platforms like YouTube or embedded in PowerPoint presentations.
Tips for Creating Effective Voiceovers in Canva
- High-Quality Voice Recording : If recording your own voice, ensure a quiet environment to avoid background noise. Use a good quality microphone for clearer sound.
- Customization : Take advantage of Canva Pro features to access advanced customization options, including a broader range of sound effects and AI voiceover options.
- Synchronization : Align your voiceover with the animations and transitions in your Canva design for a professional finish.
- Utilize AI Tools : Explore AI voiceover options for different accents and languages to suit your audience.
- Leverage the Tutorial Resources : Canva provides a range of tutorials for beginners. These can be found via the search bar on the homepage and are incredibly helpful for getting started with video editing and voiceovers
Adding a voiceover to your Canva video is a great way to personalize and enhance your content. Whether it’s for a Canva presentation, social media post, or a tutorial, the process is straightforward, and the results can be impressive. By following these steps and utilizing Canva’s user-friendly interface and AI tools, you can create engaging video content with a professional touch. Remember, practice makes perfect, so don’t hesitate to experiment with different features and find what works best for your project.
Cost : Free to try
Speechify is the #1 AI Voice Over Generator. Using Speechify Voice Over is a breeze. It takes only a few minutes and you’ll be turning any text into natural-sounding Voice Over audio.
- Type in the text you’d like to hear spoken
- Select a voice & listening speed
- Press “Generate. That’s it!
Choose from 100’s of voices, and a plethora of languages and then customize each voice to make it your own. Add emotion like whisper, right up to anger and screaming. Your stories or presentations, or any other project can come alive with rich, natural sounding features.
You can also clone your own voice and use it in your voice over text to speech.
Speechify Voice Over also comes loaded with royalty free images, video, and audio that are all free to use for your personal or commercial projects. Speechify Voice Over is clearly the best option for your voice overs - no matter your team size. You can try our AI voice today , for free!
Frequently Asked Questions
To add a voiceover to a video, start by opening your video editing software. Import your video file and drag it onto the timeline. Then, record your voiceover or use a pre-recorded audio file, and align it with the video content. Customize the timing and volume to sync perfectly with the video.
In Canva, start by opening your video project. Click on the ‘uploads’ tab in the top right corner, and drag your audio file onto the timeline. You can adjust the audio to align with specific parts of your video, customizing it for your Canva presentation or social media posts.
To record yourself on Canva, select your project and click the 'record voiceover' button. Ensure your microphone is connected and working. Press the recording button to start recording your voice. Once done, the recording will automatically be added to your project.
Currently, Canva does not support separating audio directly from a video file within the platform. You would need to use external video editing tools to extract audio from a video file before uploading it to Canva.
Yes, you can add a voiceover to a video in Canva. Upload your video file or select a template, then use the audio upload feature to add your recorded voiceover. You can synchronize the voiceover with your video using Canva’s video editor.
The best microphone for recording high-quality voiceovers in Canva would depend on your setup and budget. Generally, USB microphones are a great choice for beginners, offering ease of use and good sound quality. For professional use, consider a condenser microphone with a recording studio setup.
To edit audio in Canva, upload your audio file and add it to your video project. You can trim the audio, adjust its volume, and align it with specific parts of the video. Canva also offers sound effects and music tracks to enhance your video content.
A voice-over refers to the technique of placing a voice narration over video content, where the speaker is not seen in the video. In contrast, a voice-off is used in broadcasting, where a speaker starts talking off-screen and then appears on screen while still speaking.
AI Logo Design: Revolutionizing Brand Identity
Everything to Know About Google Cloud Text to Speech API

Cliff Weitzman
Cliff Weitzman is a dyslexia advocate and the CEO and founder of Speechify, the #1 text-to-speech app in the world, totaling over 100,000 5-star reviews and ranking first place in the App Store for the News & Magazines category. In 2017, Weitzman was named to the Forbes 30 under 30 list for his work making the internet more accessible to people with learning disabilities. Cliff Weitzman has been featured in EdSurge, Inc., PC Mag, Entrepreneur, Mashable, among other leading outlets.
- Entertainment Picks
- Gaming Picks
- Editor’s Choice
- Buying Guides
- Entertainments
Best Telemedicine Software: for your healthcare practice
Best microlearning platforms: enhance your knowledge, best homeschool apps: enhancing your student engagement, best free helpdesk software: improves your customer satisfaction, beats solo 4 review, limble cmms review, hellosign review, grammarly review to boost your content, hubspot service hub review 2024: a comprehensive platform, how to add voice overs to your canva presentations: a step-by-step guide.
If you use Canva to make presentations, you might wonder how to make them more interactive and engaging. One way to do this is by adding voice overs to your presentation. In this article, we’ll provide a simple step-by-step guide on how to add voice overs to your Canva presentations.
- What is Canva?
Canva is a versatile online graphic design platform providing a wide range of customizable templates to create attractive presentations. Along with the drag-and-drop feature, it also has a photo editing tool that lets you enhance your images without prior experience in photo editing.
- How to Add Voice Overs to Your Canva Presentations
Here are the simple steps to add voice overs to your Canva presentations:
- Open Canva and click on the “Studio” link in the left-hand navigation panel.
- Click “Screenshot” at the top of the page after uploading the file and click “Burn”.
- Open the PowerPoint presentation.
- Ensure the presentation is activated and displayed in front of you.
- Adjust the dashed box on the screen to cover the PowerPoint presentation.
- Click the “Record” button to start the recording.
- Can I add music to my Canva presentations?
Yes, you can add background music to your Canva presentations, either for a single slide or the entire presentation. Nevertheless, it is important to ensure that the music you choose complements your presentation and does not overpower the content.
- How do I edit photos in Canva?
Editing photos in Canva is a breeze. To do so, open the photo in Canva and use the available editing toolkit to crop, resize, adjust color, saturation, contrast, add filters, and add effects.
- Can I use Canva to make presentations?
Definitely! Canva is designed to create engaging and interactive presentations. You can customize templates, create presentations from scratch, insert animations and videos, and add interactive elements to your presentations.
- What is Canva Studio?
Canva Studio is an online platform that lets you collaborate, share your designs with stakeholders, access free templates and design assets, and work seamlessly with your team members, clients, and colleagues.
- Final Words
Now that you know how to add voice overs to your Canva presentations, you can create more engaging and interactive presentations. Follow this guide and share it with others who might benefit from it.
LEAVE A REPLY Cancel reply
Save my name, email, and website in this browser for the next time I comment.
Related Articles
.tdb_module_title{display:block;position:relative;margin:0;font-family:'roboto',sans-serif;font-size:21px;font-weight:400;line-height:1.2}.tdb_module_title a{transform:translatez(0);transition:box-shadow 0.2s ease;-webkit-transition:box-shadow 0.2s ease}.tdb_module_title .tdb-module-title-excl{font-family:'roboto',sans-serif;color:#fff;background-color:#ff0000;padding:4px 8px 2px;margin-right:8px;font-size:14px;font-weight:500;line-height:1;vertical-align:middle}.tdb_module_template_387521 .tdc-row .tdb_module_title_0{text-align:left;font-family:var(--general)important;font-size:22pximportant;line-height:1.2important;font-weight:700important}.tdb_module_template_387521 .tdc-row .tdb_module_title_0 a{color:var(--dark)}.tdb_module_template_387521 .tdc-row .tdb_module_title_0:hover a{color:var(--accent)}.tdb_module_template_387521 .tdc-row .tdb_module_title_0 .tdb-module-title-excl{display:inline-block}@media (min-width:768px) and (max-width:1018px){.tdb_module_template_387521 .tdc-row .tdb_module_title_0{font-family:var(--general)important;font-size:18pximportant;line-height:1.2important;font-weight:700important}}@media (max-width:767px){.tdb_module_template_387521 .tdc-row .tdb_module_title_0{font-family:var(--general)important;font-size:18pximportant;line-height:1.2important;font-weight:700important}} best telemedicine software: for your healthcare practice, how to use microsoft onenote (10 simple steps), how to delete files from google drive on desktop and mobile.
- Social media
- Advertise Affliates
- Terms Conditions
© BollyInside
⚡️ Introducing Rapid Voice Cloning
Voice Cloning
Record or Upload your voice data to create your AI Voice.
Speech to Speech
Realtime speech-to-speech voice conversion.
Build your synthetic voices in 60+ languages.
Neural Audio Editing
Audio Editing made simple with synthetic voices
Programmatically build content with your synthetic voices.
Realtime Audio Deepfake Detector
Watermarker
AI Watermarker to Protect your IP
Start Building Your Voice
Conversational AI Bots
Real-time Custom Voices for your AI Assistant
Realtime text-to-speech to bring your game characters to life
Entertainment
Learn how our custom voice cloning solution is used in TV and Movies.
Advertisement
Create dynamic ads with familiar voices.
Call Centers
Increase call volume, and augment your agents with synthetic voices.
Create AI Audiobooks with Resemble AI’s Audiobook Narrator Voices
Our ethical statement and guidelines for usage.
Case Studies and Development Thoughts from our team.
Schedule a Demo with our team
How to add AI Voices to Canva

We’ve previously tackled adding AI voices to Google Slides. Due to the insistent demand, we will do another round of tutorials, but this time, we will learn how to add AI voices to Canva presentation!
Some of you may wonder what is so special about Canva. Why are more and more people using it nowadays? To answer that question, Canva has been known to be a great tool for creating visual content for social media. Apart from its easy-to-use interface, its asset library has consistently welcomed its users with constant updates, making room for more creativity and personalization.

Over the years, it has gone from being a simple graphic design tool to becoming a one-stop shop for people with graphic design and video editing needs. Everything is available in Canva: 2D/3D Graphics, images, videos, frames, animation, music, they even have AI! That is why creating presentations has never been easier. While images, graphics, and engaging content are pleasing to the eyes, we can take it up a notch by adding a voice!
Think about watching an Ad; apart from its captivating images, it’s just not complete with that voiceover. You might think you have no voice-over talent, but don’t worry; Resemble’s got you! We’ll teach you how to bring your Canva presentations from being great to being awesome through AI Voices!
But first, Content.
We need to have a script prepared for your presentation. Head over to ChatGPT and try this prompt: ”Create a script for a presentation about the seven wonders of the world in a professional tone.”

Note: The script should include key points and transitions between slides. After generating your script, it’s time to go to Resemble.AI and input your generated script.
Next. Audio.
To start integrating Resemble.AI ‘s Voices into your Canva presentations, the first step is to choose the right voice that suits the tone and style of your presentation.
Do you want a British voiceover that sounds like National Geographic? Or maybe an animated voice like a DJ. Whether you aim for a professional, friendly, or authoritative tone, Resemble.AI offers a wide range of voice options to cater to your needs.

Once you’ve selected the perfect voice, you can customize the script for your presentation. Consider the pacing, emphasis, and intonation to ensure that the voiceover perfectly complements the content of each slide. This level of customization can effectively enhance your presentation’s overall impact.
Should you want to further customize the audio by using your own voice, you may do so by clicking on the VOICES tab and selecting Rapid Voice Clone, which will allow you to have your own AI voiceover in a matter of minutes. If you want a more accurate AI version of your voice, you may opt for the Professional Voice clone, where you are asked for more data. How cool is that?

Your Canva Presentation
After customizing the script, you can easily integrate the Resemble.AI voiceover into your Canva presentation by uploading the audio file directly into the platform. Simply go to your presentation, Uploads, then Audio.
Canva provides seamless integration for audio files, allowing you to synchronize the voiceover with specific slides or sections of your presentation. You select the file then drag it below your slides until you see a tile with soundwaves.

You may add audio effects or adjust the length of the voice clip and make it more appropriate to your topic and pacing. You may also try adding a second layer of sound that would serve as your background music. Just go to ‘Apps’, then select ‘Audio.’ You can select based on category or you may skim through the library for a variety. You may hover over the sound you want to listen to and click ‘Play’.

Repeat the same steps with the rest of your voice-over clips. Make sure you listen to your presentation as a whole to ensure a more seamless experience for your audience.
Best Practices for Using Synthetic Voices

To maximize the impact of your voice-enabled presentations, consider the following best practices:
- Choose the Right Voice : The tone of the voice should match the content of your presentation. A cheerful voice might be great for educational content, while a serious tone could be better for professional reports.
- Scripting : When writing scripts for your audio, remember that spoken language differs from written text. Keep sentences shorter and use a conversational style to ensure clarity and engagement.
- Test Your Presentation : Always preview your presentation with the audio to check for timing and coherence. Make adjustments based on what feels natural and engaging.
Integrating Resemble AI voices into your Canva presentations is a powerful way to make your content engaging for your audience. With customizable options and straightforward integration, Resemble AI can help you create presentations that are not only visually appealing but also audibly engaging. Experiment with different voices and scripts or create one of your own to find the best for your audience and message. Give your audience a whole new experience with your AI voice. You may try it out for Free. Click here to request a demo.
More Related to This

Resemble AI at US Senate: Key Learnings and Takeaways from the Senate Hearing on Election Deepfakes
Apr 19, 2024
This week, Resemble AI CEO and founder Zohaib Ahmed was invited to testify in front of the United States Senate Judiciary Subcommittee on Privacy, Technology, and the Law to discuss the impact that deepfake technology can have on the US elections. Startling incidents...

Voice Changer for Discord
May 6, 2024
Have you ever thought about what it would be like to sound like your favorite video game characters while streaming your play on Discord? Or maybe you want to use a female voice or a deep male voice to surprise your friends? What if we told you that we might just have...

Introducing Resemble Enhance: Open Source Speech Super Resolution AI Model
Dec 14, 2023
Open-Source AI-Powered Speech Enhancement In digital audio technology, the necessity for crystal clear sound quality is paramount, however achieving pristine sound quality has remained a consistent challenge. Background noise, distortions, and bandwidth limitations...
- Share full article
Advertisement
Supported by
Art Fair Review
An Embarrassment of Style at the Independent
This year’s fair is in overdrive, with exhibitors taking big swings in dozens of directions. Use our critic’s personal playlist to find your way around the floor.

By Will Heinrich
The Independent is a stylish affair. Carefully curated and relatively small, it can always be counted on to look good, but this year its style is in overdrive. Occasionally it’s pinch-hitting for substance, mere showiness with nothing behind it. Sometimes, as in Ruby Neri’ s bravura ceramic sculptures in the fair’s special 15th-anniversary “15x15: Independent 2010-2024” exhibition, which is taking place at Spring Studios in TriBeCa, visual pizazz hits a kind of critical mass, becoming substance in itself.
Most often, though, these 172 artists showing with 89 exhibitors are taking big swings in lots of directions — severe abstraction, obsessive figuration, decaying sneakers — so that making a list of standouts was nearly impossible. The following eight booths are more like a personal playlist to get you moving around the floor. (Note that there are no booth numbers.)
But don’t forget to explore the corners, too, where you’ll find Margot Samel showing trompe l’oeil paintings by Olivia Jia; the Houston-based publisher and gallery F selling F. Richard Coldwell ’s dystopian art-world novel “ Lies From the Flies on the Wall ”; and “Moby Dick” with drawings by Alex Katz at the Karma Bookstore .
FIFTH FLOOR
Three large square oil paintings by Kate Spencer Stewart could almost pass for dark brown monochromes. Step closer: They’re actually a rich, bloody maroon, speckled with flickers of cardinal red and long streaks of bright, toxic green. With silent composure and whispering depths, they’re a thought-provoking contrast to the inventive landscapes of Michael Ho next door at the Shanghai gallery Vacancy .
Niru Ratnam
The Turkish filmmaker Kutlug Ataman’s “Mesopotamian Dramaturgies/Journey to the Moon” is a single-channel video in which a voice-over describes a sequence of mostly black-and-white photographs. It tells the story, at once hopeful and cynical in a magical realist sort of way, of a small town in 1950s Turkey, its collective imagination sparked by a politician’s speech, trying to send a minaret to space with balloons. The implicit question is, “Are any of us really capable of democracy?” A dozen acrylic and graphite drawings of birds by Sutapa Biswas, accompanied by her video “Magnesium Bird,” make for a piquant counterweight.
SIXTH FLOOR
Ricco/Maresca Gallery and Christian Berst Art Brut
For me, the fair’s most memorable event will be the American debut of the Polish photographer Tomasz Machcinski (1942-2022), who started dressing up in character and shooting thrilling, dangerous and vital self-portraits in the early 1960s. His astonishingly emotive and variable face, as everyone from Gandhi to Hitler as well as numerous men and women sprung only from his own imagination, has to be seen to be believed. Machcinski’s self-portraits are presented alongside a strangely beguiling trove of Polaroids of women on TV by Tom Wilkins (1951-2007), also enjoying its first American showing. Jointly presented by New York’s Ricco/Maresca and Christian Berst Art Brut from Paris.
Five graceful canvases by the painter Ryan Mrozowski make up the first appearance at the Independent of this hip gallery from Reykjavik, Iceland. To two of his signature paintings of orange-tree foliage, dense but delicate meditations on what it means to commodify sensual pleasure, Mrozowski adds a few orange half circles floating freely on top of the green leaves. The effect is like a magician’s very dry wink at the end of a well-executed trick. In three diptychs that the artist calls “split paintings,” more foliage is alternately grayed out to call forth a haze of understated questions about perception, binocular vision and the bicameral mind.
Jessie Henson uses an industrial sewing machine to apply closely set lines of thread to paper that she then adorns with metallic leaf. The process both causes the paper to buckle and fixes its buckling in place, making every sculptural, sensual, sometimes tortured-looking undulation an integral part of each piece. Altogether the work offers a compelling combination of texture, eccentricity and discreet subversion of art-historical categories. Even the most jaded art-world intellectual should feel comfortable enjoying the pretty colors, most of which Henson seems to have borrowed from a private cache of vintage shag rugs.
The Approach and Chris Sharp
The hundreds of little oblong dots that cover Glenn Goldberg’s paintings evoke textiles, Australian Aboriginal art, and stick and poke tattoos, among other things. But mainly what they do, in this joint presentation from the Angeleno gallerist Chris Sharp and the London gallery the Approach, is disrupt your ability to read the works as figurative, as abstract or even simply as whole compositions — instead each canvas is a complex ledger of distinct decisions about color and pattern. It makes sense that despite the sparrow-like silhouettes inhabiting all six pieces in this exhibit, the Bronx-born artist, as quoted in the galleries’ publicity materials, says, “There are no birds in my work.”
SEVENTH FLOOR
Susan Te Kahurangi King is well known for her lucid, sinuous pencil drawings of cartoon characters. Often they look impossibly perfect, like projections of professionally animated dream images — even when the characters are crammed into one half of an otherwise empty page. It’s an illuminating treat to see this lineup of odder and less finished examples of this New Zealand artist’s work, shown here to contextualize one larger work. Donald Duck trips into an ironic riverine fate on one sheet of paper stained with grease; on another, a graphite gray Tweety Bird with enormous eyes stares at the viewer, frozen in space, maybe flying, maybe falling.
King’s Leap
This Chinatown gallery brings four intense works by Magnus Maxine, each presenting a dense paper pulp surface , colored with oil paint, layered over a page or full spread of The New York Times. The two larger pieces, which feature a heavy pink cross and a circular arrangement of rays, are by far the strongest. But all four seem to have been made not so much by building on top of the day’s news but by ripping it away to reveal the rougher, more primal world of half-formed signs and symbols that surges underneath.
Independent
May 10-12, Spring Studios, 50 Varick Street, Manhattan; independenthq.com/fair , $45 for a single day pass.
An earlier version of this review, using information provided by Bureau gallery, misidentified the medium used in Kate Spencer Stewart’s artwork. The three large canvases are oil paintings; they are not covered in crushed crystal and ground mineral pigment.
How we handle corrections
Will Heinrich writes about new developments in contemporary art, and has previously been a critic for The New Yorker and The New York Observer. More about Will Heinrich
COMMENTS
Wait for your recording to upload. On the next screen, you can do the following: Share a link to your recording: Click Copy link. Download your recording: Click Download. Delete your recording: Click Discard. Save your recording and go back to the editor: Click Save and exit. A Public view link is automatically created when you record a talking ...
Step 1: Open the presentation and select the slide where you want to add the voice-over. Step 2: Click the Uploads section on the left and switch to the Audio tab to reveal all the audio files ...
Upload your script and choose from over 120 AI voices in 20+ languages, including Spanish, Chinese, and French. Infuse a human element by customizing the voice's speed, pitch, emotion, and tonality. Seamlessly add a voice to any Canva video, design, or presentation with a lifelike AI speech generator.
Learn how to take your Canva presentations & videos to the next level with voiceovers! 🟣 Unlock Canva Pro [Free Trial] https://partner.canva.com/1qJQD---H...
How to record voiceover in Canva // You're going to learn two exciting ways to record a voiceover in Canva.1. Canva Voiceover - Present and RecordFirstly I'l...
Watch this video to learn how to add narration to your Canva presentations. Learn more about Canva through this playlist: https://www.youtube.com/playlist?li...
In this episode, learn how to create Canva Talking Presentations™ Simply start inspired with a Presentation Template, set up the recording studio, start reco...
Head on to the recording studio. Access the "Present and record" option on the editor's top-right side or click on the three-dot menu to select it among recommended actions. Select "Go to recording studio" and set up your camera and microphone. Start recording with your notes in Presenter's View and have the options to pause and ...
Now, if you chose 'Talking Presentations' while creating the presentation, the option for 'Present and Record' will appear on the toolbar itself. Otherwise, click the 'three-dot' icon next to the 'Present' button. Then, select 'Present and Record' from the menu that appears. Click the 'Go to Recording Studio' button.
Make sure to save files as MP3s. In Canva, click on the "Uploads" tab. Drag and drop your voiceover MP3 files into the uploads area. Go back to your presentation slides. Click and drag your uploaded MP3 file onto the timeline of the slide where you want that voiceover to play. Drag voiceover to timeline. Repeat for all other slides and ...
If you use Canva to make presentations, you might wonder how to make them more interactive and engaging. One way to do this is by adding voice overs to. Internet. Macbook. Linux. Graphics. PC. Phones. Social media. Windows. Android. Apple. Buying Guides ...
Recording voice overs can add a dynamic dimension to your Canva designs, whether you're creating presentations, videos, or interactive content. Canva offers a simple and intuitive tool for recording voice directly within its platform, making it easy for users to add narration, commentary, or audio effects to their projects.
Add the mp4 file for each page in Canva. What you now need to do is to choose the sections you want from the overall voice over recording. You can do this by choosing the scissors icon that will help you to choose the exact section by moving the start and finish bar. Choose the right section of your recording for each page.
Once you create a page, tweak its animation to make a smooth transition between pages. Step 1: Select a slide in Canva. Step 2: Click Animate at the top. Step 3: Check basic, exaggerated, photo ...
The answer is YES. Canva supports adding voiceover to presentations and videos. You can easily and directly Canva voice recording by your own voice with the help of an external recording studio or using AI tools to generate a voiceover for your presentation. How to add voice over in Canva presentation with the audio file?
Canva is a versatile graphic design tool that allows you to create stunning designs for various purposes, including social media, marketing, and presentations. One of the exciting features of Canva is the ability to add voiceovers to your designs, making them more engaging and interactive. In this article, we will explore how to record voice over in Canva, step-by-step.
Learn to add voice overs to Canva videos with ease! Follow our step-by-step guide for beginners and pros alike. ... Whether it's for a Canva presentation, social media post, or a tutorial, the process is straightforward, and the results can be impressive. By following these steps and utilizing Canva's user-friendly interface and AI tools ...
How to add an AI voiceover. Click the dropdown to select a language. Select a voice. If you have Murf.AI Pro, you can choose from a wider range of voices by clicking See all. Add your script in the Enter your text text box. Click the Choose style dropdown to select an emotion or voice style. You can also adjust the Speed and Pitch by dragging ...
How to Add Voice Overs to Your Canva Presentations. Here are the simple steps to add voice overs to your Canva presentations: Open Canva and click on the "Studio" link in the left-hand navigation panel. Click "Screenshot" at the top of the page after uploading the file and click "Burn". Open the PowerPoint presentation.
In this video Joanna will show you how you can now record yourself talking over the presentation you've just designed in Canva. ️ Check out Joanna's website ...
Repeat the same steps with the rest of your voice-over clips. Make sure you listen to your presentation as a whole to ensure a more seamless experience for your audience. Best Practices for Using Synthetic Voices. To maximize the impact of your voice-enabled presentations, consider the following best practices:
Grow your Kingdom Channel from 0 to 10,000https://www.kingdommessengerworkshop.com/free-training--Today you are going to learn how to create a Voice Over rig...
The Turkish filmmaker Kutlug Ataman's "Mesopotamian Dramaturgies/Journey to the Moon" is a single-channel video in which a voice-over describes a sequence of mostly black-and-white photographs.
From the homepage. Go to Apps. On the search bar, type AiVOOV and press the Enter key on your keyboard. Select AiVOOV. A pop-up window will appear where you can sign in with your AiVOOV account. To use the app in an existing presentation, select Use in existing design. Select Your Projects or Shared with you to browse for your design.
Presentations. Whiteboards. PDF editor. Graphs and charts. Photos and videos. Video editor. ... Turn your text into voice using AI Voices. Access more than 800 AI voices that sound like humans in 100+ languages in one place for your Canva voiceover. Create natural voice-overs quickly for all your Canva projects.